
Popular categories
Looking for a yarn?


|
||||||||||||||||||||||
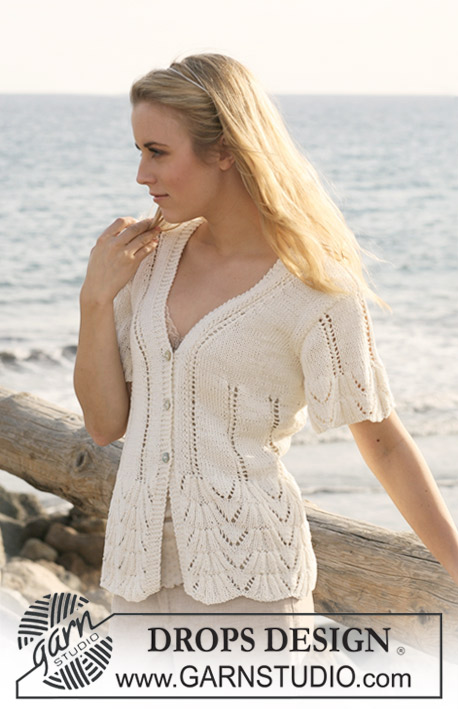
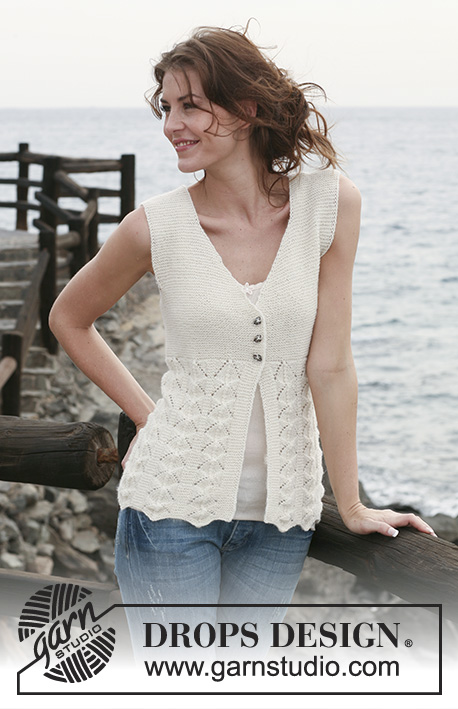
Vintage Romance |
||||||||||||||||||||||
|
|
||||||||||||||||||||||
Short DROPS waistcoat in ”Muskat” with patterned rib border. Size S to XXXL
DROPS 118-13 |
||||||||||||||||||||||
|
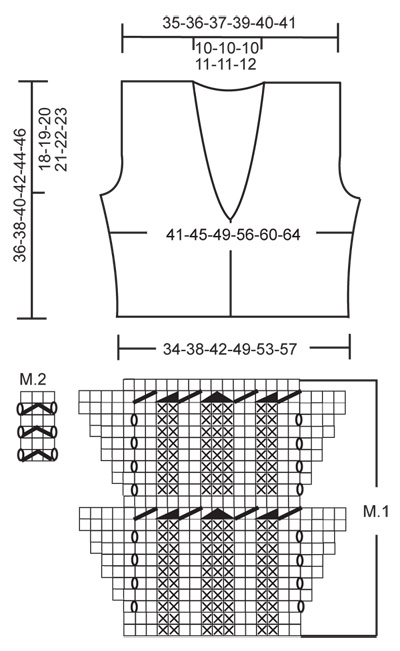
GARTER ST (back and forth on needle): K all rows. PATTERN: See diagrams M.1 and M.2 - pattern in diagram is seen from RS. BUTTONHOLES: Make 3 buttonholes from RS on right front band. 1 BUTTONHOLE = K tog 3rd and 4th st from mid front and make 1 YO. Make buttonholes when piece measures (for all sizes): 3, 8 and 13 cm. DECREASING TIP-1 (applies to neck): Make all dec from RS inside 14 sts (= 5 front band sts in garter st, 6 stocking sts and M.2). Dec as follows AFTER 14 sts: slip 1 st as if to K, K1 and psso. Dec as follows BEFORE 14 sts: K2 tog. DECREASING TIP-2 (applies to armhole): Make all dec from RS inside 4 garter sts: Dec as follows AFTER 4 sts: slip 1 st as if to K, K1, psso. Dec as follows BEFORE 4 sts: K2 tog. -------------------------------------------------------- -------------------------------------------------------- BODY PIECE: Worked back and forth on circular needle from mid front. Cast on 153-169-185-217-233-249 sts (includes 5 front band sts each side towards mid front) on circular needle size 4 mm with Muskat. Continue as follows from RS: 5 front band sts in GARTER ST – see above, M.1 9-10-11-13-14-15 times across the row – in the last repeat do not work the last st (in order to make pattern identical on both front pieces) – and 5 front band sts in garter st. Work 1 vertical repeat of M.1 like this. AT THE SAME TIME when piece measures 3 cm make BUTTONHOLE – see above! READ ALL OF THE FOLLOWING SECTION BEFORE CONTINUING! Insert a marker 40-44-48-56-60-64 sts in from each side (= 73-81-89-105-113-121 sts between markers on back piece). PATTERN: Continue in pattern as follows (first row = RS): 5 front band sts in garter st, 6 stocking sts, M.2 (centred on the first repeat of M.1), 125-141-157-189-205-221 stocking sts, M.2 (centred on the last repeat of M.1), 6 stocking sts and 5 front band sts in garter st. REMEMBER THE KNITTING TENSION! INC AT THE SIDE: When piece measures 9 cm inc 1 st each side of both markers (K2 in st each side of marker), and repeat the inc on every 3-3-4-4-5-5 row a total of 7 times. DEC FOR NECK: When piece measures 15 cm dec 1 st each side towards mid front – SEE DECREASING TIP-1, and repeat the dec on every other row a total of 8-8-8-9-9-10 times and then on every 4th row 6 times for all sizes. ARMHOLE: When piece measures 17-18-19-20-21-22 cm work 4 rows garter st on 12-14-16-18-20-22 sts each side (i.e. 6-7-8-9-10-11 sts each side of marker) – work remaining sts as before. On next row cast off 4-6-8-10-12-14 sts each side for armhole (i.e. 2-3-4-5-6-7 sts each side of marker) and complete front and back pieces separately with 4 garter sts towards armhole. LEFT FRONT PIECE: Continue dec for neck, AT THE SAME TIME on next row from RS dec 1 st at the side towards armhole – SEE DECREASING TIP-2, and repeat the dec on every other row a total of 5-7-9-14-16-17 times. When all dec for armhole and neck are complete there are 26-27-28-29-30-31 sts left on shoulder. Continue with 4 garter sts towards armhole until piece measures 36-38-40-42-44-46 cm, cast off. RIGHT FRONT PIECE: Like left front piece, but mirrored. BACK PIECE: = 83-89-95-109-115-121 sts. Continue with 4 garter sts each side, AT THE SAME TIME dec each side for armhole as described for front piece = 73-75-77-81-83-87 sts. When piece measures 33-35-37-39-41-43 cm work 4 rows garter st on the middle 31-31-31-33-33-35 sts (work remaining sts as before) and now cast off the middle 21-21-21-23-23-25 sts for neck and complete each shoulder (= 26-27-28-29-30-31 sts) separately. Continue with 5 garter sts towards neck and cast off when piece measures 36-38-40-42-44-46 cm. ASSEMBLY: Sew shoulder seams and sew on buttons. |
||||||||||||||||||||||
Diagram explanations |
||||||||||||||||||||||
|
||||||||||||||||||||||
|
||||||||||||||||||||||
|
Have you made this or any other of our designs? Tag your pictures in social media with #dropsdesign so we can see them! Do you need help with this pattern?You'll find tutorial videos, a Comments/Questions area and more by visiting the pattern on garnstudio.com. © 1982-2024 DROPS Design A/S. We reserve all rights. This document, including all its sub-sections, has copyrights. Read more about what you can do with our patterns at the bottom of each pattern on our site. |
||||||||||||||||||||||


With over 40 years in knitting and crochet design, DROPS Design offers one of the most extensive collections of free patterns on the internet - translated to 17 languages. As of today we count 304 catalogues and 11422 patterns - 11422 of which are translated into English (UK/cm).
We work hard to bring you the best knitting and crochet have to offer, inspiration and advice as well as great quality yarns at incredible prices! Would you like to use our patterns for other than personal use? You can read what you are allowed to do in the Copyright text at the bottom of all our patterns. Happy crafting!
Comments / Questions (40)
Quindi devo fare l'aumento, sul diritto,poi lavoro 1 f rovescio ed 1 ferro a diritto e poi fare l'aumento (questo caso però devo aumentare sul rovescio). Scusatemi e grazie ancora!
09.05.2016 - 15:53DROPS Design answered:
Buongiorno Benedetta. Sì esatto, è come ha scritto lei. Buon lavoro!
09.05.2016 - 16:06Buongiorno gentilissime Non ricordo come interpretare"ripetere gli aumenti ogni 3 ferri,"relativo all'aumento su ogni lato.potete aiutarmi? Grazie
09.05.2016 - 13:41DROPS Design answered:
Buongiorno Benedetta. Deve aumentare, lavorare due ferri senza aumenti, al terzo ferro aumenta di nuovo. Buon lavoro!
09.05.2016 - 13:53Är inte diagramet m1 med början längst ner ett varv för mycket? Som jag förstår avser första varvet avigsidan på arbetet och då fortsättningsvis blir det fel när man kommer till varv 11 i diagramet. Tacksam för en förklaring. MVH. Laine Sandström
02.01.2015 - 10:27DROPS Design answered:
Hej Laine, första varvet i diagrammet stickas från rätsidan. Lycka till!
09.02.2015 - 11:48Je suis embetee car je n arrive pas a trouver le meme nombre de maille pour le motif n°1 je monte 185 maille et j en ais pas assez il en manque 5 pour faire le bon motif au nombre demander comment faire
28.03.2014 - 11:53DROPS Design answered:
Bonjour Roman, les diagrammes se lisent en commençant en bas à droite, on lit de droite à gauche sur l'endroit et de gauche à droite sur l'envers. Tricotez les 185 m ainsi: 5 m point mousse, 11 x M1 mais la 11ème fois sur 15 m seulement (= 10 x les 16 m de M1, 1 x M1 mais sans tricoter la dernière m end (= on termine ici par 2 m end au lieu de 3 m end)), 5 m point mousse = 185. Bon tricot!
28.03.2014 - 13:41Hallo. Wieder ein herrliches Stück. habe nicht mehr viel vor mir und freu mich schon auf´s Tragen. Bitte mal prüfen in der Legende zum Diagramm ist ein Fehler - die linken Abnahmen der 2 und der 3 Maschen sind vertauscht. LG Kristina
14.01.2013 - 07:12DROPS Design answered:
Liebe Kristina, das stimmt! Wir weden es sofort korrigieren. Vielen Dank für den Hinweis und viel Spass mit der Weste!
14.01.2013 - 09:28I'm a bit confused about before/after in the decreasing tips: Could you restate those? As in, how many stitches am I supposed to knit before I decrease k2tog and how many after that should I skp -- where should they be placed? Same question regarding the armhole decreases, too. Thanks.
10.05.2012 - 04:40DROPS Design answered:
At neck you have 14 sts. You dec inside these 14 sts on rows from RS. So on left front you dec before these 14 sts by K2 tog, and on right front you first work the 14 sts, then dec by skp. Along the armhole you have 4 sts in garter st, dec after these 4 sts on RS rows on left front, and before these 4 sts on RS rows on right front.
10.05.2012 - 23:59Ruutupiirroksen virhe on nyt korjattu.
13.06.2011 - 22:40Hei, Suomenkielisissä ohjeissa virhettä ei ole korjattu, eli siinä näyttää kohdassa, jossa pitäisi kutoa 3 nurin yhteen, vain 2 nurin yhteen.Onneksi päättelemällä homma toimi.
13.06.2011 - 14:50Ik ben hem aan het breien en hij wordt erg leuk ! Alleen met de onderkan wat zitten modderen maar uiteindelijk wel uitgekomen. Je moet even goed kijken en de foto er bij nemen dan kom je er echt wel uit.
19.03.2010 - 20:51Melissa, you are right - thank you, we have now edited.
14.03.2010 - 18:25