
Popular categories
Looking for a yarn?


|
||||||||||||||||||||||||||||||||||||||||||||||
Purple Mountain |
||||||||||||||||||||||||||||||||||||||||||||||
 |
 |
|||||||||||||||||||||||||||||||||||||||||||||
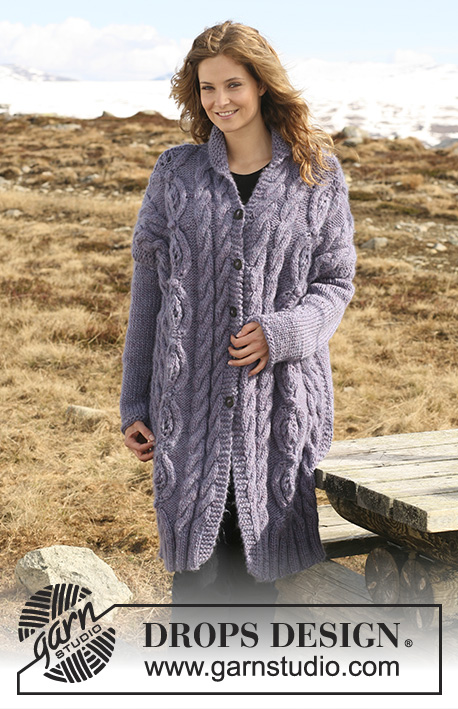
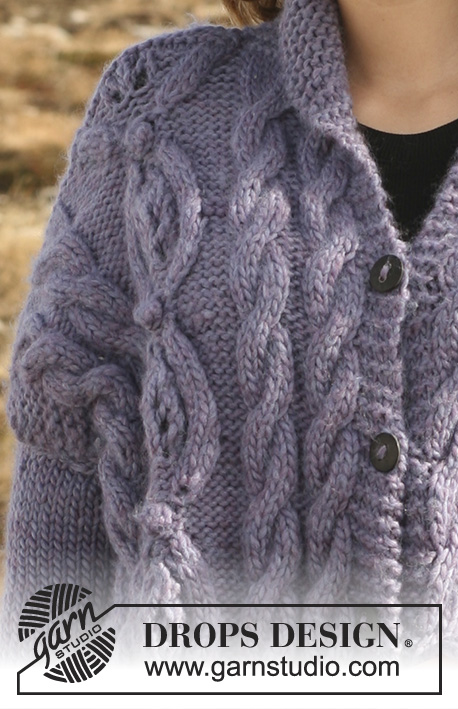
Long DROPS jacket in ”Snow” with cables. Size S to XXXXL .
DROPS Extra 0-554 |
||||||||||||||||||||||||||||||||||||||||||||||
|
GARTER ST (back and forth on needle): K all rows. PATTERN: See diagram M.1, M.2 and M.3. Diagrams show the pattern from the RS. NOTE: number of sts in M.2 varies from 17 to 27. BUTTONHOLES: Make buttonholes on right front band. 1 buttonhole = cast off 3rd st from mid front and cast on 1 new st on next row Make buttonholes when piece measures: SIZE S: 35, 43, 51, 59 and 67 cm. SIZE M: 37, 45, 53, 61 and 69 cm. SIZE L: 36, 43, 50, 57, 64 and 71 cm. SIZE XL: 38, 45, 52, 59, 66 and 73 cm. SIZE XXL: 35, 43, 51, 59, 67 and 75 cm. SIZE XXXL: 37, 45, 53, 61, 69 and 77 cm. SIZE XXXXL: 37, 44, 51, 58, 65, 72 and 79 cm. ---------------------------------------------------------- BACK PIECE: Worked back and forth on circular needle. Cast on 77-83-89-95-101-113-119 sts (includes 1 edge st each side) on circular needle size 7 mm with Snow. Continue as follows (first row = RS): 1 edge st, * K3, P3 *, repeat from *-* and finish with K3 and 1 edge st. When piece measures approx 8-8-9-9-10-10-11 cm change to circular needle size 8 mm. K 1 row from RS, AT THE SAME TIME dec 11-13-13-15-17-21-21 sts evenly = 66-70-76-80-84-92-98 sts. Now continue in stocking st. When piece measures 64-66-68-70-72-74-76 cm dec 1 st each side = 64-68-74-78-82-90-96 sts. NOTE! Armhole starts here. Now continue in stocking st with 3-3-4-2-3-3-4 GARTER STS – see above - each side. When piece measures 77-80-83-86-89-92-95 cm work 2 rows garter st on all sts. On next row cast off the middle 4-4-4-4-6-6-6 sts for neck = 30-32-35-37-38-42-45 sts left on each shoulder. Work 6 rows garter st and cast off loosely. LEFT FRONT PIECE: Worked back and forth on circular needle. Cast on 35-37-40-42-42-47-50 sts (includes 1 edge st at the side and 4 front band sts towards mid front) on circular needle size 7 mm with Snow. Work front band sts in garter st throughout. Continue as follows (first row = RS): SIZE S + M + L: 1 edge st, P3-3-4, K3, P3-4-5, K3, P3, K3, P3, K3, P3-4-5, K3 and 4 front band sts. SIZE XL + XXL + XXXL + XXXXL: 1 edge st, P2-3-3-4, K3, P1-1-3-4, K3, P3, K3, P3, K3, P3, K3, P3, K3, P1-1-3-4, K3 and 4 front band sts. When piece measures approx 8-8-9-9-10-10-11 cm change to circular needle size 8 mm and work next row as follows (from RS): SIZE S + M + L: 1 edge st, P3-3-4, inc K3 to K6 by working 2 sts in each st, P3-4-5, K3, P9, K3, P3-4-5, inc K3 to K6 and 4 front band sts. SIZE XL + XXL + XXXL + XXXXL: 1 edge st, P2-3-3-4, inc K3 to K6 by working 2 sts in each st, P1-1-3-4, inc K3 to 6 K, P3, K3, P9, K3, P3, inc K3 to K6, P1-1-3-4,inc K3 to K6 and 4 front band sts. There are now 41-43-46-54-55-59-62 sts on needle. Work 1 row from WS with K over K and P over P. Work next row as follows (from RS): SIZE S + M + L: 1 edge st, P3-3-4, M.1 (= 6 sts), P0-1-2, M.2a (= 21 sts), P0-1-2, M.3 (= 6 sts) and 4 front band sts. SIZE XL + XXL + XXXL + XXXXL: 1 edge st, P2-3-3-4, M.1 (= 6 sts), P1-1-3-4, M.1, M.2a (= 21 sts), M.3 (= 6 sts), P1-1-3-4, M.3 and 4 front band sts. After 1 vertical repeat of M.2a continue with M.2b. When piece measures 64-66-68-70-72-74-76 cm dec 1 st at the side = 40-42-45-53-54-58-61 sts. NOTE! Armhole starts here. Continue in pattern as before with 3-3-4-2-3-3-4 garter sts at the side. When piece measures 68-70-72-74-76-78-80 cm inc 1 st inside the 4 front band sts on every other row a total of 4-5-5-6-6-7-7 times = 44-47-50-59-60-65-68 sts. Work inc sts in garter st. When piece measures 78-81-84-87-90-93-95 cm K 1 row from RS, AT THE SAME TIME dec 6-6-6-12-12-12-12 sts evenly (do not dec on front band and inc sts) = 38-41-44-47-48-53-56 sts. K 3 rows on all sts. Now cast off 30-32-35-37-38-42-45 sts for shoulder towards the neckline = 8-9-9-10-10-11-11 sts left on needle for collar. Work these sts. Continue for collar as follows (first row = from WS): * Work 2 rows on 5-5-5-6-6-6-6 sts only, work 2 rows on all sts *, repeat from *-* until collar measures approx 3-3-3-3-4-4-4 cm from shoulder, measured where shortest. Cast off. RIGHT FRONT PIECE: Like left front piece, but mirrored. REMEMBER BUTTONHOLES – see above. SLEEVE: Worked back and forth on circular needle. Cast on 28-30-32-32-34-34-36 sts (includes 1 edge st each side) on circular needle size 7 mm with Snow. Work 2 rows GARTER ST – see above. Change to circular needle size 8 mm and continue in stocking st with 1 edge st each side. When piece measures approx 8 cm inc 1 st each side, and repeat the inc on every 28-13-13-8-8-5-5 cm a total of 2-3-3-4-4-5-5 times = 32-36-38-40-42-44-46 sts. Continue until piece measures 42-41-40-39-38-35-34 cm (less for the larger sizes because of wider shoulder) and now cast off 4-5-5-5-5-6-6 sts each side on every other row 2 times = 16-16-18-20-22-20-22 sts. Cast off remaining sts. ASSEMBLY: Sew shoulder seams. Set in sleeves. Sew sleeve and side seams inside 1 edge st. Sew collar tog mid back and sew to neckline. Sew on buttons. |
||||||||||||||||||||||||||||||||||||||||||||||
Diagram explanations |
||||||||||||||||||||||||||||||||||||||||||||||
|
||||||||||||||||||||||||||||||||||||||||||||||

|
||||||||||||||||||||||||||||||||||||||||||||||
|
||||||||||||||||||||||||||||||||||||||||||||||
|
Have you made this or any other of our designs? Tag your pictures in social media with #dropsdesign so we can see them! Do you need help with this pattern?You'll find tutorial videos, a Comments/Questions area and more by visiting the pattern on garnstudio.com. © 1982-2024 DROPS Design A/S. We reserve all rights. This document, including all its sub-sections, has copyrights. Read more about what you can do with our patterns at the bottom of each pattern on our site. |
||||||||||||||||||||||||||||||||||||||||||||||


With over 40 years in knitting and crochet design, DROPS Design offers one of the most extensive collections of free patterns on the internet - translated to 17 languages. As of today we count 304 catalogues and 11422 patterns - 11422 of which are translated into English (UK/cm).
We work hard to bring you the best knitting and crochet have to offer, inspiration and advice as well as great quality yarns at incredible prices! Would you like to use our patterns for other than personal use? You can read what you are allowed to do in the Copyright text at the bottom of all our patterns. Happy crafting!
Comments / Questions (13)
Bonjour Où trouver les explications de ce modèle en français ? Merci Annie
24.07.2022 - 08:22DROPS Design answered:
Bonjour Annie, le modele francais est disponible ICI. Bon tricot!
24.07.2022 - 13:31Hvilke mål over bryst, ryglængde, ærmelængde et. svarer størrelse XXXXL mon til ? De nævnte mål - STR XXXXL: 37, 44, 51, 58, 65, 72 og 79 cm. er jo helt useriøse. Findes der "dyre" og "billigere" strikkepinde. Mange venlige hilsner fra, Marianne Dyhrberg Cornett
26.04.2021 - 16:20Hallo, ik ga met het voorpand beginnen maar lijk maar 2 grote kabels te zien aan weerzijden van het middelste patroon, toch op het plaatje zijn er 2 aan 1 kant. Hoe kan dat?
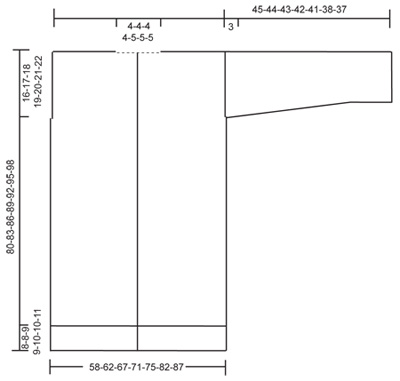
11.03.2021 - 13:34I would like to know the finished bust sizes and length of arms and body please
17.09.2020 - 01:29DROPS Design answered:
Dear Evelyn, please refer to the schematic drawing at the bottom of the page, Every relevant measurenement is given there. Happy crafting!
17.09.2020 - 05:34Liebes Trops-Team, wir möchten gerne in unserer Avanti Stricklust das DROPS-Modell 0-554 Jacke mit Zöpfen vorstellen. Lassen Sie mir bitte die Diagramme bzw. die Strickstriften in einer druckfähigen Auflösung zukommen? Ich freue mich auf Ihre Nachricht und verbleibe mit freundlichen Grüßen, Marion Fischer (Nachfolgerin von Jacqueline Kerber), Redaktionsassistentin, MACH MAL PAUSE / MINI /AVANTI / STRICKLUST PABEL-MOEWIG VERLAG KG, Karlsruher Str. 31, D-76437 Rastatt
24.07.2018 - 11:50DROPS Design answered:
Liebe Frau Fischer, die Diagramme finden Sie ganz unten am Ende der Anleitung. Viel Spaß beim stricken!
24.07.2018 - 14:44Anna De Necker wrote:
Good day. I am not sure what the following number sequences mean...3-3-3-4-2-3-3-3-4. There are a few number sequences like that in this pattern. Please can I get help with this. Anna (South Africa)
19.05.2017 - 19:55DROPS Design answered:
Hi Anna, The numbers refer to the size you are knitting - so S is size small and all the first numbers in each sequence correspond to this size. Medium is the second number in the sequence and so on. I hope this helps, Kind regards, Deirdre
21.05.2017 - 10:49Hoe zit het precies met de maten? Met welke confectiemaat is maat XXL bijv. te vergelijken.
27.04.2014 - 19:26DROPS Design answered:
Convectiematen zijn voor elk merk net een beetje anders en elk model heeft een andere pasvorm. Vergelijk daarom de maten op de tekening onderaan het patroon met een vest of trui die u goed past voor de keuze van de juiste maat.
28.04.2014 - 11:45Volgens mij zit er een fout in het patroon bij M.2b. Naar mijn idee moet de 9e steek van links in de 13e naald van m.2b een kruisje zijn. Anders klopt die kant niet met de andere kant.
25.01.2014 - 14:26DROPS Design answered:
Hoi Conny. Je hebt gelijk. We hebben de teltekening gewijzigd. Bedankt voor het melden.
18.02.2014 - 15:13Hejsa! Der er flere fejl i diagrammet i M.2b delen Mvh Birgit
26.07.2011 - 13:19Bonjour Fuhrer, ce sont effectivement des diminutions qu'il faut répartir, comme l'indique le nombre de mailles. Le modèle a été corrigé, merci.
30.11.2009 - 09:13