
Popular categories
Looking for a yarn?


|
||||||||||
Little Lamb |
||||||||||
|
|
||||||||||
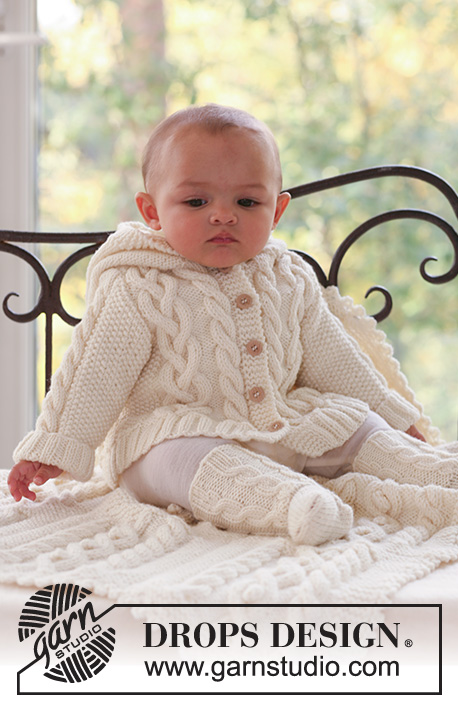
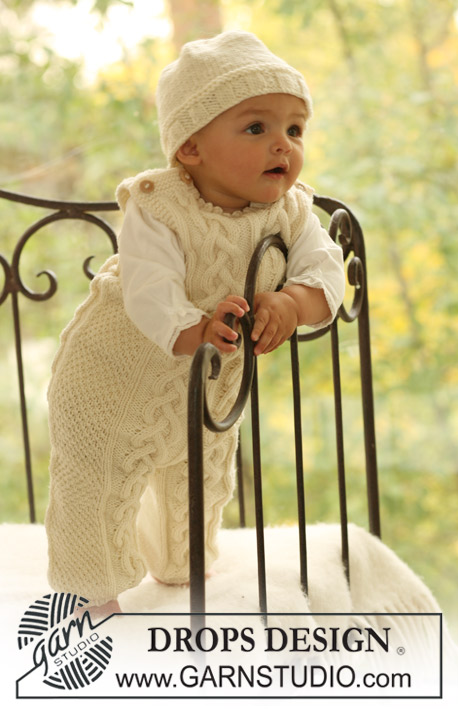
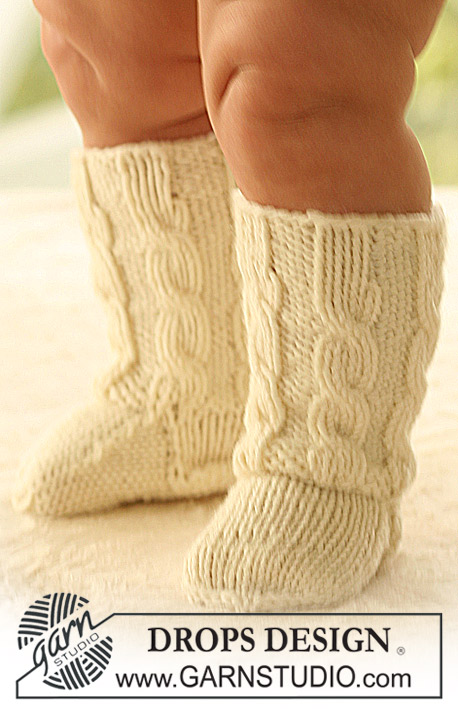
Set of beret hat and onesie with cables for baby in DROPS Merino Extra Fine
DROPS Baby 16-2 |
||||||||||
|
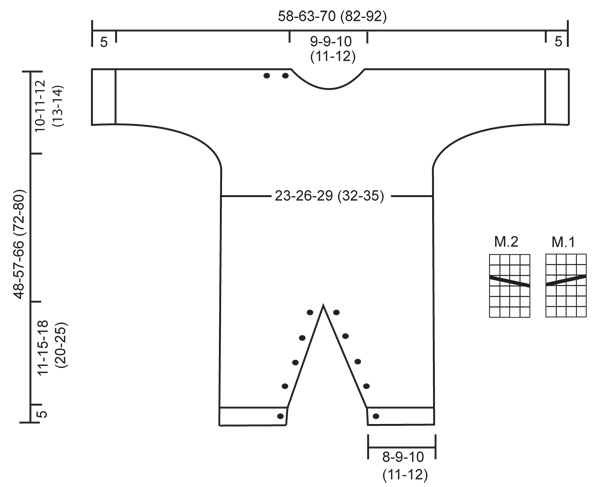
JUMPSUIT: GARTER ST (back and forth on needle): K all rows. PATTERN: See diagram M.1 and M.2. The diagrams show the pattern from the RS. BUTTONHOLES: Make buttonholes on buttonhole edge on front of leg. On right leg make buttonholes from RS and on left leg make buttonholes from WS. 1 buttonhole = K tog 2nd and 3rd st from edge and make 1 YO. Make buttonholes when leg measures: SIZE 1/3 months: 2, 5, 8, 11 and 14 cm. SIZE 6/9 months: 2, 6, 10, 14 and 18 cm. SIZE 12/18 months: 2, 6, 11, 16 and 21 cm. SIZE 2 years: 2, 6, 10, 14, 18 and 23 cm. SIZE 3/4 years: 2, 7, 12, 17, 22 and 28 cm. ---------------------------------------------------------- RIGHT LEG: Worked back and forth on circular needle. Cast on 47-53-53 (59-65) sts on circular needle size 3.5 mm with Merino Extra Fine. P 1 row from WS and continue as follows from RS: 4 garter sts (buttonhole edge) rib K3/P3, on the next 36-42-42 (48-54) sts and finish row with K3 and 4 garter sts (= buttonhole edge). Continue in rib with 4 garter sts each side, AT THE SAME TIME when piece measures 2 cm make buttonhole – SEE ABOVE. When piece measures 5 cm K 2 rows on all sts, AT THE SAME TIME dec 11-13-9 (11-13) sts evenly on first row = 36-40-44 (48-52) sts. Change to needle size 4.5 mm and continue in stocking st with 4 garter sts each side. AT THE SAME TIME when piece measures 6 cm inc 1 st each side inside the 4 garter sts on every 3-3-4 (4-4) row a total of 9-10-11 (12-13) times = 54-60-66 (72-78) sts. REMEMBER THE KNITTING TENSION! When piece measures 16-20-23 (25-30) cm cast off 4 sts each side = 46-52-58 (64-70) sts. Put piece aside and knit the other leg. LEFT LEG: Like right leg, but make buttonholes on the opposite side. BODY PIECE: Slip both legs on the same circular needle = 92-104-116 (128-140) sts. Insert 1 marker each side = 46-52-58 (64-70) sts between markers. Work next round as follows – beg on the left side of piece: 18-21-24 (27-30) stocking sts, P2, K2 in each of the next 2 sts (= K4), P2, K2 in each of the next 2 sts (= K4), P2 and work remaining sts in stocking st = 96-108-120 (132-144) sts. Work next round as follows: 18-21-24 (27-30) stocking sts, P2, M.1, P2, M.2, P2 and work remaining sts in stocking st. Continue like this until piece measures 38-46-54 (59-66) cm. Now divide the piece by markers at sides and complete front and back pieces separately – NOTE: Make sure to divide piece so that the cable row in M.1 and M.2 sits on the RS. FRONT PIECE: = 50-56-62 (68-74) sts. Continue in stocking st with cables as before, AT THE SAME TIME cast on new sts each side for sleeves. Cast on at the end of every row at the sides: 4 sts 2-1-1 (1-1) times, 6 sts 0-1-1 (2-1) times, 8 sts 1-1-1 (1-2) times and 9-9-13 (16-21) sts 1 time = 100-110-124 (148-168) sts – work inc sts in stocking st. When piece measures 44-53-61 (67-75) cm K2 tog on the 2 cables = 96-106-120 (144-164) sts. On next row slip the middle 10-10-12 (14-16) sts on a stitch holder for neck and complete each side separately. RIGHT SHOULDER/SLEEVE: Continue as before, AT THE SAME TIME cast off to shape the neckline at the beg of every row from mid front: 2 sts 1 time and 1 st 2 times = 39-44-50 (61-70) sts left on shoulder/sleeve. AT THE SAME TIME when piece measures 46-55-64 (70-78) cm work garter st on the first 12-13-14 (15-16) sts from mid front (work remaining sts as before). After 4 rows garter st make 2 buttonholes as follows from RS: K2 tog, 1 YO, work 5-6-7 (8-9) sts, K2 tog, 1 YO, work remaining sts on row. Continue in stocking st with garter st on the first 12-13-14 (15-16) sts from mid front until piece measures 48-57-66 (72-80) cm, cast off. LEFT SHOULDER/SLEEVE: Like right shoulder/sleeve, but mirrored = 39-44-50 (61-70) sts on shoulder/sleeve. Continue in stocking st until piece measures 48-57-66 (72-80) cm, cast off. BACK PIECE = 46-52-58 (64-70) sts. Cast on new sts each side for sleeves as described for front piece = 96-106-120 (144-164) sts. When piece measures 46-55-64 (70-78) cm cast off the middle 16-16-18 (20-22) sts for neck and complete each side separately. RIGHT SHOULDER/SLEEVE: = 40-45-51 (62-71) sts. Cast off 1 st on neckline on next row = 39-44-50 (61-70) sts. When piece measures 48-57-66 (72-80) cm cast off the first 27-31-36 (46-54) sts from sleeve edge towards shoulder. Work another 1.5 cm stocking st with 1 garter st each side on the remaining 12-13-14 (15-16) sts (= buttonhole edge). K 1 row from WS and cast off all sts from RS LEFT SHOULDER/SLEEVE: Continue and cast off as described for right shoulder/sleeve, but mirrored = 39-44-50 (61-70) sts left on shoulder/sleeve. Continue in stocking st until piece measures 48-57-66 (72-80) cm, cast off. ASSEMBLY: Sew upper arm seams, edge to edge to avoid a chunky seam – on right shoulder only sew seam up to buttonhole edge. CUFF: Pick up 38-44-50 (50-56) sts on needle size 3.5 mm along sleeve edge. K 2 rows and continue in rib, K3/P3, with 1 edge st each side. Cast off when rib measures 5 cm. Repeat along the other sleeve edge. Sew seams under arms inside 1 edge st. NECK: Pick up approx 48 to 64 sts round neckline (incl sts on stitch holders) on needle size 4.5 mm. K 3 rows and cast off. Sew tog buttonhole edges at the top of the front of legs and sew tog the buttonhole edges at the top of the back of legs. Sew on buttons to fit buttonholes on legs and shoulder. ---------------------------------------------------------- BASQUE HAT: Head circumference: 40/42 - 44/46 - 46/48 (48/50 - 50/52) cm INCREASING TIP: Inc 1 st by making 1 YO. Work YO into back of loop on return row to avoid a hole. ---------------------------------------------------------- HAT: Worked back and forth on pointed needles. Cast on 90-92-94 (96-98) sts on needle size 4 mm with Merino Extra Fine. Work 2 cm rib, K1/P1. Continue in garter st – SEE ABOVE – AT THE SAME TIME dec 5-7-4 (6-3) sts evenly on first row = 85-85-90 (90-95) sts. Insert 5 markers in piece as follows from RS: First marker after 1 st, and the remaining 4 markers with 17-17-18 (18-19) sts between each = 16-16-17 (17-18) sts left after the last marker. On next row from RS inc 1 st to the left of all markers – SEE INCREASING TIP – and repeat the inc on every other row a total of 6-7-8 (9-10) times = 115-120-130 (135-145) sts. REMEMBER THE KNITTING TENSION! When piece measures 6.5-7-7.5 (8-8.5) cm dec 1 st to the left of all markers by K2 tog, and repeat the dec on every other row a total of 18-19-20 (21-22) times = 25-25-30 (30-35) sts. Now K2 tog across the row. Cut the thread, pull through remaining sts and fasten. Sew hat tog mid back in outer loops of sts. Hat measures approx 15-16-17 (18-19) cm. |
||||||||||
Diagram explanations |
||||||||||
|
||||||||||
|
||||||||||
|
Have you made this or any other of our designs? Tag your pictures in social media with #dropsdesign so we can see them! Do you need help with this pattern?You'll find tutorial videos, a Comments/Questions area and more by visiting the pattern on garnstudio.com. © 1982-2024 DROPS Design A/S. We reserve all rights. This document, including all its sub-sections, has copyrights. Read more about what you can do with our patterns at the bottom of each pattern on our site. |
||||||||||


With over 40 years in knitting and crochet design, DROPS Design offers one of the most extensive collections of free patterns on the internet - translated to 17 languages. As of today we count 304 catalogues and 11422 patterns - 11422 of which are translated into English (UK/cm).
We work hard to bring you the best knitting and crochet have to offer, inspiration and advice as well as great quality yarns at incredible prices! Would you like to use our patterns for other than personal use? You can read what you are allowed to do in the Copyright text at the bottom of all our patterns. Happy crafting!
Comments / Questions (133)
Bonjour, Concerne le béret au moment de la répartition des 5 marqueurs que j'ai placé comme indiqué sur l'endroit mon tricot présente une pointe de côté droit correspondant aux augmentations et aux diminutions au final. Résultat je ne parviens pas à coudre ensemble puisque l'autre côté est droit. Serait-il possible de tricoter le béret en rond à l'aide d'une aiguille circulaire ? En vous remerciant d'avance. Pia.
22.05.2021 - 11:06DROPS Design answered:
Bonjour Mme Berbett, la forme est normale, c'est dû aux diminutions qui sont faites d'un côté au tout début du rang, vous pouvez simplement coudre les côtés tout du long dans le brin le plus à l'extérieur des mailles pour que la couture ne soit pas épaisse. Vous pouvez aussi choisir de le tricoter en rond (pensez bien à alterner 1 tour endroit, 1 tour envers pour tricoter le point mousse). Bon tricot!
25.05.2021 - 07:38Hej, stickade baskern och blev jättenöjd! Men nu när jag tvättat den mkt försiktigt förhand i ulltvättmedel (utan att vrida osv) så har den blivit alldeles för stor och töjt sig mycket, varför?
08.03.2021 - 18:31DROPS Design answered:
Hej Felicia, har du vasket ifølge vaskeanvisningen på banderolen og på farvekortet. DROPS Merino Extra Fine - tvätt
09.03.2021 - 12:05Beide Beine auf eine nadel dann 24 M stricken und mit dem Zopf beginnen. Dann ist mein zopf auf dem linken Bein und nicht im Vorderteil. Was mache ich denn falsch? Lg Liane
19.11.2020 - 19:41DROPS Design answered:
Liebe Liane, nach dem 2. Bein sollen Sie den Faden abschneiden, die Maschen von beiden Beine zusammen legen und jetzt ab die linke Seite (= in der Mitte von den linken Bein) müssen jetzt die Runden beginnen: 18-21-24 (27-30) M. glatt, 2 li., 2 re. in jede der 2 nächsten M. (= 4 re.), 2 li., 2 re. in jede der 2 nächsten M. (= 4 re.), 2 li. und glatt über die restlichen M. stricken = 96-108-120 (132-144) M. Viel Spaß beim stricken!
20.11.2020 - 08:33Ben aan voorpand voor maat 6/9 maar begrijp niet hoe ik moet starten _ de 1ste markeerder is op de 27 st - start ik van daaruit en dan 56 stn? kan toch niet want dan heb ik niet genoeg voor achterpand. Sorry ik snap het niet goed.(( ter info, ik werk met 2 breinldn
02.09.2020 - 19:05DROPS Design answered:
Dag Martine,
Na het verdelen van het werk heb je voor het achterpand heb je 52 steken op de naald en voor het voorpand heb je 56 steken op de naald. Je breit dan alleen over de 56 steken van het voorpand, dus tussen de 2 markeerdraden en met de kabels in het midden van het werk). Je begint dus aan een van de zijkanten, je breit 56 steken en zet aan het einde steeds steken op voor de aangebreide mouw.
03.09.2020 - 12:43Wat wordt er bedoeld met" alle 25 steken 2 aan 2 samen breien"
02.09.2020 - 17:29DROPS Design answered:
Dag Carla,
Je breit over de hele naald steeds 2 steken samen, waardoor je na die naald ongeveer 13 steken op de naald hebt.
03.09.2020 - 12:44If I start my cable row at the center of the left leg, my cables will be on the back of the piece. I have my legs positioned on circular needles with my bottonhole edges in the middle of my row. Therefore, to make sure my cables are on the front piece, I would have to begin my round on the right leg?
22.04.2020 - 15:18DROPS Design answered:
Dear Kerry, yes correct, round starts on the middle of left side = left leg so that you then work some stitches in stocking st, P2, increase the next 2 sts to 4 sts, P2 and finish with stocking st (back piece is worked without cables). Happy knitting!
22.04.2020 - 15:40I have just put both legs on circular needle, am I right to position them so that the buttonhole edges of each leg are in the center of my needles? I’m coming to knot from the strut here marker on the left leg and that would mean I would put cables on the back piece. Please help.
22.04.2020 - 15:05DROPS Design answered:
Dear Kerry, the buttonholes should be on next to each other and towards mid front (beg of row on right leg + end of row on left leg). The markers should be in the middle of each leg, rounds will now start on the side and not on mid front/mid back.
22.04.2020 - 15:38Hi me again. Had already answered y last question before you replied. I just wanted to check. I have started with the increases and now starting the cables. Now I understand the continue like this part. But it doesn’t seem like there is any distance on the cables. You are repeating the c2b,p2, c2f every single row and also when I have completed 2 rows the cables seem a little thin compared to the photo of the item being knitted Is that definitely right ?
24.03.2020 - 16:33DROPS Design answered:
Dear Rachel, when you work M.1 and M.2 the cables will be worked on row 4 in diagram, and then there will be 5 rows between each cable, ie start working diagram from the bottom corner on the right side and work the whole diagrams in height (= 6 rows) then start again from row 1 to 6 (= 5 rows between each cable). Happy knitting!
24.03.2020 - 18:10Hi, I have just knitted the two legs and slipped both on the same circular needle. I just wanted to clarify the pattern for starting body piece. It mentions about placing marker on each side. And then mentions about knitting next round with the 18 stocking stitches then m1 and m2. If I did this from end of leg the cables would end out at the side of the outfit ( leg) and not at the centre? I just wanted to clarify this bit before I started knitting it.
21.03.2020 - 20:42DROPS Design answered:
Dear Rachel, when you work the body, the rounds will now start in the middle of the left side, ie on one of the marker (in the middle of the left leg), so that the 2nd marker will be in the middle of right leg = there are 46 sts between markers, 23 sts from each leg. The 18 sts worked before cables will be on the front piece from the side to the cables in the middle of front piece. Happy knitting!
23.03.2020 - 11:50I don’t want to sound silly when I ask this but I am new to making baby items.but I am just a little confused On this pattern. At the start of the pattern for right leg. Says purl first row after cast on , which I get done. I then proceed to next row, RS 4 hater sts, them rob k3 p3 till ending in K3 and 4 garter sts. So I do that row. But when continuing 4 garter sts and continue in rib. K3 p3 the texture of pattern doesn’t look right so little unsure what is wrong.
19.01.2020 - 19:50DROPS Design answered:
Dear Rachel, on first row from RS work: K4, then repeat K3/P3 until 7 sts remain, K3 and finish with K7. From WS work; K4 (edge in garter st), work P over P and K over K (= rib are from WS: P3/K3 until 7 sts remain, then work P3), and finish with K4. Happy knitting!
20.01.2020 - 10:23