Addi's Sweater

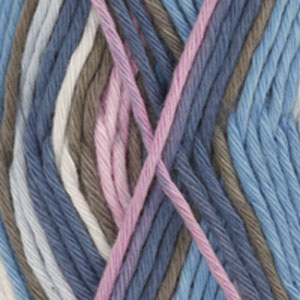
Knitted sweater in DROPS Muskat Soft with crochet edge. Size children 5 to 14 years.

DROPS Children 15-2
Size (years):
5/6 - 7/8 - 9/10 - 11/12 - 13/14
All measurements in charts are in cm.

Materials: DROPS Muskat soft from Garnstudio
300-300-350-400-450 g color no. 06, blue lilac mix

DROPS STRAIGHT NEEDLES size 4 mm / US 6 or the size needed to obtain the correct gauge.
DROPS CROCHET HOOK size 3.5 mm/E/4 for the edge.

Knitting gauge: 21 sts x 28 row on needles size 4 mm / US 6 in stockinette sts with Muskat Soft = 10 x 10 cm / 4" x 4".

-------------------------------------------------------

Alternative Yarn – See how to change yarns here
Yarn Groups A to F – Use the same pattern and change the yarn here
Yarn usage using an alternative yarn – Use our yarn converter here

-------------------------------------------------------

Pattern instructions

NOTE: This pattern is written in American English. All measurements in charts are in cm. For conversion from inches to cm - click here. There are different terms for crocheting in American and British English. If this pattern includes crochet, click for "crochet terms" here. For this pattern in British English, please click here.
Garter sts back and forth: Knit on all rows.

Back piece:
Cast on 86-90-94-98-102 sts (includes 1 edge st each side) on needles size 4 mm / US 6 with Muskat Soft.
Knit 2 rows of garter sts and continue with stockinette sts.
When the piece measures 4 cm / 1½" bind off 1 st each side, repeat on every 4-4.5-5-5.5-8 cm / 1½"-1¾"-2"-2¼"-3⅛" a total of 5-5-5-5-4 times= 76-80-84-88-94 sts.
When the piece measures 24-26-28-30-32 cm / 9½"-10¼"-11"-11¾"-12½" bind off for arm holes in beg of every row, each side like this: 3 sts 1 time, 2 sts 1-1-1-2-3 times and 1 st 3-3-4-3-3 times = 60-64-66-68-70 sts.
When the piece measures 38-41-44-47-50 cm / 15"-16⅛"-17¼"-18½"-19¾" bind off the mid 28-30-30-32-34 sts for the neck and work each side separately.
Continue and bind off 1 st towards the neck on the following row = 15-16-17-17-17 sts left for shoulder.
Bind off when piece measures 40-43-46-49-52 cm / 15¾"-17"-18"-19¼"-20½".

Front piece:
Cast on and work as back piece.
When the piece measures 24-26-28-30-32 cm / 9½"-10¼"-11"-11¾"-12½" bind off for arm holes as done for the back piece, and at the same time when the piece measures 27-29-31-33-35 cm / 10⅝"-11⅜"-12¼"-13"-13¾" bind off the mid 16-16-16-18-18 sts for the slit at the neck. Continue work each side separately.
When the piece measures 35-38-40-43-45 cm / 13¾"-15"-15¾"-17"-17¾" put the 5-6-6-6-7 sts towards the mid front on a stitch holder. Then bind off 1 st for the neck on every row starting from neck a total of 2 times = 15-16-17-17-17 sts left for shoulder.
Bind off when the piece measures 40-43-46-49-52 cm / 15¾"-17"-18"-19¼"-20½".

Sleeve:
Cast on 47-52-52-57-57 sts (includes 1 edge st each side) on needles size 4 mm / US 6 with Muskat Soft. Knit 2 rows of garter sts and then continue in stockinette sts, at the same time when the piece measures 4 cm / 1½" inc. 1 st each side, repeat inc on every 3-3.5-3-4-3.5 cm / 1⅛"-1¼"-1⅛"-1½"-1¼" a total of 9-8-10-9-10 times = 65-68-72-75-77 sts.
When the piece measures 30-33-36-39-41 cm / 11¾"-13"-14¼"-15¼"-16⅛" bind off for the sleeve cap in beg of every row, each side as follows: 3 sts 1 time, 2 sts 3 times, 1 st 0-1-2-3-5 times. Then bind off 2 sts each side until the piece measures 34-38-42-46-49 cm / 13⅜"-15"-16½"-18"-19¼" and then bind off 3 sts 1 times each side. Bind off remaining sts when the piece measures approx. 35-39-43-47-50 cm / 13¾"-15¼"-17"-18½"-19¾".

Assembly:
Sew the shoulder seams.
Pick up approx. 52-70 sts (including the sts on stitch holder) with needle size 4 mm / US 6 around the neck line and knit 4 rows of garter sts. Bind off.
Sew in the sleeves. Sew the sleeve and the side seams inside 1 edge sts.

Crochet border:
Neck slit at the front: Beg. at the bottom of 1 corner of the slit at the front piece using hook size 3.5 mm/E.
Crochet *1 sc, 1 ch* repeat from *-* so there will be a total of 13-13-13-17-17 sc (divisible with 4 +1) up along one side. Turn.
Now crochet diagram M.1 over the first 5 sts and continue to crochet diagram M.2 until 4 sc remains and crochet diagram M.3 over the last 4 sc.
Turn and continue according to diagram from the 3rd row onwards.
Measure after 6th row = 4 cm / 1½".
Repeat for the other side.
Sew the crochet edge with small sts to the bottom edge of the slit.

Crochet border:
Crochet a border around the bottom edge of the tunic and around the bottom edge of the sleeves as follows:
1st round: 1 sc in the first st *5 ch, skip 3 sts, 1 sc in the next st*, repeat from *-* and finish with a sl st in the first sc on round.
2nd round: Crochet 3 sl sts in the top of the first ch space from the beg. of previous round, *5 ch, 1 sc in the next ch space from previous round* repeat from *-* and finish with a sl st in the top of the first ch from previous round.
3rd round: ch 3, *3 dc in the first ch space from previous round, 2 ch*, repeat from *-* and finish with 1 sl st in the 3rd ch at the beg. of round.
4th round: *5 ch, 1 sc in the 2 ch from previous round*, repeat from *-* and finish with 1 sl st in the first ch from beg. of round.
5th. round: Crochet 3 sl st at the top of the first ch space from previous round, *5 ch, 1 sc in the next ch space from previous round* repeat from *-* and finish with 1 sl st in the top of the ch space from previous round.
Fasten off.

Now crochet a border edge over the crochet borders in the slit and around the neck as follows:
1st round: 1 sc at the in the top of the cornet of the crochet border mid front *5 ch, skip approx. 1.5 cm / ½", 1 sc in the next st* repeat from *-* around the neck and over the crochet border at the other side (make sure to finish with a dc at the top corner). Turn.
2nd round: Crochet 3 sl sts to the top of the first ch space at the beg. of previous round, *5 ch, 1 sc in the next ch space from previous round* repeat from *-* and finish with 1 sl st at the top of the first ch space from previous row. Fasten off.


Diagram

All measurements in charts are in cm.

symbols = 1 ch
symbols = 1 sc in st
symbols = 1 sc (crochet around the ch space)
symbols = 1 dc (crochet around the ch space)
symbols = 1st and 2nd row are explained in the pattern, beg. 3rd. row
symbols = sl st
diagram
Do you have a question? See a list of frequently asked questions (FAQ)

Knitting tension is what determines the final measurements of your work, and is usually measured per 10 x 10 cm. It is provided like so: number of stitches in width x number of rows in height - eg: 19 stitches x 26 rows = 10 x 10 cm.

The knitting tension is very individual; some people knit/crochet loosely while others work tightly. You adjust the knitting tension with the needle size, which is why the suggested needle size only serve as a guide! You need to adjust this (up or down) to ensure that YOUR knitting tension matches the knitting tension provided in the pattern. If you work with a different knitting tension than provided you will have a different yarn consumption, and your work will have different measurements than what the pattern suggests.

The knitting tension also determines which yarns can replace each other. As long as you achieve the same knitting tension you can replace one yarn with another.

See DROPS lesson: How to measure your tension/gauge

See DROPS video: How to make a gauge tension swatch

The required amount of yarn is provided in grams, eg: 450 g. To calculate how many balls you’ll need you first need to know how many grams are in 1 ball (25g, 50g or 100g). This information is available if you click on the individual yarn quality on our pages. Divide the amount required with the amount of each ball. For example, if each ball is 50g (the most common amount), the calculation will be as follows: 450 / 50 = 9 balls.

The important thing when changing from one yarn to another is that the knitting/crochet tension remains the same. This is so that the measurements of the finished piece will be the same as on the sketch provided. It is easier to achieve the same knitting tension using yarns from the same yarn group. It is also possible to work with multiple strands of a thinner yarn to achieve the knitting tension of a thicker one. Please try our yarn converter. We recommend you to always work a test swatch.

Please NOTE: when changing yarn the garment might have a different look and feel to the garment in the photo, due to individual properties and qualities of each yarn.

See DROPS lesson: Can I use a different yarn than the one mentioned in the pattern?

All our yarns are categorised into yarn groups (from A to F) according to thickness and knitting tension – group A contains the thinnest yarns and group F the thickest. This makes it easier for you to find alternative yarns to our patterns, should you wish to switch yarn. All yarns within the same group have a similar knitting tension and can easily replace each other. However, different yarn qualities have different structures and properties which will give the finished work a unique look and feel.

Click here for an overview of the yarns in each yarn group

At the top of all our patterns you’ll find a link to our yarn converter, which is a helpful tool should you wish to use a different yarn than suggested. By filling in the yarn quality you wish to replace, the amount (in your size) and number of strands, the converter will present good alternative yarns with the same knitting tension. Additionally it will tell you how much you’ll require in the new qualities and whether you’ll need to work with multiple strands. Most skeins are 50g (some are 25g or 100g).

If the pattern is worked with multiple colours, every colour will have to be converted separately. Similarly, if the pattern is worked with several strands of different yarns (for example 1 strand Alpaca and 1 strand Kid-Silk) you will have to find alternatives for each, individually.

Click here to see our yarn converter

Since different yarns have different qualities and textures we have chosen to keep the original yarn in our patterns. However, you can easily find options among our available qualities by using our yarn converter, or simply pick a yarn from the same yarn group.

It is possible that some retailers still have discontinued yarns in stock, or that someone has a few skeins at home that they would like to find patterns for.

The yarn converter will provide both alternative yarn as well as required amount in the new quality.

If you think it's hard to decide what size to make, it can be a good idea to measure a garment you own already and like the size of. Then you can pick the size by comparing those measures with the ones available in the pattern's size chart.

You'll find the size chart at the bottom of the pattern.

See DROPS lesson: How to read size chart

The needle size provided in the pattern serves only as a guide, the important thing is to follow the knitting tension. And since knitting tension is very individual, you will have to adjust the needle size to ensure that YOUR tension is the same as in the pattern – maybe you’ll have to adjust 1, or even 2 needle sizes, up or down to achieve the correct tension. For this, we recommend that you work test swatches.

Should you work with a different knitting tension than the one provided, the measurements of the finished garment might deviate from the measurement sketch.

See DROPS lesson: How to measure your tension/gauge

See DROPS video: How to make a gauge tension swatch

Working a garment top-down provides more flexibility and room for personal adjustment. For example it is easier to try the garment on while working, as well as making adjustments to length of yoke and shoulder caps.

The instructions are carefully explaining every step, in the correct order. Diagrams are adjusted to the knitting direction and are worked as usual.

The diagram depicts all rows/rounds, and every stitch seen from the right side. It is read from bottom to top, from right to left. 1 square = 1 stitch.

When working back and forth, every other row is worked from the right side and every other row is worked from the wrong side. When working from the wrong side, the diagram will have to be worked reversed: from left to right, knit stitches are purled, purl stitches are knit etc.

When working in the round every round is worked from the right side and the diagram are worked from right to left on all rounds.

See DROPS lesson: How to read knitting diagrams

The diagram depicts all rows/rounds, and every stitch seen from the right side. It is worked from bottom to top, from right to left.

When working back and forth every other row is worked from the right side: from right to left and every other row is worked from the wrong side: from left to right.

When working in the round, every row in the diagram are worked from the right side, from right to left.

When working a circular diagram you start in the middle and work your way outwards, counter clockwise, row by row.

The rows usually start with a given number of chain stitches (equivalent to the height of the following stitch), this will either be depicted in the diagram or explained in the pattern.

See DROPS lesson: How to read crochet diagrams

Instructions for working several diagrams after each other on the same row/round, will often be written like so: “work A.1, A.2, A.3 a total of 0-0-2-3-4 times". This means you work A.1 once, then A.2 is worked once, and A.3 is repeated (in width) the number of times provided for your size – in this case like so: S = 0 times, M = 0 times, L=2 times, XL= 3 times and XXL = 4 times.

The diagrams are worked as usual: begin with the first row in A.1, then work the first row in A.2 etc.

See DROPS lesson: How to read knitting diagrams

See DROPS lesson: How to read crochet diagrams

The total width of the garment (from wrist-to-wrist) will be larger in the larger sizes, despite the actual sleeves being shorter. The larger sizes have longer sleeve caps and wider shoulders, so there will be a good fit in all sizes.

The measurement sketch/schematic drawing provides information regarding the full length of the garment. If it’s a jumper or a jacket the length is measured from the highest point on the shoulder (usually closest to the neckline), and straight down to the bottom of the garment. It is NOT measured from the tip of shoulder. Similarly, the length of yoke is measured from the highest point on the shoulder and down to where yoke is split into body and sleeves.

See DROPS lesson: How to read a schematic drawing

Diagrams are often repeated on the round or in height. 1 repeat is the diagram the way it appears in the pattern. If it says to work 5 repeats of A.1 in the round, then you work A.1 a total of 5 times after/next to each other in the round. If it says to work 2 repeats of A.1 vertically/in height you work the entire diagram once, then begin again at the start and work the entire diagram one more time.

Chain stitches are slightly narrower than other stitches and to avoid working the cast-on edge too tight, we simply chain more stitches to begin with. The stitch count will be adjusted on the following row to fit the pattern and measurement sketch.

The rib edge is more elastic and will contract slightly compared to, for example, stocking stitch. By increasing before the rib edge, you avoid a visible difference in width between the rib edge and the rest of the body.

It’s very easy to cast off too tightly, and by making yarn overs while casting off (and simultaneously casting these off) you avoid a too tight cast off edge.

See DROPS video: How to bind off with yarn overs (yo)

To achieve an even increase (or decrease) you can increase on, for example: every 3rd and 4th row alternately, like so: work 2 rows and increase on the 3rd row, work 3 rows and increase on the 4th. Repeat this until the increase is complete.

See DROPS lesson: Increase or decrease 1 st on every 3rd and 4th row alternately

Should you prefer to work in the round instead of back and forth, you may of course adjust the pattern. You’ll need to add steeks mid-front (usually 5 stitches), and follow the instructions. When you would normally turn and work from the wrong side, simply work across the steek and continue in the round. At the end you’ll cut the piece open, pick up stitches to work bands, and cover the cut edges.

See DROPS video: How to knit steeks and cut open

Should you prefer to work back and forth instead of in the round, you may of course adjust the pattern so you work the pieces separately and then assemble them at the end. Divide the stitches for the body in 2, add 1 edge stitch in each side (for sewing) and work the front and back pieces separately.

See DROPS lesson: Can I adapt a pattern for circular needles into straight needles?

Pattern repeats can vary slightly in the different sizes, in order to get the correct proportions. If you’re not working the exact same size as the garment in the photo, yours might deviate slightly. This has been carefully developed and adjusted so that the complete impression of the garment is the same in all sizes.

Make sure to follow instructions and diagrams for your size!

If you have found a pattern you like which is available in women’s size it’s not very difficult to convert it to men’s size. The biggest difference will be the length of sleeves and body. Start working on the women size that you think would fit across the chest. The additional length will be worked right before you cast off for the armhole/sleeve cap. If the pattern is worked top-down you can add the length right after the armhole or before the first decrease on sleeve.

Regarding additional yarn amount, this will depend on how much length you add, but it is better with a skein too many than too few.

All yarns will have excess fibres (from production) that might come off as lint or shedding. Brushed yarns (ie hairier yarns) have more of these loose, excess fibres, causing more shedding.

Shedding also depends on what is worn under or over the garment, and whether this pulls at the yarn fibres. It’s therefore not possible to guarantee that there will be no shedding

Below are some tips on how to get the best result when working with hairier yarns:

1. When the garment is finished (before you wash it) shake it vigorously so the looser hairs come off. NOTE: do NOT use a lint roller, brush or any method that pulls at the yarn.

2. Place the garment in a plastic bag and put it in your freezer - the temperature will cause the fibres to become less attached to each other, and excess fibres will come off easier.

3. Leave in the freezer for a few hours before taking it out and shaking it again.

4. Wash the garment according to the instructions on the yarn label.

Pilling is a natural process that happens to even the most exclusive of fibers. It's a natural sign of wear and tear that is hard to avoid, and that is most visible in high friction areas of your garment like a sweater's arms and cuffs.

You can make your garment look as new by removing the pilling, using a fabric comb or a pill/lint remover.

Still can't find the answer you need? Then scroll down and leave your question so one of our experts can try to help you. This will be done normally within 5 to 10 working days.
In the meantime, you can read the questions and answers that others have left to this pattern or join the DROPS Workshop on Facebook to get help from fellow knitters/crocheters!

You might also like...

Post a comment to pattern DROPS Children 15-2

We would love to hear what you have to say about this pattern!

If you want to leave a question, please make sure you select the correct category in the form below, to speed up the answering process. Required fields are marked *.

Comments / Questions (41)

country flag Heidrun Mühlberg-Krüger wrote:

Ich möchte gern von Ihnen wissen ,wo ich die Drops Muskat soft Wolle multicolor kaufen kann. Da die Farbe Nr. 06 (blaulilamix) nicht mehr im Sortiment ist ,würde ich auch eine andere Farbe nehmen. Vielleicht können Sie mir weiter helfen. Danke und freundliche Grüße H. Mühlberg-Krüger

02.09.2020 - 17:03

DROPS Design answered:

Liebe Frau Mühlberg-Krüger, DROPS Muskat Soft is jetzt ausgelaufen, benutzen Sie unseren Garnumrechner um eine Alternative zu finden, gerne wird Ihnen auch Ihr DROPS Laden weiterhelfen, den richtigen Garn zu finden. Viel Spaß beim stricken!

03.09.2020 - 08:47

country flag Anne Berdal wrote:

Jag hittar inte garntypen. Bara Drops Muskat i en färg - inte som här i blålillamix.

24.02.2019 - 13:05

DROPS Design answered:

Hej Anne, Den färgen har tyvärr utgått, DROPS Muskat finns bara enfärgad. Lycka till :)

28.02.2019 - 14:04

country flag Monique wrote:

Geachte, er staat, neem voor de hals 52 steken op (kleinste maat) rondom de hals. Is dat ook langs de split of vanaf en tot en met de 5 op een draad gezette steken? Als dat met de split erbiij is heb ik veel meer dan 52 steken nodig. Met dank

17.03.2018 - 16:19

DROPS Design answered:

Hallo Monique, Deze 52 steken moet je inderdaad alleen opnemen langs de hals en over de bovenkant van de gehaakte steken van het split (dus niet langs de zijkanten van het split)

19.03.2018 - 07:52

country flag Monique wrote:

Beste, op een moment staat bij de mouw, kant daarna 2 steken af aan weerskanten tot een hoogte van 34 cm. Is dat elke naald of om de naald? Met dank.

12.03.2018 - 11:56

DROPS Design answered:

Hallo Monique, Dat is inderdaad op elke naald, steeds aan het begin van de naald 2 steken.

13.03.2018 - 16:21

country flag Diane Mueller wrote:

Thank you very much for the info and for answering so quickly! Am making this pullover for my 8 yr. old granddaughter who LOVES rainbow colors!

22.01.2016 - 18:13

country flag Diane Mueller wrote:

Love the pattern. My question has to do with the front neckline instructions: When the piece measures 15 3/4" put the 6 sts towards the mid front on a stitch holder. Then bind off 1 st for the neck on every row starting from neck a total of 2 times = 17 sts left for shoulder. Having trouble visualizing the stitch holder part. Shouldn't I just decrease 2 stitches at the neck edge and work till desired length and then bind off? Thank you

22.01.2016 - 17:27

DROPS Design answered:

Dear Mrs Mueller, work next row from neckline as follows: work the first 6 sts and slip them onto a st holder or a thread, work remaining sts on row, work return row. Dec 1 st at beg of next row from neckline and continue as stated. Afterwards you will slip sts from st holder /thread back onto needle and work the neckedge (see under assembly). Happy knitting!

22.01.2016 - 17:44

country flag Renate Hansen wrote:

Jeg ønsker en oppskrift på enkel glattstrikket genser med rageland og rund hals str 12 år jente. Jeg har forsøkt lenge å finne på nettsiden, men finner ikke :(( Mvh Renate

10.01.2016 - 20:41

Kerry-Anne Tweddle wrote:

Good Day, I don't think you understood my previous question, what I was asking about the neck line has to do with the 4 rows of garter stitch that is mentioned after sewing the shoulders, I was asking if those garter rows must go all the way to the down the gap on the neckline or till the stitches that you have left on hooks, sorry I should have been more specific on the previous question.

08.07.2015 - 11:42

DROPS Design answered:

Dear Mrs Tweeddle, sorry for misunderstanding, the 4 rows in garter st are worked over the sts on the st holders each side on front pieces + along neckline on back piece, not along the vent mid front. You should hae approx. 52-70 sts including the sts from thread/st holder. Happy knitting!

08.07.2015 - 17:40

Kerry-Anne Tweddle wrote:

Good Day, I am rather new to knitting and I just have a question about the neck line. It is the first time I am doing a neck line like this and I was wandering when you are assembling the jersey, do you only sew one side of the shoulders and then do the neck line or sew both shoulders. And you go all the way to the bottom of the opening or just until the stitches you have on the hooks?

07.07.2015 - 12:05

DROPS Design answered:

Dear Mrs Tweedle, in this pattern, you first sew both shoulders, then crochet the border beg at the bottom of vent on front piece then crochet up along the vent, then along neckline on back piece and down to the bottom of vent on the other side on front piece. Happy crocheting!

07.07.2015 - 16:38

country flag Teresa Mas wrote:

Mi problema es que no encuentro una lana tipo B, es decir, del mismo grupo que Muskat soft, que sea una mezcla de colores. Las veo todas unicolor. Puedes aconsejarme qué lana puedo comprar, que sea multicolor? Gracias

08.01.2015 - 15:28

DROPS Design answered:

Hola Teresa. En este momento en el grupo B no hay lanas multicolor. Puedes utilizar del grupo C pero en este caso debes ajustar la tensión del tejido al patrón. Tambíen puedes hacerlo a rayas.

14.01.2015 - 23:13