DROPS Snow
DROPS Snow
100% Wool
from 2.65 $ /50g
Get the yarn to make this pattern from 29.15$.

The yarn cost is calculated from the pattern’s smallest size and the yarn’s cheapest product type. Looking for an even better price? You might find it on the DROPS Deals!

DROPS SS24

Cozy Cuddle

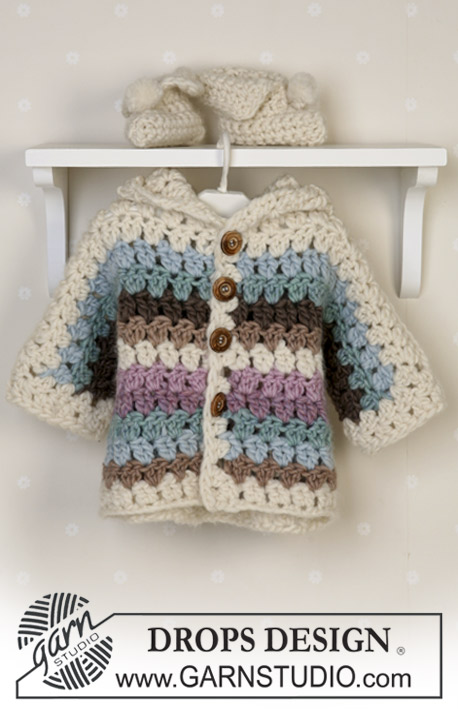
Crochet set of striped jacket and slippers in DROPS Snow. Sizes baby and children from 1 month to 4 years.

DROPS Baby 14-25
FINISHED SIZE
1/3 – 6/9 – 12/18 months (2 –3/4 years)

FINISHED GARMENT MEASUREMENTS
Width at chest: 20½-22¾-26¾ (28 3/8-30¾) inches
Full length: 11¾-13-14¼ (15¾-17¾) inches

MATERIALS
DROPS Snow from Garnstudio

JACKET:
3-4-4 (5-5) balls #01, off-white
1-1-1 (2-2) balls #31, light mint
1-1-1 (2-2) balls #37, mint-mix
1 ball for all sizes of following colors: #13 camel, #23 dark beige, #30 baby pink, #36 rose-mix.

Size M/13/9 mm crochet hook or size needed to obtain gauge.

DROPS wooden button no 512: 4-4-4 (5-5) pcs

BOOTIES:
2-2-2 (2-2) balls #01, off-white

Size K/10½/7 mm crochet hook or size needed to obtain gauge.

-------------------------------------------------------

Alternative Yarn – See how to change yarns here
Yarn Groups A to F – Use the same pattern and change the yarn here
Yarn usage using an alternative yarn – Use our yarn converter here

-------------------------------------------------------

DROPS Snow
DROPS Snow
100% Wool
from 2.65 $ /50g
Get the yarn to make this pattern from 29.15$.

The yarn cost is calculated from the pattern’s smallest size and the yarn’s cheapest product type. Looking for an even better price? You might find it on the DROPS Deals!

Pattern instructions

NOTE: This pattern is written in American English. All measurements in charts are in cm. For conversion from inches to cm - click here. There are different terms for crocheting in American and British English. If this pattern includes crochet, click for "crochet terms" here. For this pattern in British English, please click here.
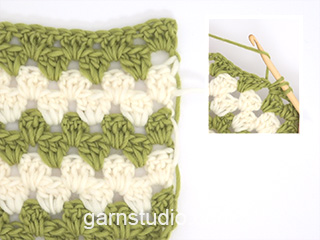
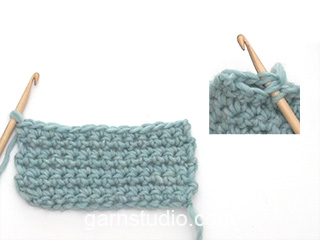
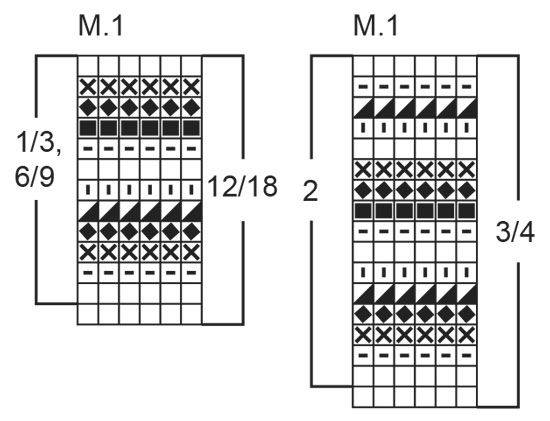
JACKET:

GAUGE
Width of 4 dc-groups and 4 rows in height = 4 x 4 inches

STRIPES
See rows below - or chart 1 for right size.
Each row = 1 row of dc’s.
1/3+6/9 months: work row 2-13 below.
12/18 months: work row 1-13 below.
2 years: work row 2-17 below.
3/4 years: work row 1-17 below.
1st row: off white
2nd row: off white
3rd row: camel
4th row: light mint
5th row: mint-mix
6th row: rose-mix
7th row: baby pink
8th row: off white
9th row: camel
10th row: dark beige
11th row: mint-mix
12th row: light mint
13th row: off white
14th row: baby pink
15th row: rose-mix
16th row: camel
17th row: off white

CROCHET INFO 1
At the beginning of each row of dc’s replace the 1st dc with 3 ch, and finish each row with 1 dc in 3rd ch from beginning of previous row.

CROCHET INFO 2
1 dc-group = 2 dc in same st. ½ dc-group = 3 ch (equals 1 dc)

BACK PIECE
Read Crochet info 1.
With Snow #01, ch 31-34-40 (43-46).
Crochet stripes as described above as follows:
1st row: 1 dc in 4th ch from hook, *skip 2 ch, 2 dc in next ch*, repeat from *-* = 10-11-13 (14-15) dc-groups on row, turn the piece.
2nd row: 3 ch (= 1 dc), 2 dc between the first 2 dc-groups from previous row (crochet at top of st and not round the whole st), *2 dc between the next 2 dc-groups*, repeat from *-* and finish with 2 dc at the top of the last dc = 1 dc (3 ch) + 10-11-13 (14-15) dc-groups on row – read Crochet info 2. Repeat 2nd row.

When piece measures approx 8"-9"-9" (10⅝"-11¾") cast on new sts for sleeves each side as follows: Cut the yarn. Ch 16-19-19 (25-28), crochet as before over back piece, at the end of row ch 16-19-19 (25-28). Turn the piece and crochet as explained for 1st row so that the pattern continues as before = 1 dc (3 ch) + 20-23-25 (30-33) dc-groups on row.
When piece measures 11¾"-13"-14¼" (15¾"-17¾") fasten off.

LEFT FRONT PIECE
With Snow #01, ch 16-16-19 (22-22).
Crochet following explanation for stripes above and dc-groups as described for back piece = 1 dc (3 ch) +5-5-6 (7-7) dc-groups after 2nd row. When piece measures approx 8"-9"-9" (10⅝"-11¾") cast on new sts for sleeve at side as described for back piece. Continue pattern as before = 1 dc (3 ch) + 10-11-12 (15-16) dc-groups on row. When piece measures 11¾"-13"-14¼" (15¾"-17¾") fasten off.

RIGHT FRONT PIECE
Crochet as left front piece, but mirrored.

CUFFS
With Snow #01 crochet 2 rows of dc along sleeve edge = approx 1 dc (3 ch) + 8-8-10 (10-11) dc on row.

FRONT EDGES
With Snow #01 crochet 1 row of dc-groups along the front edge of both front pieces = approx 12-13-14 (16-18) dc-groups.

ASSEMBLY
Sew shoulder/sleeve seams – start at sleeve edge and work towards neckline – leave 5-5 dc-groups mid back for neck opening. Sew underarm and side seams.

HOOD
With Snow #01 crochet 1 sc in 1st st, ch 3, then approx 13-14-15 (16-17) dc-groups around neckline as described on 1sr row for jacket. Continue with dc-groups until hood measures approx 8¾"-9½"-10¼" (11½"-11¾"), fasten off. Fold hood double and sew top seam with neat sts.

BUTTONS
Sew on buttons on left front piece – the top one approx ½"-¾" from neckline and the bottom one approx 4"-4¾" from lower edge.

___________________________________________________________________________


BOOTIES:
To fit foot length: 4-4½-4¾ (5½-6) inches

GAUGE
Width of 10 sc and 11 rows in height = 4 x 4 inches.

CROCHET INFO
At the beginning of each row of sc’s replace the 1st sc with 1 ch, and finish each row with 1 sc in ch from beginning of previous row.

BOOTIE
Crochet the bootie in one piece and sew seams mid front and mid back.
With Snow #01, ch 7-8-9 (10-11). Crochet back and forth with sc - read Crochet Info – start in 2nd ch from hook. = 7-8-9 (10-11) sc on row. When piece measures 2¾"-3⅛"-3½" (4"-4") inc at one side for foot by ch 3-3-3 (4-4), turn and continue with sc in all sts = 10-11-12 (14-15) sc. When piece measures 6"-7"-8¼" (9½"-10¼") bind off the 3-3-3 (4-4) foot sts by turning the piece just before these sts. Continue with sc over the remaining 7-8-9 (10-11) sc until piece measures 8¾"-10¼"-11¾" (13⅜"-14¼"). Fasten off

ASSEMBLY
Fold bootie double and sew seam mid back and mid front with neat sts – leave an opening of approx 2"-2½"-2¾" (3"-3⅛") at the top mid front.
Crochet the other bootie.

POMPOM
Make 2 small pompons with a diameter of approx 1 inch and attach to top of each bootie.

___________________________________________________________________________


BLANKET
See pattern b14-21

This pattern has been corrected.

Updated online: 27.10.2010
When piece measures approx 8”-9”-9” (10 5/8”-11¾”) cast on new sts for sleeves each side as follows: Cut the yarn. Ch 16-19-19 (25-28), crochet as before over back piece, at the end of row ch 16-19-19 (25-28). Turn the piece and crochet as explained for 1st row so that the pattern continues as before = 1 dc (3 ch) + 20-23-25 (30-33) dc-groups on row.

Diagram

All measurements in charts are in cm.

symbols = off-white
symbols = camel
symbols = light mint
symbols = mint mix
symbols = rose mix
symbols = baby pink
symbols = dark beige
diagram
diagram
Do you have a question? See a list of frequently asked questions (FAQ)

Knitting tension is what determines the final measurements of your work, and is usually measured per 10 x 10 cm. It is provided like so: number of stitches in width x number of rows in height - eg: 19 stitches x 26 rows = 10 x 10 cm.

The knitting tension is very individual; some people knit/crochet loosely while others work tightly. You adjust the knitting tension with the needle size, which is why the suggested needle size only serve as a guide! You need to adjust this (up or down) to ensure that YOUR knitting tension matches the knitting tension provided in the pattern. If you work with a different knitting tension than provided you will have a different yarn consumption, and your work will have different measurements than what the pattern suggests.

The knitting tension also determines which yarns can replace each other. As long as you achieve the same knitting tension you can replace one yarn with another.

See DROPS lesson: How to measure your tension/gauge

See DROPS video: How to make a gauge tension swatch

The required amount of yarn is provided in grams, eg: 450 g. To calculate how many balls you’ll need you first need to know how many grams are in 1 ball (25g, 50g or 100g). This information is available if you click on the individual yarn quality on our pages. Divide the amount required with the amount of each ball. For example, if each ball is 50g (the most common amount), the calculation will be as follows: 450 / 50 = 9 balls.

The important thing when changing from one yarn to another is that the knitting/crochet tension remains the same. This is so that the measurements of the finished piece will be the same as on the sketch provided. It is easier to achieve the same knitting tension using yarns from the same yarn group. It is also possible to work with multiple strands of a thinner yarn to achieve the knitting tension of a thicker one. Please try our yarn converter. We recommend you to always work a test swatch.

Please NOTE: when changing yarn the garment might have a different look and feel to the garment in the photo, due to individual properties and qualities of each yarn.

See DROPS lesson: Can I use a different yarn than the one mentioned in the pattern?

All our yarns are categorised into yarn groups (from A to F) according to thickness and knitting tension – group A contains the thinnest yarns and group F the thickest. This makes it easier for you to find alternative yarns to our patterns, should you wish to switch yarn. All yarns within the same group have a similar knitting tension and can easily replace each other. However, different yarn qualities have different structures and properties which will give the finished work a unique look and feel.

Click here for an overview of the yarns in each yarn group

At the top of all our patterns you’ll find a link to our yarn converter, which is a helpful tool should you wish to use a different yarn than suggested. By filling in the yarn quality you wish to replace, the amount (in your size) and number of strands, the converter will present good alternative yarns with the same knitting tension. Additionally it will tell you how much you’ll require in the new qualities and whether you’ll need to work with multiple strands. Most skeins are 50g (some are 25g or 100g).

If the pattern is worked with multiple colours, every colour will have to be converted separately. Similarly, if the pattern is worked with several strands of different yarns (for example 1 strand Alpaca and 1 strand Kid-Silk) you will have to find alternatives for each, individually.

Click here to see our yarn converter

Since different yarns have different qualities and textures we have chosen to keep the original yarn in our patterns. However, you can easily find options among our available qualities by using our yarn converter, or simply pick a yarn from the same yarn group.

It is possible that some retailers still have discontinued yarns in stock, or that someone has a few skeins at home that they would like to find patterns for.

The yarn converter will provide both alternative yarn as well as required amount in the new quality.

If you think it's hard to decide what size to make, it can be a good idea to measure a garment you own already and like the size of. Then you can pick the size by comparing those measures with the ones available in the pattern's size chart.

You'll find the size chart at the bottom of the pattern.

See DROPS lesson: How to read size chart

The needle size provided in the pattern serves only as a guide, the important thing is to follow the knitting tension. And since knitting tension is very individual, you will have to adjust the needle size to ensure that YOUR tension is the same as in the pattern – maybe you’ll have to adjust 1, or even 2 needle sizes, up or down to achieve the correct tension. For this, we recommend that you work test swatches.

Should you work with a different knitting tension than the one provided, the measurements of the finished garment might deviate from the measurement sketch.

See DROPS lesson: How to measure your tension/gauge

See DROPS video: How to make a gauge tension swatch

Working a garment top-down provides more flexibility and room for personal adjustment. For example it is easier to try the garment on while working, as well as making adjustments to length of yoke and shoulder caps.

The instructions are carefully explaining every step, in the correct order. Diagrams are adjusted to the knitting direction and are worked as usual.

The diagram depicts all rows/rounds, and every stitch seen from the right side. It is read from bottom to top, from right to left. 1 square = 1 stitch.

When working back and forth, every other row is worked from the right side and every other row is worked from the wrong side. When working from the wrong side, the diagram will have to be worked reversed: from left to right, knit stitches are purled, purl stitches are knit etc.

When working in the round every round is worked from the right side and the diagram are worked from right to left on all rounds.

See DROPS lesson: How to read knitting diagrams

The diagram depicts all rows/rounds, and every stitch seen from the right side. It is worked from bottom to top, from right to left.

When working back and forth every other row is worked from the right side: from right to left and every other row is worked from the wrong side: from left to right.

When working in the round, every row in the diagram are worked from the right side, from right to left.

When working a circular diagram you start in the middle and work your way outwards, counter clockwise, row by row.

The rows usually start with a given number of chain stitches (equivalent to the height of the following stitch), this will either be depicted in the diagram or explained in the pattern.

See DROPS lesson: How to read crochet diagrams

Instructions for working several diagrams after each other on the same row/round, will often be written like so: “work A.1, A.2, A.3 a total of 0-0-2-3-4 times". This means you work A.1 once, then A.2 is worked once, and A.3 is repeated (in width) the number of times provided for your size – in this case like so: S = 0 times, M = 0 times, L=2 times, XL= 3 times and XXL = 4 times.

The diagrams are worked as usual: begin with the first row in A.1, then work the first row in A.2 etc.

See DROPS lesson: How to read knitting diagrams

See DROPS lesson: How to read crochet diagrams

The total width of the garment (from wrist-to-wrist) will be larger in the larger sizes, despite the actual sleeves being shorter. The larger sizes have longer sleeve caps and wider shoulders, so there will be a good fit in all sizes.

The measurement sketch/schematic drawing provides information regarding the full length of the garment. If it’s a jumper or a jacket the length is measured from the highest point on the shoulder (usually closest to the neckline), and straight down to the bottom of the garment. It is NOT measured from the tip of shoulder. Similarly, the length of yoke is measured from the highest point on the shoulder and down to where yoke is split into body and sleeves.

See DROPS lesson: How to read a schematic drawing

Diagrams are often repeated on the round or in height. 1 repeat is the diagram the way it appears in the pattern. If it says to work 5 repeats of A.1 in the round, then you work A.1 a total of 5 times after/next to each other in the round. If it says to work 2 repeats of A.1 vertically/in height you work the entire diagram once, then begin again at the start and work the entire diagram one more time.

Chain stitches are slightly narrower than other stitches and to avoid working the cast-on edge too tight, we simply chain more stitches to begin with. The stitch count will be adjusted on the following row to fit the pattern and measurement sketch.

The rib edge is more elastic and will contract slightly compared to, for example, stocking stitch. By increasing before the rib edge, you avoid a visible difference in width between the rib edge and the rest of the body.

It’s very easy to cast off too tightly, and by making yarn overs while casting off (and simultaneously casting these off) you avoid a too tight cast off edge.

See DROPS video: How to bind off with yarn overs (yo)

To achieve an even increase (or decrease) you can increase on, for example: every 3rd and 4th row alternately, like so: work 2 rows and increase on the 3rd row, work 3 rows and increase on the 4th. Repeat this until the increase is complete.

See DROPS lesson: Increase or decrease 1 st on every 3rd and 4th row alternately

Should you prefer to work in the round instead of back and forth, you may of course adjust the pattern. You’ll need to add steeks mid-front (usually 5 stitches), and follow the instructions. When you would normally turn and work from the wrong side, simply work across the steek and continue in the round. At the end you’ll cut the piece open, pick up stitches to work bands, and cover the cut edges.

See DROPS video: How to knit steeks and cut open

Should you prefer to work back and forth instead of in the round, you may of course adjust the pattern so you work the pieces separately and then assemble them at the end. Divide the stitches for the body in 2, add 1 edge stitch in each side (for sewing) and work the front and back pieces separately.

See DROPS lesson: Can I adapt a pattern for circular needles into straight needles?

Pattern repeats can vary slightly in the different sizes, in order to get the correct proportions. If you’re not working the exact same size as the garment in the photo, yours might deviate slightly. This has been carefully developed and adjusted so that the complete impression of the garment is the same in all sizes.

Make sure to follow instructions and diagrams for your size!

If you have found a pattern you like which is available in women’s size it’s not very difficult to convert it to men’s size. The biggest difference will be the length of sleeves and body. Start working on the women size that you think would fit across the chest. The additional length will be worked right before you cast off for the armhole/sleeve cap. If the pattern is worked top-down you can add the length right after the armhole or before the first decrease on sleeve.

Regarding additional yarn amount, this will depend on how much length you add, but it is better with a skein too many than too few.

All yarns will have excess fibres (from production) that might come off as lint or shedding. Brushed yarns (ie hairier yarns) have more of these loose, excess fibres, causing more shedding.

Shedding also depends on what is worn under or over the garment, and whether this pulls at the yarn fibres. It’s therefore not possible to guarantee that there will be no shedding

Below are some tips on how to get the best result when working with hairier yarns:

1. When the garment is finished (before you wash it) shake it vigorously so the looser hairs come off. NOTE: do NOT use a lint roller, brush or any method that pulls at the yarn.

2. Place the garment in a plastic bag and put it in your freezer - the temperature will cause the fibres to become less attached to each other, and excess fibres will come off easier.

3. Leave in the freezer for a few hours before taking it out and shaking it again.

4. Wash the garment according to the instructions on the yarn label.

Pilling is a natural process that happens to even the most exclusive of fibers. It's a natural sign of wear and tear that is hard to avoid, and that is most visible in high friction areas of your garment like a sweater's arms and cuffs.

You can make your garment look as new by removing the pilling, using a fabric comb or a pill/lint remover.

Still can't find the answer you need? Then scroll down and leave your question so one of our experts can try to help you. This will be done normally within 5 to 10 working days.
In the meantime, you can read the questions and answers that others have left to this pattern or join the DROPS Workshop on Facebook to get help from fellow knitters/crocheters!

You might also like...

Post a comment to pattern DROPS Baby 14-25

We would love to hear what you have to say about this pattern!

If you want to leave a question, please make sure you select the correct category in the form below, to speed up the answering process. Required fields are marked *.

Comments / Questions (98)

country flag Dagny Synnøve Dahl wrote:

Hei! Lurer litt på disse armene jeg også. Jeg forstår at jeg klipper tråden og starter med 19 luftmasker med ny tråd og \"fester\" disse med å fortsette med staver som vanlig i bakstykket over til andre siden der det avsluttes med 19 luftmasker... MEN... hvilken farge blir det nå? Dersom luftmaskene og rekken med staver er i én farge vil jo da neste rad få en tynn stripe med fargen fra forrige rad der armene starter.... Beklager dårlig forklaring :-)

07.03.2018 - 22:55

country flag Sue wrote:

I’m having difficulty understanding the yarn quantities required for the jacket. In simple terms, how many grams do I need of each colour please?

27.02.2018 - 23:04

DROPS Design answered:

Dear Sue, the yarn quantities are given for the different sizes, so what you would need depends on which size you want to knit. For example if you want to knit the size for 56/9 months olf babies, that is the second in the list where we state the sizes. So take the second amount given for each color. Also do not forget, you can always ask for help in person in the store you bought (or buying) your DROPS yarn from. Happy Crafting!

27.02.2018 - 23:22

country flag Tana wrote:

Hola! Tengo una duda respecto a este patrón. Cuando acabo la ultima fila de la espalda, es decir, hago el ultimo punto alto y tengo 23 cm, entonces corto el hilo (aquí me surge la primera pregunta, debo rematar este punto?). A continuación, sin dar la vuelta, monto 19 cadenas y entonces, debo empezar a trabajar sobre esas 19 cadenas como si fuera la primera fila de la espalda, o las dejo sueltas y empiezo a trabajar sobre la espalda? Muchas gracias

09.01.2018 - 14:18

DROPS Design answered:

Hola Tana, cuandos cortas el hilo SIEMPRE hay que rematar los puntos. Comenzamos montando 19 puntos de cadeneta. Ahora, continuamos trabajando la cadeneta; el punto 20 es el 1º punto de la espalda. Trabajamos todos los puntos de la espalda y al final montamos 19 puntos de cadeneta para la otra manga. Ahora continuamos trabajando de ida y vuelta sobre los puntos de la espalda y de las dos mangas.

13.01.2018 - 20:44

country flag Jenny Hjelm wrote:

Hej jag skulle vilja göra denna kofta till 12-åring med virknål 4. Hur gör jag om mönstret?

25.05.2017 - 13:37

DROPS Design answered:

Hej, Vi kan tyvärr inte skriva om våra mönster, men du kanske kan välja en dam modell i Small som DROPS 97-1 och virka ärmarna kortare....

29.05.2017 - 14:24

country flag BAKOLY wrote:

Merci pour votre reponse rapide.

01.03.2017 - 17:32

country flag Bakoly RAKOTOMANGA wrote:

Bonjour, pouvez vous me dire ce que veut dire ca 12 til 15 cm sur le schéma ? Merci

01.03.2017 - 16:50

DROPS Design answered:

Bonjour Mme Rakotomanga, cela signifie environ 12 à 15 cm. Bon crochet!

01.03.2017 - 17:21

country flag Tania wrote:

Ik haak met andere wol (phildar partner6) dan het patroon. Ik vind er moeilijk om te werken met het aantal opzet steken omdat ik ander garen gebruik en dunnere haaknaald. Het rugpand is nu 40 cm breed, de lengte 23 cm tot aan de mouw staat wel keurig genoteerd en hou dit ook aan. Maar hoe lang moeten de mouwen worden in cm. Ik heb geen idee, heb zelf geen kinderen. En is 40 cm voor het rugpand niet te breed? Dit zijn 17 gr St en 2 1/2 stokjes. De lengte is 17 toeren.

18.12.2016 - 14:36

DROPS Design answered:

Hoi Tania. Ik kan je helaas niet helpen bij individuele aanpassingen en andere garens. Maar onderaan het patroon vind je de maattekening voor elke maat in cm. Je kan hier vergelijken met je eigen werk en de maat die je gaat maken. Succes.

19.12.2016 - 16:04

country flag Lorraine Wiosna wrote:

How many balls of eskimo would I need to do a plain version of crochet jacket and booties ? thank you

05.08.2016 - 16:44

DROPS Design answered:

Dear Mrs Wiosna, best way would be to add the total amount of yarn in each colour for the desired size for 2 pieces. you may need somewhat less but maybe not that much less. Happy crocheting!

05.08.2016 - 17:13

country flag Diane wrote:

Can this pattern adjusted fo a 6 year old? Thank you!

21.09.2015 - 22:49

DROPS Design answered:

Dear Diane, you can adapt this pattern to any other size with the help of measurement for the desired size. Please contact your DROPS store for any individual and personal assistance if required. Happy crocheting!

22.09.2015 - 10:52

country flag Marijke Van Der Putte wrote:

Mutsje: Ik heb er ook een mutsje bij gemaakt. Deze komt van de site steek-voor-steek.blogspot.nl. patroon voor een babymutsje gehaakt in de vd steek. Ik kan de link alleen niet neerzetten. ... Voor een New bron mutsje heb ik 8 stokjes met losse in de eerste ring gezet ipv 11 stokjes met losse. Verder is het patroon gewoon te volgen.

13.09.2015 - 09:05