
Popular categories
Looking for a yarn?


|
||||||||||||||||||||||||||||
DROPS 85-9 |
||||||||||||||||||||||||||||
|
|
||||||||||||||||||||||||||||
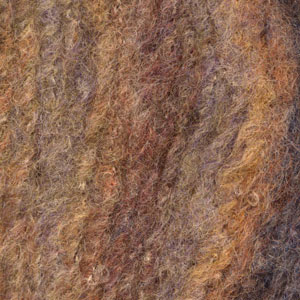
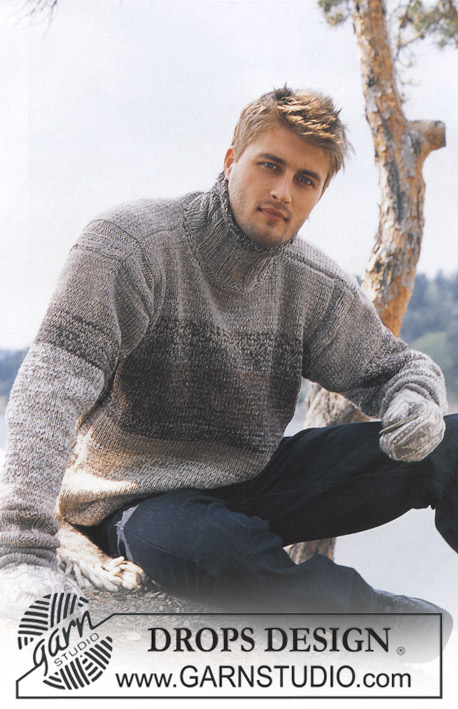
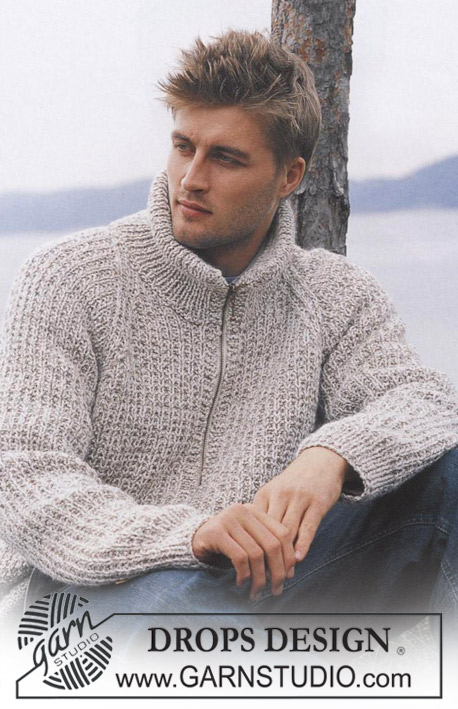
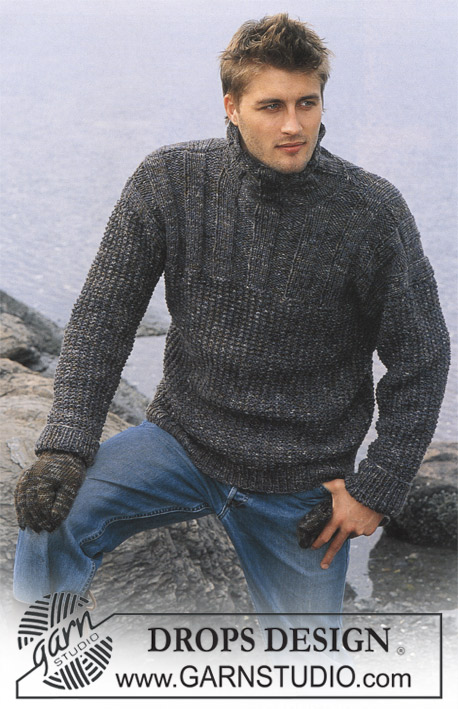
Men's knitted sweater with shawl collar in 2 strands DROPS Highlander
DROPS 85-9 |
||||||||||||||||||||||||||||
|
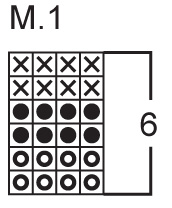
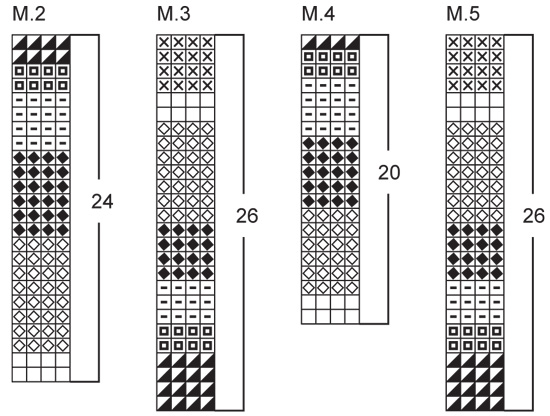
Gauge: 6 sts x 8 rows with 2 strands yarn in stockinette st = 10 x 10 cm. Rib: *K 2, P 2*, repeat from *-* Pattern: The pattern is seen from the right side and is knit entirely in stockinette st. Front: Cast on 28-30-32-34-36 sts with 1 strand olive + 1 strand beige print and knit rib as follows: Sizes S/M + XL: *K 2, P 2*, repeat *-*, finish with K 2. Sizes 12/14 years + L + XXL: *K 2, P 2*, repeat *-*. Read the entire section before knitting: When rib measures 6-7-7-7-7 cm change to stockinette st, adjusting on the 1st row (inc/dec) to 27-29-31-33-35 sts. When the piece measures 7-8-10-11-13 cm knit Pattern 1 (M.1), then continue with 1 strand olive + 1 strand blue until the piece measures 17-20-22-24-26 cm. Then knit Pattern 4 for smallest size, Pattern 2 for all other sizes. After Pattern 4 or 2 is complete, continue with 1 strand orange print + 1 strand beige print until the piece measures 45- 54-56-58-60 cm. Then knit with 1 strand olive + 1 strand beige print to finished measurements. At the same time when the piece measures 15 and 24 cm inc 1 st at each side = 31-33-35-37-39 sts. When the piece measures 35-44-45-47-48 cm bind off for armholes at each side every other row: 2 sts 1 time and 1 st 1-0-0-1-1 time = 25-29-31-31-33 sts. When the piece measures 47-56-58-60-62 cm bind off the center 5-7-7-7-7 sts for the neck. Dec 1 st at each neck edge every other row 2 times = 8-9-10-10-11 sts remain on each shoulder. Bind off when the piece measures 56-66-68-70-72 cm. Back: Cast on as on front and knit rib as follows: Sizes S/M + XL: P 2, *K 2, P 2*, repeat *-*. Sizes 12/14 years + L + XXL: *K 2, P 2*, repeat *-*. Knit Pattern as on front. Bind off for armhole as on front. When the piece measures 54-64-66-68-70 cm bind off the center 7-9-9-9-9 sts for the neck. On the next row dec 1 st at each neck edge = 8-9-10-10-11 sts remain on each shoulder. Bind off, the piece measures approx. 56-66-68-70-72 cm. Sleeve: Loosely cast on 12-12-16-16-16 sts with 1 strand olive + 1 strand beige print and knit rib. When the rib measures 8-9-9-9-9 cm change to stockinette st, adjusting on the 1st row (inc/dec) to 14-14-14-15-15 sts. When the piece measures 9-10-10-10-10 cm knit Pattern 5 for smallest size, Pattern 3 for all other sizes, then continue with 1 strand olive + 1 strand beige print to finished measurements. At the same time when the piece measures 12-14-15-15-16 cm inc 1 st at each side every 8-6.5-6.5-6.5-6.5 cm a total of 5-6-6-6-6 times = 24-26-26-27-27 sts. When the sleeve measures 46-49-50-50-51 cm bind off for sleeve cap at each side every other row: 3 sts 1 time, then 2 sts at each side until the piece measures 52-54-55-57-58 cm, then 3 sts at each side 1 time. Bind off the remaining sts, the piece measures approx. 54-56-57-59-60 cm. Assembly: Sew shoulder seams. Collar: Pick up and knit around the neck with 1 strand olive + 1 strand beige print – start at the left of the 5-7-7-7-7 bound off sts at center front, pick up approx. 24-32 sts (divisible by 4) and finish at the right of the 5-7-7-7-7 sts center front (do not pick up over the bound-off sts). K 2 rows (first row = wrong side). Then knit the next row as follows: K 1 (edge st knit in garter st), *P 2, K 2*, repeat *-*, finish with P 2 and K 1 (edge st knit in garter st). From the right side the rib starts and ends at the center front with 1 st in garter st and K 2. When the collar measures 8-10-10-10-10 cm inc the 4 center back P 2 to P 3 (as seen from the right side) = 28-36 sts. Continue over all sts in rib. When neckband measures 10-12-12-12-12 cm bind off in rib. Fold collar down and lay the folded collar ends right over left. Sew in place as follows: Right side: sew the garter st edge of right collar end to outside of bound-off center front edge. Wrong side: sew the garter st edge of left collar end to inside of bound-off center front edge. Sew in sleeves. Sew sleeve and side seams in one, in outer sts to avoid a thick seam. |
||||||||||||||||||||||||||||
Diagram explanations |
||||||||||||||||||||||||||||
|
||||||||||||||||||||||||||||
|
||||||||||||||||||||||||||||
|
||||||||||||||||||||||||||||

|
||||||||||||||||||||||||||||
|
Have you made this or any other of our designs? Tag your pictures in social media with #dropsdesign so we can see them! Do you need help with this pattern?You'll find tutorial videos, a Comments/Questions area and more by visiting the pattern on garnstudio.com. © 1982-2024 DROPS Design A/S. We reserve all rights. This document, including all its sub-sections, has copyrights. Read more about what you can do with our patterns at the bottom of each pattern on our site. |
||||||||||||||||||||||||||||


With over 40 years in knitting and crochet design, DROPS Design offers one of the most extensive collections of free patterns on the internet - translated to 17 languages. As of today we count 304 catalogs and 11422 patterns - 11417 of which are translated into English (US/in).
We work hard to bring you the best knitting and crochet have to offer, inspiration and advice as well as great quality yarns at incredible prices! Would you like to use our patterns for other than personal use? You can read what you are allowed to do in the Copyright text at the bottom of all our patterns. Happy crafting!
Comments / Questions (11)
Deze trui , “DROPS 85-9 Gebreide trui voor heren met sjaalkraag in 2 draden DROPS Highlander.” wil ik graag maken. Helaas is de wol niet leverbaar meer. Ik wil graag wol die eenzelfde uitstraling geeft. Welke raadt u aan?
28.12.2021 - 13:46DROPS Design answered:
Dag Ellen,
Highlander kun je vervangen door DROPS Andes, DROPS Snow of DROPS Wish. Waarschijnlijk komt DROPS Snow het meest in de buurt om dezelfde uitstraling te krijgen.
13.02.2022 - 09:24For 85-9, there are patterns colors shown M1 through M5. M1 is specified @ 10cms, but the instructions also mention Patterns 4 & 2 (depending on size) @22cms yet there is no definition of which M patterns are included in either. If pattern 4 & 2 are also M4 & M2, why are M3 & M5 even listed since they aren't used? If Patterns 2 & 4 are combinations of the M colors, what are they? I'm confused.
24.05.2020 - 07:41DROPS Design answered:
Dear Mrs Flores, when work measures 10 cm (3rd size), you work diagram M.1 then work M.2. After M.2 has been worked, continue with the 2 colours explained until piee measures 56 cm then change colours again to finish piece. read more about diagrams here. Happy knitting!
25.05.2020 - 09:38Hei Jeg skal strikke 85-9 i de som fargene som er avbildet. Ettersom garnet ikke lenger selges, kan dere vennligst foreslå alternativt garn inkl. forslag til farger? Takk.
02.04.2020 - 19:17DROPS Design answered:
Hej Farrah, Da kvalitet og farver ikke findes mere, så vil vi anbefale at trøjen strikkes i 4 tråde DROPS Air (for at få samme tykkelse). Vælg de farver som passer dig bedst og brug vores garnomregner for hvor meget du skal bruge i hver farve. God fornøjelse! Rigtig god fornøjelse!
03.04.2020 - 15:42Good Day : I am wanting to knit the pattern drops 85-9 and it is saying the highlander wool in discontinued .. What wool can I substitute .I want to knit a men ex-lg . Thank-you
08.01.2019 - 20:14DROPS Design answered:
Dear Mrs Whittle, that's correct DROPS Higlander is discontinued, you will find all informations to find an alternative here and more informations about the yarn and some suggestions there. Happy knitting!
09.01.2019 - 08:41Jeg får ikke oppskriften til å stemme. Forstykket er dårlig forklart, eller det virker som om noen av setningene kan ha stokket seg?? Kan dere se på dette. Når skal jeg begynne å øke egentlig? Hvor mange masker skal str L ha på forstykket før jeg begynner å felle for armene? Vennlig hilsen ELin
04.01.2018 - 19:29I am thinking of knitting this jumper in Drops Polaris, in one color (and one thread). Is this wool suitable? Also, my calculations for an XL jumper in Polaris is only 10 balls of yarn, would this be correct? Thanks!
30.06.2016 - 22:39DROPS Design answered:
Dear Mrs Larkin, 2 strands yarn group E (= Highlander) = 1 strand yarn group F (= Polaris), so that you can use Polaris here, jumper is worked with 2 strands of yarn - read more here how to calculate new amount of yarn. Happy knitting!
01.07.2016 - 17:46Is er nog enige kans dat deze wol (highlander) weer terug komt? Ik vind dit namelijk een super mooie wol en heb nog niets kunnen vinden dat qua kleur en uiterlijk gelijk is. En ik vind dat juist het mooiste aan deze trui..
03.10.2015 - 02:52DROPS Design answered:
Hoi Wietske. Nee, dat zit niet in de planning. De DROPS Cloud is bijvoorbeeld een mooie vervanger voor de Highlander.
05.10.2015 - 13:46Hi, I am looking at several patterns but can't find how many balls of wool are required for any of them. Thanks
13.03.2015 - 12:12DROPS Design answered:
Dear Mrs Evans, you will find total weight of required yarn for each size at the right side of the picture under tab "Materials" - divide by 50 g (1 ball Highlander = 50 g/80 m) to get number of balls in each size. To find an alternative to this discontinued yarn, look at group E and calculate here new quantity of yarn. Happy knitting!
13.03.2015 - 14:09Beste Een zeer mooi trui. Zou deze graag breien, maar highlander wol kan ik precies niet meer verkrijgen? Wat neem ik best in de plaats? MVG
14.10.2013 - 21:01DROPS Design answered:
Hoi Anouchka. Kijk onder Garenalternatieven op het patroon. Je kan Eskimo of Andes goed gebruiken. Veel breiplezier.
15.10.2013 - 13:26Hi, I would love to make this awesome sweater for my husband, however, the highlander yarn is discontinued? Eskimo is the sub but what colors would I buy to have the finished sweater look as the picture? Please help. Thank you so much. Sincerely, Amy Sunder, PA
17.04.2013 - 14:11DROPS Design answered:
Dear Mrs Sunder, please do not hesitate to contact your Drops store to request all advices with colours. They will answer you also per mail. Happy Knitting !
17.04.2013 - 14:21