
Popular categories
Looking for a yarn?


|
||||||||||
Winter Snuggles |
||||||||||
 |
 |
|||||||||
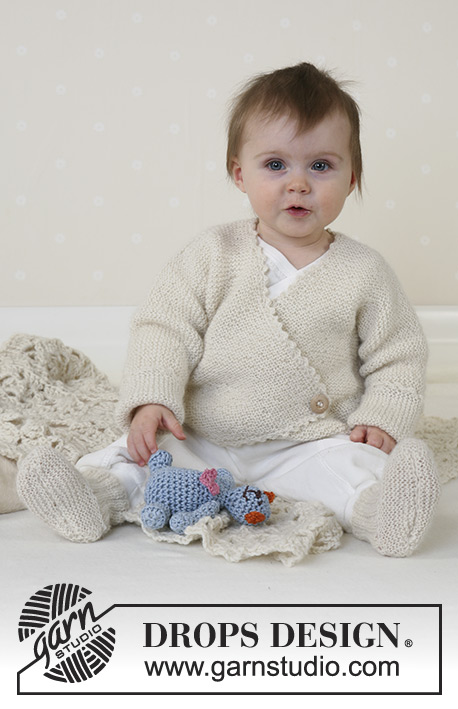
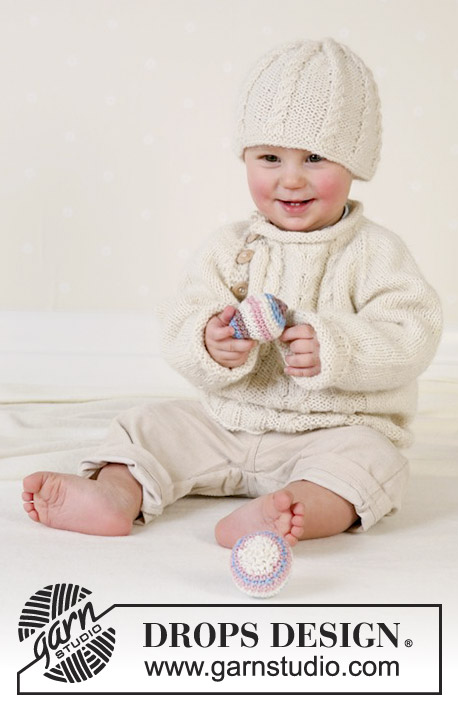
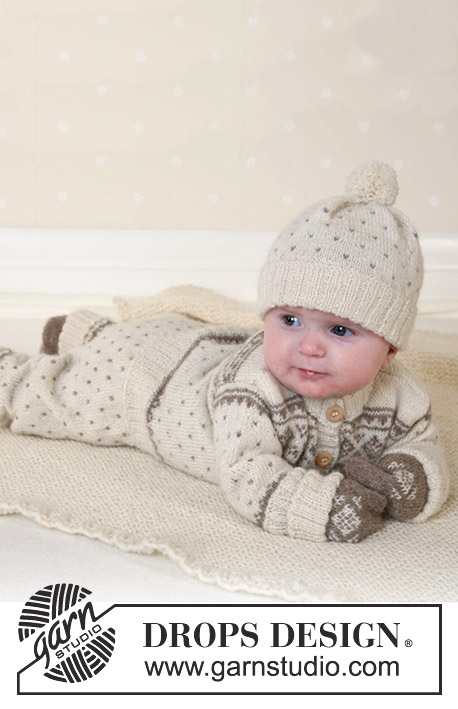
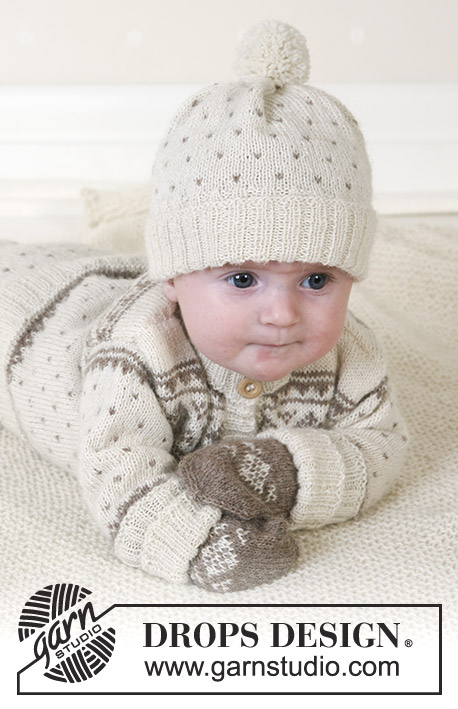
Jacket, trousers, hat, mittens, socks and blanket in Alpaca
DROPS Baby 13-5 |
||||||||||
|
Knitting tension, all garments: 24 sts x 32 rows on needles size3mm in stocking sts = 10 x 10 cm. JACKET: Rib: *K2, P2*, repeat from *-*. Garter sts (back and forth on needle): Knit all rows Pattern: See diagrams M.1 to M.4. The diagrams show the pattern from the right side. Front and back piece: Knit the jacket back and forth on circular needle from mid front. Cast on 144-160-172 (200-212) sts (incl 1 edge st towards mid front each side, knitted in garter sts throughout) with Alpaca on circular needle size 2.5mm. Knit 1 row from the wrong side and continue in Rib with 1 edge st and 2 further sts in garter sts towards mid front (seen from the right side). When Rib measures 3-4-4 (5-5) cm, change to circular needle size 3mm. Knit 1 row from the right side, at the same time adjusting number of sts evenly to 123-135-147 (171-183). Now purl 1 row from wrong side and knit 1 row from right side. Insert a marking thread 31-34-37 (43-46) sts in from each side = 61-67-73 (85-91) sts between marking threads on back piece – let the marking threads follow the piece as you progress. Knit M.1 with 1 edge st each side and knit next row as follows: 1 edge st, M.2A over the next 108-120-132 (156-168) sts, M.2B (= 13 sts), 1 edge st. Continue like this. Read all of the following section before knitting it! When piece measures approx 15-17-21 (25-28) cm – adjust after 2 rows with off-white after 1 row with pattern - continue in M.3 in the same way, i.e. 1 edge st, M.3A over the next 108-120-132 (156-168) sts, M.3B (= 13 sts) and 1 edge st. At the same time, when piece measures 17-18-21 (24-26) cm split the piece for armholes by both marking threads and finish back and front pieces separately. Back piece: = 61-67-73 (85-91) sts. Cast on 1 new st each side (= edge st for seam) = 63-69-75 (87-93) sts. Continue in M.3 with 1 edge st each side. When piece measures 27-29-33 (37-40) cm cast off the middle 21-23-25 (25-27) sts for neck. Dec 2 sts on neckline on next row = 19-21-23 (29-31) sts left on shoulder. Cast off remaining sts after M.3, piece measures approx 28-30-34 (38-41) cm. NB! If piece is shorter continue in off-white until finished measurements. Left front piece: = 31-34-37 (43-46) sts. Cast on 1 new st towards armhole (= edge st for seam) = 32-35-38 (44-47) sts. Continue in M.3 with 1 edge st each side. At the same time, when piece measures 24-26-29 (33-35) cm put the 7-8-9 (9-9) sts towards mid front on thread for neck. Now dec to shape the neckline on every other row: 2 sts 2 times and 1 st 2-2-2 (2-3) times = 19-21-23 (29-31) sts left on shoulder. Cast off when piece measures the same as back piece. Right front piece: Knit as left front, but mirrored. Sleeve : Read all of this section before knitting it! Cast on 48-53-56 (60-64) sts with off-white Alpaca on double pointed needles size 2.5mm and knit 1 round. Continue in Rib. When piece measures 5 cm, insert a marking thread – measure piece from here, continue in Rib for 5 more cm (= rib measures 10 cm from cast on edge)- and change to needle size 3mm. Knit 1 round whilst adjusting number of sts to 40-42-44(46-48). Purl 1 round, knit 1 round and continue in M.1 – adjust the middle, see arrow in diagram. After M.1 continue in M.2 (adjust middle after arrow) until piece measures 16-17-19 (23-27) cm. Now knit M.4. At the same time when piece measures 7 cm inc 2 sts mid under arm a total of 7-8-9 (11-12) times: Size 1/3 + 6/9 + 12/18 months + 2 years: on every 5th round Size 3/4 years: on every 6th round = 54-58-62 (58-72) sts – incorporate new sts in pattern as you go along. After M.4 cast off loosely, piece measures approx 19-20-22 (26-30) cm from marking thread. NB! If piece is shorter continue in off-white until finished measurements. Assembly: Sew shoulder seams. Front edge: Pick up 74-78-86 (94-102) sts along left front piece with off-white and needle size 2.5mm. Knit 1 row from wrong side and 1 row from right side. Continue in Rib with 2 sts in garter sts and 2 knitted sts each side (seen from the right side). When Rib measures 2.5 cm cast off in rib. Repeat along right front piece but when Rib measures approx 1 cm, make 5-5-5 (6-6) buttonholes evenly distributed – the lower one approx 1 cm from lower edge and the top one approx 4-6 cm from neckline (the last buttonhole will be on the neckline). 1 buttonhole: cast off 2 purled sts from the right side and cast on 2 new sts on next row. Neckline: Pick up approx 86 to 110 sts, incl sts on threads on front pieces (number of sts should be dividable by 4 + 2) round neck and front edges with off-white Alpaca and needle size 2.5mm. Knit 1 row from wrong side and 1 row from right side and continue in Rib with 2 sts in garter sts and 2 knitted sts each side (seen from the right side). When rib measures 1 cm make a buttonhole over the others on right front edge (knit tog 3rd and 4th st from edge and make a yo). When rib measures 3-4-4 (5-5) cm make another buttonhole and when neckline measures 4-5-5 (6-6) cm cast off in rib. Fold neckline double towards the wrong side and attach with neat sts on wrong side. Sew in sleeves and sew on buttons. Fold the rib on sleeves towards the right side. _________________________________________ TROUSERS: Rib: *K2, P2*, repeat from *-*. Pattern: see diagrams M.1 and M.2. The whole pattern is knitted in stocking sts. Buttonhole: Make 2 buttonholes at front with approx 8-9-10 (11-12) cm between each. 1 buttonhole: cast off 2 purled sts from right and cast on 2 new sts on next row. Decreasing tips (applies to inner side of leg): Dec as follows 1 st before the marking thread: K2 tog Decrease as follows 1 st after the marking thread: slip 1 st as if to knit, K1, psso. Start at the top and knit downwards. Cast on 160-168-176 (184-192) sts with off-white and circular needle size 2.5mm. Purl 1 round (round starts and finishes mid back). Continue in Rib. When Rib measures 2 cm, make 2 buttonholes at front – see above. When piece measures 4 cm insert a marking thread mid front (= folding edge) and measure piece from here from now on. When piece measures 2 cm, make 2 buttonholes as before (they have to fit over the first 2 when folding the edge double). When Rib measures 4 cm change to needle size 3mm. Knit 1 round, at the same time dec evenly to 114-120-126 (132-138) sts. Purl 1 round and knit 1 round. Elevation at the back: Knit M.2A, at the same time knitting elevation at the back as follows: knit 9-10-10 (11-11) sts from beginning of round, turn the piece (to avoid a hole slip the first st as if to knit and tighten thread when knitting back), knit 18-20-20 (22-22) sts, turn the piece. Continue like this by knitting 9-10-10 (11-11) sts more before each turn another 10 times (= 12 rows). Now knit M.2A round over all sts. Increases: When piece measures 13-16-17 (18-19) cm (measured from marking thread mid front) insert a new marking thread at beginning of round and after 57-60-63 (66-69) sts. Inc 1 st on each side of these marking threads (= 4 inc per round) on every 3rd round a total of 6 times = 138-144-150 (156-162) sts. After the last inc the piece measures approx 18-21-22 (23-24) cm mid front. Legs: Knit 69-72-75 (78-81) sts from mid back (= leg) and put remaining sts on a thread. Knit round and continue M.2A as before. Insert a new marking thread at beginning of round (= inner side of leg). Dec 1 st on each side of marking thread - see decreasing tips – a total of 13-12-11 (11-11) times: Size 1/3 months: on every 3rd round Size 6/9 months: on every 4th round Size 12/18 months: on every 5th round: Size 2 years: on every 7th round Size 3/4 years: on every 8th and 9th alternately = 43-48-53 (56-59) sts. When piece measures approx 30-36-40 (46-52) cm – adjust after 2 rounds of off-white after a round of pattern – knit M/1 - start at the top of diagram and see arrow which marks the middle of round (= outer side of leg). After M.1 change to off-white and needle size 2.5mm. Knit 1 round, at the same time adjusting number of sts to 68-72-76 (80-84). Knit 10 cm Rib and cast off loosely. Knit the other leg in the same way. Assembly: Fold rib at the top of the trousers down on the inside of the garment. Make sure the buttonholes fit over each other. Fasten rib on the inside of the garment. To avoid the rib being too tight it is important to make the seam elastic. Braces: Cast on 12 sts on needle size 2.5mm with off-white and knit Rib with 1 edge st and a further 2 sts each side in garter sts (seen from the right side). Cast off when piece measures approx 34-40-48 (58-64) cm. Make two and sew to back of trousers (on the inside of rib) with approx 8-9-10 (11-12) cm in between. Sew on buttons to front end of braces and cross braces at back when worn. _________________________________________ HAT: Size: 1/3 – 6/9 – 12/18 months (2 - 3/4 years) To fit head circumference: 40/42 – 42/44 – 44/46 (46/48 - 48/50) cm Pattern: See diagram M.2. The whole pattern is knitted in stocking sts. The hat is knitted round. Loosely cast on 112-116-120 (124-132) sts with off-white Alpaca on needles size 2.5 mm and purl 1 round. Now knit 10 cm Rib, K2/P2, and change to needle size 3mm and stocking sts and M.2A, at the same time adjusting number of sts to 90-96-102 (108-114). When piece measures 17-17-18 (19-20) cm insert 6 marking threads in piece with 15-16-17 (18-19) sts between each. Continue in M.2A, at the same time dec 1 st on each side of all marking threads (see Decreasing tips under trousers): on every other row 6-7-7 (6-6) times and then on every row 0-0-0 (2-2) times = 18-12-18 (12-18) sts left – knit sts not fitting into pattern when decreasing in off-white. Pull a double strand of Alpaca through the remaining sts, pull tight and attach. Fold the lower 5 cm Rib towards the right side, the hat measures approx 15-16-17 (18-19) cm. Pompon: Make a pompon with a diameter of approx 4-5 cm and attach to top of hat. _________________________________________ MITTENS: Size: 1/3 – 6/9 – 12/18 months (2 -3/4 years) The 3 bigger sizes with thumbs, the 2 smaller sizes without.. The mitten is knitted round on double pointed needles. Loosely cast on 36-40-44 (48-52) sts with beige-mix Alpaca on needles size 2.5mm and purl 1 round. Continue in Rib with K2/P2 until piece measures 8-8-10 (10-12) cm. Now continue in stocking sts, at the same time adjusting number of sts to 38-42-46 (50-54). The 3 bigger sizes: After 1 (2-3) cm in stocking sts, put the last 5 (6-6) sts on round on a thread for thumb. Cast on 5 (6-6) new sts over the thread on next row. All sizes: When piece measures 10-11-12 (13-14) cm knit M.5 over the middle 13 sts on top of hand, knit remaining sts in beige-mix (knit the threads from colour changes into the piece as you go along so that the fingers don’t get caught when wearing the mitten – don’t let the threads follow the piece all the way round, only the pattern sts) After M.5 continue with beige-mix over all sts and insert a marking thread each side when piece measures 15-16-18 (19-21) cm. Now dec 1 st on each side of both marking threads on every row until there are 10 sts left – see Decreasing tips under trousers. Pull a double strand of Alpaca through remaining sts, pull tight and sew. Fold the outer 4-4-5 (5-6) cm of Rib, mitten measures approx 13-14-16 (17-18) cm. Thumb: Put the 5 (6-6) sts from thread back on double pointed needles size 2.5 mm and pick up 7 (8-8) sts behind these = 12 (14-14) sts. Purl until thumb measures 3 (4-5) cm. Now knit all sts tog 2 and 2. Pull thread through remaining sts and attach. Knit another mitten, but knit the thumb the other side (applies to the 3 bigger sizes). _________________________________________ SOCKS: Size: 1/3 – 6/9 – 12/18 months (2 -3/4 years) To fit foot length: 10-11-12 (14-15) cm The sock is knitted round. Cast on 44-48-48 (52-56) sts using beige-mix Alpaca on needles size 2.5 mm. Knit 1 round and continue in Rib with K2/P2 until piece measures 4-5-5 (6-7) cm. Knit 1 round, at the same time dec 4-8-4 (8-8) sts evenly = 40-40-44 (44-48) sts. Knit heel as follows: Knit 3-3.5–3.5 (4-4.5) cm stocking stitch back and forth over 16-16-16 (18-18) sts mid back. Heel decreases: (1st row = right side): K 9-9-9- (10-10), K2 tog into back of st, K1, turn the piece, 2nd row: slip 1 st as if to knit, P 3-3-3 (4-4), P2 tog, P1, turn the piece, 3rd row: slip 1 st as if to knit, K 4-4-4 (5-5), K2 tog into back of st, K1, turn the piece, 4th row: slip 1 st as if to knit, P 5-5-5 (6-6), P2 tog, P1, turn the piece, 5th row: slip 1 st as if to knit, K 6-6-6 (7-7), K2 tog into back of st, K1, turn the piece, 6th row: slip 1 st as if to knit, P 7-7-7 (8-8), P2 tog, P1, turn the piece, 7th row: K2 tog, K 6-6-6 (8-8), K2 tog into back of st = 8-8-8 (10-10) sts on row( = total 32-32-36 (40-40) sts. Pick up 7-8-8- (9-11) sts on each side of heel and put all sts on same needle = 46-48-52 (54-62) sts. Continue in stocking st over all sts. At the same time, dec on each side of the upper 18-20-22 (24-26) sts: 1 st on every other row a total of 7 times = 32-34-38 (40-48) sts. When foot measures 8-9-9 (12-12) cm from the beginning of the dec for heel, insert a marking thread each side. Now dec on both sides of each marking thread (= 4 dec per round) a total of 7-7-8 (8-10) times. Pull thread though remaining sts and sew. BLANKET: see pattern 13-10 |
||||||||||
Diagram explanations |
||||||||||
|
||||||||||

|
||||||||||

|
||||||||||
|
Have you made this or any other of our designs? Tag your pictures in social media with #dropsdesign so we can see them! Do you need help with this pattern?You'll find tutorial videos, a Comments/Questions area and more by visiting the pattern on garnstudio.com. © 1982-2024 DROPS Design A/S. We reserve all rights. This document, including all its sub-sections, has copyrights. Read more about what you can do with our patterns at the bottom of each pattern on our site. |
||||||||||


With over 40 years in knitting and crochet design, DROPS Design offers one of the most extensive collections of free patterns on the internet - translated to 17 languages. As of today we count 304 catalogues and 11422 patterns - 11422 of which are translated into English (UK/cm).
We work hard to bring you the best knitting and crochet have to offer, inspiration and advice as well as great quality yarns at incredible prices! Would you like to use our patterns for other than personal use? You can read what you are allowed to do in the Copyright text at the bottom of all our patterns. Happy crafting!
Comments / Questions (116)
Bonjour, je fais un echantillon comme suit: 4 rang point mousse puis 32 rang comme suit: 4 maille point mousse, puis 24 en jersey et finir 4 mailles point mousse puis fini 4 ranfgs point mousse.. je tricote le meme fil preconise Drops Alapca aux aiguille numero 3 et j'obtiens 7.5 cm x 735 cm...je sais que je tricote serre mais la je suis loin du compte.. j'ai essaye aux aiguilles 4 je suis pres des 10*10 mais le point semble lache.. que me conseillez vous ? merci
08.05.2020 - 18:49DROPS Design answered:
Bonjour Fabrice, la réussite de votre échantillon est indispensable à l'obtention des bonnes mesures, essayez de laver/faire sécher votre échantillon en suivant bien les indications de l'étiquette (et plus d'infos ici) - vérifiez à nouveau les mesures une fois que votre échantillon sera sec et recommencez avec des aiguilles différentes si besoin. Votre magasin aura peut être quelques astuces pour vous, n'hésitez pas à le contacter, même par mail ou téléphone. Bon tricot!
11.05.2020 - 08:21Hej! I beskrivningen för koftan (storlek 1/3 mån) så står det "Sticka M.1 med 1 kantm i varje sida." Jag får det dock inte att gå jämt ut. 123-2 kantmaskor =121 och M1 är 16 maskor. 121/16 = 7,56. Sedan undrar jag över mitten på M.2A och M2B. Båda är totalt 25 maskor men mitten är ju markerad med förskjutning mot M.2A. Tacksam för hjälp!
16.04.2020 - 21:26DROPS Design answered:
Hej Ylva, mönstret upprepas efter 4 maskor, efter de 4 maskor avslutar du med 1:a maskan i mönstret igen, så det blir likt mot mitt fram. Ja i M.2 stickar du beige för var 6:e maska, men var annan gång du gör det, förskjuter maskan i beige, så den kommer mellan de beiga maskorna från första varvet. Lycka till :)
28.04.2020 - 10:50Do you have a pattern for the hat for an adult woman? I made this for my grandson and it came out beautifully. I would love to make this for my daughter as well. The baby alpaca yarn is so soft. I would use the same size needles just don't know how many to cast on for ribbing and how long to in length and how many to decrease for crown. Thank you if you can help!
22.01.2020 - 19:26DROPS Design answered:
Hi Julie, If you search for 'hats in Alpaca' this will give you a number of different options, which you could use with the same pattern-design and ribbing if you wish. Happy knitting!
23.01.2020 - 07:18Hei Anteeksi olin itse tehnyt virheen alussa,eli kyllä täsmäävät :)
14.01.2020 - 12:04Sukan kantapääkavennuksen 2. Ja 3. kierros ei täsmää.3.ssa kierroksessa silmukat eivät enään riitä?
14.01.2020 - 11:44DROPS Design answered:
Hei, ohje on oikein, koska kantapääkavennukset tehdään lyhennetyin kerroksin.
20.01.2020 - 17:48Hi.. I finished working on my hat. I was happy with the work done. Unfortunately, however, using delicate hand wash, the work has expanded. Are there any remedies? I used Drops Baby Merino wool .. Help me 😟
12.01.2020 - 08:21DROPS Design answered:
Dear Lana, Baby Merino is superwash and can be wasked in the washmachine - see shadecard/label and find more informations here. Your DROPS store might have even more tipps for you - even by mail or telephone. Happy knitting!
13.01.2020 - 09:39Hi, i don't understand this for Hat 1-3 months: ".. stockinette sts and M.2A, at the same time adjusting number of sts to 90". How do i perform these decreases?
01.01.2020 - 14:26DROPS Design answered:
Dear Lana, you count the stitches on your needles, and calculate ho many stitches more (or less) you have. You calculate the difference, The result is the number of stitches you have to increase, or decrease (depending if you have more or less stitches),and then you divide the number of stitches you already have on the needles by this number. This numbertells you, how ften you should increase, or decrease the stitches. Happy Crafting!
01.01.2020 - 21:58What length circular needle do I use 9”?
30.12.2019 - 22:37DROPS Design answered:
Dear Julie, you can use the regular length (80 cm) circulars and when the number of sttches are not enough, change to DPN's. Happy Knitting!
31.12.2019 - 15:33Scusate, ma non ho capito per il cappello 1-3 mesi come fare a "lavorare seguendo il diagramma M.2A; ALLO STESSO TEMPO, portare il numero delle m a 90".. come eseguo queste diminuzioni?
20.12.2019 - 21:54Modèle 6.9 mois. Devant gauche. A 26 cm de hauteur totale, mettre en attente pour l’encolut les 8 mailles du milieu devant !!!!! Je ne comprends pas à quoi elles vont servir ces mailles en attente ????
13.12.2019 - 19:29DROPS Design answered:
Bonjour Mme Bernaud, ces mailles seront reprises ensuite pour le col - cf "Bordure d'encolure" à la fin des explications du gilet: on relève les mailles le long de la bordure devant droit, on reprend les mailles en attente, on relève les mailles le long de l'encolure (devant droit + dos + devant gauche) et on reprend les mailles en attente du devant gauche et on relève les mailles le long de la bordure du devant gauche. Bon tricot!
16.12.2019 - 07:44