Loch Tay

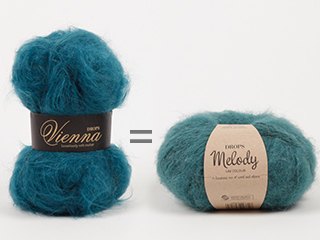
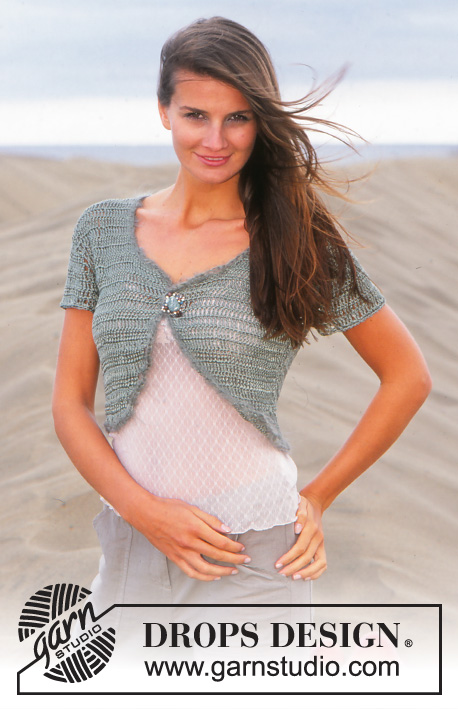
DROPS Crochet Bolero in Cotton Viscose or Safran and DROPS Melody. Size XS/S - XXL.

DROPS 95-36
Size: XS/S – S - M – L - XL - XXL
Finished measurements:
Bust: 80-88-96-106-116-128 cm / 31½"-34⅝"-37¾"-41¾"-45¾"-50⅜"
Full length: 37-39-41-43-45-47 cm / 14½"-15¼"-16⅛"-17"-17¾"-18½"

Materials: DROPS Cotton Viscose from Garnstudio
200-200-250-250-300-300 g color no. 11, khaki green
or use
DROPS Safran from Garnstudio
150-150-200-200-250-250 g color no. 50, mint

and use: DROPS Vienna from Garnstudio
50-50-50-50-50 g color no. 16, moss green
or use: DROPS Melody from Garnstudio
50 g color no 19 light sea green

DROPS Crochet Hook size 4 mm/ US 6
DROPS Crochet Hook size 6 mm/ US J/10 (for borders)

-------------------------------------------------------

Alternative Yarn – See how to change yarns here
Yarn Groups A to F – Use the same pattern and change the yarn here
Yarn usage using an alternative yarn – Use our yarn converter here

-------------------------------------------------------

Pattern instructions

NOTE: This pattern is written in American English. All measurements in charts are in cm. For conversion from inches to cm - click here. There are different terms for crocheting in American and British English. If this pattern includes crochet, click for "crochet terms" here. For this pattern in British English, please click here.
Crochet gauge: 17 tr x 6 rows = 10 x 10 cm / 4" x 4"

Crochet info: At the beginning of each row replace 1 tr with ch 4, and finish each row with 1 tr in 4th ch from beginning of previous row. Crochet in each st and not in between.

Decreasing tips (applies to armhole and neck):
Dec as follows at beginning of row: replace 1 tr with a sl st.
Dec as follows at end of row: Turn the piece when number of tr to be dec are left on row and crochet next row.

Increasing tips (applies to slope at front):
Increase new sts towards mid front by crocheting ch's in last st from previous row. Crochet the same number of ch's as the number of tr's to be increased, but as the first tr on next row is to be replaced by ch 4, replace the last ch with ch 4, i.e. if you are to increase 5 tr crochet 8 ch, turn the piece, crochet 1 tr in 5th ch from the hook and then 1 tr in each of the remaining ch's, continue on row with 1 tr in each tr from previous row.

Back piece:
Loosely ch 80-88-99-112-123-136 using hook size 4 mm/US 6 and Cotton Viscose or Safran.
Crochet the 1st row as follows: 1 tr in the 5th ch from the hook, *skip ch 1, 1 tr in each of the next 3 ch* repeat from *-* but for size XS + S + L + XXL finish with 1 tr in the last 2 ch’s (instead of the last 3 ch) and for size M + XL finish with 1 tr in the last ch (instead of the last 3 ch’s) = 58-64-72-82-90-100 tr.
Now crochet 1 tr in each tr from previous row – see Crochet info.
At the same time after 2-2-3-3-3-3 rows inc 1 tr each side by crocheting 1 extra tr in the next-to-last tr each side as follows:
Size XS + S + M: on every other row
Size L + XL + XXL: on every 3rd row
- a total of 5-5-5-4-4-4 times = 68-74-82-90-98-108 tr.
When piece measures approx 20-21-22-23-24-25 cm / 8"-8¼"-8¾"-9"-9½"-9¾" dec for armholes each side on every row – see Decreasing tips: 3-3-4-6-7-9 tr’s 1 time, 2 tr’s 0-0-1-1-2-3 times and 1 tr 1-2-3-4-4-4 times = 60-64-64-66-68-70 tr.
When piece measures approx 35-37-39-41-43-45 cm / 13¾"-14½"-15¼"-16⅛"-17"-17¾" (only 1 row left until finished measurements) crochet 1 row over only the outermost 20-21-21-21-21-22 tr’s each side (i.e. do not crochet over the middle 20-22-22-24-26-26 tr’s = neck).
Cut the yarn, piece measures approx 37-39-41-43-45-47 cm / 14½"-15¼"-16⅛"-17"-17¾"-18½".

Left front piece:
Loosely ch 28-29-32-35-37-40 using crochet hook size 4 mm/US 6 and Cotton Viscose or Safran.
Crochet the 1st row as follows: 1 tr in the 5th ch from the hook, *skip ch 1, 1 tr in each of the next 3 ch* repeat from *-* but for size XS + M + XXL finish with 1 tr in the last 2 ch’s (instead of the last 3 ch ) and for size L finish with 1 tr in the last ch (instead of the last 3 ch’s) = 19-20-22-24-26-28 tr.
Now crochet 1 tr in each tr from previous row as for back piece, at the same time inc towards mid front on every other row (i.e. on every row towards mid front) – see Increasing tips: 5 tr’s 1-1-2-2-2-2 times, 4 tr’s 1-1-0-0-0-0 times, 3 tr’s 0-0-0-1-1-2 times, 2 tr’s 1-2-2-2-3-3 times and 1 tr 1-1-2-2-2-2 times.
At the same time inc at side as for back piece.
At the same time when piece measures 20-21-22-23-24-25 cm / 8"-8¼"-8¾"-9"-9½"-9¾" – compare to back piece – dec for armhole as described for back piece.
At the same time when piece measures 26-26-26-28-28-30 cm / 10¼"-10¼"-10¼"-11"-11"-11¾" dec for neckline towards mid front on every row – see Decreasing tips: 7-8-8-9-10-10 tr’s 1 time, 2 tr’s 1 time and 1 tr 3 times = 20-21-21-21-21-22 tr left on shoulder.
When piece measures approx 37-39-41-43-45-47 cm/ 14½"-15¼"-16⅛"-17"-17¾"-18½" – compare to back piece – cut the yarn.

Right front piece:
As left front piece but mirrored.

Sleeve:
Loosely ch 66-70-74-78-82-86 using crochet hook size 4 mm/US 6 and Cotton Viscose or Safran.
Crochet the 1st row as follows: 1 tr in the 5th ch from the hook, 1 tr in next ch, *skip ch 1, 1 tr in each of the next 3 ch* repeat from *-* = 48-51-54-57-60-63 tr.
Crochet 1-1-2-3-3-4 rows of tr as before, at the same time inc 1 tr each side on every row by crocheting 1 extra tr in the second but last tr each side = 50-53-58-63-66-71 tr.
On next row dec for sleeve cap each side on every row – see Decreasing tips: 4 tr’s 1 time, 3 tr’s 1 time, and then 2 tr’s each side until piece measures approx 10-11-13-17-19-21 cm / 4"-4½"-5"-6¾"-7½"-8¼". Fasten off.

Assembly:
Sew shoulder seams. Crochet sleeves to body using crochet hook size 4 mm/US 6 and Cotton Viscose or Safran as follows: 1 sc in first st on sleeve, ch 2, 1 sc in first st on back/front piece, ch 2, 1 sc in tr on sleeve, ch 2, 1 sc in tr on back/front piece etc.
Crochet sleeve and side seams together in the same way.

Crochet border: Crochet a border round the opening of the bolero (i.e. up along both front pieces, round neck and along lower edge) using crochet hook size 6 mm/US J and Vienna or Melody as follows: 1 sc in first st, *3 ch, skip approx 2.5 cm / 1", 1 sc in next st*, repeat from *-* and finish with 3 ch and 1 sl st in first sc from beginning of round. Note! The border should be nice and even and not wavy.

Close the jacket with a brooch or button.

This pattern has been corrected.

Updated online: 13.12.2023
The pattern is updated. Decreasing for armhole on back piece + increasing on sleeve all sizes.

Diagram

All measurements in charts are in cm.

diagram measurements
Do you have a question? See a list of frequently asked questions (FAQ)

Knitting tension is what determines the final measurements of your work, and is usually measured per 10 x 10 cm. It is provided like so: number of stitches in width x number of rows in height - eg: 19 stitches x 26 rows = 10 x 10 cm.

The knitting tension is very individual; some people knit/crochet loosely while others work tightly. You adjust the knitting tension with the needle size, which is why the suggested needle size only serve as a guide! You need to adjust this (up or down) to ensure that YOUR knitting tension matches the knitting tension provided in the pattern. If you work with a different knitting tension than provided you will have a different yarn consumption, and your work will have different measurements than what the pattern suggests.

The knitting tension also determines which yarns can replace each other. As long as you achieve the same knitting tension you can replace one yarn with another.

See DROPS lesson: How to measure your tension/gauge

See DROPS video: How to make a gauge tension swatch

The required amount of yarn is provided in grams, eg: 450 g. To calculate how many balls you’ll need you first need to know how many grams are in 1 ball (25g, 50g or 100g). This information is available if you click on the individual yarn quality on our pages. Divide the amount required with the amount of each ball. For example, if each ball is 50g (the most common amount), the calculation will be as follows: 450 / 50 = 9 balls.

The important thing when changing from one yarn to another is that the knitting/crochet tension remains the same. This is so that the measurements of the finished piece will be the same as on the sketch provided. It is easier to achieve the same knitting tension using yarns from the same yarn group. It is also possible to work with multiple strands of a thinner yarn to achieve the knitting tension of a thicker one. Please try our yarn converter. We recommend you to always work a test swatch.

Please NOTE: when changing yarn the garment might have a different look and feel to the garment in the photo, due to individual properties and qualities of each yarn.

See DROPS lesson: Can I use a different yarn than the one mentioned in the pattern?

All our yarns are categorised into yarn groups (from A to F) according to thickness and knitting tension – group A contains the thinnest yarns and group F the thickest. This makes it easier for you to find alternative yarns to our patterns, should you wish to switch yarn. All yarns within the same group have a similar knitting tension and can easily replace each other. However, different yarn qualities have different structures and properties which will give the finished work a unique look and feel.

Click here for an overview of the yarns in each yarn group

At the top of all our patterns you’ll find a link to our yarn converter, which is a helpful tool should you wish to use a different yarn than suggested. By filling in the yarn quality you wish to replace, the amount (in your size) and number of strands, the converter will present good alternative yarns with the same knitting tension. Additionally it will tell you how much you’ll require in the new qualities and whether you’ll need to work with multiple strands. Most skeins are 50g (some are 25g or 100g).

If the pattern is worked with multiple colours, every colour will have to be converted separately. Similarly, if the pattern is worked with several strands of different yarns (for example 1 strand Alpaca and 1 strand Kid-Silk) you will have to find alternatives for each, individually.

Click here to see our yarn converter

Since different yarns have different qualities and textures we have chosen to keep the original yarn in our patterns. However, you can easily find options among our available qualities by using our yarn converter, or simply pick a yarn from the same yarn group.

It is possible that some retailers still have discontinued yarns in stock, or that someone has a few skeins at home that they would like to find patterns for.

The yarn converter will provide both alternative yarn as well as required amount in the new quality.

If you think it's hard to decide what size to make, it can be a good idea to measure a garment you own already and like the size of. Then you can pick the size by comparing those measures with the ones available in the pattern's size chart.

You'll find the size chart at the bottom of the pattern.

See DROPS lesson: How to read size chart

The needle size provided in the pattern serves only as a guide, the important thing is to follow the knitting tension. And since knitting tension is very individual, you will have to adjust the needle size to ensure that YOUR tension is the same as in the pattern – maybe you’ll have to adjust 1, or even 2 needle sizes, up or down to achieve the correct tension. For this, we recommend that you work test swatches.

Should you work with a different knitting tension than the one provided, the measurements of the finished garment might deviate from the measurement sketch.

See DROPS lesson: How to measure your tension/gauge

See DROPS video: How to make a gauge tension swatch

Working a garment top-down provides more flexibility and room for personal adjustment. For example it is easier to try the garment on while working, as well as making adjustments to length of yoke and shoulder caps.

The instructions are carefully explaining every step, in the correct order. Diagrams are adjusted to the knitting direction and are worked as usual.

The diagram depicts all rows/rounds, and every stitch seen from the right side. It is read from bottom to top, from right to left. 1 square = 1 stitch.

When working back and forth, every other row is worked from the right side and every other row is worked from the wrong side. When working from the wrong side, the diagram will have to be worked reversed: from left to right, knit stitches are purled, purl stitches are knit etc.

When working in the round every round is worked from the right side and the diagram are worked from right to left on all rounds.

See DROPS lesson: How to read knitting diagrams

The diagram depicts all rows/rounds, and every stitch seen from the right side. It is worked from bottom to top, from right to left.

When working back and forth every other row is worked from the right side: from right to left and every other row is worked from the wrong side: from left to right.

When working in the round, every row in the diagram are worked from the right side, from right to left.

When working a circular diagram you start in the middle and work your way outwards, counter clockwise, row by row.

The rows usually start with a given number of chain stitches (equivalent to the height of the following stitch), this will either be depicted in the diagram or explained in the pattern.

See DROPS lesson: How to read crochet diagrams

Instructions for working several diagrams after each other on the same row/round, will often be written like so: “work A.1, A.2, A.3 a total of 0-0-2-3-4 times". This means you work A.1 once, then A.2 is worked once, and A.3 is repeated (in width) the number of times provided for your size – in this case like so: S = 0 times, M = 0 times, L=2 times, XL= 3 times and XXL = 4 times.

The diagrams are worked as usual: begin with the first row in A.1, then work the first row in A.2 etc.

See DROPS lesson: How to read knitting diagrams

See DROPS lesson: How to read crochet diagrams

The total width of the garment (from wrist-to-wrist) will be larger in the larger sizes, despite the actual sleeves being shorter. The larger sizes have longer sleeve caps and wider shoulders, so there will be a good fit in all sizes.

The measurement sketch/schematic drawing provides information regarding the full length of the garment. If it’s a jumper or a jacket the length is measured from the highest point on the shoulder (usually closest to the neckline), and straight down to the bottom of the garment. It is NOT measured from the tip of shoulder. Similarly, the length of yoke is measured from the highest point on the shoulder and down to where yoke is split into body and sleeves.

See DROPS lesson: How to read a schematic drawing

Diagrams are often repeated on the round or in height. 1 repeat is the diagram the way it appears in the pattern. If it says to work 5 repeats of A.1 in the round, then you work A.1 a total of 5 times after/next to each other in the round. If it says to work 2 repeats of A.1 vertically/in height you work the entire diagram once, then begin again at the start and work the entire diagram one more time.

Chain stitches are slightly narrower than other stitches and to avoid working the cast-on edge too tight, we simply chain more stitches to begin with. The stitch count will be adjusted on the following row to fit the pattern and measurement sketch.

The rib edge is more elastic and will contract slightly compared to, for example, stocking stitch. By increasing before the rib edge, you avoid a visible difference in width between the rib edge and the rest of the body.

It’s very easy to cast off too tightly, and by making yarn overs while casting off (and simultaneously casting these off) you avoid a too tight cast off edge.

See DROPS video: How to bind off with yarn overs (yo)

To achieve an even increase (or decrease) you can increase on, for example: every 3rd and 4th row alternately, like so: work 2 rows and increase on the 3rd row, work 3 rows and increase on the 4th. Repeat this until the increase is complete.

See DROPS lesson: Increase or decrease 1 st on every 3rd and 4th row alternately

Should you prefer to work in the round instead of back and forth, you may of course adjust the pattern. You’ll need to add steeks mid-front (usually 5 stitches), and follow the instructions. When you would normally turn and work from the wrong side, simply work across the steek and continue in the round. At the end you’ll cut the piece open, pick up stitches to work bands, and cover the cut edges.

See DROPS video: How to knit steeks and cut open

Should you prefer to work back and forth instead of in the round, you may of course adjust the pattern so you work the pieces separately and then assemble them at the end. Divide the stitches for the body in 2, add 1 edge stitch in each side (for sewing) and work the front and back pieces separately.

See DROPS lesson: Can I adapt a pattern for circular needles into straight needles?

Pattern repeats can vary slightly in the different sizes, in order to get the correct proportions. If you’re not working the exact same size as the garment in the photo, yours might deviate slightly. This has been carefully developed and adjusted so that the complete impression of the garment is the same in all sizes.

Make sure to follow instructions and diagrams for your size!

If you have found a pattern you like which is available in women’s size it’s not very difficult to convert it to men’s size. The biggest difference will be the length of sleeves and body. Start working on the women size that you think would fit across the chest. The additional length will be worked right before you cast off for the armhole/sleeve cap. If the pattern is worked top-down you can add the length right after the armhole or before the first decrease on sleeve.

Regarding additional yarn amount, this will depend on how much length you add, but it is better with a skein too many than too few.

All yarns will have excess fibres (from production) that might come off as lint or shedding. Brushed yarns (ie hairier yarns) have more of these loose, excess fibres, causing more shedding.

Shedding also depends on what is worn under or over the garment, and whether this pulls at the yarn fibres. It’s therefore not possible to guarantee that there will be no shedding

Below are some tips on how to get the best result when working with hairier yarns:

1. When the garment is finished (before you wash it) shake it vigorously so the looser hairs come off. NOTE: do NOT use a lint roller, brush or any method that pulls at the yarn.

2. Place the garment in a plastic bag and put it in your freezer - the temperature will cause the fibres to become less attached to each other, and excess fibres will come off easier.

3. Leave in the freezer for a few hours before taking it out and shaking it again.

4. Wash the garment according to the instructions on the yarn label.

Pilling is a natural process that happens to even the most exclusive of fibers. It's a natural sign of wear and tear that is hard to avoid, and that is most visible in high friction areas of your garment like a sweater's arms and cuffs.

You can make your garment look as new by removing the pilling, using a fabric comb or a pill/lint remover.

Still can't find the answer you need? Then scroll down and leave your question so one of our experts can try to help you. This will be done normally within 5 to 10 working days.
In the meantime, you can read the questions and answers that others have left to this pattern or join the DROPS Workshop on Facebook to get help from fellow knitters/crocheters!

You might also like...

Post a comment to pattern DROPS 95-36

We would love to hear what you have to say about this pattern!

If you want to leave a question, please make sure you select the correct category in the form below, to speed up the answering process. Required fields are marked *.

Comments / Questions (55)

country flag Ria Agterberg wrote:

Ik heb precies het patroon gevolgd te beginnen met een aantal lossen opzetten en vervolgens dst haken, maar er klopt niets van ik heb veel te weinig stokjes.

26.06.2014 - 01:50

DROPS Design answered:

Hoi Ria. Kan je aangeven welke maat je maakt. Dan zal ik het nakijken en eventueel uitleggen hoe je verder moet.

26.06.2014 - 16:12

country flag Trudy Mannee wrote:

Als ik de beschrijving lees lijkt het of je steeds 3 d.stokjes moet haken en dan i overslaan. Op de foto lijkt het alsof alles gelijkmatig is. Hoe zit dat?

25.05.2014 - 16:11

DROPS Design answered:

Hoi Trudy. Dat is alleen in de eerste toer. Vervolgens haak je 1 dstk in elk dstk.

27.05.2014 - 11:57

country flag Petra wrote:

Het principe snap ik. Maar klopt het dat ik bij links in de oneven toeren meer steken krijg en bij rechts in de even toeren? Dus dat ze niet exact gespiegeld worden?

10.05.2014 - 13:06

DROPS Design answered:

Dat klopt inderdaad omdat u het werk spiegelt.

10.05.2014 - 14:02

country flag Petra wrote:

Ik snap niet hoe het meerderen gaat bij het voorpand. Je moet bij de 2e tr meerderen middenvoor, maar dat is aan eind van tr. Hoe moet ik hier meerderen?

06.05.2014 - 18:07

DROPS Design answered:

Dit staat bovenaan het patroon beschreven onder "Tip voor het meerderen."

07.05.2014 - 11:09

country flag Joy wrote:

I did not buy Drops yarn. I have asked every store and person I know and they too have trouble understanding. Left front, after 28 tr after 5 tr added. Does the next row have the next 5 tr added or is there a row of tr between each inc row? Thanks Joy

27.02.2014 - 21:20

DROPS Design answered:

Dear Joy, you will inc for left front piece towards mid front (for rounded edge) every other row (= 1 row with inc, 1 row without dec). Happy crocheting!

28.02.2014 - 10:55

country flag Joy wrote:

Can you write out the inc rows the way you tell us to crochet the 1st row. (i.e.) Crochet the 1st row as follows: 1 tr in the 5th ch from the hook, *skip ch 1, 1tr in each of the next 3 ch* repeat from *-*. Thank you Joy

25.02.2014 - 01:52

DROPS Design answered:

Dear Joy, to inc 9 tr, work 11 ch, 1 tr in 4th ch from hook and 1 tr in each of the next 7 tr. To inc 3 tr, work 5 ch, 1 tr in 4th ch from hook, 1 tr in next ch. For any further assistance, do not hesitate to contact the store where you bought your yarn, they will answer you even per mail or telephone. Happy crocheting!

25.02.2014 - 09:18

country flag Joy wrote:

I had found the tutorial, but still don't get it. If you chain to inc want that make the front jagged instead of a slope. The whole inc tip is what I'm having trouble with as well as the wording starting at Now crochet 1tr. I understand that the numbers are for the size pattern you are working. I can't picture how the chains portion is going to slope. I will just keep asking until I figure it out. No one in Louisiana seems to know how to read it either. Thanks Joy

25.02.2014 - 01:41

country flag Joy wrote:

Bolero Drops 95-36. Left front on increasing. After 28 tr. First question. Pattern says to inc towards mid front on every other row(i.e. on every row towards mid front. Is it every row or every other row? I also don't understand inc tip where it says for new sts to crochet ch's in last st from previous row. if you are to inc 5 tr crochet 8 chains. I'm just having a hard time reading this pattern as in the US the pattern is stated exactly row for row what we are to do. Thanks again Joy

24.02.2014 - 04:51

DROPS Design answered:

Dear Joy, for inc front piece, you inc towards mid front every other row, ie every tr-row. To inc 5 tr, work 8 ch : first 4 ch = 1st tr, work 1 tr in each of the next 4 ch = 5 tr inc. Happy crocheting!

24.02.2014 - 10:20

country flag Joy wrote:

This says it better than before. Drops 95-36. I do not understand the decreasing part (9 tr's 1 time, 2 tr's 3 times and 1 tr 4 time = 70. Also is the decrease on every other row as in 9 tr's 1 time. Joy

21.02.2014 - 21:31

DROPS Design answered:

Dear Joy, for back piece, you dec tr each side: 9 tr 1 time each side = 18 tr, 2 tr 3 times each side = 12 tr, 1 tr 4 time each side = 8 tr. You had 108 sts (last size) - (18+6+8) = 70 tr remain. Happy crocheting!

22.02.2014 - 10:17

country flag Joy wrote:

I'm sorry for being so thick headed, but on Drop 95-36 I understand that the number 9 is to decrease for size XXL, but do I make 9 crochets and decrease in the 9th crochet, then do I make 2 crochets in each crochet for 3 times and then 1 crochet in each of the next four crochets. I'm afraid I just don't understand the way it is written. Thanks again. Joy

21.02.2014 - 19:23

DROPS Design answered:

Dear Joy, this below is how you dec several dc each side. Happy crocheting!

24.02.2014 - 10:04