Loch Tay

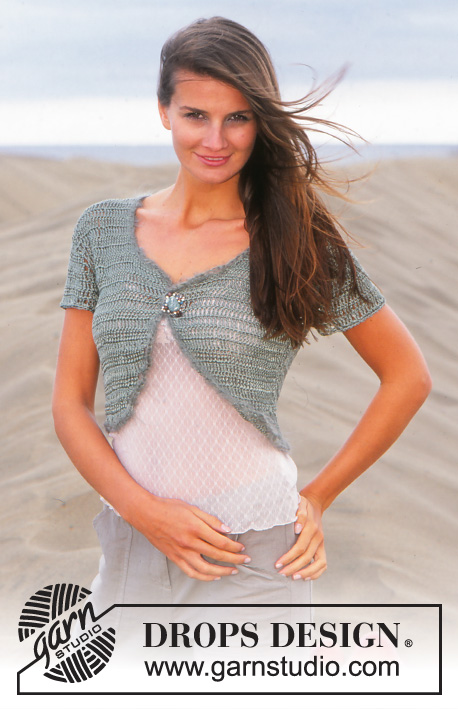
DROPS Crochet Bolero in Cotton Viscose or Safran and DROPS Melody. Size XS/S - XXL.

DROPS 95-36
Size: XS/S – S - M – L - XL - XXL
Finished measurements:
Bust: 80-88-96-106-116-128 cm / 31½"-34⅝"-37¾"-41¾"-45¾"-50⅜"
Full length: 37-39-41-43-45-47 cm / 14½"-15¼"-16⅛"-17"-17¾"-18½"

Materials: DROPS Cotton Viscose from Garnstudio
200-200-250-250-300-300 g color no. 11, khaki green
or use
DROPS Safran from Garnstudio
150-150-200-200-250-250 g color no. 50, mint

and use: DROPS Vienna from Garnstudio
50-50-50-50-50 g color no. 16, moss green
or use: DROPS Melody from Garnstudio
50 g color no 19 light sea green

DROPS Crochet Hook size 4 mm/ US 6
DROPS Crochet Hook size 6 mm/ US J/10 (for borders)

-------------------------------------------------------

Alternative Yarn – See how to change yarns here
Yarn Groups A to F – Use the same pattern and change the yarn here
Yarn usage using an alternative yarn – Use our yarn converter here

-------------------------------------------------------

Pattern instructions

NOTE: This pattern is written in American English. All measurements in charts are in cm. For conversion from inches to cm - click here. There are different terms for crocheting in American and British English. If this pattern includes crochet, click for "crochet terms" here. For this pattern in British English, please click here.
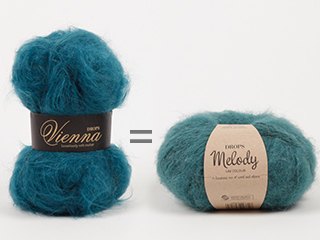
Crochet gauge: 17 tr x 6 rows = 10 x 10 cm / 4" x 4"

Crochet info: At the beginning of each row replace 1 tr with ch 4, and finish each row with 1 tr in 4th ch from beginning of previous row. Crochet in each st and not in between.

Decreasing tips (applies to armhole and neck):
Dec as follows at beginning of row: replace 1 tr with a sl st.
Dec as follows at end of row: Turn the piece when number of tr to be dec are left on row and crochet next row.

Increasing tips (applies to slope at front):
Increase new sts towards mid front by crocheting ch's in last st from previous row. Crochet the same number of ch's as the number of tr's to be increased, but as the first tr on next row is to be replaced by ch 4, replace the last ch with ch 4, i.e. if you are to increase 5 tr crochet 8 ch, turn the piece, crochet 1 tr in 5th ch from the hook and then 1 tr in each of the remaining ch's, continue on row with 1 tr in each tr from previous row.

Back piece:
Loosely ch 80-88-99-112-123-136 using hook size 4 mm/US 6 and Cotton Viscose or Safran.
Crochet the 1st row as follows: 1 tr in the 5th ch from the hook, *skip ch 1, 1 tr in each of the next 3 ch* repeat from *-* but for size XS + S + L + XXL finish with 1 tr in the last 2 ch’s (instead of the last 3 ch) and for size M + XL finish with 1 tr in the last ch (instead of the last 3 ch’s) = 58-64-72-82-90-100 tr.
Now crochet 1 tr in each tr from previous row – see Crochet info.
At the same time after 2-2-3-3-3-3 rows inc 1 tr each side by crocheting 1 extra tr in the next-to-last tr each side as follows:
Size XS + S + M: on every other row
Size L + XL + XXL: on every 3rd row
- a total of 5-5-5-4-4-4 times = 68-74-82-90-98-108 tr.
When piece measures approx 20-21-22-23-24-25 cm / 8"-8¼"-8¾"-9"-9½"-9¾" dec for armholes each side on every row – see Decreasing tips: 3-3-4-6-7-9 tr’s 1 time, 2 tr’s 0-0-1-1-2-3 times and 1 tr 1-2-3-4-4-4 times = 60-64-64-66-68-70 tr.
When piece measures approx 35-37-39-41-43-45 cm / 13¾"-14½"-15¼"-16⅛"-17"-17¾" (only 1 row left until finished measurements) crochet 1 row over only the outermost 20-21-21-21-21-22 tr’s each side (i.e. do not crochet over the middle 20-22-22-24-26-26 tr’s = neck).
Cut the yarn, piece measures approx 37-39-41-43-45-47 cm / 14½"-15¼"-16⅛"-17"-17¾"-18½".

Left front piece:
Loosely ch 28-29-32-35-37-40 using crochet hook size 4 mm/US 6 and Cotton Viscose or Safran.
Crochet the 1st row as follows: 1 tr in the 5th ch from the hook, *skip ch 1, 1 tr in each of the next 3 ch* repeat from *-* but for size XS + M + XXL finish with 1 tr in the last 2 ch’s (instead of the last 3 ch ) and for size L finish with 1 tr in the last ch (instead of the last 3 ch’s) = 19-20-22-24-26-28 tr.
Now crochet 1 tr in each tr from previous row as for back piece, at the same time inc towards mid front on every other row (i.e. on every row towards mid front) – see Increasing tips: 5 tr’s 1-1-2-2-2-2 times, 4 tr’s 1-1-0-0-0-0 times, 3 tr’s 0-0-0-1-1-2 times, 2 tr’s 1-2-2-2-3-3 times and 1 tr 1-1-2-2-2-2 times.
At the same time inc at side as for back piece.
At the same time when piece measures 20-21-22-23-24-25 cm / 8"-8¼"-8¾"-9"-9½"-9¾" – compare to back piece – dec for armhole as described for back piece.
At the same time when piece measures 26-26-26-28-28-30 cm / 10¼"-10¼"-10¼"-11"-11"-11¾" dec for neckline towards mid front on every row – see Decreasing tips: 7-8-8-9-10-10 tr’s 1 time, 2 tr’s 1 time and 1 tr 3 times = 20-21-21-21-21-22 tr left on shoulder.
When piece measures approx 37-39-41-43-45-47 cm/ 14½"-15¼"-16⅛"-17"-17¾"-18½" – compare to back piece – cut the yarn.

Right front piece:
As left front piece but mirrored.

Sleeve:
Loosely ch 66-70-74-78-82-86 using crochet hook size 4 mm/US 6 and Cotton Viscose or Safran.
Crochet the 1st row as follows: 1 tr in the 5th ch from the hook, 1 tr in next ch, *skip ch 1, 1 tr in each of the next 3 ch* repeat from *-* = 48-51-54-57-60-63 tr.
Crochet 1-1-2-3-3-4 rows of tr as before, at the same time inc 1 tr each side on every row by crocheting 1 extra tr in the second but last tr each side = 50-53-58-63-66-71 tr.
On next row dec for sleeve cap each side on every row – see Decreasing tips: 4 tr’s 1 time, 3 tr’s 1 time, and then 2 tr’s each side until piece measures approx 10-11-13-17-19-21 cm / 4"-4½"-5"-6¾"-7½"-8¼". Fasten off.

Assembly:
Sew shoulder seams. Crochet sleeves to body using crochet hook size 4 mm/US 6 and Cotton Viscose or Safran as follows: 1 sc in first st on sleeve, ch 2, 1 sc in first st on back/front piece, ch 2, 1 sc in tr on sleeve, ch 2, 1 sc in tr on back/front piece etc.
Crochet sleeve and side seams together in the same way.

Crochet border: Crochet a border round the opening of the bolero (i.e. up along both front pieces, round neck and along lower edge) using crochet hook size 6 mm/US J and Vienna or Melody as follows: 1 sc in first st, *3 ch, skip approx 2.5 cm / 1", 1 sc in next st*, repeat from *-* and finish with 3 ch and 1 sl st in first sc from beginning of round. Note! The border should be nice and even and not wavy.

Close the jacket with a brooch or button.

This pattern has been corrected.

Updated online: 13.12.2023
The pattern is updated. Decreasing for armhole on back piece + increasing on sleeve all sizes.

Diagram

All measurements in charts are in cm.

diagram measurements
Do you have a question? See a list of frequently asked questions (FAQ)

Knitting tension is what determines the final measurements of your work, and is usually measured per 10 x 10 cm. It is provided like so: number of stitches in width x number of rows in height - eg: 19 stitches x 26 rows = 10 x 10 cm.

The knitting tension is very individual; some people knit/crochet loosely while others work tightly. You adjust the knitting tension with the needle size, which is why the suggested needle size only serve as a guide! You need to adjust this (up or down) to ensure that YOUR knitting tension matches the knitting tension provided in the pattern. If you work with a different knitting tension than provided you will have a different yarn consumption, and your work will have different measurements than what the pattern suggests.

The knitting tension also determines which yarns can replace each other. As long as you achieve the same knitting tension you can replace one yarn with another.

See DROPS lesson: How to measure your tension/gauge

See DROPS video: How to make a gauge tension swatch

The required amount of yarn is provided in grams, eg: 450 g. To calculate how many balls you’ll need you first need to know how many grams are in 1 ball (25g, 50g or 100g). This information is available if you click on the individual yarn quality on our pages. Divide the amount required with the amount of each ball. For example, if each ball is 50g (the most common amount), the calculation will be as follows: 450 / 50 = 9 balls.

The important thing when changing from one yarn to another is that the knitting/crochet tension remains the same. This is so that the measurements of the finished piece will be the same as on the sketch provided. It is easier to achieve the same knitting tension using yarns from the same yarn group. It is also possible to work with multiple strands of a thinner yarn to achieve the knitting tension of a thicker one. Please try our yarn converter. We recommend you to always work a test swatch.

Please NOTE: when changing yarn the garment might have a different look and feel to the garment in the photo, due to individual properties and qualities of each yarn.

See DROPS lesson: Can I use a different yarn than the one mentioned in the pattern?

All our yarns are categorised into yarn groups (from A to F) according to thickness and knitting tension – group A contains the thinnest yarns and group F the thickest. This makes it easier for you to find alternative yarns to our patterns, should you wish to switch yarn. All yarns within the same group have a similar knitting tension and can easily replace each other. However, different yarn qualities have different structures and properties which will give the finished work a unique look and feel.

Click here for an overview of the yarns in each yarn group

At the top of all our patterns you’ll find a link to our yarn converter, which is a helpful tool should you wish to use a different yarn than suggested. By filling in the yarn quality you wish to replace, the amount (in your size) and number of strands, the converter will present good alternative yarns with the same knitting tension. Additionally it will tell you how much you’ll require in the new qualities and whether you’ll need to work with multiple strands. Most skeins are 50g (some are 25g or 100g).

If the pattern is worked with multiple colours, every colour will have to be converted separately. Similarly, if the pattern is worked with several strands of different yarns (for example 1 strand Alpaca and 1 strand Kid-Silk) you will have to find alternatives for each, individually.

Click here to see our yarn converter

Since different yarns have different qualities and textures we have chosen to keep the original yarn in our patterns. However, you can easily find options among our available qualities by using our yarn converter, or simply pick a yarn from the same yarn group.

It is possible that some retailers still have discontinued yarns in stock, or that someone has a few skeins at home that they would like to find patterns for.

The yarn converter will provide both alternative yarn as well as required amount in the new quality.

If you think it's hard to decide what size to make, it can be a good idea to measure a garment you own already and like the size of. Then you can pick the size by comparing those measures with the ones available in the pattern's size chart.

You'll find the size chart at the bottom of the pattern.

See DROPS lesson: How to read size chart

The needle size provided in the pattern serves only as a guide, the important thing is to follow the knitting tension. And since knitting tension is very individual, you will have to adjust the needle size to ensure that YOUR tension is the same as in the pattern – maybe you’ll have to adjust 1, or even 2 needle sizes, up or down to achieve the correct tension. For this, we recommend that you work test swatches.

Should you work with a different knitting tension than the one provided, the measurements of the finished garment might deviate from the measurement sketch.

See DROPS lesson: How to measure your tension/gauge

See DROPS video: How to make a gauge tension swatch

Working a garment top-down provides more flexibility and room for personal adjustment. For example it is easier to try the garment on while working, as well as making adjustments to length of yoke and shoulder caps.

The instructions are carefully explaining every step, in the correct order. Diagrams are adjusted to the knitting direction and are worked as usual.

The diagram depicts all rows/rounds, and every stitch seen from the right side. It is read from bottom to top, from right to left. 1 square = 1 stitch.

When working back and forth, every other row is worked from the right side and every other row is worked from the wrong side. When working from the wrong side, the diagram will have to be worked reversed: from left to right, knit stitches are purled, purl stitches are knit etc.

When working in the round every round is worked from the right side and the diagram are worked from right to left on all rounds.

See DROPS lesson: How to read knitting diagrams

The diagram depicts all rows/rounds, and every stitch seen from the right side. It is worked from bottom to top, from right to left.

When working back and forth every other row is worked from the right side: from right to left and every other row is worked from the wrong side: from left to right.

When working in the round, every row in the diagram are worked from the right side, from right to left.

When working a circular diagram you start in the middle and work your way outwards, counter clockwise, row by row.

The rows usually start with a given number of chain stitches (equivalent to the height of the following stitch), this will either be depicted in the diagram or explained in the pattern.

See DROPS lesson: How to read crochet diagrams

Instructions for working several diagrams after each other on the same row/round, will often be written like so: “work A.1, A.2, A.3 a total of 0-0-2-3-4 times". This means you work A.1 once, then A.2 is worked once, and A.3 is repeated (in width) the number of times provided for your size – in this case like so: S = 0 times, M = 0 times, L=2 times, XL= 3 times and XXL = 4 times.

The diagrams are worked as usual: begin with the first row in A.1, then work the first row in A.2 etc.

See DROPS lesson: How to read knitting diagrams

See DROPS lesson: How to read crochet diagrams

The total width of the garment (from wrist-to-wrist) will be larger in the larger sizes, despite the actual sleeves being shorter. The larger sizes have longer sleeve caps and wider shoulders, so there will be a good fit in all sizes.

The measurement sketch/schematic drawing provides information regarding the full length of the garment. If it’s a jumper or a jacket the length is measured from the highest point on the shoulder (usually closest to the neckline), and straight down to the bottom of the garment. It is NOT measured from the tip of shoulder. Similarly, the length of yoke is measured from the highest point on the shoulder and down to where yoke is split into body and sleeves.

See DROPS lesson: How to read a schematic drawing

Diagrams are often repeated on the round or in height. 1 repeat is the diagram the way it appears in the pattern. If it says to work 5 repeats of A.1 in the round, then you work A.1 a total of 5 times after/next to each other in the round. If it says to work 2 repeats of A.1 vertically/in height you work the entire diagram once, then begin again at the start and work the entire diagram one more time.

Chain stitches are slightly narrower than other stitches and to avoid working the cast-on edge too tight, we simply chain more stitches to begin with. The stitch count will be adjusted on the following row to fit the pattern and measurement sketch.

The rib edge is more elastic and will contract slightly compared to, for example, stocking stitch. By increasing before the rib edge, you avoid a visible difference in width between the rib edge and the rest of the body.

It’s very easy to cast off too tightly, and by making yarn overs while casting off (and simultaneously casting these off) you avoid a too tight cast off edge.

See DROPS video: How to bind off with yarn overs (yo)

To achieve an even increase (or decrease) you can increase on, for example: every 3rd and 4th row alternately, like so: work 2 rows and increase on the 3rd row, work 3 rows and increase on the 4th. Repeat this until the increase is complete.

See DROPS lesson: Increase or decrease 1 st on every 3rd and 4th row alternately

Should you prefer to work in the round instead of back and forth, you may of course adjust the pattern. You’ll need to add steeks mid-front (usually 5 stitches), and follow the instructions. When you would normally turn and work from the wrong side, simply work across the steek and continue in the round. At the end you’ll cut the piece open, pick up stitches to work bands, and cover the cut edges.

See DROPS video: How to knit steeks and cut open

Should you prefer to work back and forth instead of in the round, you may of course adjust the pattern so you work the pieces separately and then assemble them at the end. Divide the stitches for the body in 2, add 1 edge stitch in each side (for sewing) and work the front and back pieces separately.

See DROPS lesson: Can I adapt a pattern for circular needles into straight needles?

Pattern repeats can vary slightly in the different sizes, in order to get the correct proportions. If you’re not working the exact same size as the garment in the photo, yours might deviate slightly. This has been carefully developed and adjusted so that the complete impression of the garment is the same in all sizes.

Make sure to follow instructions and diagrams for your size!

If you have found a pattern you like which is available in women’s size it’s not very difficult to convert it to men’s size. The biggest difference will be the length of sleeves and body. Start working on the women size that you think would fit across the chest. The additional length will be worked right before you cast off for the armhole/sleeve cap. If the pattern is worked top-down you can add the length right after the armhole or before the first decrease on sleeve.

Regarding additional yarn amount, this will depend on how much length you add, but it is better with a skein too many than too few.

All yarns will have excess fibres (from production) that might come off as lint or shedding. Brushed yarns (ie hairier yarns) have more of these loose, excess fibres, causing more shedding.

Shedding also depends on what is worn under or over the garment, and whether this pulls at the yarn fibres. It’s therefore not possible to guarantee that there will be no shedding

Below are some tips on how to get the best result when working with hairier yarns:

1. When the garment is finished (before you wash it) shake it vigorously so the looser hairs come off. NOTE: do NOT use a lint roller, brush or any method that pulls at the yarn.

2. Place the garment in a plastic bag and put it in your freezer - the temperature will cause the fibres to become less attached to each other, and excess fibres will come off easier.

3. Leave in the freezer for a few hours before taking it out and shaking it again.

4. Wash the garment according to the instructions on the yarn label.

Pilling is a natural process that happens to even the most exclusive of fibers. It's a natural sign of wear and tear that is hard to avoid, and that is most visible in high friction areas of your garment like a sweater's arms and cuffs.

You can make your garment look as new by removing the pilling, using a fabric comb or a pill/lint remover.

Still can't find the answer you need? Then scroll down and leave your question so one of our experts can try to help you. This will be done normally within 5 to 10 working days.
In the meantime, you can read the questions and answers that others have left to this pattern or join the DROPS Workshop on Facebook to get help from fellow knitters/crocheters!

You might also like...

Post a comment to pattern DROPS 95-36

We would love to hear what you have to say about this pattern!

If you want to leave a question, please make sure you select the correct category in the form below, to speed up the answering process. Required fields are marked *.

Comments / Questions (55)

country flag Irina wrote:

Es geht um den Beginn beim Rücken. Da steht 3 D-Stäbchen und eine Masche überspringen. Soll ich, jeweils eine Luftmasche dazwischen häkeln? Wenn ich das nicht mache verringert sich sonst die Maschenanzahl. Oder ist das absichtlich so um das Bund locker zu gestalten?

23.03.2024 - 09:17

DROPS Design answered:

Liebe Irina, da die Luftmaschenketten oft zu eng sind, als man dann später braucht, wird man mehr Luftmaschen anschlagen als man Maschen braucht, dann bei der 1. Reihe wird man regelmäßig verteilt 1 Luftmasche überspringen um die richtige Maschenanzahl bzw Breite zu haben. So überspringen Sie jede 4. Luftmasche aber keine extra Lufmtasche häkeln. Viel Spaß beim Häkeln!

02.04.2024 - 08:20

country flag Delphine wrote:

Hello, and thank you for your reply to my last question ☺️. Now struggling with the sleeves 🤪 ! No issues with the first few rows and going from 60 to 66 dtr (working on an XL), but a bit confused about the decreasing 4 dtrs 1 time, 3 dtrs 1 time and 2dtr until piece measures 19 cm. Is it done on every row (says English translation) or every other row (according to French translation). And if I want to make longer sleeves, that’s where I keep going, right ? Thank you

12.12.2023 - 14:29

DROPS Design answered:

Dear Delphine, thanks for your feedback, both UK and French pattern were edited in some places, as the increases for sleeves are worked on every row (and not on every other row/tous les 2 rangs) - decreasing on top of sleeve is worked on every row. Happy crocheting!

13.12.2023 - 08:37

country flag Delphine G wrote:

Hi, I was wondering what you meant by « mid front » for the front pieces. Do you mean the end of the piece worked (which would be the middle of the front of finished product I guess) ? Or the middle of the piece worked ? I’m thinking the former, but just wanted to be sure. Many thanks !

06.12.2023 - 19:08

DROPS Design answered:

Hi Delphine, Yes, it is the edge of the front piece which is mid-front of the garment. Happy crafting!

07.12.2023 - 06:42

country flag Valérie wrote:

Bonjour, J'ai terminé le devant gauchet et je commence le devant droite. Et je suis bloquée dès le 3ème rang:. Comment faire plusieurs augmentations avec des doubles-brides en fin de rang? Pour le devant gauche, l'arrondi était en début de rang, et j'ai donc ajouté des ML, pour le devant gauche, les augmentations pour l'arrondi viennent en fin de rang et je ne sais pas comment les faire. Mes recherches dans les tutoriels en ligne n'ont rien donné. Merci pour votre aide :-)

29.07.2023 - 19:05

DROPS Design answered:

Bonjour Valérie, vous allez augmenter de la même façon que pour le devant gauche, mais pour le devant gauche, vous avez monté vos mailles en l'air en fin de rang sur l'endroit, pour le devant droit, vous allez monter vos mailles en l'air en fin de rang sur l'envers. Bon crochet!

31.07.2023 - 10:22

country flag Valérie wrote:

Hello, Je viens de commencer cet ouvrage et je bute dès la fin du premier rang. Au début du 2ème rang, faut-il faire des ml ? et si oui, combien? Merci

10.06.2023 - 15:38

DROPS Design answered:

Bonjour Valérie, au début de chaque rang de double-brides, vous allez remplacer la 1ère double-bride par 4 mailles en l'air et vous terminez le rang par 1 double-bride dans la 4ème maille en l'air du début du rang précédent - cf INFO CROCHET. Bon crochet!

12.06.2023 - 09:23

country flag Sandra wrote:

Ik heb alles gehaakt. Nu moet ik de mouwen aan het voor/achterpand haken. Mij valt op dat mijn mouw maat M, met 54 dst ongeveer 31 cm meet. Mijn armsgaten meten 19 cm, keer 2 is 38 cm. Kom ik 7 cm tekort toch?

10.04.2022 - 08:35

DROPS Design answered:

Dag Sandra,

De hoogte van het armsgat is inderdaad 19 cm, maar er zit ook een ronding in richting de oksel, dus als je opmeet langs de ronding vanaf het begin van het armsgat tot de schouder, dan zou je op een hoger getal uit moeten komen.

14.04.2022 - 11:37

country flag Anne Thrane wrote:

Hej, jeg forstår ikke ideen med at springe en luftmaske over mellem hver 3. maske på første omgang. Og skal jeg så bare hækle normalt på resten af arbejdet? Jeg undrer mig også over, at der står man skal hækle i masken og ikke mellem - jeg tror aldrig jeg har set det fremhævet før. På forhånd tak for hjælp.

18.08.2021 - 07:23

DROPS Design answered:

Hei Anne. Det at man hopper over noen luftmasker på en luftmaskeraden gjøres fordi man ikke vil at "oppleggskanten" skal stramme, noe den vil gjøre dersom man hekler i alle luftmaskene. Det at man skriver at man skal hekle i, om eller mellom masker gjør det lettere å forstå, spesielt om man er usikker. Å hekle i, om eller mellom gir også forskjellige uttrykk, da er det fint å presisere hva det skal gjøres i den enkelte oppskrift, spesielt om f.eks 2 eller 3 av disse teknikkene skal brukes i samme oppskrift. mvh DROPS design

18.08.2021 - 15:34

country flag Lauren wrote:

Thank you for replying to my previous question. I understand what mirroring means. It’s actually doing it that I am struggling with. Is there a way to have the mirrored pattern written out please? I am making size small. It would be for the right front piece please. Thank you!

20.08.2020 - 22:22

DROPS Design answered:

Dear Lauren, if you increased at the end of row from RS on left front piece for rounded front edge, increase now for the right front piece at the beg of row from RS. The increases on back piece were done at the beg of RS row for left piece, increase at the end of RS row for right front piece, etc. Happy crocheting!

21.08.2020 - 08:15

country flag Lauren wrote:

Hi, I am new at crochet and I am struggling to figure out how to mirror the front piece. I am right handed and when I have googled it, it says to work the pattern left handed which I can’t do. Is there an easier way to mirror the front piece? Or do I work it exactly the same and flip it over? Thanks!

19.08.2020 - 22:51

DROPS Design answered:

Dear Lauren, working a piece mirrored means everything you made on the right side of piece on first front piece will be now worked on the left side of piece on 2nd front piece and same for left side will be now worked on the right side. This means for example when you increased at the end of a RS row on left front piece, you will now increased at the beg of a RS row. If you don't know anymore, just lay the left front piece flat and lay the right front piece beside to make sure the increases for rounded front edge, the decreases for armholes etc. will be on the correct side. Happy crocheting!

20.08.2020 - 10:04

country flag Ann-Louise wrote:

Hej! Detta gäller alla era mönster. Jag undrar hur man ska veta vilken storlek man behöver då jag inte har hittat några mått i cm utan bara storleksangivelse i S, M, L osv?

03.09.2017 - 10:09

DROPS Design answered:

Hei Ann-Louise. Du finner en målskisse med alle mål nederst på oppskriften. God Fornøyelse!

04.09.2017 - 11:47