
Popular categories
Looking for a yarn?


|
|
DROPS 95-30 |
|
|
|
|
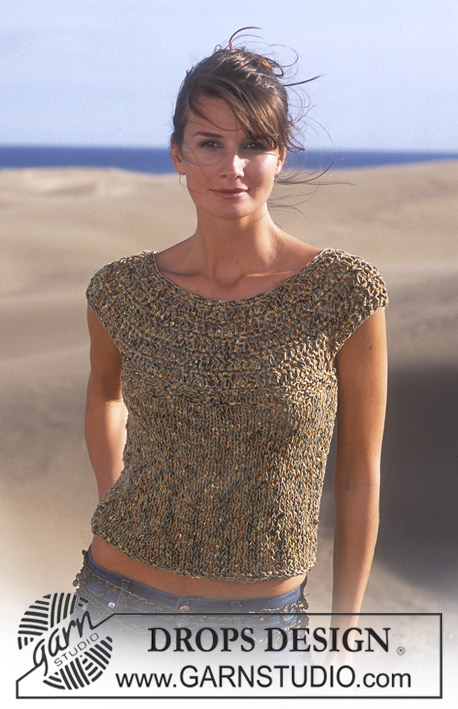
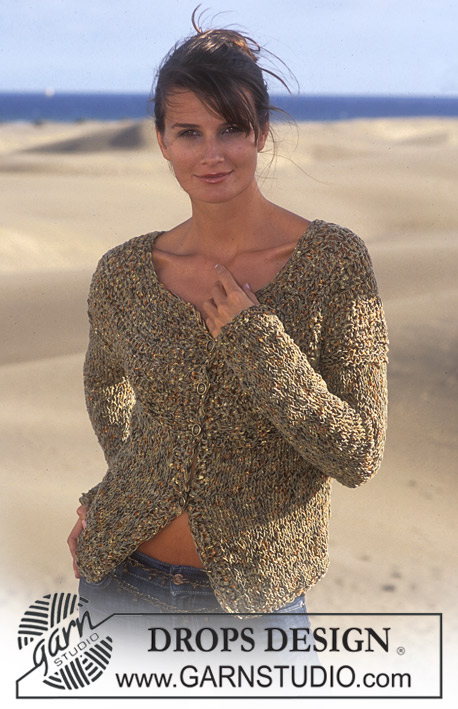
Basic DROPS Jumper in Vivaldi or DROPS Brushed Alpaca Silk
DROPS 95-30 |
|
|
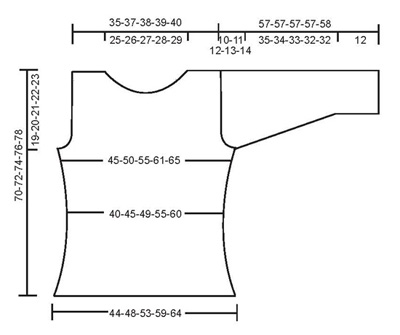
Garter st: Knit sts on all rows. Measurement tips: All measurements should be taken while the garment is hanging. Back piece: Using 2 needles size 9 mm / US 13 (to ensure the edge becomes elastic) cast on 48-53-58-65-70 sts. Remove 1 needle and work in garter st. When piece measures 24-25-26-27-28 cm / 9½"-9¾"-10¼"-10½"-11" – see measurement tips – insert a marker 15-17-19-22-24 sts in from each side (= 18-19-20-21-22 sts between markers). From the right side now dec 1 st after the first marker and 1 st before the other marker by K2 tog. Work 7 rows and then rep dec = 44-49-54-61-66 sts. Continue in garter. When piece measures 36-37-38-39-40 cm / 14"-14½"-15"-15¼"-15¾" inc 1 st after the first marker and 1 st before the other marker from the right side by making a yo (knit yo into back of st on next row). Inc on every 6th row a total of 3 times = 50-55-60-67-72 sts. When piece measures 51-52-53-54-55 cm / 20"-20½"-21"-21¼"-21½" bind off for armholes each side in beg of every row each side: 3 sts 1 time, 2 sts 1-1-2-3-4 times and 1 st 1-2-2-3-3 times = 38-41-42-43-44 sts. When piece measures 68-70-72-74-76 cm / 26¾"-27½"-28½"-29"-30" cast/bind off the middle 26-27-28-29-30 sts for neck and work each side separately. Continue and dec 1 st on neckline on next row = 5-6-6-6-6 sts left on shoulder. Cast/bind off when piece measures 70-72-74-76-78 cm / 27½"-28½"-29"-30"-30¾". Front piece: Cast on and knit as described for back piece. Make dec and inc and cast/bind off for armholes as for back piece. When piece measures 62-64-65-67-69 cm / 24½"-25"-25½"-26½"-27" bind off middle 12-13-14-15-16 sts for neck and work each side separately. Continue and bind off on neckline on every other row as follows: 2 sts 3 times and 1 st 2 times = 5-6-6-6-6 sts left on shoulder. Bind off when piece measures 70-72-74-76-78 cm / 27½"-28½"-29"-30"-30¾". Sleeve: Cast on 26-26-28-28=29 sts using 2 needles size 9 mm / US 13. Remove 1 needle and work in garter st. When sleeve measures 12 cm / 4¾" inc 1 st each side on every 8-6-5-4-3 cm / 3"-2½"-2"-1½"-1" a total of 5-6-7-8-10 times = 36-38-42-44-49 sts. When sleeve measures 47-46-45-44-44 cm / 18½"-18"-17¾"-17¼"-17¼" bind off (loosely) for sleeve cap each side in beg of every row: 3 sts 1 time each side and then 1 st each side until sleeve measures 56-56-56-56-57 cm / 22"-22"-22"-22"-22½", now bind off 2 sts each side and then bind off remaining sts. Piece measures 57-57-57-57-58 cm / 22½"-22½"-22½"-22½"-23". Assembly: Sew shoulder seams. Set in sleeves. Sew sleeve and side seams in the outer loop of the outermost st – make sure seam doesn’t pull. Crochet border: With hook size 7 mm/K and 3 strands Vivaldi crochet around all edges (body, sleeves and neck) as follows: 1 sc in first st, *ch 2, skip 2 sts (approx 1.5 cm / ½"), 1 sc in next st*, repeat from *-*, end round with ch 2 and a sl st in first sc on round. Fasten off. Make sure the border doesn’t become too tight. |
|
|
|
|
Have you made this or any other of our designs? Tag your pictures in social media with #dropsdesign so we can see them! Do you need help with this pattern?You'll find tutorial videos, a Comments/Questions area and more by visiting the pattern on garnstudio.com. © 1982-2024 DROPS Design A/S. We reserve all rights. This document, including all its sub-sections, has copyrights. Read more about what you can do with our patterns at the bottom of each pattern on our site. |


With over 40 years in knitting and crochet design, DROPS Design offers one of the most extensive collections of free patterns on the internet - translated to 17 languages. As of today we count 304 catalogs and 11422 patterns - 11417 of which are translated into English (US/in).
We work hard to bring you the best knitting and crochet have to offer, inspiration and advice as well as great quality yarns at incredible prices! Would you like to use our patterns for other than personal use? You can read what you are allowed to do in the Copyright text at the bottom of all our patterns. Happy crafting!
Comments / Questions (14)
Buonasera, chiedo cortesemente un chiarimento: le diminuzioni delle maniche : " diminuire poi 1 m da ciascun lato finche' la manica non misura 56 cm" devono essere fatte ogni 2 ferri come le precedenti diminuzioni ( ".......ogni 2 ferri, come segue: 3 m 1 volta ; "). ?? Grazie. Gabriella Madau
11.05.2021 - 18:58DROPS Design answered:
Buonasera Gabriella, si, le diminuzioni vanno lavorate a ferri alterni. Buon lavoro!
11.05.2021 - 21:17Hei, denne genseren var fin. Ser at garnet er utgått. Hva kan det erstattes med? Mvh, Tone
21.04.2018 - 11:28DROPS Design answered:
Hej Tone, det kan du erstatte med DROPS Brushed Alpaca Silk, prøv garnkalkulatoren OG sørg for at du får samme strikkefasthed som der står i opskriften. God fornøjelse!
24.04.2018 - 11:25Bngiorno, volendo fare questo modello taglia M con il brushed alpaca che ferri dovrei usare e quanta lana mi dovrebbe servire ? grazie
22.05.2015 - 17:39DROPS Design answered:
Buongiorno Sara. Le occorreranno 150 gr di Brushed Alpaca Silk che corrispondono a 6 gomitoli. Come misura dei ferri, lavorerà con la misura che le consente di ottenere il campione indicato nelle spiegazioni del modello. Buon lavoro!
22.05.2015 - 18:07Purity wrote:
Hi-i need your help about the top of the sleeve its very ununderstood.please explain again
02.12.2013 - 06:57DROPS Design answered:
Dear Purity, when sleeve measures 47-44 cm (see size), cast off at the beg of every row each side : first 3 sts each side then cast off 1 st each side until sleeve measures 56-57 cm then cast off 2 sts each side once and cast off remaining sts. Happy knitting!
02.12.2013 - 14:21Don't understand how many stitches should be left after decreasing at top of sleeve.
17.11.2013 - 20:39DROPS Design answered:
Dear Mrs Epps, number of sts remaining at the top of sleeve depends on size worked and on nber of rows for 10 cm, ie, you should dec/cast-off: 3 sts 1 time + 1 st each side until sleeve measures 56-56-56-56-57 cm, now dec 2 sts each side and cast off remaining sts when piece measures 57-57-57-57-58 cm (see size). Happy knitting!
18.11.2013 - 10:10Je ne sais pas comment on peut tricoter avec une seule aiguille ! il faudrait aussi les mesures de la manche à plat
02.10.2013 - 19:01DROPS Design answered:
Bonjour Mme Schneider, le montage se fait sur 2 aiguilles et on continue ensuite avec les mailles sur 1 seule aiguille (cf vidéo ci-dessous). En bas des explications vous trouverez un schéma avec les mesures du pull à plat: 19 à 23 cm (selon la taille choisie) x 2 pour la largeur totale de la manche. Bon tricot!
02.10.2013 - 19:24I am having such a hard time understanding the instructions for binding off for the arm holes. "...bind off for armholes each side in beg of every row each side: 3 sts 1 time, 2 sts 1-1-2-3-4 times and 1 st 1-2-2-3-3 times = 38-41-42-43-44 sts. When piece measures 68-70-72-74-76 cm / 26 3/4"-27½"-28½"-29"-30" cast/bind off the middle 26-27-28-29-30 sts for neck and work each side separately. "
30.04.2013 - 00:12DROPS Design answered:
Dear Dawn, instructions are given in the same order as sizes, ie, for smallest size, you will bind off for armholes each side at the beg of every row 3 sts 1 time, 2 sts 1 time and 1 st 1 time = 38 sts remain. When piece measures 68 cm, you cast off the middle 26 sts for neck and finish each side separately. Happy knitting !
30.04.2013 - 12:45Ich habe eine Maschenprobe mit einer 8er nadel gestrickt und komme auf viel weniger reihen wie in der Anleitung angegeben. Liegt hier ein Schreibfehler vor? Danke Katrin
04.09.2012 - 19:04DROPS Design answered:
Ich kann es mir nicht anders erklären, als dass unsere Maschenprobe ungedehnt gemessen ist. Da ja der Unterschied in der Höhe ist, empfehle ich Ihnen, das Strickstück immer wieder hängend zu messen und sich dann an den cm-Angaben zu orientieren.
05.09.2012 - 07:29wrote:
den er smuk, den må jeg strikke!
26.02.2006 - 12:21TFL wrote:
Flot, let og lækker trøje...denne vil jeg strikke.
24.01.2006 - 15:12