
Popular categories
Looking for a yarn?


|
|||||||||||||||||||
DROPS 95-12 |
|||||||||||||||||||
 |
 |
||||||||||||||||||
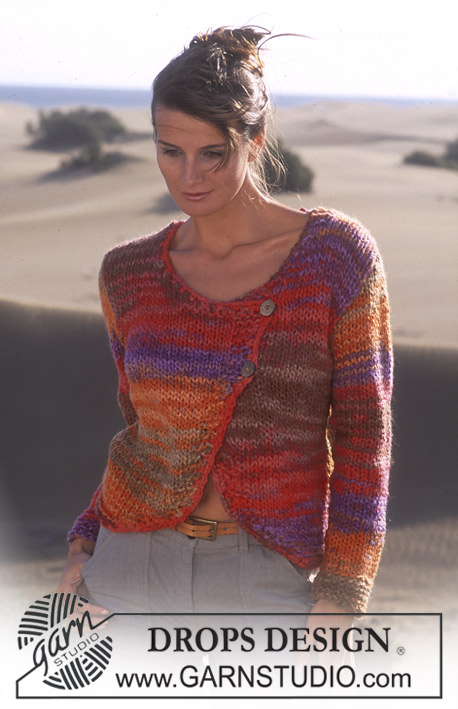
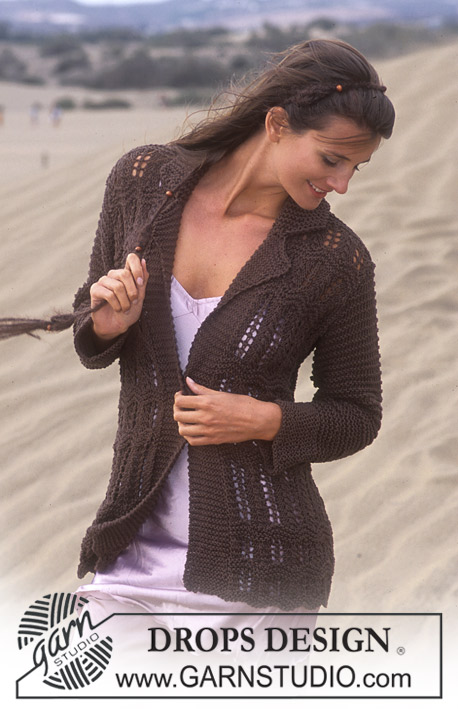
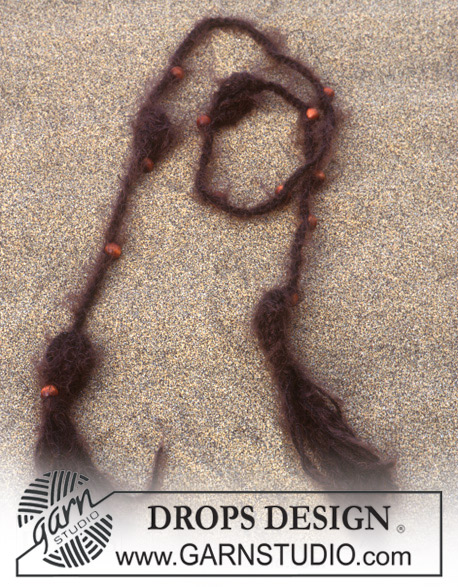
DROPS Long jacket with pattern in Paris and hair band in Symphony
DROPS 95-12 |
|||||||||||||||||||
|
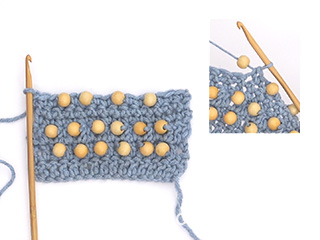
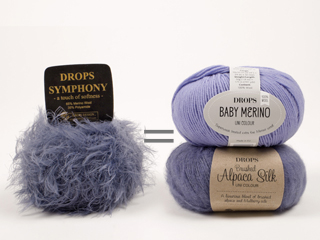
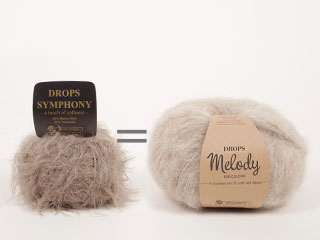
JACKET Knitting tension: 16 sts x 20 rows on needle size 5.5 mm in stocking stitch = 10 x 10 cm Garter stitch: Knit all rows Pattern: See diagram M.1 and M.2. The diagram shows the pattern from the right side. Knit pattern as follows: *M.1 in 4-4-4.5-4.5-4.5-5 cm, M.2, M.1 in 4-4-4.5-4.5-4.5-5 cm, M.2, M.1 in 9-10-10-11-12-12 cm, M.2*, repeat from *-* a total of 2 times. Now knit M.1 in 4-4-4.5-4.5-4.5-5 cm, M.2, M.1 in 4-4-4.5-4.5-4.5-5 cm and finish with M.2. Front band: knit in garter sts until finished measurements. Knit the 3 outermost sts in double thread throughout. Increasing tips (applies to collar): inc 1 st within the outermost st towards mid front by making a yo. On next row knit yo into back of st to avoid making a hole. Decreasing tips (applies to neckline): Decrease within all garter sts from the right side. Dec as follows before garter sts: K2 tog. Dec as follows after garter sts: slip 1 st as if to knit, K1, psso. Measuring tips: All measurements should be made while the garment is hanging. Back piece: Cast on 67-75-83-91-99-107 sts (inclusive of 1edge st each side) using 2 needles size 5.5 with Paris (to make sure the edge becomes elastic). Remove 1 needle and knit 4 rows garter st (1st row = right side). Knit next row as follows from the right side: 1 edge st, M.1A (= 5 sts), M.1B over the next 56-64-72-80-88-96 sts, M.1C (= 4 sts), 1 edge st. Continue in pattern – see explanation above. When piece measures 51-52-53-54-55-57 cm – see measuring tips - dec for armhole each side on every other row as follows: 3 sts 1 time, 2 sts 0-1-2-4-5-6 times and 1 st 2-3-4-4-5-6 times = 57-59-61-61-63-65 sts. Note! Knit sts not fitting into pattern after decreases in stocking sts. Make sure to keep to the correct number of sts by making as many yo’s as sts knitted tog. When there are 2 rows of garter sts left in pattern (piece measures approx 69-71-73-75-77-80 cm) cast off the middle 19-21-21-21-23-23 sts for neck = 19-19-20-20-20-21 sts left on each shoulder. Cast off after the last row in pattern, piece measures approx 70-72-74-76-78-81 cm. Left Front: Cast on 46-46-54-54-62-62 sts (inclusive of 1seam st at side and 12 edge sts towards mid front) using 2 needles size 5.5 with Paris. Remove 1 needle and knit 4 rows garter st (1st row = right side), but knit the 3 outermost sts towards mid front with double thread (use a separate ball and let the thread follow the piece as you progress). Now knit 2 rows stocking sts. NB! Remember 12 sts towards mid front in garter sts throughout. Knit next row as follows from the right side: 1 seam st, M.1A (= 5 sts), M1.B over 24-24-32-32-40-40 sts, M.1C (= 4 sts), and 12 front band sts. Read all of the following section before continuing: Collar: When piece measures 50-51-52-53-54-55 cm inc 1 st towards mid front on every 4th row – see Increasing tips – a total of 8 times. Knit inc sts in garter sts with double thread = 11 sts in double thread after all inc have been made. After the last inc (piece measures approx 64-65-66-67-68-69 cm), cast off the 10 outermost sts towards mid front on next row, on the following row cast on 10 new sts over the cast off sts (lapel). Continue in garter sts as before. Neckline: At the same time when piece measures 52-53-54-55-56-57 cm dec 1 st for neck on every other row – see Decreasing tips – a total of 5-2-5-2-6-2 times and then on every 4th row a total of 5-5-6-5-6-6 times. Knit sts not fitting into pattern in stocking sts. Armhole: At the same time when piece measures 51-52-53-54-55-56 cm dec for armhole as described for back piece. After all increases and decreases have been made there are 39-39-40-40-40-41 sts on needle (i.e. 19-19-20-20-20-21 sts on shoulder and 20 sts for collar). Continue in pattern and collar sts as before. After the last row in pattern cast of the outermost 19-19-20-20-20-21 sts for shoulder = 20 sts left. Collar: Continue over the 20 collar sts with the 11 outermost sts in double thread. Knit as follows: *4 rows garter sts over all sts, 2 rows garter sts over only the outermost 11 sts*, repeat from *-* until collar measures 6-6.5-6.5-6.5-7-7 cm (it will measure approx 12-13-13-13-14-14 cm on the outer side). Put sts on a thread. Right front piece: As left front piece, but mirrored. Sleeve: Cast on 44-44-46-46-48-48 sts (inclusive of 1 seam st each side) on needle size 5. Knit garter sts and dec 4 sts evenly on the 3rd row = 40-40-42-42-44-44 sts. When piece measures 10 cm change to needle size 5.5 and continue in M.3 until finished measurements. At the same time after the last row in garter sts, inc 1 st each side on every 5-3.5-3-2.5-2.5-2 cm a total of 8-10-11-13-13-15 times = 56-60-64-68-70-74 sts. When piece measures 47-45-44-43-42-41 cm cast off for sleeve cap each side on every other row as follows: 3 sts 1 time, 2 sts 3 times, 1 st 0-1-2-4-6-7 times, and then 2 sts each side until piece measures 53-53-53-54-55-55 cm, now dec 3 sts each side and cast off remaining sts on next row, piece measures approx 54-54-54-55-56-56 cm. Assembly: Sew shoulder seams. Sew sts from threads on collar together and sew collar to back piece with the seam on the right side. Set in sleeves and sew sleeve and side seams within 1 seam st. Close the jacket with a broche. HAIRBAND Length: 105 cm + tassels Materials: DROPS Symphony from Garnstudio 50 g colour no. 03, brown DROPS crochet hook size 5 mm 12 wooden beads Crochet ch’s whilst inserting beads in the chain when piece measures 5-12-16-21-31-39-45-57-76-86-93 and 104 cm as follows: Crochet 1 ch, pull st 1-1.5 cm long, pull st-loop through a bead (use a pin to push it through), put crochet hook through st again, make a yo, pull yo through st, continue with ch’s. After the last bead, make a ch and cut the thread. Now crochet 4 bubbles as follows: Crochet 5 ch (= 1 ch + 1 dtr), 6 dtr in the first ch just crochet, turn the piece. 4 ch (= 1 dtr), now crochet 1 dtr in each of the 6 dtr from previous row, but crochet the dtr’s together as follows: crochet 1 dtr in first dtr but wait with the last yo and pull-through (= 2 sts on needle), crochet 1 dtr in next dtr but wait with the last yo and pull-through (= 3 sts on needle), continue like this until all 6 dtr have been crochet (= 7 sts on needle). Pull the last yo on the last dtr through all sts on needle. Cut the thread. Sew on a bubble each end of the hair band and place the other 2 approx 25 cm in from each end (each bubble will have a opening on one side, sew this side to the chain). Tassels: Cut 7 threads Symphony, each 20 cm long, fold them double, and attach to one end of hair band. Repeat other end. |
|||||||||||||||||||
Diagram explanations |
|||||||||||||||||||
|
|||||||||||||||||||

|
|||||||||||||||||||
|
Have you made this or any other of our designs? Tag your pictures in social media with #dropsdesign so we can see them! Do you need help with this pattern?You'll find tutorial videos, a Comments/Questions area and more by visiting the pattern on garnstudio.com. © 1982-2024 DROPS Design A/S. We reserve all rights. This document, including all its sub-sections, has copyrights. Read more about what you can do with our patterns at the bottom of each pattern on our site. |
|||||||||||||||||||


With over 40 years in knitting and crochet design, DROPS Design offers one of the most extensive collections of free patterns on the internet - translated to 17 languages. As of today we count 304 catalogues and 11422 patterns - 11422 of which are translated into English (UK/cm).
We work hard to bring you the best knitting and crochet have to offer, inspiration and advice as well as great quality yarns at incredible prices! Would you like to use our patterns for other than personal use? You can read what you are allowed to do in the Copyright text at the bottom of all our patterns. Happy crafting!
Comments / Questions (25)
On écrit qu'à 52cm on augmente côté bande encolure 8 fois 1 m. et en même temps à 54 cm, côté bande encolure, on doit faire des diminutions. Est-ce que les diminutions sont faites dans les m au pt mousse de la bande encolure ou directement dans les m du motif situé à côté de celle-ci ? Dans les détails des diminutions pour l'encolure il est écrit de diminuer juste avant/après les m au pt mousse. Ce n'est pas clair pour moi ? Merci !
02.02.2020 - 01:19DROPS Design answered:
Bonjour Mme Lathier, les augmentations du col se font au point mousse, et on diminue pour l'encolure les mailles du point fantaisie avant/après les mailles point mousse = les mailles de bordure devant + les mailles augmentées pour le col - cf DIMINUTIONS (pour l'encolure). Bon tricot!
03.02.2020 - 09:59Hallo, klopt het dat aan het begin van het voorpand na de 4 nld ribbelsteek nog 2 nld trocotsteek gebreid moeten worden? Bij het rugpand is dat nl niet zo. Ik heb het idee dat het patroon daardoor niet mooi zal doorlopen aan de zijkanten. Ik hoor het graag.
29.07.2018 - 22:33DROPS Design answered:
Dag Chiqui, Op zowel het voor- als het achterpand, brei je 4 naalden (= 2 ribbels) ribbelsteek. Na deze 4 naalden op het voorpand brei je 2 naalden tricotsteek.
31.07.2018 - 11:39Hallo, Kan iemand mij helpen met het afkanten voor het armsgat? ik heb het wel 15 keer geprobeerd, maar ik kom niet uit met de steken. Ik brei over 75 steken. Ik kom nl niet uit met het patroon. Alvast bedankt.
23.07.2018 - 23:08DROPS Design answered:
Dag Chiqui, Je begint aan de ene kant met het afkanten van 3 steken, dan op de teruggaande naald kant je ook 3 steken af (= 1x3 steken aan beide kanten), vervolgens kant je aan beide kanten 2 steken af en dit doe je drie keer. Zo ga je verder met het afkanten aan beide kanten volgens beschrijving.
26.07.2018 - 11:14Ik ben begonnen met het rugpand en ik ben bij de minderingen voor de armsgaten. Het ajourmotief komt niet mooi uit als ik afkant voor de armsgaten. Het lijkt of het een beetje verspringt. Kunt u mij uitleggen hoe ik kan zorgen dat het ajourmotief mooi doorloopt. Ik moet eerst aan weerszijden 1x 3 st afkanten, daarna 1x 2st, 3 x 1st. Ik moet 3 steken afkanten, moet ik dan 1 kantst breien en eerst de 2 st r samenbreien en dan afkanten of moet ik 1 kantst en dan 3 steken recht afkanten?
18.07.2018 - 21:16Zit er 1 st r tussen de 2 omslagen?, want dan kom ik wel uit met de steken. Dank alvast.
01.07.2018 - 21:40DROPS Design answered:
Dag Chiqui, Ja, dat klopt; in M1 zit er 1 steek tussen de 2 omslagen.
05.07.2018 - 15:39Ik begrijp patroon M1 niet. Het telpatroon bestaat uit 17 st, is dit incl. De 2 kaatst.? Ik hou nl 13 steken over op de terugkerende naald.
01.07.2018 - 18:43DROPS Design answered:
Dag Chiqui, Telpatroon M.1 bestaat uit drie delen, namelijk M.1a, M.1b en M.1c. Je breit eerst M.1a dan herhaal je steeds M.1b en op het einde brei je M.1c Het telpatroon is exclusief kantsteken.
01.07.2018 - 19:40Bonjour Je ne comprends pas bien le motif M1B, il y à 2 jetés à la suite??? ou les jetés sont séparés par une maille endroit??? comme je les vois côte à côte sur le dessin... Merci de votre aide Miosotis
27.05.2015 - 18:35DROPS Design answered:
Bonjour Miosotis, dans M1, les diagrammes se décomposent ainsi: M1A= 2 m ens à l'end, 2 m end, 1 jeté, 1 m end M1B= 1 jeté, 2 m end, glisser 1 m à l'end, 2 m ens à l'end, passer la m glissée par-dessus la m tricotée, 2 m end, 1 jeté, 1 m end M1C: 1 jeté, 2 m end, glisser 1 m à l'end, 1 m end, passer la m glissée par-dessus la m tricotée. Ainsi, chaque diminution est compensée par 1 jeté = le nombre de mailles reste le même. Bon tricot!
28.05.2015 - 09:40Pattern says cast on 57 sts for XS. Do I cast on 59 for the edge sts? On first row of the pattern it says M.1a =5 sts, M.1b over next 56 sts and then M.1c =4 sts. That is more sts than I cast on. When switching from M.1a to M.1b to M.1c, there is a yarn over in between each section. When I repeat M.1b across, do I yarn over on both sides of the repeat or is the yarn over between a,b&c only done on a&c? Thank you, Linda Linda...:)
28.07.2014 - 04:33DROPS Design answered:
Dear Linda, I'm sorry there is a typo in the number of sts in size XS, you should cast on 67 sts - this will be corrected as soon as possible. Thank you. In M.1, the 2nd YO in M.1B is the first when you repeat the pattern, M.1C starts with 1 YO. Happy knitting!
28.07.2014 - 09:52Hallo, ich habe eine Frage: Kann es sein, dass man die Maschenaufnahme für den Kragen nicht jede 4. Reihe sondern jede 2. Reihe durchführen muss? Zumindestens bei mir kommt, das momentan so gar nicht hin. Bis ich alle Aufnahmen abgeschlossen habe bin ich schon im letzten M2 angelangt. Und auf dem Foto sieht es aus, als würde nach der Aufnahme nochmal M1 und dann erst M2 folgen. Viele Grüße!
27.11.2013 - 10:06DROPS Design answered:
Liebe Lena, ich habe mit dem norwegischen Original verglichen und es stimmt überein. Da es eine ältere Anbleitung ist, haben wir das Modell leider nicht mehr hier. Schreiben Sie uns bitte Ihre Erfahrungen.
27.11.2013 - 13:53Gentile drops, ho bisogno di un vostro aiuto per realizzare il colletto di questo giacchetto, ho comprato il vostro filato ho realizzato tutti i pezzi comprese le maniche, ma non riesco a capire come devo procedere dopo aver intrecciato le 20 maglie x la spalla. se lavoro su tutte le maglie 4 ferri a legaccio e poi solo sulle 11 esterne 2 ferri a legaccio come faccio a proseguire a maglia legaccio su tutte le maglie? non riesco a capire.Grazie Anna
12.04.2012 - 15:03DROPS Design answered:
Gentile Anna, credo di capire il problema. E' come lavorare i ferri accorciati (ved. video Ferri accorciati base sul ns sito). 4 f a leg. su tutte le 20 m, 2 f a leg. solo sulle 11 m più esterne, poi si continua su tutte le 20 m di nuovo. Si forma il colletto in questo modo. Mi faccia sapere se ha capito. italy@garnstudio.com
13.04.2012 - 13:26