
Popular categories
Looking for a yarn?


|
||||||||||||||||||||||
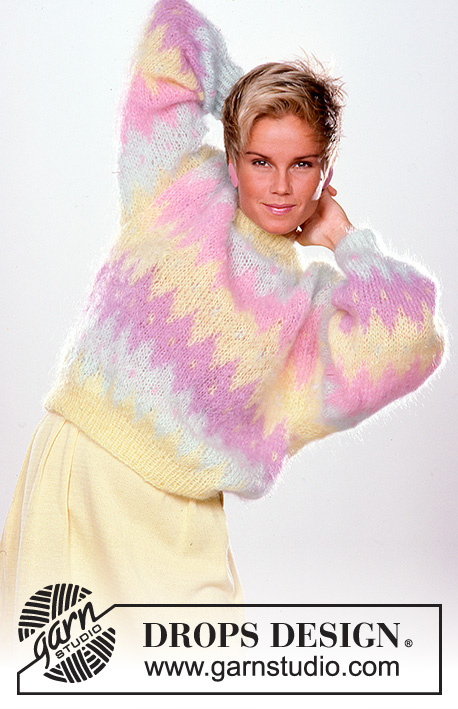
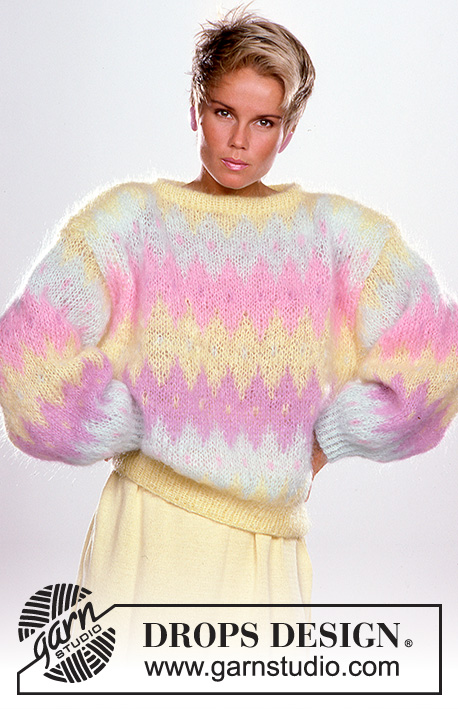
Sugar Rush |
||||||||||||||||||||||
 |
 |
|||||||||||||||||||||
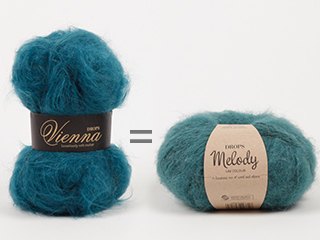
DROPS sweater with harlequin pattern in Vienna or Melody. Size S/M – M/L.
DROPS 4-17 |
||||||||||||||||||||||
|
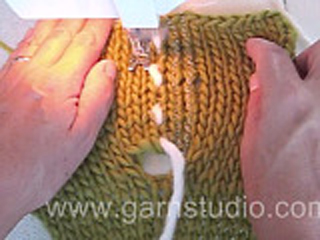
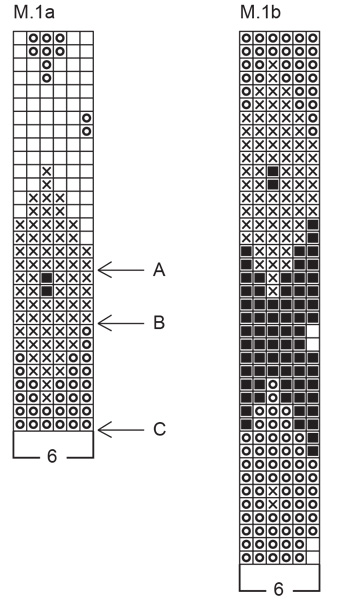
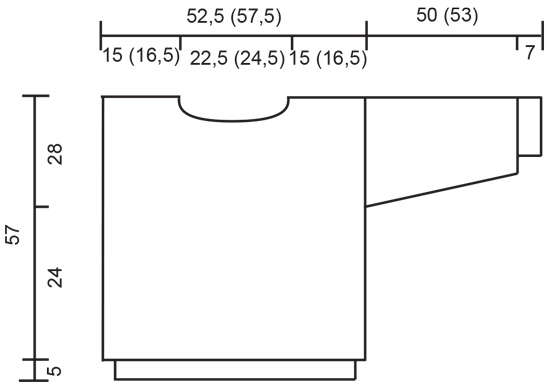
Rib: * K1 into back of loop, P1 *, repeat from *-*. Pattern: See diagram. The diagram shows the pattern from the RS and the entire pattern is worked in stockinette st. 1 square = 1 st x 1 row Erme start = beg sleeve Bolen start = beg body piece Body: The jumper is worked in the round on circular needle and cut for armholes afterwards. Cast on 126-138 sts on circular needle size 3 mm / US 2.5 with yellow/vanilla and work 5 cm / 2" rib. Change to circular needle size 7 mm / US 10.75 and continue in pattern – see diagram. When piece measures 54 cm/21¼" - make sure the pattern is identical on front and back piece – divide the piece in 2 and complete each piece separately. Front piece: Bind off the middle 11-13 sts for neck and complete each side separately. Bind off 8 sts on neckline on next row and bind off the remaining 18-20 sts on shoulder when piece measures 57 cm / 22½". Back piece: Bind off the middle 27-29 sts when piece measures 55 cm/21¾" and complete each side separately. Bind off all sts on shoulder when piece measures 57 cm / 22½". Sleeve: Worked in the round. Cast on 38 sts on double pointed needles size 3 mm / US 2.5 with mint/light sea green and work 7 cm / 2¾" rib. Change to small circular needle size 7 mm / US 10.75 and continue in pattern, at the same time inc 22 sts evenly on first round = 60 sts. Now inc 2 sts mid under arm on every 7-8 round a total of 8 times = 68 sts. After the pattern repeat piece measures approx 50-53 cm. Now work 5 rounds in reverse stockinette st in yellow/vanilla (for sewing sleeve to body piece), at the same time inc 2 sts mid under arm on every other round. Bind off. Assembly: Insert a marking thread each side to mark the armhole = approx 28 cm. Sew 2 seams on a sewing machine around the marking thread, 1st seam = ½ st from the thread, 2nd seam = ½ st from the 1st seam. Cut for armholes. Sew the shoulder seams. Pick up approx 54-60 sts round the neck on small circular needle size 6 mm / US 10 with yellow/vanilla and work 6 cm / 2⅜" stockinette st, bind off and fold edge double towards WS and fasten. Set in sleeves as follows: sew the last row in stockinette st on sleeves to row after machine seam on armhole. Turn jumper inside out and fasten piece in reverse stockinette st on sleeve to body piece. |
||||||||||||||||||||||
Diagram explanations |
||||||||||||||||||||||
|
||||||||||||||||||||||
|
||||||||||||||||||||||
|
||||||||||||||||||||||
|
Have you made this or any other of our designs? Tag your pictures in social media with #dropsdesign so we can see them! Do you need help with this pattern?You'll find tutorial videos, a Comments/Questions area and more by visiting the pattern on garnstudio.com. © 1982-2024 DROPS Design A/S. We reserve all rights. This document, including all its sub-sections, has copyrights. Read more about what you can do with our patterns at the bottom of each pattern on our site. |
||||||||||||||||||||||


With over 40 years in knitting and crochet design, DROPS Design offers one of the most extensive collections of free patterns on the internet - translated to 17 languages. As of today we count 304 catalogs and 11422 patterns - 11417 of which are translated into English (US/in).
We work hard to bring you the best knitting and crochet have to offer, inspiration and advice as well as great quality yarns at incredible prices! Would you like to use our patterns for other than personal use? You can read what you are allowed to do in the Copyright text at the bottom of all our patterns. Happy crafting!
Comments / Questions (12)
Jeg har nå strikket så arbeidet måler 30 cm, men har kommet frem til delen av mønsteret på figuren der jeg ser på bildet at det er delt til for- og bakstykke med tanke på hvilken farge jeg er på, men i følge oppskriften har jeg vel igjen over 20 cm før jeg skal dele til ermer, noe jeg ikke forstår helt?
04.02.2023 - 15:14DROPS Design answered:
Hei Isabella. Dette er en gammel oppskrift og da delte man gjerne ikke til for og bakstykket ved ermene, men man strikket helt opp til halsen og strikket frem og tilbake til halskant. Se i begynnelsen av oppskriften der det står: Bolen: Genseren strikkes på rundp og klippes opp til ermer. Da stemmer målene som er oppgitt. mvh DROPS Design
06.02.2023 - 09:10Hello, can You help me with the Sleeve part? After starting the diagram we have 60st. I need to increase 2st, every 8 row, right? It gives me 16 st more (76st), not 8, like the pattern says (68st). So, maybe I should increase only 1st every 8 rows?
28.01.2023 - 19:16DROPS Design answered:
Dear Natalia, there seems to be a typo in the pattern. You should only increase 1st every 8 rows. So you will have 68 sts in total. You mark the mid under the arm and you will increase 1 stitch next to the marker. Happy knitting!
29.01.2023 - 22:35Bonjour, désolée je n'ai pas du bien m'expliquer. Je souhaite réaliser le pull SUGAR RUSH. Je vais utiliser la laine MELODY. Il est indiqué : 100 g - 100 g pour 2 coloris et 50 g - 50 g pour les 2 autres. Dois-je comprendre qu'il me faut commander 2 x 200 g et 2 fois 100 g pour la totalité du pull ? Merci à vous.
19.10.2022 - 15:14DROPS Design answered:
Bonjour Mme Adam, le pull se tricote en 2 tailles et chacune des indications concerne chaque taille, mais pour ce modèle, il faut la même quantité pour chaque taille autrement dit: 100 g Melody col. 14 + 100 g Melody n°09 + 50 g Melody n°17 + 50 g Melody n°06 (soit 6 pelotes au total, toutes couleurs confondues). Bon tricot!
19.10.2022 - 16:25Bonjour, je souhaite comprendre quelle quantité de laine j'ai besoin lorsqu'il est affiché 100 g - 100 g ou 50 g - 50 g pour chaque laine ? Je souhaite passer commande et ne pas me tromper. Merci à vous. Cordialement.
17.10.2022 - 11:25DROPS Design answered:
Bonjour Mme Adam, tout dépend de la laine choisie, DROPS Melody par exemple se présente sous forme de pelote de 50 g alors que DROPS Kid-Silk se présente sous forme de pelote de 25 g. (cliquez sur les noms pour en savoir plus sur chacune des laines). Divisez la quantité indiquée par le poids de la pelote pour savoir le nombre de pelotes dont vous aurez besoin. Bon tricot!
17.10.2022 - 11:48Kan denne strikkes med raglan/ rundstrikk slik at en slipper å sy i ermer
02.04.2022 - 23:36DROPS Design answered:
Hej Bruun, du kan finde en genser i DROPS Melody med rundt ok og så strikke samme mønster, MEN det bliver jo ikke samme 80-er stil :)
04.04.2022 - 11:11Strikkes der med enkelt tråd Sucker rush sweater med harlequin mønster Melodygarn
03.02.2022 - 22:39DROPS Design answered:
Hej Inge, ja det stemmer der strikkes løst med enkelt tråd, du skal have 12 masker på 10 cm :)
04.02.2022 - 13:45Finn ikkje noko diagram her?
05.01.2022 - 18:09DROPS Design answered:
Hei Ane, Du finner diagrammene på bunnen av oppskriften. God fornøyelse!
06.01.2022 - 07:59Har strikket første erme. Som skal være 50 cm når mønsteret er strikket. Mitt erme ble litt over 40 cm. Bolen stemte på cm, og har ikke strikket fastere på ermet. Merkelig. I tillegg stemmer mønsteret på ermet overens med str på mønsteret på bolen.
10.11.2021 - 20:56I denne oppskriften brukes det 4 nøster av Viennea, tilsvarer det 4 nøster Melody?
02.11.2015 - 21:15DROPS Design answered:
Hej. Det är 95 m på 50 g Vienna, och 140 m på 50 g Melody så du behöver alltså inte lika många nystan av Melody som av Vienna. Här kan du läsa om hur du gör för att byta ut ett garn mot ett annat. Information om garn som utgått hittar du här. Lycka till!
03.11.2015 - 08:06J Kuiper wrote:
Niet op een rond brei naald beschrijving maar gewone brei pennen beschrijving is die er ook?
14.10.2015 - 16:15DROPS Design answered:
Hoi. Lees hier hoe u kunt aanpassen van rondbreinaalden naar rechte naalden
15.10.2015 - 09:23