
Popular categories
Looking for a yarn?


|
||||||||||
DROPS 87-15 |
||||||||||
|
|
||||||||||
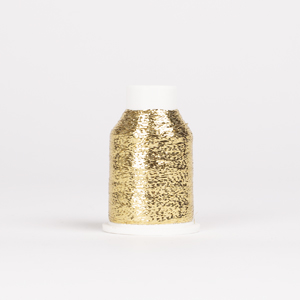
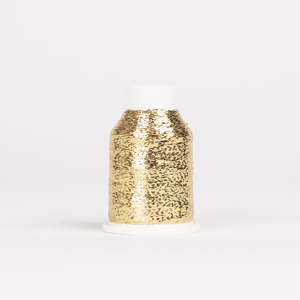
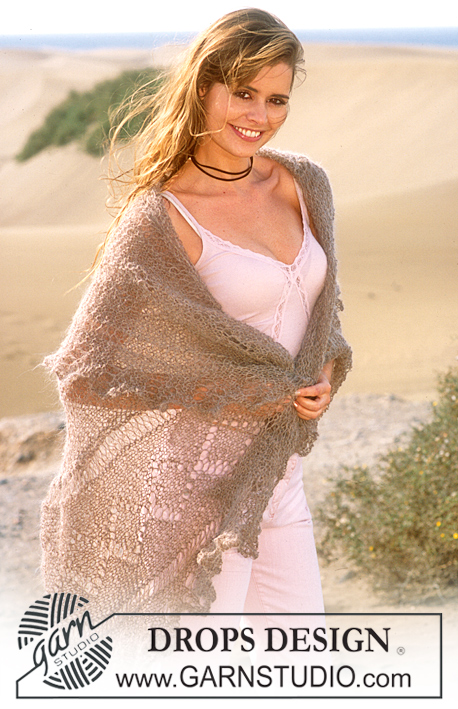
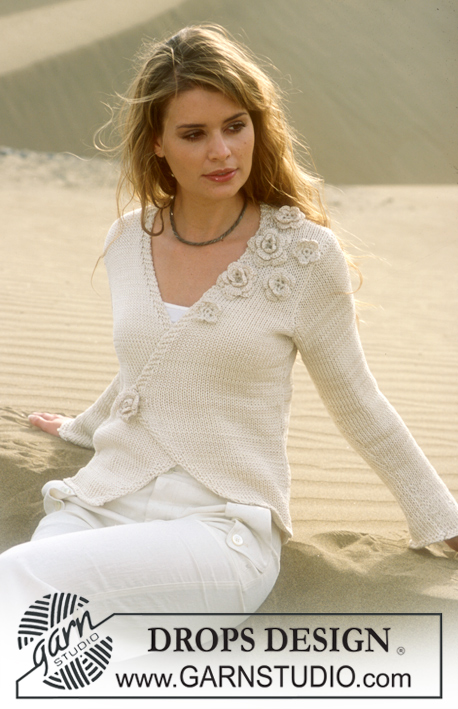
DROPS Bolero in Alpaca, Vivaldi and Glitter.
DROPS 87-15 |
||||||||||
|
Gauge: 15 sts x 21 rows with 1 strand of each yarn (3 strands) on larger needles in stockinette st = 10 x 10 cm. Pattern: See charts. The pattern is seen from the right side. The chart on the left (M.2) is Pattern 2. The chart on the right shows Patterns 1A and 1B (M.1A and M.1B) «18 p/v = ca 9 cm» – 18 rows = approx. 9 cm. Back: Cast on 53-59-65-75-85 sts on smaller needles with 1 strand of each yarn (= 3 strands). Knit 2 rows garter st, change to larger needles and stockinette st. When the piece measures 5 cm P 1 row (right side), then 2 rows stockinette st, K 1 row (wrong side) and 2 rows stockinette st. Read the entire next section before knitting: Establish pattern on the next row as follows from right side: K 1 (edge st knit in garter st), 3-0-3-2-1 sts stockinette st, Pattern 1A over the following 42-54-54-66-78 sts, Pattern 1B (= 3 sts), 3-0-3-2-1 sts stockinette st and K 1 (edge st knit in garter st). Continue in pattern as established. When Pattern 1 is complete repeat Pattern 2 a total of 2 times (Pattern 2 starts inside of 1 edge st + the increased sts at each side (see instructions below) + 3-0-3-2-1 sts stockinette st at each side so that the lace pattern in Pattern 2 comes between the 2 lace patterns in Pattern 1). After Pattern 2 continue in stockinette st to finished measurements. Side inc: When the piece measures 9 cm inc 1 st at each side a total of 6-6-6-5-4 times: Sizes S + M + L: every other row Size XL: every 3 rows, and Size XXL: every 4 rows = 65-71-77-85-93 sts – knit the increased sts in stockinette st. Armhole: When the piece measures 17-18-19-20-21 cm bind off for armhole at each side every other row: 3 sts 1 time, 2 sts 0-1-2-3-4 times and 1 st 3-3-2-3-5 times = 53-55-59-61-61 sts. When the piece measures 34-36-38-40-42 cm bind off the center 11-11-11-13-13 sts for the neck. On the next row dec 1 st at each neck edge = 20-21-23-23-23 sts remain on each shoulder. Bind off when the piece measures 36-38-40-42-44 cm. Right front: Cast on 46-49-52-57-62 sts on smaller needles with 1 strand in each yarn (= 3 strands). Knit 2 rows garter st, change to larger needles and stockinette st but keep the outermost st at the center front edge in garter st throughout. When the piece measures 5 cm, P 1 right side row (keep edge st at the center front edge in garter st as before), 2 rows stockinette st and K 1 wrong side row. Knit the next row as follows from right side: bind off the outermost 19 sts at the center front edge for tie, then K 1 (edge st knit in garter st), K 1, P 1, K 1, P 1 (= 5 edge sts) and K 22-25-28-33-38 = 27-30-33-38-43 sts. P 1 row back, keeping the outermost 5 edge sts at the center front in rib and 1 garter st at the edge as established. Read the entire next section before knitting: Pattern: Knit the next row as follows (right side row): 5 edge sts as before, 3 sts stockinette st, Pattern 1A over the following 12-18-18-24-30 sts, Pattern 1B (= 3 sts), 3-0-3-2-1 sts stockinette st and K 1 (edge st knit in garter st). Continue in pattern as established. When Pattern 1 is complete repeat Pattern 2 a total of 2 times (start Pattern 2 inside of 5 edge sts and 3 sts in stockinette st from center front edge so that the lace pattern in Pattern 2 comes between the 2 lace patterns in Pattern 1). After Pattern 2 continue in stockinette st to finished measurements. Side inc: When the piece measures 9 cm inc at the side as on back = 33-36-39-43-47 sts – knit the increased sts in stockinette st. Armhole: When the piece measures 17-18-19-20-21 cm bind off for armhole at the side as on back = 27-28-30-31-31 sts. When the piece measures 36-38-40-42-44 cm bind off the 20-21-23-23-23 sts on shoulder. Continue neckband over the remaining 7-7-7-8-8 sts as before. When neckband measures approx. 4-4.5 cm from shoulder (the edge should stretch slightly when sewn to neckband) put sts on a st holder. Left front: Cast on and knit the same as the right reversing shaping. Sleeve: Cast on 38-40-42-44-46 sts on smaller needles with 1 strand in each yarn (= 3 strands). Knit 2 rows garter st, change to larger needles and stockinette st, decreasing 4 sts evenly distributed on the 1st row = 34-36-38-40-42 sts. Read the entire next section before knitting: When the piece measures 10 cm, P 1 right side row, 2 rows stockinette st, K 1 wrong side row, and 2 rows stockinette st. Pattern: Establish pattern on the next row as follows (right side row): K 1 (edge st knit in garter st), 1-2-0-1-2 sts stockinette st, Pattern 1A over the following 30-30-36-36-36 sts, 1-2-0-1-2 sts stockinette st and K 1 (edge st knit in garter st). Continue the pattern as established. When Pattern 1 has been knit 1 time (18 rows), repeat Pattern 2 a total of 3 times (54 rows). Place Pattern 2 above Pattern 1. After Pattern 2 continue in stockinette st to finished measurements. When the piece measures 14 cm inc 1 st at each side every 3.5-3.5-3-2.5-2.5 cm a total of 10-10-11-12-13 times = 54-56-60-64-68 sts. When sleeve measures 49-48-48-47-46 cm bind off for sleeve cap at each side every other row 3 sts 1 time, 2 sts 2-2-2-3-3 times and 1 st 2-3-3-2-4 times, continue to bind off 2 sts at each side until piece measures 56-56-56-56-57 cm, then bind off 3 sts 1 time at each side. Bind off the remaining sts, the piece measures approx. 57-57-57-57-58 cm. Assembly: sew shoulder seams. Neckband: Join neckband at center back with Kitchener st. Sew the edge to back neckband. Sew in sleeves. Sew sleeve and side seams using edge sts as a seam allowance. |
||||||||||
Diagram explanations |
||||||||||
|
||||||||||

|
||||||||||
|
Have you made this or any other of our designs? Tag your pictures in social media with #dropsdesign so we can see them! Do you need help with this pattern?You'll find tutorial videos, a Comments/Questions area and more by visiting the pattern on garnstudio.com. © 1982-2024 DROPS Design A/S. We reserve all rights. This document, including all its sub-sections, has copyrights. Read more about what you can do with our patterns at the bottom of each pattern on our site. |
||||||||||


With over 40 years in knitting and crochet design, DROPS Design offers one of the most extensive collections of free patterns on the internet - translated to 17 languages. As of today we count 304 catalogues and 11422 patterns - 11422 of which are translated into English (UK/cm).
We work hard to bring you the best knitting and crochet have to offer, inspiration and advice as well as great quality yarns at incredible prices! Would you like to use our patterns for other than personal use? You can read what you are allowed to do in the Copyright text at the bottom of all our patterns. Happy crafting!
Comments / Questions (32)
Je voulais savoir si les augmentations du dos C est à 9 cm à partir du MOTIF M1 Ou du début du tricot
13.02.2024 - 11:10DROPS Design answered:
Bonjour Mme Delrieu, les 9 cm de hauteur totale se mesurent à partir du rang de montage. Bon tricot!
14.02.2024 - 07:14Bonjour Lorsque vous parlez des augmentations sur les cotes à 9cmnde hauteur total C est après M1 ou du début du tricot
13.02.2024 - 11:06DROPS Design answered:
Bonjour Mme Delrieu, mesurez ces 9 cm à partir du rang de montage = c'est bien la hauteur totale, depuis le début. Bon tricot!
20.02.2024 - 09:00Ich verstehe etwas zum Modell 87-15 nicht. Bei den beiden Vorderteilen sollen die 23 Schultermaschen nach 42 cm bei meiner Größe von außen abgekettet werden. Das ist alles noch klar für mich. Dann die inneren 8 Maschen noch 4 cm in die Höhe stricken, auf Hilfsnadel legen. Wo soll ich dann die Halskante annähen, wo doch das Rückenteil oben an der Schulter fast gerade abgekettet wurde. Ich hoffe, sie verstehen, was ich meine. Liebe Grüße von Frau Haecker.
19.03.2023 - 20:47DROPS Design answered:
Liebe Frau Haecker, die Halsblende stricken Sie separat weiter und nähen Sie zusammen und am Hals wie in diesem Video gezeigt - diese Maschen stricken Sie wie zuvor, im Video wird es kraus rechts gestrickt, Video zeigt aber nur die Technik. Viel Spaß beim stricken!
20.03.2023 - 09:16Guten Tag,ich brauche einmal Hilfe. In den mittleren Teil,ab "Gurt",komme ich nicht klar . Wie muss ich das verstehen bis "Muster" Muss ich erst 19Maschen abketten und dann kurz danach wieder 22Maschen auf der linke Nadel stricken ? Bitte um Hilfe. Liebe Grüße Christa
28.08.2021 - 17:45DROPS Design answered:
Liebe Frau Kujawa-Hüsch, die 19 M werden zuerst am Anfang der Hinreihe abgekettet, die Reihe bis zur Ende stricken, wenden und die Rückreihe links mit 5 BlendeMaschen + 1 Randmasche kraus rechts stricken. Dann zuerst Muster M.1 dann M.2 stricken. Gleichzeitig wird es an der Seite zugenommen und für das Armloch abgekettet. Kann das Ihnen helfen?
30.08.2021 - 07:32Bonjour, je cherche un équivalent pour ce magnifique patron. Que me suggérez vous? J'ai essayé le convertisseur mais comme deux laines sont utilisées, je ne sais pas comment chercher. Merci
21.11.2020 - 20:45DROPS Design answered:
Bonjour Manon! Si le modèle requiert plus d'un fil, il vous faudra recommencer pour chacun des fils que vous souhaitez remplacer. Pex. Pour la taille S: vous pouvez remplacer 150g DROPS Alpaca (1 fil) par: 148g Nord (1 fil), 123g Fabel (1 fil), 144g Delight (1 fil), 63g Kid-Silk (1 fil), 120g Flora (1 fil), 157g Safran (1 fil), 144g Baby Merino (1 fil), 150g BabyAlpaca Silk (1 fil). Vous pouvez remplacer 100g DROPS Vivaldi (1 fil) par: 100g Brushed Alpaca Silk (1 fil), 200g Alpaca Bouclé (1 fil), 187g Air (1 fil), 140g Kid-Silk (2 fils). Bon tricot!
22.11.2020 - 20:03Vorrei sapere se il motivo M2 sul dietro va lavorato su tutto il ferro. Se sì, quante maglie vanno lasciate tra un motivo e l'altro? Nello schema M2 sono indicati 8 quadretti mentre nello schema M1a/b ce ne sono solo 3. Grazie.
31.10.2019 - 17:37DROPS Design answered:
Buongiorno Patrizia. Deve lavorare lo schema M2 sulle maglie del dietro, ad eccezione della m vivagno, delle maglie aumentate e del numero di maglie da lavorare a maglia rasata indicate per la sua taglia. Il motivo traforato di M2 si deve posizionare a metà di due motivi traforati di M1. Il motivo M2 si lavora su 12 m, arrivata all’ultima maglia, riprende con la prima. Buon lavoro!
01.11.2019 - 09:10Buongiorno,mi piacerebbe poter eseguire il modello con maniche a 3/4, come posso ricavare i punti necessari? Grazie
22.02.2019 - 15:08DROPS Design answered:
Buonasera Tiziana, per un'assistenza personalizzata e adatta alle sue modifiche le suggeriamo di rivolgersi al suo rivenditore DROPS di fiducia. Buon lavoro!
19.08.2019 - 18:20Bonjour Madame, Je crois qu'il y a une erreur de frappe pour le nombre de mailles à monter pour les manches pour la taille S : Il serait plus juste que ce soit 38 mailles au lieu de 28 comme indiqué. Merci pour votre confirmation.
24.11.2018 - 01:54DROPS Design answered:
Bonjour Mme Vu, c'est exact, il faut bien monter 38 m en taille S, la correction a été faite, merci. Bon tricot!
26.11.2018 - 07:471. Instructions for pattern says that chart on the left M.2 is Pattern 2 and chart on the right is Patterns 1A and 1B, this is the reverse of the actual presentation of the charts. 2. also, i had selected language English (US/in) but all of the instructions per se are in cm.
02.07.2017 - 17:50DROPS Design answered:
Dear Mrs Lerner, M.1 A/B and M.2 are the correct diagrams. Measurements in inches will be added, thanks for your feedback. Happy knitting!
03.07.2017 - 10:18Bonjour, par quelle qualité peut-on remplacer la laine vivaldi? merci
27.03.2015 - 11:21DROPS Design answered:
Bonjour Mme Boulogne, Vivaldi appartenait au groupe C de nos qualités, DROPS Brushed Alpaca Silk est une bonne alternative, cliquez ici pour calculer la quantité nécessaire (poids/métrage) lorsque vous choisissez une alternative. Votre magasin DROPS pourra vous aider et vous conseiller si nécessaire. Bon tricot!
30.03.2015 - 16:17