DROPS Ull-Tweed
DROPS Ull-Tweed
100% Wool
Discontinued
find alternatives
DROPS SS24

Warm Memories Vest

DROPS V-neck Vest / slipover in Ull-Tweed or Karisma (men’s and children’s sizes)

DROPS 70-7
MEN’S VEST:

Sizes: M - L -XL - XXL
Finished measurements: 110-118-126-134 cm

Materials: DROPS ULL-TWEED from Garnstudio
400-450-500-500 g. col. no. 02, brown.

Or use:
DROPS KARISMA from Garnstudio
450-500-550-550 g. col. no. 56, dark brown.

DROPS 3 mm and 4.5 mm needles, or sizes needed to obtain correct gauge.
DROPS 3 mm short circular needles (for neck), or size needed to obtain correct gauge.

-------------------------------------------------------

Alternative Yarn – See how to change yarns here
Yarn Groups A to F – Use the same pattern and change the yarn here
Yarn usage using an alternative yarn – Use our yarn converter here

-------------------------------------------------------

DROPS Ull-Tweed
DROPS Ull-Tweed
100% Wool
Discontinued
find alternatives

Pattern instructions

NOTE: This pattern is written in British English. All measurements in charts are in cm. For conversion from cm to inches - click here. There are different terms for crocheting in British and American English. If this pattern includes crochet, click for "crochet terms" here. For this pattern in American English, please click here.
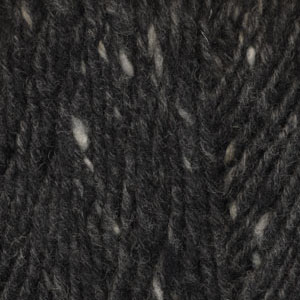
MEN’S VEST:
Gauge: 19 sts x 24 rows on larger needles in stockinette st = 10 x 10 cm
Garter st, when knitting flat: Knit all sts, all rows.
Rib: * K 2, P 2 *, repeat from * - *.

Front: Cast on 106-114-122-130 sts on smaller needles. Knit 2 rows garter st, then knit rib, keeping 1 edge st in garter st at each side. When band measures 5.5 cm knit 2 rows garter st over all sts. Change to larger needles and stockinette st. When the piece measures 35-36-37-38 cm bind off for armhole at each side every other row: 4 sts 1-1-1-1 time, 3 sts 1-1-2-2 times, 2 sts 2-3-3-4 times and 1 st 4-4-3-3 times. At the same time when the piece measures 45-46-48-49 cm bind off the center 2 sts for the neck. Dec 1 st at each neck edge every other row 12-13-13-14 times, then every 4 rows 2 times = 23-24-26-27 sts remain on each shoulder. When the piece measures 59-61-63-65 cm bind off at armhole edge every other row: 6 sts 3 times and then 5-6-8-9 sts 1 time. All sts are now bound off and the piece measures approx. 62-64-66-68 cm

Back: Cast on and knit the same as the front.
Bind off for armhole and shoulder as on front. At the same time when the piece measures 60-62-64-66 cm bind off the center 28-30-30-32 sts for the neck. On the next row dec 1 st at each neck edge. When all sts are bound off the piece measures approx. 62-64-66-68 cm

Assembly: Sew shoulder seams.

Neck: Pick up approx. 108 to 128 sts (divisible by 4) around the neck on smaller circular needles. Knit as follows (seen from the right side) back and forth on needles from center front: P 1 row, K 1 row, then knit rib, keeping 1 st in garter st at each edge and beginning rib with K 2 after the edge st.
When neckband measures 2.5 cm , K 1 row, P 1 row (right side row) then bind off. Lay right edge of neckband over left and sew down edges.

Armhole: Pick up approx. 110 to 134 sts (divisible by 4 + 2 sts) along armhole on smaller needles. Knit as follows back and forth on needles: P 1 row (right side row), K 1 row, continue with rib, keeping 1 st at each edge in garter st. When band measures 2 cm K 1 row then P 1 row (right side row) then bind off. Sew side seams.

--------------------------------------------------------------

CHILDREN'S VEST:

Sizes: 3/4 - 5/6 - 7/8 - 9/10 - 11/12 years
Finished measurements: 76-80-88-92-96 cm

Materials:
DROPS ULL-TWEED from Garnstudio
200-250-250-300-350 g. col. no. 02, brown.

Or use:
DROPS KARISMA from Garnstudio
250-300-300-350-400 g. col. no. 56, dark brown.

DROPS 3 mm and 4.5 mm needles, or sizes needed to obtain correct gauge.
DROPS 3 mm short circular needles, or size needed to obtain correct gauge (for the neck)

Gauge: 19 sts x 24 rows on larger needles in stockinette st = 10 x 10 cm
Garter st, when knitting flat: Knit all sts, all rows.
Rib: * K 2, P 2 *, repeat from * - *.

Front: Cast on 74-78-86-90-94 sts on smaller needles. Knit 2 rows garter st, change to rib, keeping 1 st at each edge in garter st throughout. When band measures 4.5 cm knit 2 rows garter st over all sts. Change to larger needles and stockinette st. When the piece measures 21-23-26-27-28 cm bind off for armhole at each side every other row: 3 sts 2 times, 2 sts 2 times and 1 st 5-4-6-6-6 times. At the same time when the piece measures 29-31-33-34-35 cm bind off the center 2 sts for the neck. Dec 1 st for the neck every other row 9-10-11-12-13 times = 12-14-15-16-17 sts remain on each shoulder. When the piece measures 37.5-40.5-44.5-46.5-48.5 cm bind off from armhole edge every other row: 3-4-4-5-5 sts 2 times and then 6-6-7-6-7 sts 1 time. All sts are now bound off and the piece measures approx. 40-43-47-49-51 cm

Back: Cast on and knit the same as the front. Bind off for armhole and shoulder as on front, but when the piece measures 38-41-45-47-49 cm bind off the center 18-20-22-24-26 sts for the neck. Dec 1 st at each neck edge on the next row. When all sts are bound off the piece measures approx. 40-43-47-49-51 cm

Assembly: Sew shoulder seams.

Neck: Pick up approx. 52 to 104 sts (divisible by 4) around the neck on smaller circular needles. Knit as follows back and forth on needles from center front: P 1 row (right side row), K 1 row, then knit rib keeping 1 st at each edge in garter st and beginning rib with K 2 after the edge st. When neckband measures 2 cm K 1 row and P 1 row (right side row) then bind off. Lay right edge of neckband over left and sew down edges.

Armhole: Pick up approx. 78 to 98 sts (divisible by 4 + 2 sts) along armhole on smaller needles. Knit as follows back and forth on st: P 1 row (right side row), K 1 row, change to rib keeping 1 st at each edge in garter st. When band measures 2 cm K 1 row then P 1 row (right side row), then bind off.
Sew side seams.

Diagram

symbols = men
symbols = children
diagram

Each of our patterns has specific tutorial videos to help you.

Do you have a question? See a list of frequently asked questions (FAQ)

Knitting tension is what determines the final measurements of your work, and is usually measured per 10 x 10 cm. It is provided like so: number of stitches in width x number of rows in height - eg: 19 stitches x 26 rows = 10 x 10 cm.

The knitting tension is very individual; some people knit/crochet loosely while others work tightly. You adjust the knitting tension with the needle size, which is why the suggested needle size is only meant as a guide! You need to adjust this (up or down) to ensure that YOUR knitting tension matches the knitting tension provided in the pattern. If you work with a different knitting tension than provided you will have a different yarn consumption, and your work will have different measurements than what the pattern suggests.

The knitting tension also determines which yarns can replace each other. As long as you achieve the same knitting tension you can replace one yarn with another.

See DROPS lesson: How to measure your tension/gauge

See DROPS video: How to make a gauge tension swatch

The required amount of yarn is provided in grams, eg: 450 g. To calculate how many balls you’ll need you first need to know how many grams are in 1 ball (25g, 50g or 100g). This information is available if you click on the individual yarn quality on our pages. Divide the amount required with the amount of each ball. For example, if each ball is 50g (the most common amount), the calculation will be as follows: 450 / 50 = 9 balls.

The important thing when changing from one yarn to another is that the knitting/crochet tension remains the same. This is so that the measurements of the finished piece will be the same as on the sketch provided. It is easier to achieve the same knitting tension using yarns from the same yarn group. It is also possible to work with multiple strands of a thinner yarn to achieve the knitting tension of a thicker one. Please try our yarn converter. We recommend you to always work a test swatch.

Please NOTE: when changing yarn the garment might have a different look and feel to the garment in the photo, due to individual properties and qualities of each yarn.

See DROPS lesson: Can I use a different yarn than the one mentioned in the pattern?

All our yarns are categorised into yarn groups (from A to F) according to thickness and knitting tension – group A contains the thinnest yarns and group F the thickest. This makes it easier for you to find alternative yarns to our patterns, should you wish to switch yarn. All yarns within the same group have a similar knitting tension and can easily replace each other. However, different yarn qualities have different structures and properties which will give the finished work a unique look and feel.

Click here for an overview of the yarns in each yarn group

At the top of all our patterns you’ll find a link to our yarn calculator, which is a helpful tool should you wish to use a different yarn than suggested. By filling in the yarn quality you wish to replace, the amount (in your size) and number of strands, the calculator will present good alternative yarns with the same knitting tension. Additionally it will tell you how much you’ll require in the new qualities and whether you’ll need to work with multiple strands. Most skeins are 50g (some are 25g or 100g).

If the pattern is worked with multiple colours, every colour will have to be calculated separately. Similarly, if the pattern is worked with several strands of different yarns (for example 1 strand Alpaca and 1 strand Kid-Silk) you will have to find alternatives for each, individually.

Click here to see our yarn calculator

Since different yarns have different qualities and textures we have chosen to keep the original yarn in our patterns. However, you can easily find options among our available qualities by using our yarn calculator, or simply pick a yarn from the same yarn group.

It is possible that some retailers still have discontinued yarns in stock, or that someone has a few skeins at home that they would like to find patterns for.

The yarn calculator will provide both alternative yarn as well as required amount in the new quality.

If you think it's hard to decide what size to make, it can be a good idea to measure a garment you own already and like the size of. Then you can pick the size by comparing those measures with the ones available in the pattern's size chart.

You'll find the size chart at the bottom of the pattern.

See DROPS lesson: How to read size chart

The needle size provided in the pattern serves only as a guide, the important thing is to follow the knitting tension. And since knitting tension is very individual, you will have to adjust the needle size to ensure that YOUR tension is the same as in the pattern – maybe you’ll have to adjust 1, or even 2 needle sizes, up or down to achieve the correct tension. For this, we recommend that you work test swatches.

Should you work with a different knitting tension than the one provided, the measurements of the finished garment might deviate from the measurement sketch.

See DROPS lesson: How to measure your tension/gauge

See DROPS video: How to make a tension/gauge swatch

Working a garment top-down provides more flexibility and room for personal adjustment. For example it is easier to try the garment on while working, as well as making adjustments to length of yoke and shoulder caps.

The instructions are carefully explaining every step, in the correct order. Diagrams are adjusted to the knitting direction and are worked as usual.

The diagram depicts all rows/rounds, and every stitch seen from the right side. It is read from bottom to top, from right to left. 1 square = 1 stitch.

When working back and forth, every other row is worked from the right side and every other row is worked from the wrong side. When working from the wrong side, the diagram will have to be worked reversed: from left to right, knit stitches are purled, purl stitches are knit etc.

When working in the round every round is worked from the right side and the diagram are worked from right to left on all rounds.

See DROPS lesson: How to read knitting diagrams

The diagram depicts all rows/rounds, and every stitch seen from the right side. It is worked from bottom to top, from right to left.

When working back and forth every other row is worked from the right side: from right to left and every other row is worked from the wrong side: from left to right.

When working in the round, every row in the diagram are worked from the right side, from right to left.

When working a circular diagram you start in the middle and work your way outwards, counter clockwise, row by row.

The rows usually start with a given number of chain stitches (equivalent to the height of the following stitch), this will either be depicted in the diagram or explained in the pattern.

See DROPS lesson: How to read crochet diagrams

Instructions for working several diagrams after each other on the same row/round, will often be written like so: “work A.1, A.2, A.3 a total of 0-0-2-3-4 times". This means you work A.1 once, then A.2 is worked once, and A.3 is repeated (in width) the number of times provided for your size – in this case like so: S = 0 times, M = 0 times, L=2 times, XL= 3 times and XXL = 4 times.

The diagrams are worked as usual: begin with the first row in A.1, then work the first row in A.2 etc.

See DROPS lesson: How to read knitting diagrams

See DROPS lesson: How to read crochet diagrams

The total width of the garment (from wrist-to-wrist) will be larger in the larger sizes, despite the actual sleeves being shorter. The larger sizes have longer sleeve caps and wider shoulders, so there will be a good fit in all sizes.

The measurement sketch/schematic drawing provides information regarding the full length of the garment. If it’s a jumper or a jacket the length is measured from the highest point on the shoulder closest to the neckline, and straight down to the bottom of the garment. It is NOT measured from the tip of shoulder. Similarly, the length of yoke is measured from the highest point on the shoulder and down to where yoke is split into body and sleeves.

On a jacket measures are never taken along bands, unless specifically stated. Always measure inside band stitches when measuring the length.

See DROPS lesson: How to read a schematic drawing

Diagrams are often repeated on the round or in height. 1 repeat is the diagram the way it appears in the pattern. If it says to work 5 repeats of A.1 in the round, then you work A.1 a total of 5 times after/next to each other in the round. If it says to work 2 repeats of A.1 vertically/in height you work the entire diagram once, then begin again at the start and work the entire diagram one more time.

Chain stitches are slightly narrower than other stitches and to avoid working the cast-on edge too tight, we simply chain more stitches to begin with. The stitch count will be adjusted on the following row to fit the pattern and measurement sketch.

The rib edge is more elastic and will contract slightly compared to, for example, stocking stitch. By increasing before the rib edge, you avoid a visible difference in width between the rib edge and the rest of the body.

It’s very easy to cast off too tightly, and by making yarn overs while casting off (and simultaneously casting these off) you avoid a too tight cast off edge.

See DROPS video: How to bind off with yarn overs (yo)

To achieve an even increase (or decrease) you can increase on, for example: every 3rd and 4th row alternately, like so: work 2 rows and increase on the 3rd row, work 3 rows and increase on the 4th. Repeat this until the increase is complete.

See DROPS lesson: Increase or decrease 1 st on every 3rd and 4th row alternately

Should you prefer to work in the round instead of back and forth, you may of course adjust the pattern. You’ll need to add steeks mid-front (usually 5 stitches), and follow the instructions. When you would normally turn and work from the wrong side, simply work across the steek and continue in the round. At the end you’ll cut the piece open, pick up stitches to work bands, and cover the cut edges.

See DROPS video: How to knit steeks and cut open

Should you prefer to work back and forth instead of in the round, you may of course adjust the pattern so you work the pieces separately and then assemble them at the end. Divide the stitches for the body in 2, add 1 edge stitch in each side (for sewing) and work the front and back pieces separately.

See DROPS lesson: Can I adapt a pattern for circular needles into straight needles?

Pattern repeats can vary slightly in the different sizes, in order to get the correct proportions. If you’re not working the exact same size as the garment in the photo, yours might deviate slightly. This has been carefully developed and adjusted so that the complete impression of the garment is the same in all sizes.

Make sure to follow instructions and diagrams for your size!

If you have found a pattern you like which is available in women’s size it’s not very difficult to convert it to men’s size. The biggest difference will be the length of sleeves and body. Start working on the women size that you think would fit across the chest. The additional length will be worked right before you cast off for the armhole/sleeve cap. If the pattern is worked top-down you can add the length right after the armhole or before the first decrease on sleeve.

Regarding additional yarn amount, this will depend on how much length you add, but it is better with a skein too many than too few.

All yarns will have excess fibres (from production) that might come off as lint or shedding. Brushed yarns (ie hairier yarns) have more of these loose, excess fibres, causing more shedding.

Shedding also depends on what is worn under or over the garment, and whether this pulls at the yarn fibres. It’s therefore not possible to guarantee that there will be no shedding

Below are some tips on how to get the best result when working with hairier yarns:

1. When the garment is finished (before you wash it) shake it vigorously so the looser hairs come off. NOTE: do NOT use a lint roller, brush or any method that pulls at the yarn.

2. Place the garment in a plastic bag and put it in your freezer - the temperature will cause the fibres to become less attached to each other, and excess fibres will come off easier.

3. Leave in the freezer for a few hours before taking it out and shaking it again.

4. Wash the garment according to the instructions on the yarn label.

Pilling is a natural process that happens to even the most exclusive of fibers. It's a natural sign of wear and tear that is hard to avoid, and that is most visible in high friction areas of your garment like a sweater's arms and cuffs.

You can make your garment look as new by removing the pilling, using a fabric comb or a pill/lint remover.

Still can't find the answer you need? Then scroll down and leave your question so one of our experts can try to help you. This will be done normally within 5 to 10 working days.
In the meantime, you can read the questions and answers that others have left to this pattern or join the DROPS Workshop on Facebook to get help from fellow knitters/crocheters!

You might also like...

Post a comment to pattern DROPS 70-7

We would love to hear what you have to say about this pattern!

If you want to leave a question, please make sure you select the correct category in the form below, to speed up the answering process. Required fields are marked *.

Comments / Questions (23)

country flag Mary wrote:

I would love to make this for my son, but the yarn is no longer available. What do you recommend instead? What weight yarn, and do you sell a good alternative?He's six four, so I'd be going for the large side - I'll probably need a lot of it! Thanks.

24.04.2022 - 01:49

DROPS Design answered:

Dear Mary, we recommend our DROPS Soft Tweed yarn, which is of a similar weight to Ull-Tweed, you can check it here: https://www.garnstudio.com/yarn.php?show=drops-soft-tweed&cid=19 You could simply order the same amount as required of Ull-Tweed (9 balls), since Soft Tweed has a little more yardage, so it should be enough. Happy knitting!

24.04.2022 - 22:25

country flag Willy De Haan wrote:

Ik wil graag de groene spencer met kabels en beige randjes breien voor mijn kleinzoon. Hij wordt juni as 3, maar is groot voor zijn leeftijd. Kan ik het patroon krijgen en de bijpassende wol bestellen? Vr groet Willy de Haan

25.10.2020 - 18:45

DROPS Design answered:

Dag Willy,

Alle patronen op onze website zijn gratis en kun je afdrukken via de knop 'Afdrukken' die je onderaan de materialenlijst bij het patroon vindt. Garens kun je bestellen via een van onze verkooppunten./

28.10.2020 - 07:54

country flag Elsje Van Deelen wrote:

Een bol van 50 gram heeft verschillende lengtes aan garen. Bij voorbeeld de ene bol heeft een lengte van 80 m en de ander 150 meter. Met die van 150 meter heb ik toch minder bollen nodig? Waarom vermeldt u het aantal meters per bol niet?

03.10.2020 - 15:16

DROPS Design answered:

Dag Elsje,

Ja, dat klopt inderdaad. De looplengte geeft een goede indicatie van hoeveel wol je nodig hebt. Als je met een dunner of dikker garen wilt breien, kun je kijken naar de looplengte op de hoeveelheid benodigde bollen te weten. Daarna moet je nog wel een proeflapje maken en evt. het patroon omrekenen op basis van de stekenverhouding.

05.10.2020 - 11:34

country flag June Rafiullah wrote:

I have ,novita mohair yarn, n/ca 50g , and need to know how many stretches to cast on for the ,warm memories ,vest in a large size. All numbers translated into inches would be greatly appreciated. June

21.04.2020 - 17:37

DROPS Design answered:

Dear Mrs Rafiullah, We are able to provide free patterns thanks to our yarns sold throughout the world. You will therefore understand that we can only recomand you to contact your DROPS Store or then the store where you bought the yarn for any further help & assistance. Thank you for your comprehension.

22.04.2020 - 08:18

country flag Anne Niemelä wrote:

Kuinka paljon menisi lankaa : step classic malliin Warm memories vest malliin ?

01.04.2020 - 16:08

country flag Anne Niemelä wrote:

Hei ! Kuinka paljon malliin Warum mamories vest menisi jos neuloo langalla step classic

01.04.2020 - 16:05

country flag Lieselotte wrote:

Is it also okay if you make the entire spencer in the round or does this mess up the pattern? Is the 130 stitches for the xxL supposed to be flat? Would be grateful if anyone knew the answer.

07.08.2019 - 12:22

DROPS Design answered:

Dear Liselotte, each piece is here worked back and forth and sewn afterwards (only neck edge is worked in the round here). If you want to work in the round you will have to calculate the total number of stitches and remove the edge stitches, then divide piece for armholes to continue each section separately back and forth. Happy knitting!

07.08.2019 - 12:49

country flag Els wrote:

About the men’s spencer, Medium size: Dutch (Nederlands) description uses 400gr nr 02 wool English description uses 300gr no. 06 wool. Please explain the difference, and what and how much I exactly should use. I actually would like to use 4Ply wool, would this be possible? Thank you!

11.04.2019 - 10:02

DROPS Design answered:

Dear Els, Dutch pattern gives the amount with DROPS Ull-Tweed and English pattern with DROPS Angora-Tweed - both garns have a different length/ball - please try our yarn converter for any alternative. Happy knitting!

11.04.2019 - 10:08

country flag Heleen wrote:

Ik bedoel dat ik dan voor- en achterpand samen op 1 rondbreinaald heb staan en in de rondte brei tot de armsgaten, en daarna per pand apart verder ga. Kunnen de kantsteken dan vervallen?

07.06.2018 - 06:32

DROPS Design answered:

Dag Heleen, Ja, de kant steken kunnen dan inderdaad vervallen, want die worden alleen toegevoegd om het kledingstuk later in elkaar te naaien.

07.06.2018 - 14:31

country flag Heleen wrote:

Als ik dit patroon met een rondbreinaald wil breien, moet ik dan de kantsteken weglaten?

06.06.2018 - 18:48