
Popular categories
Looking for a yarn?


|
||||||||||||||||||||||
Rose Romance |
||||||||||||||||||||||
 |
 |
|||||||||||||||||||||
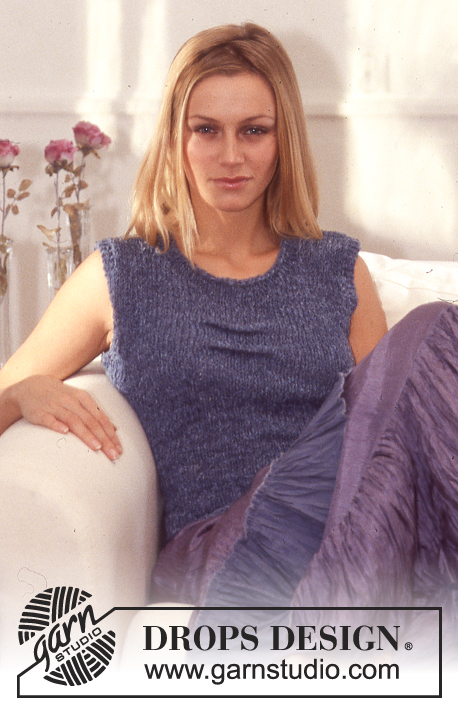
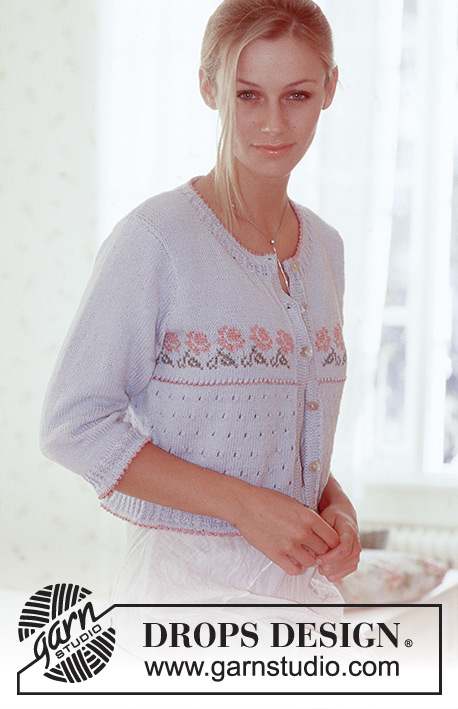
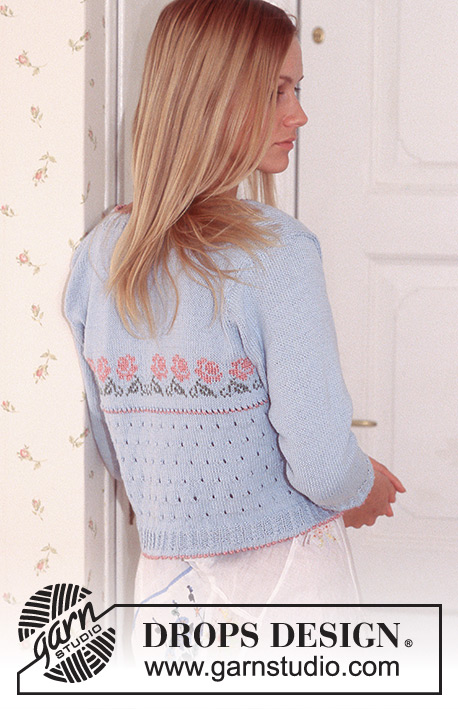
DROPS Small top and cardigan in Safran and Cotton Viscose.
DROPS 74-22 |
||||||||||||||||||||||
|
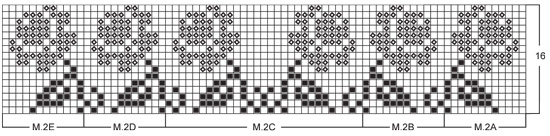
Gauge: 24 sts x 32 rows = 10 x 10 cm on larger needles in stockinette st. Pattern: See charts. The patterns are seen from the right side. Garter st, when knitting flat: Knit all sts, all rows. Rib: * P 1, K 1 *, repeat from * - *. Knitting tips (for the top): All decs are made on right side. Dec 1 st inside 5 sts knit as follows from edge (seen from the right side) K 1 (edge st knit in garter st), K 1, P 1, K 1 and P 1: After 5 sts: Slip 1 st as if to knit, K 1, psso. Before 5 sts: K 2 tog. ------------------------------------------------------------------ TOP: Front: Cast on 90-104-118 sts on smaller needles with ice blue. Knit 2 rows stockinette st (row 1 = wrong side row). Change to pink Cotton Viscose and knit 1 row reverse stockinette st, knit the next row as follows (right side row): K 1 (edge st), * yo, K 2 tog *, repeat from * - * end with K 1 (edge st). This row is for the folding edge - measure the work from here. Change to ice blue Safran and knit 5 rows stockinette st. Knit the next row as follows (right side row): K 1 (edge st), Pattern 3 over 84-98-112 sts, then P 1, K 2 (for a small cable), P 1 and K 1 (edge st). Knit 10 rows of Pattern 3. Now put a marker after 24-31-31 sts in from each side (in the center of a small cable – there are 42-42-56 sts between markers). Read the entire next section before knitting: Change to larger needles and stockinette st, but keep 3 sts each side of markers knit as before, that is to say: P 2, 2 sts in small cable and P 2. At the same time when the piece measures 6 cm inc 1 st at each side every 10 rows a total of 6 times = 102-116-130 sts - knit the increased sts in stockinette st. At the same time when the piece measures 14 cm knit Pattern 4 over 4 sts each side of markers (the arrow in the chart indicates the marker), knit the remaining sts in stockinette st. At the same time when the piece measures 16-17-18 cm knit Pattern 5 at center front - count out from center – the arrow in the chart indicates the center of the pattern. After Pattern 5 knit the rest with ice blue in stockinette st. When the piece measures approx. 24-25-25 cm (this should be at least 2 rows after Pattern 5) knit the next row as follows (right side row): K 1 (edge st knit in garter st), * P 1, K 1 *, repeat from * - * over 8 sts, P 1, 36-43-50 sts stockinette st, P 1, K 1, P 1, K 1, P 2 tog (= center front), K 1, P 1, K 1, P 1, 36-43-50 sts stockinette st, * P 1, K 1 *, repeat from * - * over 8 sts, P 1, K 1 (edge st knit in garter st). Knit 1 row with stockinette st and rib, P the center st (the st which on the previous row was P 2 tog). On the next row bind off 5 sts at each side for armhole. Then put 45-52-59 sts for left side on a st holder. 46-53-60 sts remain on needles.Knit each side separately from now on. Right side: = 46-53-60 sts. Now shape armhole and neck at the same time. Read the entire next section before knitting: Armhole: dec 1 st for armhole at the side – see knitting tips – every other row 4-10-16 times, then every 4 rows 4-4-4 times and then every 6 rows 4-3-2 times. Neck: At the same time dec 1 st for the neck – see knitting tips – every other row 19-21-23 times and then every 4 rows 4-4-4 times. After all armhole and neck shaping is complete 11 sts rib remain on shoulder and the piece measures approx. 42-44-46 cm. Knit 2 cm with rib and put the sts on a st holder and set aside. Left side: Put sts from st holder back on needles = 45-52-59 sts and knit the same as the right side, reversing all shaping. Begin the 1st row from center front on wrong side row - start by picking up 1 st in the first st on right side = 46-53-60 sts. Back: Cast on and knit the same as the front, but after 10 rows of Pattern 3 knit stockinette st over all sts (do not knit Pattern 4 and Pattern 5). When the piece measures 24-25-25 cm knit the next row as follows (right side row): K 1 (edge st knit in garter st), * P 1, K 1 *, repeat from * - * over 8 sts, P 1, 82-96-110 sts stockinette st, P 1, * K 1, P 1 *, repeat from * - * over 8 sts, K 1 (edge st knit in garter st). Bind off for armhole as on front, but not for the neck. When the piece measures 34-36-38 cm K 2 tog at center back. Then knit rib (with P 1 at each side) over the center 47-51-55 sts for 3 rows. Then bind off the center 37-41-45 sts. Keep the 5 sts in rib at each side of neck and dec 1 st at each neck inside rib sts – see knitting tips – every 4 rows 4 times. After all armhole and neck shaping is complete 11 sts rib remain on each shoulder. When the piece measures 44-46-48 cm, put sts on a st holder and set aside. Assembly: Sew side seams using edge sts as seam allowance. Sew shoulder seams. CARDIGAN: Body: Cast on 194-222-243 sts on smaller circular needles with ice blue Safran. Knit 2 rows stockinette st (row 1 = wrong side). Change to pink Cotton Viscose and knit 1 row reverse stockinette st (wrong side row), knit the next row as follows: K 1 (edge st), K 1, * yo, K 2 tog *, repeat from * - *, end with: Sizes S/M and M/L: K 2 Size XL: K 3 This is the folding edge – measure the work from here. Change to ice blue Safran, knit 5 rows stockinette st, then knit the next row as follows: K 1 (edge st), Pattern 3 for 189-217-238 sts, K 2 (small cable), P 1, K 1 (edge st). After 10 rows of Pattern 3, change to larger circular needles and Pattern 1 (1 edge st at each side is not knit in the pattern), and inc 3-0-2/dec 0-1-0 sts evenly distributed on 1st row = 197-221-245 sts. After 1st row of Pattern 1 put a marker 50-56-62 sts in from each edge for sides = 97-109-121 sts between markers (the back). When the piece measures 6-7-7 cm inc 1 st at each side of each marker every 7 rows a total of 6 times = 221-245-269 sts - knit the increased sts knit in the pattern as you go along. When the piece measures approx. 18-19-19 cm - there must be at least 5 rows of stockinette st after last row with yo - knit 1 row stockinette st with pink Cotton Viscose. Then knit the next row as follows (right side row) with ice blue Safran: K 1 (edge st), * K 2 tog, yo *, repeat from * - *, finish with K 2. Then knit 5 rows stockinette st with ice blue, increasing 2 sts evenly distributed over back on the last row = 223-247-271 sts. Knit the next row as follows (right side row): K 1 (edge st), Pattern 2A (= 12 sts), Pattern 2B over 84-96-108 sts, Pattern 2C (= 29 sts), 84-96-108 sts of Pattern 2D, Pattern 2E (= 12 sts) and K 1 (edge st). After Pattern 2 (16 rows) knit the rest with stockinette st and ice blue Safran. At the same time when the piece measures 27 cm (Pattern 2 should be complete) bind off 8 sts at each side for armhole (4 sts at each side of markers) and knit each piece separately. Right front: = 52-58-64 sts. Bind off for armhole at the side every other row: 3 sts 1-1-1 time, 2 sts 0-2-4 times and 1 st 4-5-5 times = 45-46-48 sts. When the piece measures 34-35-36 cm bind off 8 sts at center front edge for neck. Then bind off at neck edge every other row: 3 sts 2 times, 2 sts 3 times and 1 st 6 times = 19-20-22 sts remain on shoulder. Bind off the remaining sts when the piece measures 46-48-50 cm. Left front: = 52-58-64 sts. Knit the same as right front, reversing shaping. Back: = 103-115-127 sts. Bind off for armhole at each side as on front = 89-91-95 sts remain on needles. When the piece measures 44-46-48 cm bind off the center 47 sts for the neck. Then dec 1 st at each neck edge every other row 2 times = 19-20-22 sts remain on each shoulder. Bind off the remaining sts when the piece measures 46-48-50 cm. Sleeve: Cast on 56-63-63 sts on smaller double-pointed needles with ice blue Safran, join and place a marker at the join. Knit 2 rows stockinette st. Change to pink Cotton Viscose and knit 1 row stockinette st, knit the next row as follows: * K 2 tog, yo *, repeat from * - *, end with K 0-1-1. This is the folding edge - measure the work from here. Change to ice blue Safran, knit 4 rows stockinette st, then knit 10 rows of Pattern 3. Change to larger double-pointed needles and continue in stockinette st to finished measurements. At the same time when the piece measures 5 cm inc 1 st each side of marker a total of 13-14-19 times: Size S/M: alternately every 6th and 7th row. Size M/L: every 6 rows. Size L/XL: every 4 rows = 82-91-101 sts. When the piece measures 32-31-30 cm bind off 3 sts each side of marker and knit back and forth on needles. Now bind off for sleeve cap at each side every other row: 2 sts 4-2-3 times, 1 st 4-10-13 then bind off 2 sts at each side until the piece measures 40-41-42 cm and then bind off 3 sts 1 time. The piece measures approx. 41-42-43 cm, bind off the remaining sts. Assembly: Sew shoulder seams. Fold lower edge on the cardigan double to wrong side and stitch down. Button band: Pick up along left button band approx. 82-92 sts on smaller needles with ice blue Safran. Knit 6 rows stockinette st, P 1 row (folding edge) and then 6 rows stockinette st for facing, bind off. Fold button band double to wrong side and stitch down. Repeat along right button band, but after 2 rows make 5 buttonholes evenly distributed - the bottom buttonhole should be 1 cm from lower edge and the top buttonhole approx. 4 cm from top (there will be 1 buttonhole in the neckband). 1 buttonhole = bind off 2 sts and cast on 2 new sts over the bound-off sts on the next row. Make buttonholes on facing to match. Neckband: Pick up approx. 145-159 sts around the neck (divisible by 7+5 sts, including over button bands) on smaller circular needles with ice blue Safran. Knit each row as follows: K 1 (edge st), Pattern 3 to last 4 sts, K 2 (small cable), P 1, K 1 (edge st) for 6 rows. Then knit 3 rows stockinette st, decreasing 21 sts evenly distributed on the 1st row. On the 2nd row make a buttonhole over the others on button bands - bind off the 3rd and 4th sts from center front, cast on 2 new sts over these on the next row. Change to pink Cotton Viscose, knit 1 row stockinette st and then knit the next row as follows (right side row): K 1 (edge st), * K 2 tog, yo *, repeat from * - * and finish with K 1 (edge st). This is the folding edge. Change to ice blue Safran and knit 3 rows stockinette st then bind off - make a matching buttonhole on facing. Fold facings at neck and lower edge of sleeves to wrong side and stitch down. Sew in sleeves and buttons. |
||||||||||||||||||||||
Diagram explanations |
||||||||||||||||||||||
|
||||||||||||||||||||||

|
||||||||||||||||||||||
|
||||||||||||||||||||||

|
||||||||||||||||||||||

|
||||||||||||||||||||||
|
Have you made this or any other of our designs? Tag your pictures in social media with #dropsdesign so we can see them! Do you need help with this pattern?You'll find tutorial videos, a Comments/Questions area and more by visiting the pattern on garnstudio.com. © 1982-2024 DROPS Design A/S. We reserve all rights. This document, including all its sub-sections, has copyrights. Read more about what you can do with our patterns at the bottom of each pattern on our site. |
||||||||||||||||||||||


With over 40 years in knitting and crochet design, DROPS Design offers one of the most extensive collections of free patterns on the internet - translated to 17 languages. As of today we count 304 catalogues and 11422 patterns - 11422 of which are translated into English (UK/cm).
We work hard to bring you the best knitting and crochet have to offer, inspiration and advice as well as great quality yarns at incredible prices! Would you like to use our patterns for other than personal use? You can read what you are allowed to do in the Copyright text at the bottom of all our patterns. Happy crafting!
Comments / Questions (3)
Lynn wrote:
I would like to knit this pattern but I need a little help with it. At the beginning of the cardigan it mentions Pattern 3 but I cant see Pattern 3 on the drawings, I only see M1, upto M5, I am confused? After the folding edge change to ice blue safran etc then pattern 3 for 189 stitches?
14.07.2017 - 10:05DROPS Design answered:
Dear Lynn, Pattern 3 is M.3, you will find it on the right side of M.1 next to M.5 (under M.2). Happy knitting!
14.07.2017 - 10:14Is the right side the knit side or the purl side
21.10.2016 - 22:11DROPS Design answered:
Dear Ga, when you are starting front piece 1st row worked will be P from WS, and 2nd row will be K from RS. Then you will work K from RS when working diagrams. Happy knitting!
24.10.2016 - 09:08Jeg vil SÅ gerne strikke denne trøje men kan den mon forlænges til ca. hoftelængde? Jeg er ikke så god til at lave om på opskrifter men hvis det bare handler om at ændre på de angivne cm i opskriften så går det måske nok.
29.08.2013 - 15:38DROPS Design answered:
Hej Jeanette. Det tror jeg godt du kan. Du kan maale hvor meget laengere du vil have den og saa vil jeg foreslaa du strikker hulkanten og M.3 som beskrevet og strikker M.4 laengere end i mönstret. Roserne begynder lige ved brystet, du kan maale dig frem. Vil du evt have indtagninger til talje kan du göre det - evt sammenligne med et lignende mönster med talje og se hvordan det göres der. God fornöjelse.
30.08.2013 - 17:01