
Popular categories
Looking for a yarn?


|
|
DROPS 74-20 |
|
 |
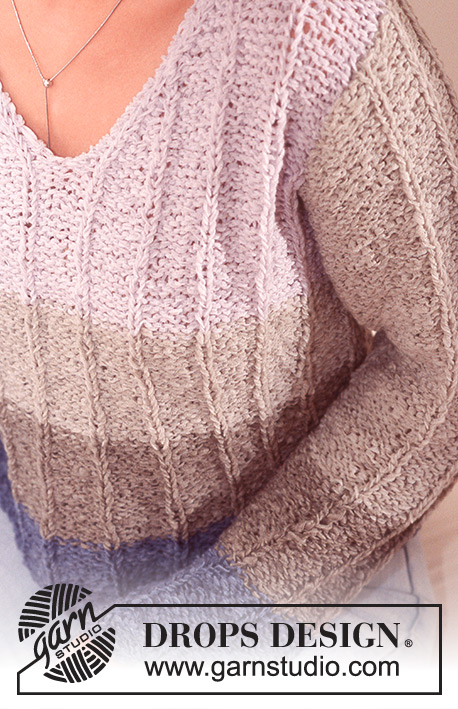 |
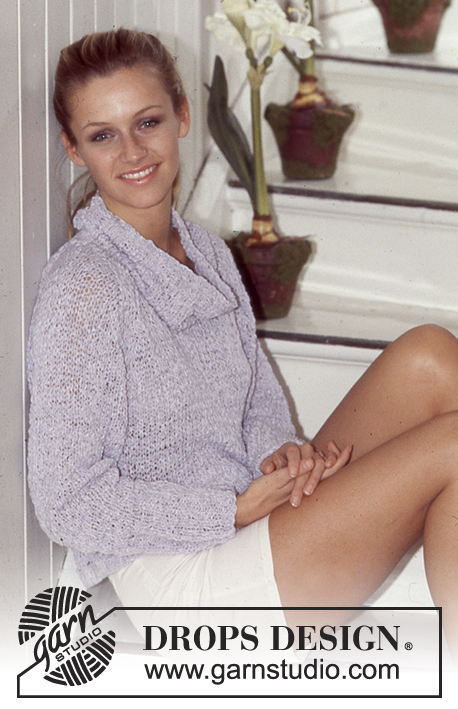
DROPS Pullover with V-neck in Passion.
DROPS 74-20 |
|
|
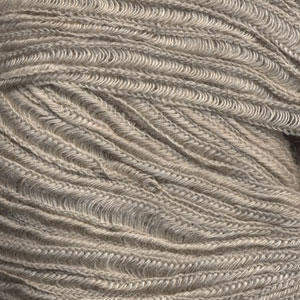
Gauge: 14 sts x 19 rows = 10 x 10 cm on larger needles in stockinette st. Knitting tip: Passion has a tendency to twist while knitting. For best results, untwist the yarn as you go along. Measuring tips: The fabric will be very stretchy! The measurements on the diagram show the garment measured as held up on the needles. Garter st, when knitting flat: Knit all sts, all rows. Stripe pattern for front and back: 8-9-9-10 cm denim blue 8-9-9-10 cm khaki beige, 8-9-9-10 cm light beige and then work to finished measurements in light blue. Stripe pattern for sleeve: 12 cm denim blue 10 cm khaki beige, then work to finished measurements in light beige. Decreasing tips (for neck): Dec inside 3 sts knit as follows from edge (seen from the right side): K 1 (edge st knit in garter st throughout), P 1, K 1. All decs are made on right side rows. Dec 1 st as follows: After 3 edge sts: P 2 tog. Before 3 edge sts: slip 2 sts to right hand needle, put them back on left hand needle 1 by 1, twisting each, then P 2 tog (or, P 2 tog through back of sts). Front: Cast on 57-63-69-75 sts on smaller needles with denim blue and purl 1 row. Change to larger needles and establish rib pattern as follows on the next row (right side row): size S: K 1 (edge st knit in garter st throughout), P 3, K 1, * P 4, K 1 *, repeat from * - * a total of 3 times, * P 5, K 1 *, repeat from * - * a total of 3 times, * P 4, K 1 *, repeat from * - * a total of 3 times, P 3, K 1 (edge st knit in garter st throughout). Size M: K 1 (edge st knit in garter st throughout), K 1, P 5, K 1, * P 4, K 1 *, repeat from * - * a total of 3 times, * P 5, K 1 *, repeat from * - * a total of 3 times, * P 4, K 1 *, repeat from * - * a total of 3 times, P 5, K 1, K 1 (edge st knit in garter st throughout). Size L: K 1 (edge st knit in garter st throughout), P 3, K 1, P 5, K 1, * P 4, K 1 *, repeat from * - * a total of 3 times, * P 5, K 1 *, repeat from * - * a total of 3 times, * P 4, K 1 *, repeat from * - * a total of 3 times, P 5, K 1, P 3, K 1 (edge st knit in garter st throughout) Size XL: K 1 (edge st knit in garter st throughout), K 1, P 5, K 1, * P 4, K 1 *, repeat from * - * a total of 3 times, * P 5, K 1 *, repeat from * - * a total of 5 times, * P 4, K 1 *, repeat from * - * a total of 3 times, P 5, K 1, K 1 (edge st knit in garter st throughout). Continue with rib pattern as established and follow stripe pattern – see instructions above. When the piece measures 7-8-8-9 cm dec all P 4 to P 3 (* P 1, P 2 tog, P 1 *) = 51-57-63-69 sts. When the piece measures 15-16-17-18 cm inc all the P 3 to P 4 again (inc 1 st by pulling up a st from the row below) = 57-63-69-75 sts. When the piece measures 23-24-25-26 cm inc all the P 4 to P 5 (inc 1 st by pulling up a st from the row below) = 63-69-75-81 sts. Read the entire next section before knitting Armhole: When the piece measures 35-35-36-37 cm bind off for armhole at each side every other row: 3 sts 1 time, 2 sts 0-1-2-3 times and 1 st 3-3-4-4 times. Continue in rib pattern as established, keeping the 1 edge st at armhole in garter st throughout. Neckband: At the same time, when the piece measures 40-41-42-43 cm bind off the center st for the neck. Put half the sts on a st holder and knit each side separately. Right side: Continue armhole shaping in sizes L and XL (in sizes S and M armhole shaping is complete), and at the same time dec 1 st for the neck every other row 7-7-8-8 times - see knitting tips = 18-19-18-19 sts remain on each shoulder. Bind off when the piece measures 54-56-58-60 cm. Left side: Put sts on st holder back on needles and knit the same as the right side. NOTE: knit the 1st row from center front, pick up 1 st in the bound off center front st and knit together with 1st st on needle. This is the lower edge of the V-neck. Back: Cast on and knit the same as the front. Bind off for armhole as on front = 51-53-53-55 sts on needles. When the piece measures 52-54-56-58 cm (on right side row) knit 1 row over the center 17-17-19-19 sts. On the next row loosely bind off the center 15-15-17-17 sts for the neck = 18-19-18-19 sts remain on each shoulder. Bind off when the piece measures 54-56-58-60 cm. Sleeve: Cast on 32-38-38-38 sts on smaller needles with denim blue. P 1 row, change to larger needles and establish rib pattern as follows on the next row (right side row): K 1 (edge st knit in garter st throughout), * K 1, P 5 * , repeat from * - * and finish with K 1 (edge st knit in garter st throughout). Continue with rib pattern as established following stripe pattern - see instructions above! At the same time when the piece measures 12 cm inc 1 st at each side – make incs on right side rows inside the K 1 edge st and the K 1 rib at beginning of row and inside the K 1 edge st at the end of the row. Inc 1 st at each side every 4-4.5-3.5-3 cm a total of 10-9-11-12 times = 52-56-60-62 sts - the increased sts shall be P sts (as seen from the right side). When sleeve measures 51-50-49-47 cm bind off for sleeve cap at each side every other row: 3 sts 1 time, 2 sts 3 times, 1 st 0-1-2-3 times, then 2 sts at each side until the piece measures 56-56-57-57 cm and then bind off 3 sts 1 time. Bind off, the piece measures approx. 57-57-58-58 cm. Assembly: Sew shoulder seams. Sew in sleeves using edge st on Body as a seam allowance and sew sleeve and side seams using edge sts as a seam allowance. |
|

|
|
|
Have you made this or any other of our designs? Tag your pictures in social media with #dropsdesign so we can see them! Do you need help with this pattern?You'll find tutorial videos, a Comments/Questions area and more by visiting the pattern on garnstudio.com. © 1982-2024 DROPS Design A/S. We reserve all rights. This document, including all its sub-sections, has copyrights. Read more about what you can do with our patterns at the bottom of each pattern on our site. |
|


With over 40 years in knitting and crochet design, DROPS Design offers one of the most extensive collections of free patterns on the internet - translated to 17 languages. As of today we count 304 catalogues and 11422 patterns - 11422 of which are translated into English (UK/cm).
We work hard to bring you the best knitting and crochet have to offer, inspiration and advice as well as great quality yarns at incredible prices! Would you like to use our patterns for other than personal use? You can read what you are allowed to do in the Copyright text at the bottom of all our patterns. Happy crafting!
Comments / Questions (13)
Is there a size 52 here? From the written pattern I could not tell, but from the schematics it appears there is. I don’t want to order yarn to make this if it does not fit. Thanks for your response.
11.03.2023 - 12:46DROPS Design answered:
Dear Sharon, since sizes may vary between different countries, our sizes are indicated by the measurements stated in the materials and/or schematic. So you can compare this to the size 52 measurements and see if it matches and select the appropiate necessary amount of yarn. Happy knitting!
12.03.2023 - 16:59Bij afkanten voor de mouwkop staat afkanten bij 51-50-49-47 cm, maar volgens mij moet dat 47-49-50-51 zijn.l
05.01.2022 - 21:26Kan het zijn dat de verhouding van de mouwkop en het inzetten niet klopt. Ik krijg die mouwen er niet juist ingezet. Die kop is veel te kort ?
16.02.2021 - 20:36DROPS Design answered:
Dag Conny,
Als ik kijk naar het aantal steken wat je hebt op het moment dat je gaat minderen voor de mouwkop zou het wel moeten kloppen. Ook de mouwkop zou moeten kloppen. Heb je de stekenverhouding gecontroleerd?
09.03.2021 - 19:56Wil graag het patroon met garen bestellen maat xl. bij voorbaat dank.
05.01.2021 - 22:28DROPS Design answered:
Dag Mia,
Het patroon is gratis te downloaden/ af te drukken via de knop 'Afdrukken' onder de lijst met materialen. Het garen kun je bestellen via een van onze verkooppunten, zie hier. Helaas is het garen voor dit patroon uit ons assortiment. Voor een vervangend garen kun je de garenvervanger gebruiken onderaan de lijst met materialen bij het patroon. (Je hebt een garen nodig uit categorie D of E).
10.01.2021 - 12:26Pin.it/3ylhc12 Tried this sweater
09.09.2020 - 19:19Beste, Er staat voor een medium voor patroon 74-20 dat je moet 63 steken opzetten maar is dit niet te weinig oog worden de voor en achterbanden 2 x apart gebreid zodat je dan 126 st hebt voor voor en rugpand
31.03.2020 - 17:18DROPS Design answered:
Dag Muylaert Karina,
De 63 steken is voor 1 pand. Bij een stekenverhouding van 14 steken = 10 cm in de breedte, zou dit moeten kloppen.
05.05.2020 - 15:31Hi, kann es sein, dass folgende Beschreibung nicht korrekt ist: Krausrippe (hin und zurück auf der Ndl): 1 Krausrippe = 2 Ndl. 1.Ndl: re, 2.Ndl: re Müsste das statt "Ndl." nicht eigentlich "Reihe" da stehen? VG
13.01.2020 - 20:00DROPS Design answered:
Liebe Nettl, ja stimmt, es sollte "Reihe" hier sein. Viel Spaß beim stricken!
14.01.2020 - 07:35Todas las hileras se sigue el mismo patron o solo el lado derecho y el otro lado se teje los puntos tal como se encuentra? Me refiero si un lado es r a la vuelta es d? muchas gracias
17.10.2018 - 13:29DROPS Design answered:
Hola Ghislaine. En este patrón el lado revés se trabaja como se presentan los puntos.
20.10.2018 - 20:28K brei dit patroon, maar in dubbele parelsteek en in large. Aan de onderste 2 lijnen onder het patroon kan ik niet aan uit. Bovenste lijn zegt 44 48 52 56. Dan de lijn eronder heeft getallen boven en onder de lijn, welke afmetingen zijn dit?
17.02.2018 - 19:19DROPS Design answered:
Hallo Jaqueline, De onderste getallen staan voor de breedte van het werk aan de onderkant, de getallen daarboven staan voor de breedte op taillehoogte en de getallen daar weer boven staan voor de breedte ter hoogte van de oksels, dus waar de armsgaten beginnen.
18.02.2018 - 14:11Alison Hayton wrote:
Ive had to add 1 st at the beginning on the small size to make the pattern work. It was all looking like garter stitch with no pattern. 2 knit stitches at the beginning of the row works best I found like on the other sizes.
07.08.2017 - 19:22