
Popular categories
Looking for a yarn?


|
||||||||||||||||||||||||||||
DROPS 93-15 |
||||||||||||||||||||||||||||
|
|
||||||||||||||||||||||||||||
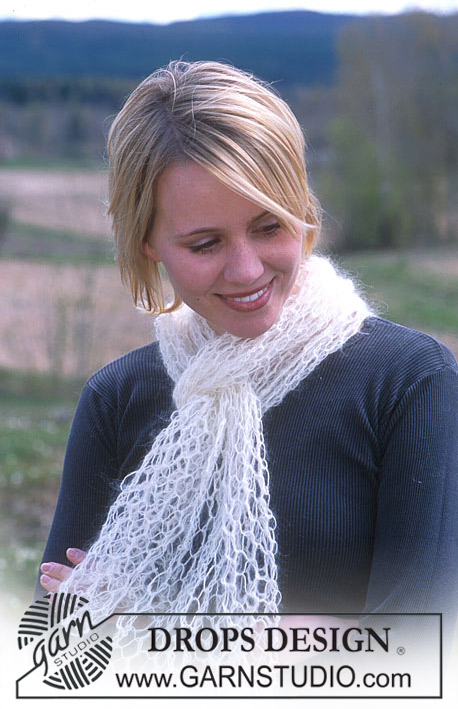
Shawl in Vivaldi
DROPS 93-15 |
||||||||||||||||||||||||||||
|
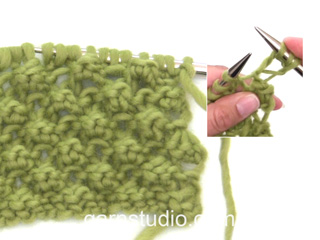
Gauge: 17 sts x 24 rows in stockinette st = 10 x 10 cm Pattern: See the charts M.1-M.3. Patterns 1 to 3 are seen from the right side. Increasing tips: Inc at the center of shawl every other row to finished measurements by making a yo at each side of marker (make yos on right side row and P the yos on the next row). At the same time cast on 2 new sts loosely at end of each row to finished measurements – 4 sts increased each row. Shawl: Cast on 5 sts with natural and put a marker in the center st (move the marker up each row). Knit stockinette st and inc at the marker and at each side – see increasing tips above – to finished measurements. When there are 47 sts on needles (the piece measures approx. 7 cm at center of work) knit the next row as follows from right side: K 1 (edge st knit in garter st), Pattern 1 (= 14 sts), 8 sts stockinette st, yo, K 1, yo (= incs at center of work), 8 sts stockinette st, Pattern 1 (= 14 sts, but work in mirror image so that the pattern will be the same on each side of center), K 1 (edge st knit in garter st), and cast on 2 new sts. Continue the pattern as established, increasing at center and at each side as before – knit the increased sts both at each side and at center in stockinette st until there are enough sts for the pattern. When the piece measures approx. 30 cm (measured at center) – adjust so that you have knit at least 2 rows stockinette st after lace pattern – knit 6 rows garter st. Change to dusty pink and Pattern 2 – the 1st row of Pattern 2 = wrong side. Start Pattern 2 inside of 1 edge st. The sts that do not fit in the pattern at center and at sides work in reverse stockinette st until there are enough sts for the pattern. Work Pattern 2 in mirror image after the center. When the piece measures approx. 39 cm change to natural and knit 6 rows garter st. Then change to beige and Pattern 3 – start Pattern 3 inside of 1 edge st. The sts at center and at sides that do not fit in Pattern 3 knit in stockinette st until there are enough sts for pattern. Work Pattern 3 in mirror image after the center. When the piece measures approx. 49 cm (Pattern 3 should have repeated 4 times or 16 rows), change to brown. Knit Pattern 3 one more time (there are now approx. 305 sts) and then bind off loosely – so that the bound-off edge is not too tight knit and bind off the 1st row of Pattern 3. Crocheted edge: Crochet 1 row of ch-loops with dusty pink on the center ridge of the garter st stripe above Pattern 2 as follows: 1 sc in first st, * ch 4, skip over 2 sts, 1 sc in the next st *, repeat * - *. Crochet the same edging with natural white along the top edge of shawl. Then crochet the same edging with brown along the 2 sides. |
||||||||||||||||||||||||||||
Diagram explanations |
||||||||||||||||||||||||||||
|
||||||||||||||||||||||||||||

|
||||||||||||||||||||||||||||
|
Have you made this or any other of our designs? Tag your pictures in social media with #dropsdesign so we can see them! Do you need help with this pattern?You'll find tutorial videos, a Comments/Questions area and more by visiting the pattern on garnstudio.com. © 1982-2024 DROPS Design A/S. We reserve all rights. This document, including all its sub-sections, has copyrights. Read more about what you can do with our patterns at the bottom of each pattern on our site. |
||||||||||||||||||||||||||||


With over 40 years in knitting and crochet design, DROPS Design offers one of the most extensive collections of free patterns on the internet - translated to 17 languages. As of today we count 304 catalogs and 11422 patterns - 11417 of which are translated into English (US/in).
We work hard to bring you the best knitting and crochet have to offer, inspiration and advice as well as great quality yarns at incredible prices! Would you like to use our patterns for other than personal use? You can read what you are allowed to do in the Copyright text at the bottom of all our patterns. Happy crafting!
Comments / Questions (9)
Hej! Kan jag ta det bruna garnet i Droos Air men de andra färgerna i Brushed Alpaca Silk? Mvh Ann
04.02.2019 - 11:20DROPS Design answered:
Hej Ann, Ja det kan du absolut gøre, men sørg for at holde samme strikkefasthed. Det vil sige at du muligvis skal strikke en af kvaliteterne med en lidt tykkere eller tyndere pind for at få 17 m på 10 cm. God fornøjelse!
07.02.2019 - 16:03Hej! Nu har jag stickat och repat i två där... får inte till hålmönstret! Det måste vara fel på beskrivningen..? Eller är det jag som är helt dum i huvudet... hahaha Blir så frustrerad när det inte fungerar som jag vill... Kanske det är fler som haft samma problem Mvh Catarina
22.08.2016 - 16:06DROPS Design answered:
Hej Catarina. Der skulle ikke vaere fejl i mönstret. Men du strikker ikke omslag drejet sammen eller for stramt?
24.08.2016 - 12:03Heeft u ook een foto van het patroon in zijn geheel? Ben een beginnend breister en kom er niet helemaal uit vanaf de voorbeeld foto. Vr. groet, agnes.
22.03.2015 - 15:57DROPS Design answered:
Hoi Agnes. Nee, wij hebben helaas niet een andere foto van deze.
23.03.2015 - 14:48Obrigada pela resposta.Clara Silva
11.03.2015 - 21:46Boa noite queiram desculpar mas julgo que o diagrama M.1 tem em falta uma malha entre as laçadas, logo no início do desenho. Se os diagramas mostram o trabalho pelo direito, como são tricotadas as voltas do avesso? Obrigada, Clara Silva
10.03.2015 - 20:45DROPS Design answered:
Bom dia, Quase não se nota no diagrama, mas há um quadrado que indica uma malha meia, entre as laçadas. Nas voltas do avesso, tricotam-se as malhas e as laçadas como elas se apresentam (ou seja, em liga). Bom Tricô!
11.03.2015 - 11:40Hallo, klopt het dan dat ik de merkdraad steeds tussen de omslagen heb? Of moet je eerst een omslag doen, 1 steek breien en weer een omslag?
10.02.2015 - 16:49DROPS Design answered:
Hoi Agnes. Je hebt de merkdraad in de middelste steek zitten. Je meerdert aan beide kanten van deze steek: 1 omslag, steek met merkdraad, 1 omslag
19.02.2015 - 16:30Hvis jeg skal strikke sjalet i bare 1 farge, hvor mange nøster trenger jeg da?
25.11.2014 - 17:47DROPS Design answered:
Hej Elisabeth, Så kan du muligvis klare dig med 3 nøgler. God fornøjelse!
26.11.2014 - 15:17Ce modèle me plaît beaucoup!Je l'essaierai c'est sûr!!!
08.10.2011 - 15:31The chart is in norweigen. Can I find it translated in English anywhere? Can I still purchase Vivaldi? Didn't see it on this web site's store...thanks
20.02.2007 - 03:40