
Popular categories
Looking for a yarn?


|
|
DROPS 43-15 |
|
 |
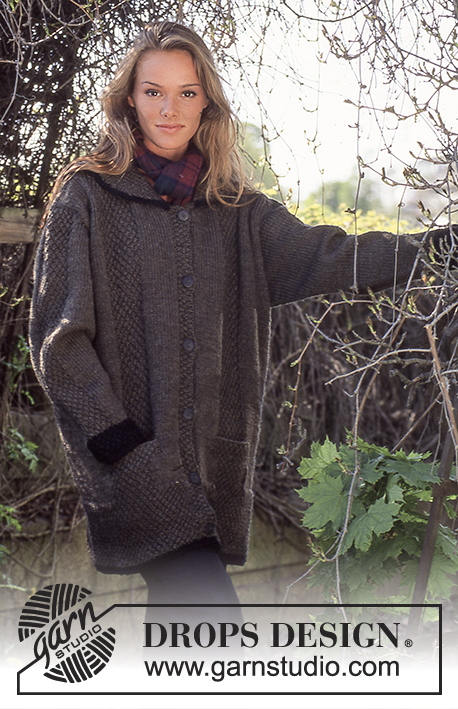 |
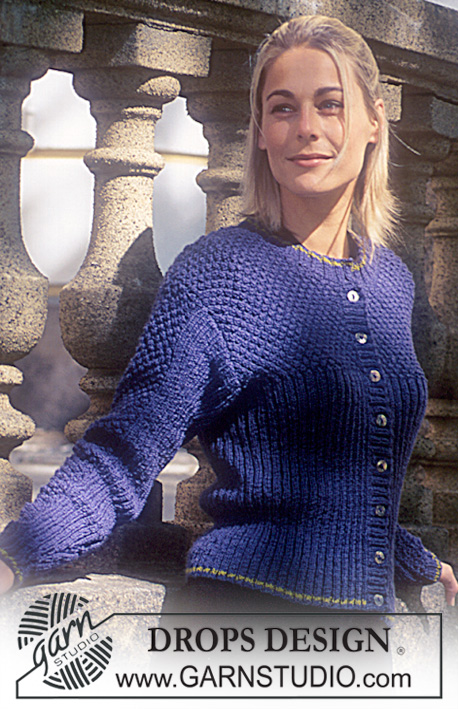
DROPS jacket in Alaska or Air with textured pattern
DROPS 43-15 |
|
|
Knitting gauge: 17 sts x 22 rows on needle size 5 mm / US 8 and stockinette sts = 4'' x 4'' (10 x 10 cm) Remember needle sizes are guidelines only! Double seed sts: 1st row: K1, P1. 2nd row: Knit K over K and P over P. 3rd row: K over P and P over K. 4th row: Knit P over P and K over K. Repeat 1st to 4th rows continuously. Pocket lining: Cast on 30 sts on double pointed needles size 5 mm / US 8 with green, knit 30 cm / 11 3/4'' stockinette st and slip sts onto thread or stitch holder. Knit 2 pcs. Body: Knit jacket back and forth on circular needles. Cast on 192 (204-216) sts on circular needle size 5 mm / US 8 with black and knit 14 cm / 5½'' double seed stitch - but after 1 round change to green. Continuing work pattern as follows: * 14 sts stockinette sts, 14 sts double seed sts, 40 (46-52) sts stockinette sts, 14 sts double seed sts, 14 sts stockinette sts *, repeat from *-*. Continuing, work pattern. When piece measures 20 (20-20) cm work next row as follows: Knit 10 (10-10) sts, slip 30 sts onto thread or stitch holder for pocket, knit until 40 (40-40) sts are left, slip 30 sts onto thread or stitch holder for pocket, knit 10 (10-10) sts. On next row slip pocket lining (see explanation above) in on row in opening over the 30 sts on thread or stitch holder. Continuing work pattern. Remember knitting gauge. When piece measures 49 (52-54) cm work next row as follows: 46 (49-52) sts front piece, bind off 4 sts for armhole, 92 (98-104) sts back piece, bind off 4 sts for armhole, 46 (49-52) sts front piece. Complete each piece separately. Front piece: = 46 (49-52) sts. Continuing bind off for armhole on every other row: 2 sts 2 (2-3) times, 1 sts 3 (3-3) times = 41 (42-43) sts. When piece measures 66 (69-72) cm bind off to shape neckline on every other row: 2 (3-3) sts 1 times, 2 sts 3 times, 1 sts 4 times. Bind off when piece measures 74 (77-80) cm Back piece: = 92 (98-104) sts. Continuing bind off for armhole like front piece = 82 (84-86) sts. When piece measures 72 (75-78) cm bind off middle 20 (22-22) sts to shape neckline. Then bind off 2 sts on each side on next row to shape neckline. Bind off when piece measures 74 (77-80) cm Sleeve: Cast on 38 (38-40) sts on double pointed needles size 5 mm / US 8 with black and knit 5 cm / 2'' double seed stitch - but after 1 round change to green. Continuing work pattern as follows: 12 (12-13) sts stockinette sts, 14 sts double seed sts, 12 (12-13) sts stockinette sts. Continue knitting pattern at the same time as inc mid under sleeve: 2 sts 24 (24-24) times on every 3rd round (knit inc sts in stockinette sts after each) = 86 (86-88) sts. When piece measures 43 (43-44) cm bind off 6 sts mid under arm and complete knitting back and forth on needle. Continuing bind off to shape sleeve cap on every other row: 3 sts 7 times, bind off. Piece measures approx 51 (51-52) cm. Assembly: Sew shoulder seams. Pick up approx 110-120 sts along left front piece on circular needles size 5 mm / US 8 with green and knit 3 cm / 1'' double seed sts. Repeat along right front piece but after 1 cm / 3/8'' knit 6 buttonholes distributed evenly on row - 1 buttonhole = bind off 2 sts and cast on 2 new sts over bind off sts on next row. Small collar as shown on picture (large collar goes 5 cm / 2'' further down on front): Figures in () = larger collar. Pick up approx 60-64 (60-64) sts around neck on circular needle size 5 mm / US 8 with green to mid front band (i.e. only over half the front band), knit double seed sts back and forth on needle and inc each side towards middle on every other row: 1 st 6 (1 sts 11) times. At the same time when piece measures 5 (5) cm inc 2 (2) sts on each shoulder on every other row until complete measurement. At the same time when piece measures 10.5 (10.5) cm bind off on each side towards mid front on every other row: 2 sts 6 times, 4 sts 1 time (3 sts1 times, 4 sts 6 times) and then knit 2 (2) rows and bind off remaining sts. Crochet edge: Crochet from RS with black and hook size 3.5 mm/E/4 as follows: 1 row with sc at bottom of body, sleeves and around collar (also crochet over front band). Then crochet one row of sc the opposite direction, i.e. from left to right without turning the piece, crochet sc from RS in each sc from previous row(= lobster sts of sc). Pockets: Slip sts from thread onto needle size 5 mm / US 8 and knit 3 cm / 1'' double seed sts, bind off. Fold pocket lining double, sew edges tog with backstitches and then sew pocket lining into first row of seed sts edge of pocket. Sew in sleeves and buttons. |
|

|
|
|
Have you made this or any other of our designs? Tag your pictures in social media with #dropsdesign so we can see them! Do you need help with this pattern?You'll find tutorial videos, a Comments/Questions area and more by visiting the pattern on garnstudio.com. © 1982-2024 DROPS Design A/S. We reserve all rights. This document, including all its sub-sections, has copyrights. Read more about what you can do with our patterns at the bottom of each pattern on our site. |
|


With over 40 years in knitting and crochet design, DROPS Design offers one of the most extensive collections of free patterns on the internet - translated to 17 languages. As of today we count 304 catalogs and 11422 patterns - 11417 of which are translated into English (US/in).
We work hard to bring you the best knitting and crochet have to offer, inspiration and advice as well as great quality yarns at incredible prices! Would you like to use our patterns for other than personal use? You can read what you are allowed to do in the Copyright text at the bottom of all our patterns. Happy crafting!
Comments / Questions (3)
MI SPIEGO MEGLIO : LE 14 MAGLIE A GRANA DI RISO DOPPIA SONO SU TUTTO IL LAVORO E NON SOLO SUI PRIMI 14 CM. VERO?
01.10.2022 - 14:14DROPS Design answered:
Buongiorno Margherita, veda la risposta alla domanda precedenre. Si ricordi di scrivere in minuscolo la prossima volta. Buon lavoro!
01.10.2022 - 14:24Lavorare 14 cm a grana di riso doppia - ma dopo il primo ferro passare al colore verde oliva scuro. Proseguire come segue: * 14 m maglia rasata, ETC. *-*. Proseguire con il motivo come impostato. Quando il lavoro misura 20 (20-20) cm, lavorare il ferro successivo come segue LA DOMANDA E': LAVORARE 14 CM A GRANA DI RISO DOPPIA OPPURE 20???
01.10.2022 - 14:09DROPS Design answered:
Buongiorno Margherita, deve lavorare i primi 14 cm a grana di riso doppia, poi proseguire con il motivo come impostato. Buon lavoro!
01.10.2022 - 14:23Buonasera, vorrei sapere come poter aumentare la taglia di questo modello? Grazie mille.
22.03.2021 - 16:31DROPS Design answered:
Buonasera Elisabetta, per un aiutocosì personalizzato può rivolgersi al suo rivenditore DROPS di fiducia. Buon lavoro!
23.03.2021 - 18:09