
Popular categories
Looking for a yarn?


|
|
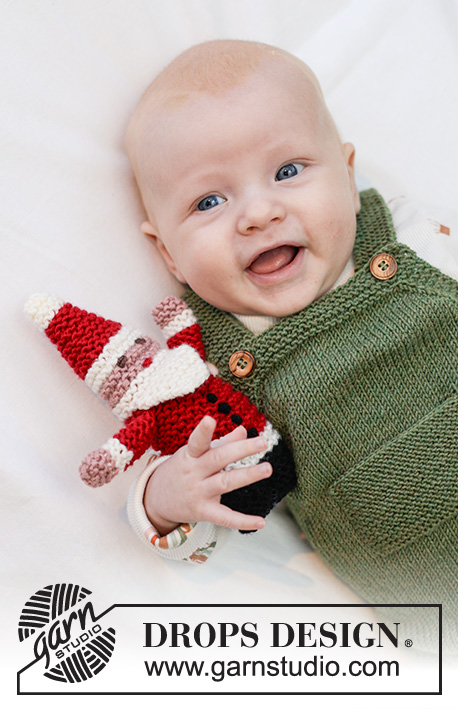
Little Fern Romper |
|
 |
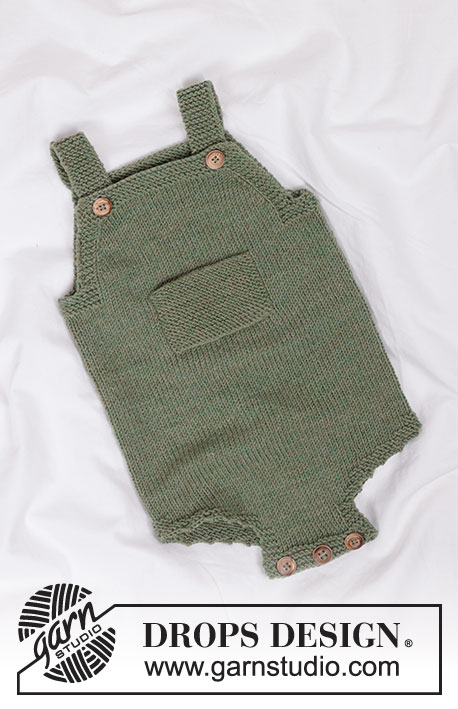 |
Knitted play suit for baby in DROPS BabyMerino. Piece is knitted top down in stockinette stitch and garter stitch. Size 0 - 4 years
DROPS Baby 45-10 |
|
|
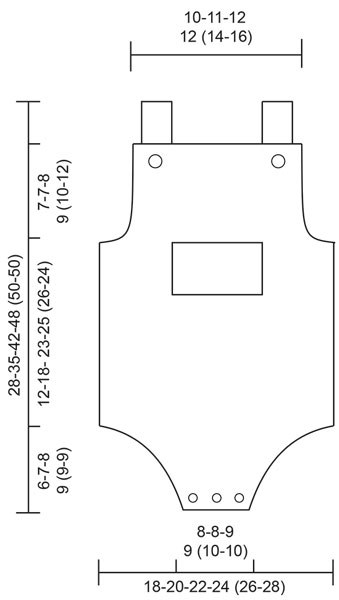
---------------------------------------------------------- EXPLANATION FOR THE PATTERN: ---------------------------------------------------------- GARTER STITCH (back and forth): Knit all rows. 1 ridge vertically = knit 2 rows. GARTER STITCH (worked in the round): 1 ridge vertically = 2 rounds, i.e. knit 1 round and purl 1 round. INCREASE TIP: All increases are done from right side. Increase as follows AFTER 4-5-6-6 (8-8) stitches in garter stitch and 1 stitch in stockinette stitch. The new stitch is twisted towards the left. Use left needle to pick up yarn between 2 stitches from row below, pick up yarn from the front and knit stitch in back loop of stitch. Increase as follows BEFORE 4-5-6-6 (8-8) stitches in garter stitch and 1 stitch in stockinette stitch. The new stitch is twisted towards the right. Use left needle to pick up yarn between 2 stitches from row below, pick up yarn from the back and knit stitch in front loop of stitch. ---------------------------------------------------------- START THE PIECE HERE: ---------------------------------------------------------- PLAY SUIT - SHORT OVERVIEW OF THE PIECE: Piece is worked back and forth in 2 parts top down before slipping them together and working in the round on a short circular needle. Then divide the piece again and work each part back and forth separately. Finish by knitting shoulder straps and pocket. FRONT PIECE: Cast on 27-29-32-32 (36-42) stitches on circular needle size 3 MM = US 2.5 with DROPS Baby Merino. Work 4 ridges in GARTER STITCH over all stitches - read explanation above. On 5th row decrease for 2 buttonholes as follows: Work 3 stitches in garter stitch, make 1 yarn over, knit 2 together, work as before until 4 stitches remain on needle, make a yarn over, knit 2 together, 2 stitches in garter stitch. Then work in stockinette stitch with 4-5-6-6 (8-8) stitches in garter stitch in each side of piece. REMEMBER THE KNITTING GAUGE! When piece measures 2-2-3-3 (3-4) cm = ¾"-¾"-1⅛"-1⅛" (1⅛"-1½"), increase 1 stitch in each side of piece - read INCREASE TIP! Increase like this every other row 6-7-9-11 (12-9) times in total and then every 4th row 1-1-0-0 (0-2) times in total = 41-45-50-54 (60-64) stitches. Continue in stockinette stitch with garter stitch on each side until piece measures approx. 7-7-8-9 (10-12) cm = 2¾"-2¾"-3⅛"-3½" (4"-4¾"). The last row is worked from wrong side Put piece aside and work the back piece. BACK PIECE: Cast on 27-29-32-32 (36-42) stitches on circular needle size 3 MM = US 2.5 with DROPS Baby Merino and work the same way as on front piece but without buttonholes = 41-45-50-54 (60-64) stitches on needle. The last row is worked from wrong side. Now put the piece together and work in the round. BODY: Cast on 3-3-3-4-4-4 stitches for armhle, work the stitches on front piece, cast on 6-6-6-8-8-8 stitches for armhole and insert a marker in the middle of the new stitches, work the stitches on back piece, cast on 3-3-3-4-4-4 stitches for armhole, insert a marker here = beginning of the round. There are now 94-102-112-124 (136-144) stitches - now measure piece from here. Work in stockinette stitch in the round while at the same time working in garter stitch over stitches in garter stitch and the stitches cast on in each side (= 14-16-18-20 (24-24) stitches in garter stitch) until you have 4 ridges in total vertically. Continue in stockinette stitch over all stitches. When piece measures approx. 10-16-21-23 (24-22) cm = 4"-6¼"-8¼"-9" (9½"-8¾"), work 9 stitches in garter stitch on each side of markers (= 18 stitches in garter stitch in each side) and work the rest in stockinette stitch. Work like this until there are 4 ridges in total vertically. Now divide the piece at the markers, and finish front and back piece separately. BACK PIECE: = 47-51-56-62 (68-72) stitches. Work piece back and forth in stockinette stitch with 9 stitches in garter stitch in each side while at the same time decreasing for gusset at the beginning of every row. (The ridges are displace on every bind off, make sure to always work 9 stitches in garter stitch after bind off.) NOTE! On last bind off work 6 stitches in garter stitch in each side. Bind off as follows: 4 stitches 1-0-1-1 (3-2) times in total in each side and then 3 stitches 3-5-4-5 (3-5) times in total in each side = 21-21-24-24 (26-26) stitches on needle. Then work in garter stitch over the 6 outmost stitches in each side and stockinette stitch over the middle stitches until piece measures approx. 4-5-6-7 (7-7) cm = 1½"-2"-2⅜"-2¾" (2¾"-2¾") from division. Now work in garter stitch over all stitches until you have 4-5-5-5 (6-6) ridges in total vertically and piece measures approx. 18-25-31-34 (35-33) cm = 7"-9¾"-12¼"-13⅜" (13¾"-13"). Bind off by knitting. FRONT PIECE: = 47-51-56-62 (68-72) stitches. Work the same way as back piece = 21-21-24-24 (26-26) stitches on needle. Continue to work until piece measures approx. 17-23-29-34 (35-33) cm = 6¾"-9"-11⅜"-13⅜" (13¾"-13"). On next row from right side, bind off for 3 buttonholes as follows: Knit 3-3-4-4 (4-4), * 1 yarn over, knit 2 together, knit 4-4-5-5 (6-6) stitches *, repeat from *-* 1 more time, knit 2 together, 1 yarn over and knit 4. Continue to work in garter stitches until piece measures approx. 18-25-31-34 (35-33) cm = 7"-9¾"-12¼"-13⅜" (13¾"-13"). Bind off by knitting. SHOULDER STRAP: Begin with one shoulder strap. Pick up 1 stitch in each of the outermost 6-7-7-8 (8-8) stitches on back piece. Work in garter stitch back and forth until strap measures approx. 9-15 cm = 3½"-6" (or desired length), equals approx. 3-5 cm = 1⅛"-2" overlap to make the strap adjustable. Bind off by knitting and work the other strap the same way. POCKET: Cast on 16-18-20-23 (26-31) stitches on circular needle size 3 MM = US 2.5. Work in garter stitch over all stitches. Continue like this until piece measures approx. 4-6-6-8 (8-9) cm = 1½"-2⅜"-2⅜"-3⅛" (3⅛"-3½"). Bind off by knitting. ASSEMBLY: Sew the buttons on to the straps. Sew 3 button at the bottom of play suit on back piece. Fasten the pocket to front piece with grafting/kitchener stitches, approx. 7-7-8-9 (10-12) cm = 2¾"-2¾"-3⅛"-3½" (4"-4¾") down from cast-on edge on front piece. |
|
|
|
|
Have you made this or any other of our designs? Tag your pictures in social media with #dropsdesign so we can see them! Do you need help with this pattern?You'll find tutorial videos, a Comments/Questions area and more by visiting the pattern on garnstudio.com. © 1982-2024 DROPS Design A/S. We reserve all rights. This document, including all its sub-sections, has copyrights. Read more about what you can do with our patterns at the bottom of each pattern on our site. |
|


With over 40 years in knitting and crochet design, DROPS Design offers one of the most extensive collections of free patterns on the internet - translated to 17 languages. As of today we count 304 catalogs and 11422 patterns - 11417 of which are translated into English (US/in).
We work hard to bring you the best knitting and crochet have to offer, inspiration and advice as well as great quality yarns at incredible prices! Would you like to use our patterns for other than personal use? You can read what you are allowed to do in the Copyright text at the bottom of all our patterns. Happy crafting!
Comments / Questions (12)
Hello, could you please drescribe a bit better how to decrease for gusset ?, is it just -1 stitch at the beg. of every row? how many times in total before the "bind off as follows:" on each side? (size 6-9months). Thank you
21.04.2024 - 21:54DROPS Design answered:
Dear Erika, the decreases for the gusset are the ones described as "Bind off as follows". So you don't need to do anything before that. Happy knitting!
22.04.2024 - 00:54Moet ik met het afkanten beginnen na LET OP dus met 1x4 en 4x3 of start ik met 9 steken ribbel en minder ik elke naald een steek aan elke kant? Zo ja hoe vaak moet ik dit dan doen?
23.01.2024 - 18:33DROPS Design answered:
Dag Mirjam,
Je kant steeds vlak naast de 9 ribbelsteken af. Dus aan het begin van de naald brei je eerst de 9 ribbelsteken dan kant je af. Aan het eind van de naald kant je af voor de laatste 9 ribbelsteken. De reeks getallen refereren naar de verschillende maten, dus afhankelijk van welke maat je breit, kant je een aantal keren 4 steken af en een aantal keren 3 steken.
24.01.2024 - 09:39\'En el último remate trabajar 6 puntos en punto musgo a cada lado\'...\r\nCuantos puntos tiene que haber en la aguja antes de rematar esos 6 puntos a cada lado?\r\nGracias
11.12.2023 - 21:48"Wie folgt abnehmen: 4 Maschen insgesamt je 1-0-1-1 (3-2) x beidseitig und dann 3 Maschen insgesamt je 3-5-4-5 (3-5) x beidseitig = 21-21-24-24 (26-26) Maschen auf der Nadel." Wenn ich es so stricke, ist es unförmig. Ist 4x1M gemeint? So nehme ich 1x4 M ab. Franzi hatte anscheinend das gleiche Problem.
05.11.2023 - 10:08DROPS Design answered:
Liebe Uschi, am Anfang der 2 nächsten Reihe (Hin- sowie Rückreihe) werden Sie jetzt 4 Maschen abketten (= 4 Maschen x 1 Mal beidseitig), dann je nach der Größe ketten Sie 3 Maschen am Anfang der 6-10-8-10 (6-10) Reihen (=3-5-4-5(3-5) Mal auf jeder Seite). Siehe auch 2. Foto, es kann Ihnen helfen. Viel Spaß beim stricken!
06.11.2023 - 08:28Notizen: 1. Beide Träger stricken und Maschen für das Rückenteil dazwischen aufnehmen -> keine Naht 2. Bündchenmuster unter Armausschnitt -> elastischer beim Anziehen. 3. Krausre an Rückteil unten verlängern, damit Body mitwachsen kann -> 3 extra Knöpfe Für Gr. 48/52 35 gr Baby Merino
04.11.2023 - 15:51Wie viel Garn benötige ich für ein 0-2 Monte altes Baby?
15.10.2023 - 18:16DROPS Design answered:
Liebe Anke, es sind 2 Knäuel DROPS Baby Merino benötigt, aber dann sollen Sie die Größe zwischen 0/1 Monat = ca 48/52 cm oder 1/3 Monat = ca 56/62 cm wählen. Viel Spaß beim stricken!
16.10.2023 - 10:16Prosím, potřebuju vysvětlit jak přesně ujímat při spodních dílech( Pleteme v řadách lícovým žerzejem, na každé straně dílu 9 ok vroubkovým vzorem a SOUČASNĚ na začátku každé řady ujímáme oka pro rozkrok Na každé straně uzavřeme 4 oka …atd.) Myslela jsem že na každe řadě na začátku spojîm 2 oka hladce, ale mam teď spodní díl příliš dlouhý a nerozumím tomu že uzavřeme4 oka na každé straně ? Děkuju mockrát!
07.09.2023 - 21:12Salve,come mai nelle istruzioni ci sono 2 asole e nella foto sono 3?grazie
31.07.2023 - 11:56DROPS Design answered:
Buonasera Sofia, le prime asole lavorate sono quelle in cui si allacciano le bretelle, le 3 asole della chiusura in basso si lavorano alla fine. Buon lavoro!
31.07.2023 - 19:37Hallo, wird beim unteren Vorder und Rückenteil wirklich bei jeder Reihe abgenommen oder nur bei den Hin Reihen? Wenn ich in jeder Reihe beidseitig 3 Maschen abnehme sieht das Unterteil anders aus als auf dem Foto. Danke schon einmal!
05.07.2023 - 18:21DROPS Design answered:
Liebe Franzi, es wird beidseitig abgekettet, dh am Anfang jeder Hin- sowie jeder Rück-Reihe. Viel Spaß beim stricken!
06.07.2023 - 09:59Jag har ju läst mönstret fel.. löste det själv
21.06.2023 - 00:15