
Popular categories
Looking for a yarn?


|
|||||||||||||||||||||||||
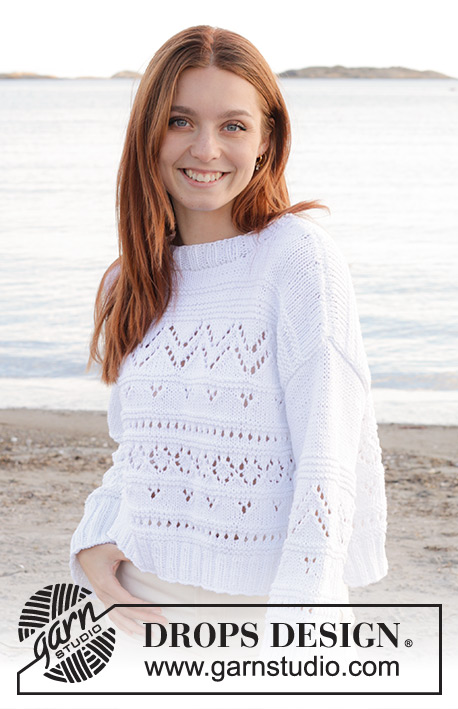
Frosted Mountains Sweater |
|||||||||||||||||||||||||
 |
 |
||||||||||||||||||||||||
Knitted jumper in DROPS Paris or DROPS Bomull-Lin. The piece is worked bottom up, with lace pattern. Sizes S - XXXL.
DROPS 240-16 |
|||||||||||||||||||||||||
|
------------------------------------------------------- EXPLANATIONS FOR THE PATTERN: ------------------------------------------------------- RIDGE/GARTER STITCH (worked back and forth): Knit all rows. 1 ridge = knit 2 rows. PATTERN: See diagrams A.1 to A.5. Choose diagram for your size (applies to A.2). The diagrams show all rows in the pattern from the right side. DECREASE TIP (for neck): Decrease for neck inside 2 stitches in stocking stitch. All decreases are worked from the right side! AFTER 2 STOCKING STITCHES: Slip 1 stitch as if to knit, knit 1 and pass the slipped stitch over the knitted stitch (= 1 stitch decreased). BEFORE 2 STOCKING STITCHES: Work until there are 4 stitches left mid-front, knit 2 together, work the last 2 stitches in stocking stitch (= 1 stitch decreased). INCREASE TIP (for sleeves): Start 1 stitch before the marker-thread, make 1 yarn over, knit 2 (marker thread sits between these 2 stitches), 1 yarn over. On the next round work the yarn overs twisted to avoid holes. Then work the new stitches in pattern. ------------------------------------------------------- START THE PIECE HERE: ------------------------------------------------------- JUMPER – SHORT OVERVIEW OF THE PIECE: The front and back pieces are worked separately back and forth, bottom up. The sleeves are worked in the round with double pointed needles/short circular needle from the bottom up to the sleeve cap, then finished back and forth on circular needle to finished measurements. Finally, the neck is worked in the round. BACK PIECE: Cast on 94-98-110-122-134-138 stitches with circular needle size 4 mm and DROPS Paris or DROPS Bomull-Lin. Purl 1 row from the wrong side. Then work rib as follows: 2 stitches in GARTER STITCH – read description above, * knit 2, purl 2 *, work from *-* until there are 4 stitches left, knit 2 and 2 stitches in garter stitch. Continue this rib for 6 cm. Change to circular needle size 5 mm. Continue with stocking stitch and 1 stitch in garter stitch on each side and decrease 10-8-10-12-14-12 stitches evenly on the first row = 84-90-100-110-120-126 stitches. Continue working until the piece measures 7-8-10-10-10-11 cm from cast on edge. Continue with pattern as follows: 1 stitch in garter stitch, work A.1 until there is 1 stitch left and 1 stitch in garter stitch. On the last row in A.1 decrease 1-0-1-1-1-1 stitch inside 1 stitch in garter stitch = 83-90-99-109-119-125 stitches. When A.1 is finished in height, continue as follows: 1 stitch in garter stitch, work 0-0-0-1-2-1 stitches like the first stitch in A.2, then A.2 10-11-12-13-14-15 times in width, 1-0-1-2-3-2 stitches like the last stitch in A.2 and 1 stitch in garter stitch. When A.2 is finished in height, continue as follows: 1 stitch in garter stitch, work 0-0-2-1-0-0 stitches in stocking stitch, A.3A, then A.3B 12-13-14-16-18-19 times, A.3C, work 0-1-2-1-0-0 stitches in stocking stitch and 1 stitch in garter stitch. When A.3 is finished in height, continue with A.1 and 1 stitch in garter stitch on each side. On the first row increase 1-0-1-1-1-1 stitch inside 1 garter stitch = 84-90-100-110-120-126 stitches. When A.1 is finished in height the piece measures approx. 26-27-29-30-30-31 cm. Continue with A.2 as follows (and decrease 1-0-1-1-1-1 stitch on the first row = 83-90-99-109-119-125 stitches): 1 stitch in garter stitch, 0-0-0-1-2-1 stitches like the first stitch in A.2, work A.2 10-11-12-13-14-15 times, 1-0-1-2-3-2 stitches like the last stitch in A.2 and 1 stitch in garter stitch. AT THE SAME TIME, when the piece measures 28-29-30-31-32-33 cm, cast off 2-3-7-9-12-11 stitches at the beginning of the next 2 rows for the armholes = 79-84-85-91-95-103 stitches. When A.2 is finished in height, continue as follows: 1 stitch in garter stitch, 3-0-1-4-1-0 stitches like the first stitch in A.4A, A.4A, work A.4B 6-7-7-7-8-9 times, A.4C, 3-1-1-4-1-0 stitches like the last stitch in A.4C and 1 stitch in garter stitch. When A.4 is finished in height, work A.5 with 1 stitch in garter stitch on each side. Work A.5, 2 times in height. Then finish the piece in stocking stitch with 1 stitch in garter stitch on each side. OVERVIEW OF THE NEXT SECTION: When the piece measures 46-48-50-52-54-56 cm, decrease for the neck and place stitches on a thread for the shoulders. Read NECK and DIAGONAL SHOULDERS before continuing. NECK: Cast off the middle 21-22-23-25-25-27 stitches for the neck and finish each shoulder separately. Then decrease 1 stitch for the neck on each row from the right side 3 times – read DECREASE TIP. DIAGONAL SHOULDERS: AT THE SAME TIME, when the piece measures 46-48-50-52-54-56 cm, place the outermost stitches by the armhole on a thread, working them first to avoid cutting the strand: Place 7-7-7-8-8-9 stitches on the thread 3 times, then the last 5-7-7-6-8-8 stitches. All stitches are now either decreased or on the thread. Place the 26-28-28-30-32-35 thread-stitches back on circular needle size 5 mm. Purl 1 row from the wrong side; to avoid holes where you turned mid-front, pick up the strand between the 2 stitches and work it twisted together with the first stitch on the left needle. Cast off loosely with knit from the right side. The piece measures approx. 50-52-54-56-58-60 cm from the cast-on edge up to the top of the shoulder. Work the other shoulder in the same way. FRONT PIECE: Cast on and work in the same way as the back until the front piece measures 44-46-47-49-50-52 cm = 79-84-85-91-95-103 stitches (follow the adjustments given for the back piece so the stitch-number is correct for each pattern). OVERVIEW OF THE NEXT SECTION: Now decrease for the neck and place stitches on a thread for the shoulders. Read NECK and DIAGONAL SHOULDERS before continuing. NECK: Place the middle 19-20-21-23-23-25 stitches on a thread for the neck and finish each shoulder separately. Then decrease 1 stitch for the neck on each row from the right side 4 times – remember DECREASE TIP. DIAGONAL SHOULDERS: AT THE SAME TIME, when the piece measures 46-48-50-52-54-56 cm, place the outermost stitches by the armhole on a thread in the same way as on the back piece. When all stitches are either decreased or on the thread, place the 26-28-28-30-32-35 thread-stitches back on circular needle size 5 mm and work them in the same way as on the back piece. Purl 1 row from the wrong side. Cast off loosely with knit from the right side. The piece measures approx. 50-52-54-56-58-60 cm from the cast-on edge and up to the top of the shoulder. Work the other shoulder in the same way. SLEEVES: Cast on 56-56-60-60-64-64 stitches with double pointed needles 4 mm and DROPS Paris or DROPS Bomull-Lin. Knit 1 round. Insert 1 marker-thread at the beginning of the round. Work rib in the round (knit 2, purl 2) for 10 cm. Change to double pointed needles 5 mm. Knit 1 round and decrease 11-9-11-9-11-9 stitches evenly spaced = 45-47-49-51-53-55 stitches. Insert 1 marker in the 23rd-24th-25th-26th-27th-28th stitch (mid-top of sleeve). The marker-thread is used when increasing under the sleeve, the marker for positioning the pattern. Count out from the marker-stitch where to begin the pattern – the marker-stitch matches the mid-stitch in the diagram. The stitches which do not fit into the pattern are worked in stocking stitch. Work A.1, A.2, A.4B and A.5 upwards. When the patterns have been worked in this order, continue with stocking stitch until the finished measurements. AT THE SAME TIME when the piece measures 12-12-12-13-14-12 cm, increase 1 stitch on each side of the marker-stitch - read INCREASE TIP. Increase like this every 4½-4-3½-3-2½-2½ cm a total of 8-9-9-10-11-12 times = 61-65-67-71-75-79 stitches (the increases are finished before working the sleeve cap). When the piece measures 47-46-44-42-41-42 cm, divide the sleeve at the marker-thread and work the sleeve cap back and forth on circular needle. Cast off when the sleeve measures 48 cm in all sizes. Work the other sleeve in the same way. ASSEMBLY: Sew the shoulder seams. Sew the sleeve cap to the armhole inside the edge stitch on the body. Sew the split to the bottom of the armhole – see sketch. Sew the side seams inside the 1 stitch – start at the armhole and work down to the rib, leaving a split at the bottom. NECK: Start from one shoulder seam and from the right side, knit up 76 to 88 stitches around the neck with short circular needle size 4 mm with DROPS Paris or DROPS Bomull-lin (including the stitches from the thread mid-front). The stitch-number should be divisible by 4. Work rib in the round (knit 2, purl 2) for 4 cm. Cast off. |
|||||||||||||||||||||||||
Diagram explanations |
|||||||||||||||||||||||||
|
|||||||||||||||||||||||||

|
|||||||||||||||||||||||||

|
|||||||||||||||||||||||||

|
|||||||||||||||||||||||||

|
|||||||||||||||||||||||||
|
Have you made this or any other of our designs? Tag your pictures in social media with #dropsdesign so we can see them! Do you need help with this pattern?You'll find tutorial videos, a Comments/Questions area and more by visiting the pattern on garnstudio.com. © 1982-2024 DROPS Design A/S. We reserve all rights. This document, including all its sub-sections, has copyrights. Read more about what you can do with our patterns at the bottom of each pattern on our site. |
|||||||||||||||||||||||||


With over 40 years in knitting and crochet design, DROPS Design offers one of the most extensive collections of free patterns on the internet - translated to 17 languages. As of today we count 304 catalogues and 11415 patterns - 11415 of which are translated into English (UK/cm).
We work hard to bring you the best knitting and crochet have to offer, inspiration and advice as well as great quality yarns at incredible prices! Would you like to use our patterns for other than personal use? You can read what you are allowed to do in the Copyright text at the bottom of all our patterns. Happy crafting!
Comments / Questions (11)
A.1 bedoel ik bij onderstaande vraag
06.09.2023 - 16:44DROPS Design answered:
Dag Mevr Mullenders,
Het model op de foto heeft de kleinste maat aan en in de kleinste maat brei je nog 1 cm in tricotsteek na de boord, dus dat valt niet zo op op de foto. Bij de grotere maten is dat wat meer.
07.09.2023 - 19:40Volgens beschrijving komt na de boord 4cm tricotsteek totdat het werk 10cm is. Maar als ik de fotobekijk, is gelijk met A.2 begonnen? graag opheldering
06.09.2023 - 13:34Hur skall ärmkullen stickas? I beskrivningen står endast " När arbetet mäter ca 47-46-44-42-41-42 cm, delas arbetet vid markören och ärmkullen stickas fram och tillbaka på rundsticka. Maska av när ärmen mäter 48 cm i alla storlekar. Sticka den andra ärmen på samma sätt." Här menas antagligen markören mitt på arbetet? Skall ärmkullen stickas rak (utan minskningar) mellan de båda markörerna eller vad menas?
27.08.2023 - 09:54DROPS Design answered:
Arbetet delas för ärmkullen vid märktråden som finns mitt under ärmen. Sedan stickas ärmkullen fram och tillbaka utan minskningar tills ärmen mäter 48 cm.
18.09.2023 - 17:19Hallo.ich muss jetzt Mal fragen.ich bin jetzt beim ärmel. die Mittelmasche des Ärmels soll mit der Mittelmasche des Diagramms übereinstimmen.Nur ist das Diagramm eine gerade Maschenzahl,da gibt es ja keine Mittelmasche,sondern nur 2. Die Ärmelmaschen sind aber nun Mal ungerade laut Anleitung.Wie wird es jetz da bitte aufgeteilt?? Wenn es die Mittelmasche vom Diagramm sein soll. Es aber keine gibt.weil gerade Zahl an maschen.Es bleibt ja nun irgendwo eine übrig. Vielen lieben Dank.lg
06.08.2023 - 16:31DROPS Design answered:
Liebe Frau Schwarzenberger, ein Markierer wird in der 23.-24.-25.-26.-27.-28. Masche der Runde angebracht, diese Masche soll die mittlere Masche sein, die mit dem Sternchen im Diagram. Die übrigen Maschen, die unter der Ärmel nicht im Muster gestrickt werden könnnen, werden dann einfach nur glatt rechts gestrickt, so werden so viele Maschen wie möglich mit Muster gestrickt. Vielleicht kann Ihnen damit diese Lektion helfen. Viel Spaß beim stricken!
07.08.2023 - 10:58Vielen dank. jetzt hat es geklappt.
17.05.2023 - 17:31Hallo. wie stricke ich A.? (grösse m rückenteil) Rdm 0 m 13x 3A, 3B und 1x 3C, 1 m, rdm ?oder 1x 3A. 13x 3B. 1x 3C gehts sich sonst mit der maschenanzahl nicht aus. vielen dank
17.05.2023 - 13:17DROPS Design answered:
Liebe Andrea, meinen Sie A.3, richtig? Dann stricken Sie so in M beim Rückenteil: 1 Randmasche, A.3A (= 4 Maschen), A.3B (= 6 Maschen) 13 Mal (= über die nächsten 78 Maschen) , A.3C (5 Maschen), 1 Masche glatt rechts, 1 Randmasche (= 1+4+78+5+1+1=90 Maschen). Viel Spaß beim stricken!
17.05.2023 - 15:50Por más que leo la parte de los hombros europeos no logró en tenderlo
07.03.2023 - 23:34DROPS Design answered:
Hola Nayfher, primero, pasas los pts a un gancho auxiliar, por tramos, como se indica en el patrón para tu talla. Puedes ver el siguiente vídeo: https://www.garnstudio.com/video.php?id=301&lang=es sobre cómo pasar los puntos al gancho auxiliar. Es similar a cuando trabajas filas acortadas. Después de pasar todos los puntos al gancho auxiliar como se explica, pasarlos de vuelta a la aguja (todos a la vez) y trabajar 1 fila de revés. Después, cerrar de derecho.
12.03.2023 - 17:48Beach at dawn
22.01.2023 - 09:45Johnne
19.01.2023 - 03:12Clear Skies
18.01.2023 - 16:26