DROPS Air
DROPS Air
65% Alpaca, 28% Polyamide, 7% Wool
from 4.80 £ /50g
Get the yarn to make this pattern from 28.80£.

The yarn cost is calculated from the pattern’s smallest size and the yarn’s cheapest product type. Looking for an even better price? You might find it on the DROPS Deals!

DROPS SS24

Free to Be

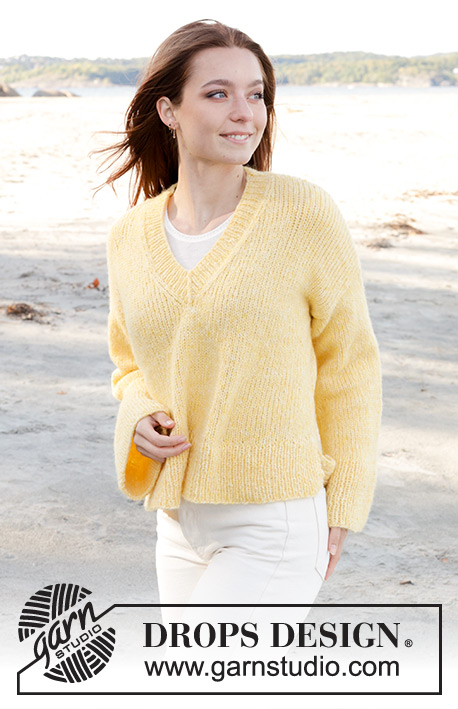
Knitted jumper in DROPS Air. The piece is worked bottom up with V-neck. Sizes S - XXXL.

DROPS 240-17
DROPS Design: Pattern ai-434
Yarn group C or A + A
-------------------------------------------------------

SIZES:
S - M - L - XL - XXL - XXXL

YARN:
DROPS AIR from Garnstudio (belongs to yarn group C)
300-350-350-400-400-400 g colour 40, lemonade

NEEDLES:
DROPS CIRCULAR NEEDLE SIZE 5 MM: Length 40 cm and 80 cm.
DROPS CIRCULAR NEEDLE SIZE 3.5 MM: Length 40 cm and 80 cm.
DROPS DOUBLE POINTED NEEDLES SIZE 5 MM.
DROPS DOUBLE POINTED NEEDLES SIZE 3.5 MM.
The technique MAGIC LOOP can be used – you then only need circular needle of 80 cm in each size.

KNITTING TENSION:
17 stitches in width and 22 rows in height with stocking stitch = 10 x 10 cm.
NOTE: Needle size is only a guide. If you get too many stitches on 10 cm, change to a larger needle size. If you get too few stitches on 10 cm, change to a smaller needle size.

-------------------------------------------------------

Alternative Yarn – See how to change yarns here
Yarn Groups A to F – Use the same pattern and change the yarn here
Yarn usage using an alternative yarn – Use our yarn converter here

-------------------------------------------------------

DROPS Air
DROPS Air
65% Alpaca, 28% Polyamide, 7% Wool
from 4.80 £ /50g
Get the yarn to make this pattern from 28.80£.

The yarn cost is calculated from the pattern’s smallest size and the yarn’s cheapest product type. Looking for an even better price? You might find it on the DROPS Deals!

Pattern instructions

NOTE: This pattern is written in British English. All measurements in charts are in cm. For conversion from cm to inches - click here. There are different terms for crocheting in British and American English. If this pattern includes crochet, click for "crochet terms" here. For this pattern in American English, please click here.
-------------------------------------------------------

EXPLANATIONS FOR THE PATTERN:
-------------------------------------------------------

RIDGE/GARTER STITCH (worked back and forth):
Knit all rows.
1 ridge = knit 2 rows.

DECREASE TIP (for neck):
All decreases are worked from the right side!
AT BEGINNING OF ROW:
Work 1 garter stitch, knit 1, slip 1 stitch as if to knit, knit 1 and pass the slipped stitch over the knitted stitch.
AT END OF ROW:
Work until there are 4 stitches left, knit 2 together, knit 1, 1 garter stitch.

INCREASE TIP (for sleeves):
Work 1 garter stitch, knit 1, 1 yarn over (1 stitch increased), knit until there are 2 stitches left, 1 yarn over (1 stitch increased), knit 1 and 1 garter stitch. On the next row purl the yarn overs twisted to avoid holes. Then work the new stitches in stocking stitch.

-------------------------------------------------------

START THE PIECE HERE:

-------------------------------------------------------

JUMPER – SHORT OVERVIEW OF THE PIECE:
The front and back pieces are worked separately, back and forth with circular needle, bottom up. The sleeves are worked in the round with double pointed needles/short circular needle as far as the sleeve cap, then finished back and forth with circular needle. The piece is sewn together and the neck worked to finish.

BACK PIECE:
Cast on 121-129-139-151-165-181 stitches with circular needle size 3.5 mm and DROPS Air. Purl 1 row from the wrong side. Work rib back and forth (knit 1, purl 1) with 1 stitch in GARTER STITCH on each side – read description above, for 10 cm.
Knit 1 row from the right side and decrease 37-37-41-43-47-53 stitches evenly spaced (do not decrease the edge stitches) = 84-92-98-108-118-128 stitches.
Change to circular needle size 5 mm and work stocking stitch with 1 stitch in garter stitch on each side.
REMEMBER THE KNITTING TENSION!
When the piece measures 37-38-39-40-41-42 cm, cast off 1-2-2-4-5-6 stitches for the armholes at the beginning of the next 2 rows = 82-88-94-100-108-116 stitches.
When the piece measures 54-56-58-60-62-64 cm, cast off the middle 22-24-26-26-28-30 stitches for the neck. Finish each shoulder separately. Cast off 1 stitch on the next row from the neck = 29-31-33-36-39-42 stitches on the shoulder. Cast off when the piece measures 56-58-60-62-64-66 cm. Work the other shoulder in the same way.

FRONT PIECE:
Cast on and work in the same way as the back piece until the front measures 35-36-37-38-39-40 cm = 84-92-98-108-118-128 stitches. Start decreasing for the neck on the next row from the right side as follows:
Work 38-42-45-50-55-60 stitches, knit 2 together, knit 1, 1 garter stitch, turn.
Place the other stitches on a thread (right shoulder).

LEFT SHOULDER (front piece):
= 41-45-48-53-58-63 stitches. Read the next section before continuing; you are decreasing for the neck and casting off for the armhole!
Continue with stocking stitch and 1 edge stitch in garter stitch mid-front and decrease for the neck inside the 1 edge stitch at the end of the row from the right side - read DECREASE TIP. Decrease every 1½ cm a total of 12-13-14-14-15-16 times (the first decrease has already been worked when dividing front piece). AT THE SAME TIME when the piece measures 37-38-39-40-41-42 cm, cast off 1-2-2-4-5-6 stitches for the armhole at the beginning of the next row from the right side.
When all the decreases for the neck and armhole are finished there are 29-31-33-36-39-42 stitches on the shoulder. Continue with stocking stitch and 1 edge stitch in garter stitch by the neck until the piece measures 56-58-60-62-64-66 cm. Cast off with knit from the right side.

RIGHT SHOULDER (front piece):
Place the stitches from the thread back on the needle = 42-46-49-54-59-64 stitches.
Read the next section before continuing; you are decreasing for the neck and casting off for the armhole!
Continue with stocking stitch (first row from the right side) and 1 edge stitch in garter stitch mid-front. Decrease for the neck inside the 1 edge stitch at the beginning of the row from the right side - remember DECREASE TIP. Decrease every 1½ cm a total of 12-13-14-14-15-16 times (the first decrease has been worked on first row). AT THE SAME TIME when the piece measures 37-38-39-40-41-42 cm, cast off 1-2-2-4-5-6 stitches for the armhole at the beginning of the next row from the wrong side.
When all the decreases for the neck and armhole are finished there are 29-31-33-36-39-42 stitches on the shoulder. Continue with stocking stitch and 1 edge stitch in garter stitch by the neck until the piece measures 56-58-60-62-64-66 cm. Cast off with knit from the right side.

SLEEVES:
Cast on 72-74-76-80-82-84 stitches with double pointed needles size 3.5 mm. Knit 1 round, then work rib in the round (knit 1, purl 1) for 12 cm. Change to double pointed needles size 5 mm. Knit 1 round and decrease 20-20-20-22-22-22 stitches evenly spaced = 52-54-56-58-60-62 stitches. Insert a marker-thread at the beginning of the round = mid-under sleeve. Work stocking stitch. When the sleeve measures 13 cm, increase 1 stitch on each side of the marker-thread – read INCREASE TIP. Increase like this every 6-5-4½.4½-3½-2½ cm a total of 6-7-8-8-9-10 times = 64-68-72-74-78-82 stitches. When the sleeve measures 49-48-48-46-43-41 cm, work the sleeve cap back and forth (from the marker-thread) until the sleeve measures 50-49-49-48-46-45 cm, i.e. a split of 1-1-1-2-3-4 cm at the top of the sleeve. Cast off. Work the other sleeve in the same way.
ASSEMBLY:
Sew the shoulder seams. Sew the sleeve cap to the armhole. Sew the side seams from the armholes down to the ribbing, inside the 1 edge stitch (= 10 cm split on each side).

NECK:
Use short circular needle size 3.5 mm. Start from the right side on one shoulder and knit up 42-44-46-48-50-52 stitches along one side of the neck (knit up 1 stitch in the middle of the neck), knit up 42-44-46-48-50-52 stitches along the other side of the neck and 28-30-32-32-36-38 stitches around the back of the neck = approx. 112-118-124-128-136-142 stitches. Purl 1 row and adjust if needed the stitch-number so it is divisible by 2. Work rib in the round (knit 1, purl 1) making sure you knit the stitch mid-front. AT THE SAME TIME on every 2nd round decrease 2 stitches mid-front as follows: Work until there is 1 stitch left before the knitted stitch mid-front, slip 2 stitches as if to knit together, knit 1, pass the slipped stitches over the knitted stitch (= 2 stitches decreased). This will give you a neat finish to the neck and the knitted stitch will create a straight line.
Cast off with knit over knit and purl over purl when the neck measures 4 cm.

Diagram

diagram measurements

Each of our patterns has specific tutorial videos to help you.

Do you have a question? See a list of frequently asked questions (FAQ)

Knitting tension is what determines the final measurements of your work, and is usually measured per 10 x 10 cm. It is provided like so: number of stitches in width x number of rows in height - eg: 19 stitches x 26 rows = 10 x 10 cm.

The knitting tension is very individual; some people knit/crochet loosely while others work tightly. You adjust the knitting tension with the needle size, which is why the suggested needle size is only meant as a guide! You need to adjust this (up or down) to ensure that YOUR knitting tension matches the knitting tension provided in the pattern. If you work with a different knitting tension than provided you will have a different yarn consumption, and your work will have different measurements than what the pattern suggests.

The knitting tension also determines which yarns can replace each other. As long as you achieve the same knitting tension you can replace one yarn with another.

See DROPS lesson: How to measure your tension/gauge

See DROPS video: How to make a gauge tension swatch

The required amount of yarn is provided in grams, eg: 450 g. To calculate how many balls you’ll need you first need to know how many grams are in 1 ball (25g, 50g or 100g). This information is available if you click on the individual yarn quality on our pages. Divide the amount required with the amount of each ball. For example, if each ball is 50g (the most common amount), the calculation will be as follows: 450 / 50 = 9 balls.

The important thing when changing from one yarn to another is that the knitting/crochet tension remains the same. This is so that the measurements of the finished piece will be the same as on the sketch provided. It is easier to achieve the same knitting tension using yarns from the same yarn group. It is also possible to work with multiple strands of a thinner yarn to achieve the knitting tension of a thicker one. Please try our yarn converter. We recommend you to always work a test swatch.

Please NOTE: when changing yarn the garment might have a different look and feel to the garment in the photo, due to individual properties and qualities of each yarn.

See DROPS lesson: Can I use a different yarn than the one mentioned in the pattern?

All our yarns are categorised into yarn groups (from A to F) according to thickness and knitting tension – group A contains the thinnest yarns and group F the thickest. This makes it easier for you to find alternative yarns to our patterns, should you wish to switch yarn. All yarns within the same group have a similar knitting tension and can easily replace each other. However, different yarn qualities have different structures and properties which will give the finished work a unique look and feel.

Click here for an overview of the yarns in each yarn group

At the top of all our patterns you’ll find a link to our yarn calculator, which is a helpful tool should you wish to use a different yarn than suggested. By filling in the yarn quality you wish to replace, the amount (in your size) and number of strands, the calculator will present good alternative yarns with the same knitting tension. Additionally it will tell you how much you’ll require in the new qualities and whether you’ll need to work with multiple strands. Most skeins are 50g (some are 25g or 100g).

If the pattern is worked with multiple colours, every colour will have to be calculated separately. Similarly, if the pattern is worked with several strands of different yarns (for example 1 strand Alpaca and 1 strand Kid-Silk) you will have to find alternatives for each, individually.

Click here to see our yarn calculator

Since different yarns have different qualities and textures we have chosen to keep the original yarn in our patterns. However, you can easily find options among our available qualities by using our yarn calculator, or simply pick a yarn from the same yarn group.

It is possible that some retailers still have discontinued yarns in stock, or that someone has a few skeins at home that they would like to find patterns for.

The yarn calculator will provide both alternative yarn as well as required amount in the new quality.

If you think it's hard to decide what size to make, it can be a good idea to measure a garment you own already and like the size of. Then you can pick the size by comparing those measures with the ones available in the pattern's size chart.

You'll find the size chart at the bottom of the pattern.

See DROPS lesson: How to read size chart

The needle size provided in the pattern serves only as a guide, the important thing is to follow the knitting tension. And since knitting tension is very individual, you will have to adjust the needle size to ensure that YOUR tension is the same as in the pattern – maybe you’ll have to adjust 1, or even 2 needle sizes, up or down to achieve the correct tension. For this, we recommend that you work test swatches.

Should you work with a different knitting tension than the one provided, the measurements of the finished garment might deviate from the measurement sketch.

See DROPS lesson: How to measure your tension/gauge

See DROPS video: How to make a tension/gauge swatch

Working a garment top-down provides more flexibility and room for personal adjustment. For example it is easier to try the garment on while working, as well as making adjustments to length of yoke and shoulder caps.

The instructions are carefully explaining every step, in the correct order. Diagrams are adjusted to the knitting direction and are worked as usual.

The diagram depicts all rows/rounds, and every stitch seen from the right side. It is read from bottom to top, from right to left. 1 square = 1 stitch.

When working back and forth, every other row is worked from the right side and every other row is worked from the wrong side. When working from the wrong side, the diagram will have to be worked reversed: from left to right, knit stitches are purled, purl stitches are knit etc.

When working in the round every round is worked from the right side and the diagram are worked from right to left on all rounds.

See DROPS lesson: How to read knitting diagrams

The diagram depicts all rows/rounds, and every stitch seen from the right side. It is worked from bottom to top, from right to left.

When working back and forth every other row is worked from the right side: from right to left and every other row is worked from the wrong side: from left to right.

When working in the round, every row in the diagram are worked from the right side, from right to left.

When working a circular diagram you start in the middle and work your way outwards, counter clockwise, row by row.

The rows usually start with a given number of chain stitches (equivalent to the height of the following stitch), this will either be depicted in the diagram or explained in the pattern.

See DROPS lesson: How to read crochet diagrams

Instructions for working several diagrams after each other on the same row/round, will often be written like so: “work A.1, A.2, A.3 a total of 0-0-2-3-4 times". This means you work A.1 once, then A.2 is worked once, and A.3 is repeated (in width) the number of times provided for your size – in this case like so: S = 0 times, M = 0 times, L=2 times, XL= 3 times and XXL = 4 times.

The diagrams are worked as usual: begin with the first row in A.1, then work the first row in A.2 etc.

See DROPS lesson: How to read knitting diagrams

See DROPS lesson: How to read crochet diagrams

The total width of the garment (from wrist-to-wrist) will be larger in the larger sizes, despite the actual sleeves being shorter. The larger sizes have longer sleeve caps and wider shoulders, so there will be a good fit in all sizes.

The measurement sketch/schematic drawing provides information regarding the full length of the garment. If it’s a jumper or a jacket the length is measured from the highest point on the shoulder closest to the neckline, and straight down to the bottom of the garment. It is NOT measured from the tip of shoulder. Similarly, the length of yoke is measured from the highest point on the shoulder and down to where yoke is split into body and sleeves.

On a jacket measures are never taken along bands, unless specifically stated. Always measure inside band stitches when measuring the length.

See DROPS lesson: How to read a schematic drawing

Diagrams are often repeated on the round or in height. 1 repeat is the diagram the way it appears in the pattern. If it says to work 5 repeats of A.1 in the round, then you work A.1 a total of 5 times after/next to each other in the round. If it says to work 2 repeats of A.1 vertically/in height you work the entire diagram once, then begin again at the start and work the entire diagram one more time.

Chain stitches are slightly narrower than other stitches and to avoid working the cast-on edge too tight, we simply chain more stitches to begin with. The stitch count will be adjusted on the following row to fit the pattern and measurement sketch.

The rib edge is more elastic and will contract slightly compared to, for example, stocking stitch. By increasing before the rib edge, you avoid a visible difference in width between the rib edge and the rest of the body.

It’s very easy to cast off too tightly, and by making yarn overs while casting off (and simultaneously casting these off) you avoid a too tight cast off edge.

See DROPS video: How to bind off with yarn overs (yo)

To achieve an even increase (or decrease) you can increase on, for example: every 3rd and 4th row alternately, like so: work 2 rows and increase on the 3rd row, work 3 rows and increase on the 4th. Repeat this until the increase is complete.

See DROPS lesson: Increase or decrease 1 st on every 3rd and 4th row alternately

Should you prefer to work in the round instead of back and forth, you may of course adjust the pattern. You’ll need to add steeks mid-front (usually 5 stitches), and follow the instructions. When you would normally turn and work from the wrong side, simply work across the steek and continue in the round. At the end you’ll cut the piece open, pick up stitches to work bands, and cover the cut edges.

See DROPS video: How to knit steeks and cut open

Should you prefer to work back and forth instead of in the round, you may of course adjust the pattern so you work the pieces separately and then assemble them at the end. Divide the stitches for the body in 2, add 1 edge stitch in each side (for sewing) and work the front and back pieces separately.

See DROPS lesson: Can I adapt a pattern for circular needles into straight needles?

Pattern repeats can vary slightly in the different sizes, in order to get the correct proportions. If you’re not working the exact same size as the garment in the photo, yours might deviate slightly. This has been carefully developed and adjusted so that the complete impression of the garment is the same in all sizes.

Make sure to follow instructions and diagrams for your size!

If you have found a pattern you like which is available in women’s size it’s not very difficult to convert it to men’s size. The biggest difference will be the length of sleeves and body. Start working on the women size that you think would fit across the chest. The additional length will be worked right before you cast off for the armhole/sleeve cap. If the pattern is worked top-down you can add the length right after the armhole or before the first decrease on sleeve.

Regarding additional yarn amount, this will depend on how much length you add, but it is better with a skein too many than too few.

All yarns will have excess fibres (from production) that might come off as lint or shedding. Brushed yarns (ie hairier yarns) have more of these loose, excess fibres, causing more shedding.

Shedding also depends on what is worn under or over the garment, and whether this pulls at the yarn fibres. It’s therefore not possible to guarantee that there will be no shedding

Below are some tips on how to get the best result when working with hairier yarns:

1. When the garment is finished (before you wash it) shake it vigorously so the looser hairs come off. NOTE: do NOT use a lint roller, brush or any method that pulls at the yarn.

2. Place the garment in a plastic bag and put it in your freezer - the temperature will cause the fibres to become less attached to each other, and excess fibres will come off easier.

3. Leave in the freezer for a few hours before taking it out and shaking it again.

4. Wash the garment according to the instructions on the yarn label.

Pilling is a natural process that happens to even the most exclusive of fibers. It's a natural sign of wear and tear that is hard to avoid, and that is most visible in high friction areas of your garment like a sweater's arms and cuffs.

You can make your garment look as new by removing the pilling, using a fabric comb or a pill/lint remover.

Still can't find the answer you need? Then scroll down and leave your question so one of our experts can try to help you. This will be done normally within 5 to 10 working days.
In the meantime, you can read the questions and answers that others have left to this pattern or join the DROPS Workshop on Facebook to get help from fellow knitters/crocheters!

You might also like...

Post a comment to pattern DROPS 240-17

We would love to hear what you have to say about this pattern!

If you want to leave a question, please make sure you select the correct category in the form below, to speed up the answering process. Required fields are marked *.

Comments / Questions (13)

country flag Valerie wrote:

Hello, I am new to making V-neck sweaters and am a bit confused about the Neck indications: If we are knitting the neck in the round, and decreasing before the centre knit stitch, then we are always decreasing from the same side of the V. Will that not move the centre stitch slightly off to one side? Should we instead be decreasing on both sides of the centre knit stitch?

12.03.2024 - 14:38

DROPS Design answered:

Dear Valerie, in this video we show how to work such a V-neck decreasing on mid front to keep V-edge and the knit stitches straight forward. Happy knitting!

12.03.2024 - 15:47

country flag Zuzana wrote:

Sveter som nakoniec uplietla, začala som odznova s menším počtom očiek, on sa nakoniec trochu stiahol, ale nevadí sedí dobre, mám z neho radosť. Akurát mi ostalo jedno klbko. Robíte dobrú prácu. Mohli by ste uvádzať meno autora/autorky modelu.

20.05.2023 - 17:56

country flag Susi wrote:

So ein schlichter V- Pullover von oben nach unten ohne unnötige Nähte, das wäre es !!!

21.03.2023 - 10:29

country flag Zuzana wrote:

Dobrý deň, začala som pliesť tento model vo veľkosti L. Zdá sa mi veľmi široký. Po 16 cm výšky má šírku 61 cm. Podľa vášho nákresu by to malo byť 56 cm. Skúšobný vzor mi vyšiel tak ako uvádzate. Rozdiel 5 cm na jenom diele je veľa. Spolu to bude v obvode 10 cm. Ešte sa to nejako zbehne, alebo po opratí?

15.03.2023 - 16:52

country flag Susan Evett wrote:

Can you work this in the round to the start of the sleeves, then separate for front/back? thank you!

21.02.2023 - 00:59

DROPS Design answered:

Dear Mrs Evett, probably, but note that there are 10 cm vents on each side, so that front and back piece should be worked first separately. Happy knitting!

21.02.2023 - 10:11

country flag Belén wrote:

Lemon morning

22.01.2023 - 23:26

country flag Anette Brandt Schmidt wrote:

Sunshine

22.01.2023 - 11:53

country flag Melanie wrote:

Daisy

21.01.2023 - 11:37

country flag Elin wrote:

Sunset dream

19.01.2023 - 20:02

country flag Domi wrote:

Kogel Mogel

18.01.2023 - 12:51