
Popular categories
Looking for a yarn?


|
|||||||||||||||||||||||||||||||
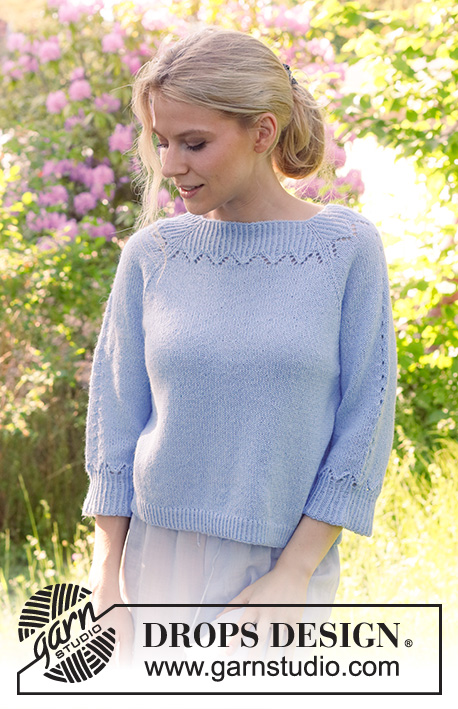
Lost in the Sky Top |
|||||||||||||||||||||||||||||||
 |
 |
||||||||||||||||||||||||||||||
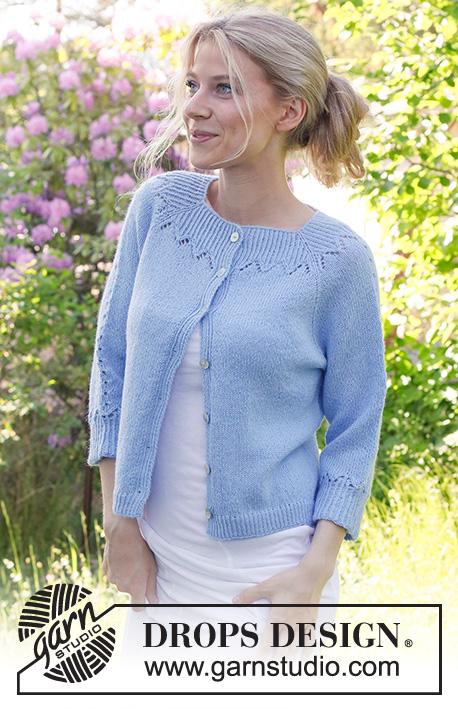
Knitted jumper with ¾ sleeves in DROPS Alpaca. Piece is knitted top down with raglan and lace pattern. Size: S - XXXL
DROPS 230-48 |
|||||||||||||||||||||||||||||||
|
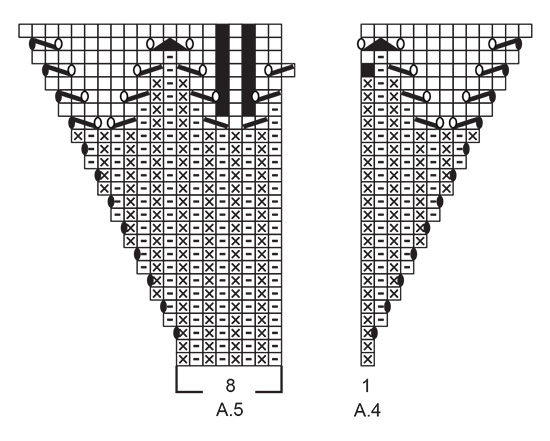
---------------------------------------------------------- EXPLANATION FOR THE PATTERN: ---------------------------------------------------------- PATTERN: See diagrams A.1 to A.7. RAGLAN: Increase before/after stitch with marker. Increase 1 stitch by making 1 yarn over. On next round knit yarn over twisted to avoid holes. DECREASE TIP (applies to sleeves): Decrease 1 stitch on each side of marker thread as follows: Work until 3 stitches remain before marker thread and knit 2 together, knit 2 (marker thread is between these 2 stitches), slip 1 stitch knitwise, knit 1, pass slipped stitch over stitch worked. ---------------------------------------------------------- START THE PIECE HERE: ---------------------------------------------------------- JUMPER - SHORT OVERVIEW OF THE PIECE: Work yoke in the round on circular needle from right shoulder at the back, top down. Now divide yoke for body and sleeves. Work the body in the round on circular needle. Work sleeves in the round on double pointed needles/a short circular needle. YOKE: Cast on 120-120-120-140-140-140 stitches on a short circular needle size 2.5 mm with DROPS Alpaca. Knit 1 round. Work next round as follows: A.1 (insert 1 marker in first stitch), A.2, A.3 (insert 1 marker in last stitch – stitches between these 2 stitches belong to right sleeve), A.4, work A.2 3-3-3-4-4-4 times in total, A.5 (these stitches belong to front piece), A.1 (insert 1 marker in first stitch), A.2, A.3 (insert 1 marker in last stitch – stitches between these 2 markers belong to left sleeve), A.4, work A.2 3-3-3-4-4-4 times in total, A.5 (these stitches belong to back piece). Continue pattern like this - the 4 stitches with markers mark the raglan lines. When 2 rounds have been worked, switch to a short circular needle size 3 mm, then continue pattern as before - REMEMBER THE KNITTING TENSION! When A.1 to A.5 have been worked vertically, there are 192-192-192-208-208-208 stitches on needle. Then work in stocking stitch in the round over all stitches - knit in addition A.6 in the middle of each sleeve - stitch with star in A.6 should fit stitch with star in A.2. AT THE SAME TIME on next round increase for RAGLAN – see explanation above. Increase 1 stitch on each side of 4 stitches with markers (8 stitches increased– NOTE: Increase before first marker must be done at the end of round). Increase for raglan every other round 16-20-24-27-30-35 times in total. After last increase for raglan there are 320-352-384-424-448-488 stitches on needle and piece measures approx. 18-21-23-25-27-30 cm from cast-on edge. If piece is shorter than this, continue without increases until correct measurements. On next round divide piece for body and sleeves as follows: Work 2-4-3-2-4-7 stitches in stocking stitch, slip the next 69-73-83-91-93-97 stitches on a thread for sleeve, cast on 8-8-10-10-12-12 new stitches on row (in the side under sleeve), work 91-103-109-121-131-147 stitches in stocking stitch, slip the next 69-73-83-91-93-97 stitches on a thread for sleeve, cast on 8-8-10-10-12-12 new stitches on row (in the side under sleeve) and work the remaining 89-99-106-119-127-140 stitches in stocking stitch. Finish body and sleeves separately. BODY: = 198-222-238-262-286-318 stitches. Work in stocking stitch over stitches on back piece until the middle of the 8-8-10-10-12-12 stitches that were cast on under sleeves - round begins here. Work in stocking stitch in the round. When piece measures 22-21-21-21-21-20 cm from division, knit 1 round while increasing 20-22-24-26-28-32 stitches evenly = 218-244-262-288-314-350 stitches. Switch to circular needle size 2.5 mm. Work rib knit 1 twisted/purl 1 for 3 cm. Loosely cast off. Jumper measures approx. 48-50-52-54-56-58 cm from shoulder and down. SLEEVE: Slip the 69-73-83-91-93-97 stitches from thread in one side of piece on double pointed needles or a short circular needle size 3 mm and pick in addition up 1 stitch in each of the 8-8-10-10-12-12 new stitches cast on under sleeve = 77-81-93-101-105-109 stitches. Insert 1 marker thread in the middle of the 8-8-10-10-12-12 stitches that were cast on under sleeves. Move marker thread upwards when working. Begin round at the marker thread and work stocking stitch in the round, but continue A.6 mid on top of sleeve as before. When sleeve measures 2-2-2-3-3-1 cm from division, decrease 2 stitches mid under sleeve - read DECREASE TIP. Decrease like this every 3½-2½-1½-1-1-1 cm 6-8-10-14-12-14 times in total = 65-65-73-73-81-81 stitches. Work until sleeve measures 24-22-21-19-17-15 cm from division. Approx. 9 cm remain until finished measurements, try the jumper on and work to desired length Knit 1 round while decreasing 1 stitch under sleeve (on right sleeve knit the last 2 stitches on round twisted together, on left sleeve knit the first 2 stitches on round together) = 64-64-72-72-80-80 stitches. Work A.7 8-8-9-9-10-10 times in total around the sleeve - A.7 should fit nicely over A.6 mid on top of sleeve. When A.7 has been worked, switch to double pointed needles size 2.5 mm. Continue rib over stitches in A.7 with knit 1 twisted, purl 1. When rib measures 1 cm (measured after A.7), increase every fourth purl 1 to purl 2 (i.e. increase every 8th stitch to purl 2) = 72-72-81-81-90-90 stitches. When rib measures 2 cm, increase the same way but displace to avoid increasing over previous increases = 80-80-90-90-100-100 stitches. When rib measures 3½ cm, increase the same way and displace to next 1 purl = 88-88-99-99-110-110 stitches, and when rib measures 5 cm, increase the remaining 1 purl to 2 purl = 96-96-108-108-120-120 stitches. Cast off somewhat loosely when rib measures 6 cm. Sleeve measures approx. 33-31-30-28-26-24 cm from division. Work the other sleeve the same way. |
|||||||||||||||||||||||||||||||
Diagram explanations |
|||||||||||||||||||||||||||||||
|
|||||||||||||||||||||||||||||||

|
|||||||||||||||||||||||||||||||
|
|||||||||||||||||||||||||||||||

|
|||||||||||||||||||||||||||||||

|
|||||||||||||||||||||||||||||||
|
Have you made this or any other of our designs? Tag your pictures in social media with #dropsdesign so we can see them! Do you need help with this pattern?You'll find tutorial videos, a Comments/Questions area and more by visiting the pattern on garnstudio.com. © 1982-2024 DROPS Design A/S. We reserve all rights. This document, including all its sub-sections, has copyrights. Read more about what you can do with our patterns at the bottom of each pattern on our site. |
|||||||||||||||||||||||||||||||


With over 40 years in knitting and crochet design, DROPS Design offers one of the most extensive collections of free patterns on the internet - translated to 17 languages. As of today we count 304 catalogues and 11422 patterns - 11422 of which are translated into English (UK/cm).
We work hard to bring you the best knitting and crochet have to offer, inspiration and advice as well as great quality yarns at incredible prices! Would you like to use our patterns for other than personal use? You can read what you are allowed to do in the Copyright text at the bottom of all our patterns. Happy crafting!
Comments / Questions (9)
Hej! Jag tror d har kommit in ett fel.. sticka de sista 89-99-106-119-127-140 maskorna i slätstickning. Fram- och bakstycke och ärmar stickas sedan var för sig. .. Sen så står d ju på storlek M..att fram o bakstycke ska vara 222 m.. Så d ska nog stå 103 där d står 99 på storlek M Säkert bara ett tryckfel..😊
10.03.2024 - 08:24Hallo Drops Team, gleich eine Frage zur Passe. Folge der Diagramme in Kurzform : A1, A2,A3,A4,A2,A1,A5 dann wieder A1,A2,A3,A4,A2,A5 so im Text Gehört hier zwischen A2 und A5 ebenfalls auch noch A1? Sonst bleibt mir ja gleich 1 Masche übrig! Wenn ja müsste diesbezüglich Anleitung korregiert werden. Viele Grüße
17.08.2023 - 20:10DROPS Design answered:
Liebe Yvonne, für Die Ärmel strickt man: A.1, A.2, A.3 und für Rücken bzw Vorderteil stricken Sie: A.4, A.2 (3 oder 4 Mal), A.5 so haben Sie 21 M in S z.B. für Die Ärmel und 39 M für Vorder- und Rückenteil (und dann 120 M insgesamt). Viel Spaß beim stricken!
18.08.2023 - 08:39What does it mean "this is no stitch, go to next symbol". What do you do? Do we leave that stitch alone?
04.04.2023 - 23:59DROPS Design answered:
Hi Jennifer, This means the next stitch on the round is worked according to the next symbol (the blank square is ignored). Happy Easter!
05.04.2023 - 06:46Undskyld. Jeg troede ikke den første besked var gået igennem. Tak for hurtig respons og god weekend 🧶😊☀️
22.04.2022 - 14:13Hej igen. Det ser ud til at der er forskel i den danske og engelske opskrift. Den sorte markering i den engelske siger at masken ikkecskal strikkes. I den danske står der at der skal slåes en maske op??? Mvh Charlotte
22.04.2022 - 13:09DROPS Design answered:
Hej igenigen :) Det er blevet rettet :)
22.04.2022 - 13:55Hej. Der er forskel i den dansk og den engelske udgave. Den sorte markering står i den engelske som om man ikke skal strikke den. I den danske står der at man skal lave et opslag og strikke det drejet på næste omgang. Så der ikke kommer hul ???
22.04.2022 - 10:50DROPS Design answered:
Hej Charlotte, tak for information, det er rettet :)
22.04.2022 - 12:37Hej. \r\nJeg har strikket mønsterdelen på bærestykket og har nu 236 m. I opskriften står der at jeg skal have 208???\r\nJeg har taget 12x8 m ud i raglanen =96 m + de 140 m fra start = 236 m. Hvad har jeg overset i opskriften?\r\nMvh Charlotte Lützen
21.04.2022 - 10:07DROPS Design answered:
Hej Charlotte, har du trukket maskerne fra som er taget ind ifølge diagram A.2, A.3 og A.5? I A.2 har du 8 masker istedet for 10 masker. Og i A.3 og A.5 har du taget 2 masker ind i hvert diagram :)
22.04.2022 - 10:31Hej, prøv liiige at tjekke tjekke tallene, når diagrammerne A1-A5 er strikket i højden giver det 206 og ikke 208, der bliver taget 8 masker ind på hver 2. omgang og det kan aldrig give 208 men 206, ellers en fin opskrift PS også de andre tal i,op Mvh Hanne
01.04.2022 - 12:57Summer cloud
13.03.2022 - 23:14