DROPS Karisma
DROPS Karisma
100% Wool
from 2.50 € /50g
Get the yarn to make this pattern from 22.50€.

The yarn cost is calculated from the pattern’s smallest size and the yarn’s cheapest product type. Looking for an even better price? You might find it on the DROPS Deals!

DROPS SS24

Grey Stone Hill

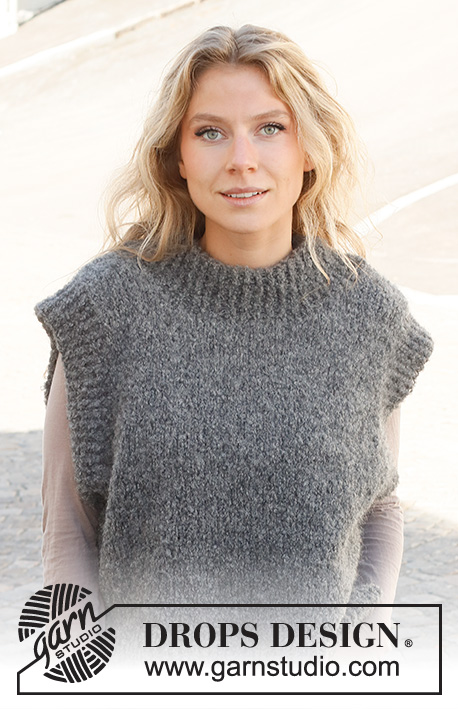
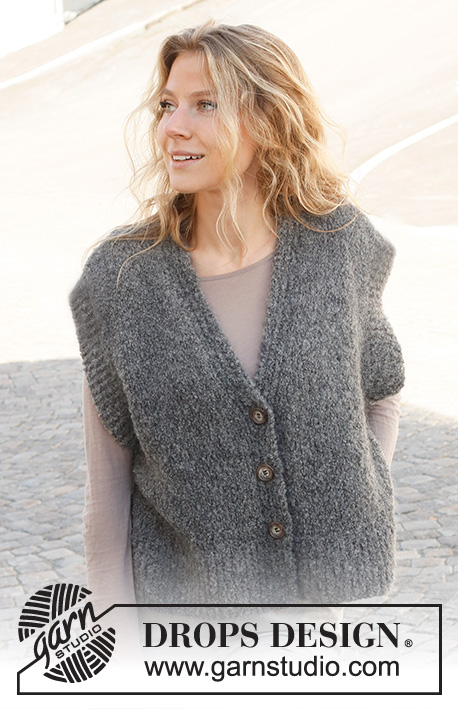
Knitted vest / slipover in DROPS Karisma. Piece is knitted with high neck, rib on edges and vents in the sides. Size: S - XXXL

DROPS 228-29
DROPS design: Pattern u-921
Yarn group B
----------------------------------------------------------

SIZE:
S - M - L - XL - XXL - XXXL

MATERIALS:
DROPS KARISMA from Garnstudio (belongs to yarn group B)
450-450-500-550-600-700 g colour 21, medium grey

NEEDLES:
DROPS CIRCULAR NEEDLE SIZE 4.5 mm: Length 60-60-60-80-80-80 cm.
DROPS CIRCULAR NEEDLE SIZE 3.5 mm : Length 40 cm and 60-60-60-80-80-80 cm.
The technique MAGIC LOOP can be used on neck edge – you then only need circular needle of 80 cm in size 3.5 mm.

KNITTING TENSION:
20 stitches in width and 26 rows vertically in stocking stitch = 10 x 10 cm.
NOTE! Remember that needle size is only a suggestion. If you have too many stitches on 10 cm switch to larger needles. If you have too few stitches on 10 cm switch to smaller needles.

-------------------------------------------------------

Alternative Yarn – See how to change yarns here
Yarn Groups A to F – Use the same pattern and change the yarn here
Yarn usage using an alternative yarn – Use our yarn converter here

-------------------------------------------------------

DROPS Karisma
DROPS Karisma
100% Wool
from 2.50 € /50g
Get the yarn to make this pattern from 22.50€.

The yarn cost is calculated from the pattern’s smallest size and the yarn’s cheapest product type. Looking for an even better price? You might find it on the DROPS Deals!

Pattern instructions

----------------------------------------------------------

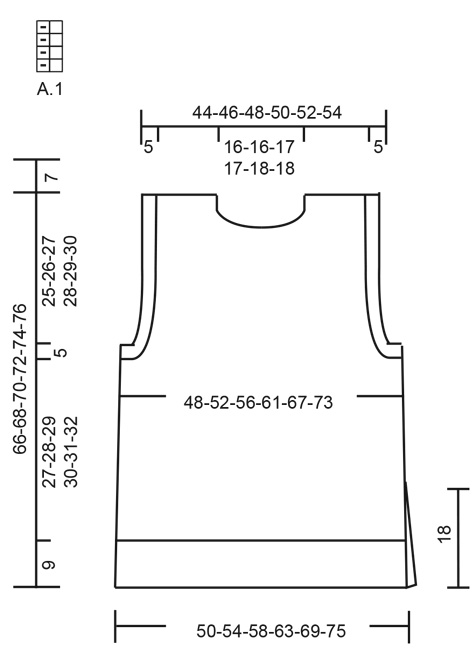
EXPLANATION FOR THE PATTERN:

----------------------------------------------------------

GARTER STITCH (worked in the round):
1 ridge vertically = 2 rounds, i.e. knit 1 round and purl 1 round.

GARTER STITCH (back and forth):
Knit all rows.
1 ridge vertically = knit 2 rows.

PATTERN:
See diagram A.1. Diagrams show all rows in pattern seen from the right side.

DECREASE TIP-1 (evenly):
To calculate how to decrease evenly, use the total number of stitches on row (e.g. 119 stitches), minus edge stitches (e.g. 12 stitches) , and divide the remaining 107 stitches by number of increases/decreases to be done (e.g. 20) = 5.3.
If decreasing knit in this example approx. every 4th and 5th stitch and every 5th and 6th stitch together.

DECREASE TIP-2 (applies to sides of body):
Decrease 1 stitch on each side of stitches in garter stitch as follows: Work until 2 stitches remain before stitches in garter stitch, knit 2 together, work 12 stitches in garter stitch, slip 1 stitch knitwise, knit 1, pass slipped stitch over stitch worked.

DECREASE TIP-3:
All decreases are done from the right side!
Decrease at beginning of row as follows:
Decrease 1 stitch after 1 edge stitch in garter stitch and 3 knit stitches as follows: Slip 1 stitch knitwise, knit 1, pass slipped stitch over stitch worked (= 1 stitch decreased).
Decrease at end of row as follows:
Decrease 1 stitch before 3 knit stitches and 1 edge stitch in garter stitch as follows: Work until 6 stitches remain on needle. Knit 2 together, knit 3, work 1 edge stitch in garter stitch (= 1 stitch decreased).

CAST-OFF TIP:
To avoid a tight cast-off edge when casting off, you may use a larger needle. If this still is too tight make 1 yarn over after approx. every 4th stitch while casting off (cast off yarn overs as stitches).

----------------------------------------------------------

START THE PIECE HERE:

----------------------------------------------------------

VEST – SHORT SUMMARY OF PIECE:
Work back piece and front piece back and forth on circular needle upwards until vent is done, then slip the 2 part on to same circular needle and work in the round on circular needle up to armhole. Divide piece for front piece and back, and work each part back and forth. Work sleeve edges and neck edge in the round on circular needle.

BACK PIECE:
Cast on 119-129-139-151-165-179 stitches on circular needle size 3.5 mm with DROPS Karisma. Work rib as follows:
6 stitches in GARTER STITCH – read explanation above, A.1 until 7 stitches remain, work first stitch in A.1, 6 stitches in garter stitch. Continue back and forth like this until piece measures 9 cm.
Work next row as follows from right side:
Work garter stitch as before over the first 6 stitches, knit the next 107-117-127-139-153-167 stitches and decrease at the same time 20-22-24-26-28-30 stitches evenly – read DECREASE TIP-1, work in garter stitch as before over the last 6 stitches = 99-107-115-125-137-149 stitches.
Switch to circular needle size 4.5 mm.
Now work in stocking stitch with 6 stitches in garter stitch in each side.
REMEMBER THE KNITTING TENSION!
When piece measures 18 cm – adjust so that next row is worked from right side, put piece aside. Work front piece.
FRONT PIECE:
Work as on back piece.

BODY:
Slip stitches on front piece and back piece on to same circular needle size = 198-214-230-250-274-298 stitches. Begin round before 12 stitches in garter stitch in one side.
Continue in stocking stitch and 12 stitches stitch in GARTER STITCH in each side - read explanation above.
When piece measures 20 cm, decrease 1 stitch on each side of the 12 stitches in garter stitch - read DECREASE TIP-2. Repeat decrease when piece measures 28-29-30-31-32-33 cm = 190-206-222-242-266-290 stitches.
When piece measures 36-37-38-39-40-41 cm, cast off 12-12-14-16-18-20 stitches in each side for armholes (i.e. cast off the 12 stitches in garter stitch and 0-0-1-2-3-4 stitches on each side of garter stitches).
Then finish front and back piece separately.

BACK PIECE:
= 83-91-97-105-115-125 stitches.
Continue back and forth in stocking stitch with 1 edge stitch in garter stitch in each side. At the same time on next row from right side begin decrease for armhole - read DECREASE TIP-3.
Decrease like this every other row 1-1-3-7-12-18 times, then every 4th row 7-9-8-6-4-1 times (= 8-10-11-13-16-19 stitches decreased for armhole in each side) = 67-71-75-79-83-87 stitches. Continue to work until piece measures 64-66-68-70-72-74 cm. Now cast off the middle 29-29-31-31-33-33 stitches for neck and finish each shoulder separately. Then on next row from the neck, decrease 1 stitch = 18-20-21-23-24-26 stitches remain on shoulder. When piece measures 66-68-70-72-74-76 cm, cast off. Work the other shoulder the same way.

FRONT PIECE:
= 83-91-97-105-115-125 stitches.
Continue back and forth in stocking stitch with 1 edge stitch in garter stitch in each side. At the same time decrease for armholes the same way as on back piece. When piece measures 58-60-61-63-64-66 cm, slip the middle 15-15-17-17-19-19 stitches on front piece on a stitch holder, and finish each shoulder separately.
Left shoulder:
Continue back and forth with stocking stitch and 1 edge stitch in garter stitch in each side, at the same time on next row from right side decrease as follows: Work until 6 stitches remain on needle (= towards the neck), knit 2 together, knit 3, work 1 edge stitch in garter stitch (= 1 stitch decreased). Decrease like this on every other row (i.e. every row from right side) 8 times in total = 18-20-21-23-24-26 stitches for shoulder. When piece measures 66-68-70-72-74-76 cm, cast off.
Right shoulder:
Continue back and forth with stocking stitch and 1 edge stitch in garter stitch in each side, at the same time on next row from right side decrease as follows from the neck: Work 1 edge stitch in garter stitch, knit 3, slip next stitch knitwise, knit 1, pass slipped stitch over stitch worked (= 1 stitch decreased). Decrease like this on every other row (i.e. every row from right side) 8 times in total = 18-20-21-23-24-26 stitches for shoulder. When piece measures 66-68-70-72-74-76 cm, cast off.

ASSEMBLY:
Sew shoulder seams with grafting/kitchener stitches inside cast-off edges.

SLEEVE EDGES:
Begin from right side where piece was divided for armhole. Use circular needle size 3.5 mm and pick up approx. 132 to 154 stitches around the entire armhole (number of stitches must be divisible by 2). Work rib according to diagram A.1 in the round for 4½-5 cm. Cast off stitches with knit over knit and purl over purl. Repeat around the other armhole.

NECK EDGE:
Begin mid on top of one shoulder with circular needle size 3.5 mm and Karisma and pick up approx. 96 to 110 stitches inside 1 edge stitch in garter stitch. Work rib in the round according to A.1. When rib measures 7 cm, cast off with knit over knit and purl over purl.

Diagram

symbols = knit twisted from right side, purl twisted from wrong side
symbols = purl from the right side, knit from the wrong side
diagram

Each of our patterns has specific tutorial videos to help you.

Do you have a question? See a list of frequently asked questions (FAQ)

Knitting tension is what determines the final measurements of your work, and is usually measured per 10 x 10 cm. It is provided like so: number of stitches in width x number of rows in height - eg: 19 stitches x 26 rows = 10 x 10 cm.

The knitting tension is very individual; some people knit/crochet loosely while others work tightly. You adjust the knitting tension with the needle size, which is why the suggested needle size is only meant as a guide! You need to adjust this (up or down) to ensure that YOUR knitting tension matches the knitting tension provided in the pattern. If you work with a different knitting tension than provided you will have a different yarn consumption, and your work will have different measurements than what the pattern suggests.

The knitting tension also determines which yarns can replace each other. As long as you achieve the same knitting tension you can replace one yarn with another.

See DROPS lesson: How to measure your tension/gauge

See DROPS video: How to make a gauge tension swatch

The required amount of yarn is provided in grams, eg: 450 g. To calculate how many balls you’ll need you first need to know how many grams are in 1 ball (25g, 50g or 100g). This information is available if you click on the individual yarn quality on our pages. Divide the amount required with the amount of each ball. For example, if each ball is 50g (the most common amount), the calculation will be as follows: 450 / 50 = 9 balls.

The important thing when changing from one yarn to another is that the knitting/crochet tension remains the same. This is so that the measurements of the finished piece will be the same as on the sketch provided. It is easier to achieve the same knitting tension using yarns from the same yarn group. It is also possible to work with multiple strands of a thinner yarn to achieve the knitting tension of a thicker one. Please try our yarn converter. We recommend you to always work a test swatch.

Please NOTE: when changing yarn the garment might have a different look and feel to the garment in the photo, due to individual properties and qualities of each yarn.

See DROPS lesson: Can I use a different yarn than the one mentioned in the pattern?

All our yarns are categorised into yarn groups (from A to F) according to thickness and knitting tension – group A contains the thinnest yarns and group F the thickest. This makes it easier for you to find alternative yarns to our patterns, should you wish to switch yarn. All yarns within the same group have a similar knitting tension and can easily replace each other. However, different yarn qualities have different structures and properties which will give the finished work a unique look and feel.

Click here for an overview of the yarns in each yarn group

At the top of all our patterns you’ll find a link to our yarn calculator, which is a helpful tool should you wish to use a different yarn than suggested. By filling in the yarn quality you wish to replace, the amount (in your size) and number of strands, the calculator will present good alternative yarns with the same knitting tension. Additionally it will tell you how much you’ll require in the new qualities and whether you’ll need to work with multiple strands. Most skeins are 50g (some are 25g or 100g).

If the pattern is worked with multiple colours, every colour will have to be calculated separately. Similarly, if the pattern is worked with several strands of different yarns (for example 1 strand Alpaca and 1 strand Kid-Silk) you will have to find alternatives for each, individually.

Click here to see our yarn calculator

Since different yarns have different qualities and textures we have chosen to keep the original yarn in our patterns. However, you can easily find options among our available qualities by using our yarn calculator, or simply pick a yarn from the same yarn group.

It is possible that some retailers still have discontinued yarns in stock, or that someone has a few skeins at home that they would like to find patterns for.

The yarn calculator will provide both alternative yarn as well as required amount in the new quality.

If you think it's hard to decide what size to make, it can be a good idea to measure a garment you own already and like the size of. Then you can pick the size by comparing those measures with the ones available in the pattern's size chart.

You'll find the size chart at the bottom of the pattern.

See DROPS lesson: How to read size chart

The needle size provided in the pattern serves only as a guide, the important thing is to follow the knitting tension. And since knitting tension is very individual, you will have to adjust the needle size to ensure that YOUR tension is the same as in the pattern – maybe you’ll have to adjust 1, or even 2 needle sizes, up or down to achieve the correct tension. For this, we recommend that you work test swatches.

Should you work with a different knitting tension than the one provided, the measurements of the finished garment might deviate from the measurement sketch.

See DROPS lesson: How to measure your tension/gauge

See DROPS video: How to make a tension/gauge swatch

Working a garment top-down provides more flexibility and room for personal adjustment. For example it is easier to try the garment on while working, as well as making adjustments to length of yoke and shoulder caps.

The instructions are carefully explaining every step, in the correct order. Diagrams are adjusted to the knitting direction and are worked as usual.

The diagram depicts all rows/rounds, and every stitch seen from the right side. It is read from bottom to top, from right to left. 1 square = 1 stitch.

When working back and forth, every other row is worked from the right side and every other row is worked from the wrong side. When working from the wrong side, the diagram will have to be worked reversed: from left to right, knit stitches are purled, purl stitches are knit etc.

When working in the round every round is worked from the right side and the diagram are worked from right to left on all rounds.

See DROPS lesson: How to read knitting diagrams

The diagram depicts all rows/rounds, and every stitch seen from the right side. It is worked from bottom to top, from right to left.

When working back and forth every other row is worked from the right side: from right to left and every other row is worked from the wrong side: from left to right.

When working in the round, every row in the diagram are worked from the right side, from right to left.

When working a circular diagram you start in the middle and work your way outwards, counter clockwise, row by row.

The rows usually start with a given number of chain stitches (equivalent to the height of the following stitch), this will either be depicted in the diagram or explained in the pattern.

See DROPS lesson: How to read crochet diagrams

Instructions for working several diagrams after each other on the same row/round, will often be written like so: “work A.1, A.2, A.3 a total of 0-0-2-3-4 times". This means you work A.1 once, then A.2 is worked once, and A.3 is repeated (in width) the number of times provided for your size – in this case like so: S = 0 times, M = 0 times, L=2 times, XL= 3 times and XXL = 4 times.

The diagrams are worked as usual: begin with the first row in A.1, then work the first row in A.2 etc.

See DROPS lesson: How to read knitting diagrams

See DROPS lesson: How to read crochet diagrams

The total width of the garment (from wrist-to-wrist) will be larger in the larger sizes, despite the actual sleeves being shorter. The larger sizes have longer sleeve caps and wider shoulders, so there will be a good fit in all sizes.

The measurement sketch/schematic drawing provides information regarding the full length of the garment. If it’s a jumper or a jacket the length is measured from the highest point on the shoulder closest to the neckline, and straight down to the bottom of the garment. It is NOT measured from the tip of shoulder. Similarly, the length of yoke is measured from the highest point on the shoulder and down to where yoke is split into body and sleeves.

On a jacket measures are never taken along bands, unless specifically stated. Always measure inside band stitches when measuring the length.

See DROPS lesson: How to read a schematic drawing

Diagrams are often repeated on the round or in height. 1 repeat is the diagram the way it appears in the pattern. If it says to work 5 repeats of A.1 in the round, then you work A.1 a total of 5 times after/next to each other in the round. If it says to work 2 repeats of A.1 vertically/in height you work the entire diagram once, then begin again at the start and work the entire diagram one more time.

Chain stitches are slightly narrower than other stitches and to avoid working the cast-on edge too tight, we simply chain more stitches to begin with. The stitch count will be adjusted on the following row to fit the pattern and measurement sketch.

The rib edge is more elastic and will contract slightly compared to, for example, stocking stitch. By increasing before the rib edge, you avoid a visible difference in width between the rib edge and the rest of the body.

It’s very easy to cast off too tightly, and by making yarn overs while casting off (and simultaneously casting these off) you avoid a too tight cast off edge.

See DROPS video: How to bind off with yarn overs (yo)

To achieve an even increase (or decrease) you can increase on, for example: every 3rd and 4th row alternately, like so: work 2 rows and increase on the 3rd row, work 3 rows and increase on the 4th. Repeat this until the increase is complete.

See DROPS lesson: Increase or decrease 1 st on every 3rd and 4th row alternately

Should you prefer to work in the round instead of back and forth, you may of course adjust the pattern. You’ll need to add steeks mid-front (usually 5 stitches), and follow the instructions. When you would normally turn and work from the wrong side, simply work across the steek and continue in the round. At the end you’ll cut the piece open, pick up stitches to work bands, and cover the cut edges.

See DROPS video: How to knit steeks and cut open

Should you prefer to work back and forth instead of in the round, you may of course adjust the pattern so you work the pieces separately and then assemble them at the end. Divide the stitches for the body in 2, add 1 edge stitch in each side (for sewing) and work the front and back pieces separately.

See DROPS lesson: Can I adapt a pattern for circular needles into straight needles?

Pattern repeats can vary slightly in the different sizes, in order to get the correct proportions. If you’re not working the exact same size as the garment in the photo, yours might deviate slightly. This has been carefully developed and adjusted so that the complete impression of the garment is the same in all sizes.

Make sure to follow instructions and diagrams for your size!

If you have found a pattern you like which is available in women’s size it’s not very difficult to convert it to men’s size. The biggest difference will be the length of sleeves and body. Start working on the women size that you think would fit across the chest. The additional length will be worked right before you cast off for the armhole/sleeve cap. If the pattern is worked top-down you can add the length right after the armhole or before the first decrease on sleeve.

Regarding additional yarn amount, this will depend on how much length you add, but it is better with a skein too many than too few.

All yarns will have excess fibres (from production) that might come off as lint or shedding. Brushed yarns (ie hairier yarns) have more of these loose, excess fibres, causing more shedding.

Shedding also depends on what is worn under or over the garment, and whether this pulls at the yarn fibres. It’s therefore not possible to guarantee that there will be no shedding

Below are some tips on how to get the best result when working with hairier yarns:

1. When the garment is finished (before you wash it) shake it vigorously so the looser hairs come off. NOTE: do NOT use a lint roller, brush or any method that pulls at the yarn.

2. Place the garment in a plastic bag and put it in your freezer - the temperature will cause the fibres to become less attached to each other, and excess fibres will come off easier.

3. Leave in the freezer for a few hours before taking it out and shaking it again.

4. Wash the garment according to the instructions on the yarn label.

Pilling is a natural process that happens to even the most exclusive of fibers. It's a natural sign of wear and tear that is hard to avoid, and that is most visible in high friction areas of your garment like a sweater's arms and cuffs.

You can make your garment look as new by removing the pilling, using a fabric comb or a pill/lint remover.

Still can't find the answer you need? Then scroll down and leave your question so one of our experts can try to help you. This will be done normally within 5 to 10 working days.
In the meantime, you can read the questions and answers that others have left to this pattern or join the DROPS Workshop on Facebook to get help from fellow knitters/crocheters!

You might also like...

Post a comment to pattern DROPS 228-29

We would love to hear what you have to say about this pattern!

If you want to leave a question, please make sure you select the correct category in the form below, to speed up the answering process. Required fields are marked *.

Comments / Questions (15)

country flag Monique wrote:

Necesito saber si 1 hilera es 1 rango de

04.03.2024 - 17:24

DROPS Design answered:

Hola Monique, 1 hilera = 1 fila.

10.03.2024 - 20:11

country flag Monique wrote:

Cuando dicen 1 diminución cada 2 hileras, significa 1 disminución por el derecho, nada por el revés y otra disminución por el derecho?

04.03.2024 - 17:23

DROPS Design answered:

Hola Monique, sí, hilera = fila. Por lo tanto, si disminuyes cada 2 hileras significa que disminuyes en cada fila por el mismo lado (es decir, en cada fila por el lado derecho).

10.03.2024 - 20:11

country flag Indu wrote:

Love this vest .Got the yarn excited to start.

29.11.2023 - 02:17

country flag Sharon Hunt-Edwards wrote:

Hello, have bought the yarn suggested her to make this vest. I would like, however, to use drops matching kid silk. Will this change the gauge in anyway and how much kid silk should i purchase?\r\nSharon

18.11.2023 - 11:45

DROPS Design answered:

Dear Mrs Hunt-Edwards, if you use Kid-Silk and Karisma together, this will automatically affect the tension; see an example here so that you might rather find a pattern matching this tension. Happy knitting!

20.11.2023 - 09:55

country flag Åsa wrote:

Hej, jag har kommit till delen på framstycket där det står "När arbetet mäter 58-60-61-63-64-66 cm, sätts de mittersta 15-15-17-17-19-19 maskorna på framstycket på en tråd, och varje axel stickas färdig för sig." Men jag hittar ingenstans i återstoden av mönstret vad jag ska göra med dessa maskor sedan. Har försökt läsa både i norska, svenska och engelska mönstret men förstår inte. Tacksam för hjälp.

15.11.2023 - 13:33

DROPS Design answered:

Hej Åsa, det er en del af halskanten :)

16.11.2023 - 14:46

country flag Helga Eitel wrote:

Ich möchte diesen Pullunder gerne ohne die Seitenschlitze und dafür mit einem Bündchen in Rippenmuster stricken. Wie kann ich das machen? Für einen Tipp bin ich sehr dankbar.

08.01.2023 - 21:24

DROPS Design answered:

Liebe Frau Eitel, dann können Sie wahrscheinlich vom Anfang an mit A.1 und 1 Randmasche (anstatt 6 Maschen kraus rechts) beidseitig stricken. Viel Spaß beim stricken!

09.01.2023 - 10:28

country flag Marianne wrote:

Hej kan du förklara Ribbstickning A1 Stickas den räta maskan alltid vriden på räta varvet och vanlig avg från aviga sidan ? Mvh Marianne

28.10.2022 - 18:37

DROPS Design answered:

Hei Marianne. Slik står det under Diagramforklaringen til den blanke firkanten: = vriden rätmaska från rätsidan, vriden avigmaska från avigsidan. mvh DROPS Design

31.10.2022 - 10:21

country flag Anna wrote:

Hello, \r\nWith the decreasing in this pattern at the top of the 9cms ribbing, your Decrease Tip 1 says the following:\r\n\"If decreasing knit in this example approx. every 4th and 5th stitch and every 5th and 6th stitch together.\"\r\nPlease can you explain if you mean that I decrease evenly on every 4th stitch and again on every 6th stitch? I am afraid I dont understand your instructions.and doing this will not be even?\r\n\r\nMany thanks,\r\nAnna

16.06.2022 - 12:18

DROPS Design answered:

Dear Anna, maybe this lesson will help you to understand how to decrease evenly depending on the number of sts - but in the example you should: *k3, K2 tog, K4, K2 tog* and repeat from *-*, adjusting so that you will have the correct number of sts decreased. Happy knitting!

16.06.2022 - 16:14

country flag FRANCINE RIOUX wrote:

Modèle Drops 228-29 Pour le col, il est inscrit de relever environ 96 à 110 mailles est-ce que cela inclus les mailles centrales glissées en attente sur l'arrêt de mailles ??? Je suppose que non mais ce n'est pas clair dans le patron

15.06.2022 - 18:19

DROPS Design answered:

Bonjour Mme Rioux, en fait si, ces mailles mises en attente lors de l'encolure devant sont bien incluses dans ces 96 à 110 mailles. Bon tricot!

16.06.2022 - 09:18

country flag FRANCINE RIOUX wrote:

Quelle est la légende du diagramme A1? Je pense qu\'il y a erreur ???

29.04.2022 - 22:07

DROPS Design answered:

Bonjour Mme Rioux, A.1 correspond à des côtes 1 maille torse à l'endroit, 1 maille envers; sur l'envers, la maille torse à l'endroit va se tricoter torse à l'envers et la maille envers se tricotera à l'endroit. cette vidéo montre comment tricoter ce type de côtes et pourra probablement vous aider. Bon tricot!

02.05.2022 - 08:01