DROPS Brushed Alpaca Silk
77% Alpaca, 23% Silk
from 2.90 £ /25g
Get the yarn to make this pattern from 14.50£.

The yarn cost is calculated from the pattern’s smallest size and the yarn’s cheapest product type. Looking for an even better price? You might find it on the DROPS Deals!

DROPS SS24

Fall Bouquet

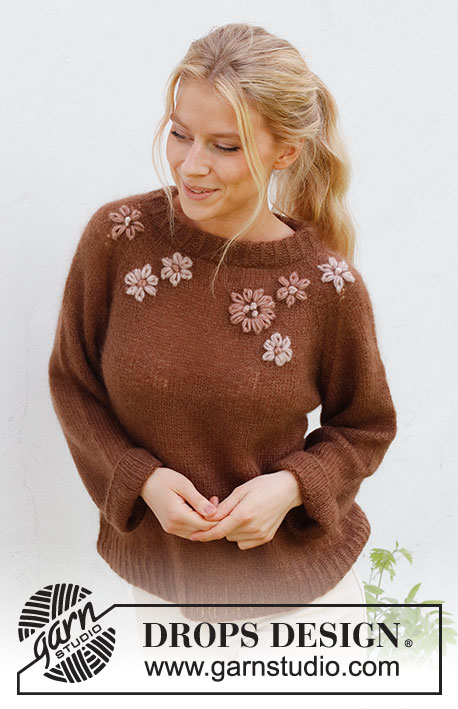
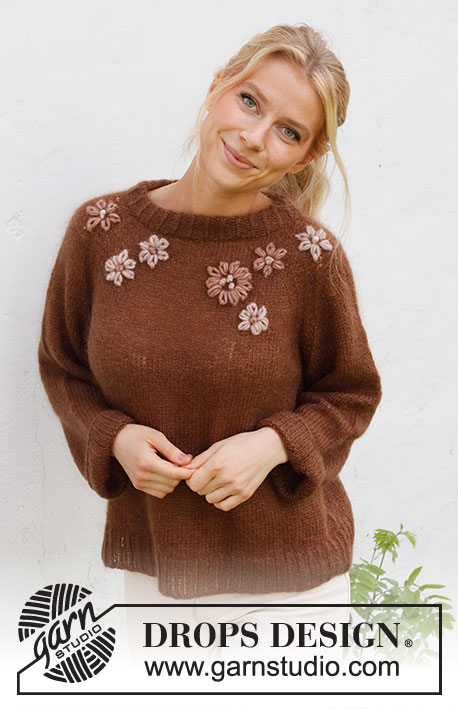
Knitted jumper in 1 strand DROPS Brushed Alpaca Silk or 2 strands DROPS Kid-Silk. The piece is worked top down with raglan, embroidered flowers with French knots. Sizes S - XXXL.

DROPS 227-48
DROPS Design: Pattern no as-159
Yarn group C or A + A
-------------------------------------------------------

SIZES:
S - M - L - XL - XXL - XXXL
Small flower measures 4.5 to 5 cm in diameter.
Large flower measures 6.5 to 7 cm in diameter.

MATERIALS:
DROPS BRUSHED ALPACA SILK from Garnstudio (belongs to yarn group C)
125-150-175-175-200-225 g colour 05, beige

Or use:
DROPS Kid-Silk from Garnstudio (yarn group A)
175-200-225-225-250-275 g colour 35, chocolate

For the flowers use:
DROPS AIR from Garnstudio (belongs to yarn group C)
50 g colour 33, pink sand
50 g colour 34, pink marble
50 g colour 35, clay

NEEDLES:
DROPS CIRCULAR NEEDLE SIZE 5 MM: Length 40 cm and 60-60-80-80-80-80 cm.
DROPS CIRCULAR NEEDLE SIZE 4 MM: Length 40 cm and 60-60-80-80-80-80 cm.
DROPS DOUBLE POINTED NEEDLES SIZE 5 MM.
DROPS DOUBLE POINTED NEEDLES SIZE 4 MM.
The technique MAGIC LOOP can be used – you then only need circular needle of 80 cm in each size.
NEEDLE: For embroidering

KNITTING TENSION:
17 stitches in width and 22 rows in height with stocking stitch with 1 strand DROPS Brushed Alpaca Silk or 2 strand DROPS Kid-Silk = 10 x 10 cm.
NOTE: Needle size is only a guide. If you get too many stitches on 10 cm, change to a larger needle size. If you get too few stitches on 10 cm, change to a smaller needle size.

-------------------------------------------------------

Alternative Yarn – See how to change yarns here
Yarn Groups A to F – Use the same pattern and change the yarn here
Yarn usage using an alternative yarn – Use our yarn converter here

-------------------------------------------------------

DROPS Brushed Alpaca Silk
77% Alpaca, 23% Silk
from 2.90 £ /25g
Get the yarn to make this pattern from 14.50£.

The yarn cost is calculated from the pattern’s smallest size and the yarn’s cheapest product type. Looking for an even better price? You might find it on the DROPS Deals!

Pattern instructions

NOTE: This pattern is written in British English. All measurements in charts are in cm. For conversion from cm to inches - click here. There are different terms for crocheting in British and American English. If this pattern includes crochet, click for "crochet terms" here. For this pattern in American English, please click here.
-------------------------------------------------------

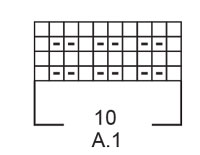
EXPLANATIONS FOR THE PATTERN:

-------------------------------------------------------

PATTERN:
See diagram A.1.

INCREASE TIP (evenly spaced):
To work out how to increase evenly, count the total number of stitches on the needle (e.g. 81 stitches) and divide by the number of increases to be made (e.g. 19) = 4.2. 
In this example, increase by making 1 yarn over after approx. each 4th stitch. On the next round knit the yarn overs twisted to avoid holes.

RAGLAN:
Increase 1 stitch, by making 1 yarn over, on each side of A.1 in the transitions between body and sleeves (= 8 stitches increased on the round). On the next round work the yarn overs twisted to avoid holes. The increased stitches are worked in stocking stitch.

DECREASE TIP (for sleeves): 
Decrease 1 stitch on either side of the marker thread as follows: Work until there are 3 stitches left before the marker thread, knit 2 together, knit 2 (marker thread sits between these 2 stitches), slip 1 stitch as if to knit, knit 1 and pass the slipped stitch over the knitted stitch (2 stitches decreased).

CASTING-OFF TIP:
To avoid the cast-off edge being tight you can cast off with a larger size needle. If the edge is still tight, make 1 yarn over after approx. each 4th stitch at the same time as casting off; the yarn overs are cast off as normal stitches.

-------------------------------------------------------

START THE PIECE HERE:

-------------------------------------------------------

JUMPER – SHORT OVERVIEW OF THE PIECE:
The neck and yoke are worked in the round with circular needle, from mid back and top down. The yoke is divided for the body and sleeves and these are continued separately, in the round.
Flowers with French knots are embroidered onto the front piece to finish.

NECK:
Cast on 78-81-84-90-93-96 stitches with circular needle size 4 mm and 1 strand DROPS Brushed Alpaca Silk or 2 strand DROPS Kid-Silk. Knit 1 round, then work rib in the round (knit 1 twisted, purl 2) for 8 cm. This neck is folded double later.
Knit 1 round where you increase 16-17-18-16-17-18 stitches evenly spaced – read INCREASE TIP = 94-98-102-106-110-114 stitches. Knit 1 round. Change to circular needle size 5 mm and insert a marker at the beginning of the round (= mid-back); the yoke is measured from this marker!

YOKE:
Work pattern as follows: Knit 12-13-14-15-16-17 (= half back piece), A.1 over the next 10 stitches (= raglan), knit 3 (= sleeve), A.1 over the next 10 stitches (= raglan), knit 24-26-28-30-32-34 stitches (= front piece), A.1 over the next 10 stitches (= raglan), knit 3 (= sleeve), A.1 over the next 10 stitches (raglan), knit 12-13-14-15-16-17 (= half back piece).
Continue this pattern and on the next round begin to increase to RAGLAN – read description above. Increase like this every 2nd round a total of 21-23-25-28-31-34 times = 262-282-302-330-358-386 stitches. REMEMBER THE KNITTING TENSION!
Continue working until the piece measures 19-21-23-25-28-31 cm from the marker on the neck.
Divide for the body and sleeves on the next round as follows: Work the first 38-41-44-48-52-56 stitches (= half back piece), place the next 55-59-63-69-75-81 stitches on a thread for the sleeve, cast on 6-6-8-8-10-12 stitches (= in side under the sleeve), work the next 76-82-88-96-104-112 stitches (= front piece), place the next 55-59-63-69-75-81 stitches on a thread for the sleeve, cast on 6-6-8-8-10-12 stitches (= in side under the sleeve), work the last 38-41-44-48-52-56 stitches.
The body and sleeves are finished separately. THE PIECE IS MEASURED FROM HERE!

BODY:
= 164-176-192-208-228-248 stitches. Continue with stocking stitch in the round for 27-27-27-27-26-25 cm. Try the jumper on and work to desired length (approx. 6 cm left to finished length). To avoid the following rib being tight, knit 1 round where you increase 25-25-27-29-33-37 stitches evenly spaced = 189-201-219-237-261-285 stitches. Change to circular needle size 4 mm and work rib (knit 1 twisted, purl 2) for 6 cm. Cast off with knit over knit and purl over purl – read CASTING-OFF TIP. The jumper measures approx. 56-58-60-62-64-66 cm from the shoulder down.

SLEEVES:
Place the 55-59-63-69-75-81 stitches from the thread on the one side of the piece on double pointed needles/short circular needle size 5 mm and knit up 1 stitch in each of the 6-6-8-8-10-12 stitches cast on under the sleeve = 61-65-71-77-85-93 stitches. Insert a marker thread in the middle of the new stitches under the sleeve.
Work stocking stitch in the round for 3 cm, then begin to decrease under the sleeve – read DECREASE TIP. Decrease like this every 5½-5-3½-2½-1½-1 cm a total of 6-7-9-11-15-18 times = 49-51-53-55-55-57 stitches. Continue with stocking stitch until the sleeve measures 38-37-35-34-31-29 cm (shorter measurements in larger sizes due to wider neck and longer yoke). Try the jumper on and work to desired length (approx. 6 cm left to finished length). Knit 1 round where you increase 5-6-7-8-8-9 stitches evenly spaced = 54-57-60-63-63-66 stitches. Work rib (knit 1 twisted, purl 2) for 6 cm. The sleeve measures approx. 44-43-41-40-37-35 cm from the division. Cast off with knit over knit and purl over purl. Work the other sleeve in the same way.

ASSEMBLY:
Fold the neck double to the inside and sew down. To avoid the neck being tight and rolling outwards, it is important that the seam is elastic.

EMBROIDERY:
Embroider flowers onto the front yoke.

FLOWERS - SHORT OVERVIEW:
1 or 3 French knots form the centre of the flowers. Chain stitches are worked around them for the petals.
Flowers 1 to 6 = small flowers measuring 4.5 to 5 cm in diameter.
Flower 7 = large flower measuring 6.5 to 7 cm in diameter.

SMALL FLOWER:
Embroider 1 French knot - see diagram A and diagram explanations – the knot is worked with a single strand. It is the centre of the flower. Cut and fasten the strand.
Work chain stitches around the knot – see diagram B and diagram explanations – the chain stitches are worked with a double strand.
Work 6 stitches around the centre, each stitch 1.5 - 2 cm long. Cut and fasten the strands.

LARGE FLOWER:
Embroider 3 French knots - see diagram A and diagram explanations – the knots are worked with a single strand.
Work the knots close together, with a maximum diameter of 2 – 2.5 cm. They are the centre of the flower. Cut and fasten the strands.
Work chain stitches around the knots - see diagram B and diagram explanations - the chain stitches are worked with a double strand.
Work 11 stitches around the centre, each stitch 2 – 2.5 cm long.
Cut and fasten the strands.

Position the flowers as follows – the measurements are from the centre of the flowers:
When pattern explains that the flowers should be embroidered to the right or to the left of the previous flower, it refers to the direction (right/left) as seen in the picture.
Flower-1 is worked at the top of the left shoulder (as seen in the picture), 4 cm from the neck and with the French knot in the transition between the sleeve and A.1 – use pink sand for the French knot and clay for the petals.
Flower-2 is worked to the right, 7.5 cm from flower-1 and 7.5 cm down from the neck – use clay for the French knot and pink marble for the petals.
Flower-3 is worked to the right, 6 cm from flower-2 and 3 cm down from the neck – use clay for the French knot and pink marble for the petals.
Flower-4 is worked on the right shoulder (as seen in the picture) 4.5 cm down from the neck and with the French knot in the transition between the sleeve and A.1 – use pink sand for the French knot and pink marble for the petals.
Flower-5 is worked to the left, 6.5 cm from flower-4 and 4 cm down from the neck – use pink marble for the French knot and clay for the petals.
Flower-6 is worked to the left, 9 cm from flower-5 and 12 cm down from the neck – use clay for the French knot and pink marble for the petals.
Flower-7 is worked between flower-5 and flower-6 and 6.5 cm down from the neck – use pink marble for the French knot and clay for the petals.

Diagram

symbols = knit
symbols = purl
symbols = French knot, Pictures 1-4
PICTURE 1: Insert the needle from the wrong side and up to the right side where you would like the French knot to be positioned.
PICTURE 2: Wind the strand around the end of the needle 2 to 4 times – depending on how big you wish the knot to be.
PICTURE 3: Thread the needle down, 0.5-1 stitches away from where the strand came up and pull it out on the wrong side.
PICTURE 4: Pulling the strand through the material fastens the French knot. Fasten the strand on the wrong side.
symbols = Chain stitch, Pictures 1-6.
PICTURE 1: Insert the needle from the wrong side and through to the right side where you would like the chain stitch to begin.
PICTURE 2: Insert the needle down through the hole the strand came up through, then to the right side again approx. 2 cm further on – allow the strand to lie under the point of the needle.
PICTURE 3: Now thread the needle through the piece and form a loop with the strand which comes up in the middle of the loop.
PICTURE 4: Insert the needle into the piece approx. 0.5 stitches in front of the loop and pull it through the piece.
PICTURE 5: The chain stitch is finished; if you want more stitches, start from Picture 1 again. Fasten the thread on the wrong side.
PICTURE 6: This picture shows vertical, horizontal and diagonal chain stitches, some starting from the same hole, some starting from separate holes.
diagram
diagram
diagram
diagram

Each of our patterns has specific tutorial videos to help you.

Do you have a question? See a list of frequently asked questions (FAQ)

Knitting tension is what determines the final measurements of your work, and is usually measured per 10 x 10 cm. It is provided like so: number of stitches in width x number of rows in height - eg: 19 stitches x 26 rows = 10 x 10 cm.

The knitting tension is very individual; some people knit/crochet loosely while others work tightly. You adjust the knitting tension with the needle size, which is why the suggested needle size is only meant as a guide! You need to adjust this (up or down) to ensure that YOUR knitting tension matches the knitting tension provided in the pattern. If you work with a different knitting tension than provided you will have a different yarn consumption, and your work will have different measurements than what the pattern suggests.

The knitting tension also determines which yarns can replace each other. As long as you achieve the same knitting tension you can replace one yarn with another.

See DROPS lesson: How to measure your tension/gauge

See DROPS video: How to make a gauge tension swatch

The required amount of yarn is provided in grams, eg: 450 g. To calculate how many balls you’ll need you first need to know how many grams are in 1 ball (25g, 50g or 100g). This information is available if you click on the individual yarn quality on our pages. Divide the amount required with the amount of each ball. For example, if each ball is 50g (the most common amount), the calculation will be as follows: 450 / 50 = 9 balls.

The important thing when changing from one yarn to another is that the knitting/crochet tension remains the same. This is so that the measurements of the finished piece will be the same as on the sketch provided. It is easier to achieve the same knitting tension using yarns from the same yarn group. It is also possible to work with multiple strands of a thinner yarn to achieve the knitting tension of a thicker one. Please try our yarn converter. We recommend you to always work a test swatch.

Please NOTE: when changing yarn the garment might have a different look and feel to the garment in the photo, due to individual properties and qualities of each yarn.

See DROPS lesson: Can I use a different yarn than the one mentioned in the pattern?

All our yarns are categorised into yarn groups (from A to F) according to thickness and knitting tension – group A contains the thinnest yarns and group F the thickest. This makes it easier for you to find alternative yarns to our patterns, should you wish to switch yarn. All yarns within the same group have a similar knitting tension and can easily replace each other. However, different yarn qualities have different structures and properties which will give the finished work a unique look and feel.

Click here for an overview of the yarns in each yarn group

At the top of all our patterns you’ll find a link to our yarn calculator, which is a helpful tool should you wish to use a different yarn than suggested. By filling in the yarn quality you wish to replace, the amount (in your size) and number of strands, the calculator will present good alternative yarns with the same knitting tension. Additionally it will tell you how much you’ll require in the new qualities and whether you’ll need to work with multiple strands. Most skeins are 50g (some are 25g or 100g).

If the pattern is worked with multiple colours, every colour will have to be calculated separately. Similarly, if the pattern is worked with several strands of different yarns (for example 1 strand Alpaca and 1 strand Kid-Silk) you will have to find alternatives for each, individually.

Click here to see our yarn calculator

Since different yarns have different qualities and textures we have chosen to keep the original yarn in our patterns. However, you can easily find options among our available qualities by using our yarn calculator, or simply pick a yarn from the same yarn group.

It is possible that some retailers still have discontinued yarns in stock, or that someone has a few skeins at home that they would like to find patterns for.

The yarn calculator will provide both alternative yarn as well as required amount in the new quality.

If you think it's hard to decide what size to make, it can be a good idea to measure a garment you own already and like the size of. Then you can pick the size by comparing those measures with the ones available in the pattern's size chart.

You'll find the size chart at the bottom of the pattern.

See DROPS lesson: How to read size chart

The needle size provided in the pattern serves only as a guide, the important thing is to follow the knitting tension. And since knitting tension is very individual, you will have to adjust the needle size to ensure that YOUR tension is the same as in the pattern – maybe you’ll have to adjust 1, or even 2 needle sizes, up or down to achieve the correct tension. For this, we recommend that you work test swatches.

Should you work with a different knitting tension than the one provided, the measurements of the finished garment might deviate from the measurement sketch.

See DROPS lesson: How to measure your tension/gauge

See DROPS video: How to make a tension/gauge swatch

Working a garment top-down provides more flexibility and room for personal adjustment. For example it is easier to try the garment on while working, as well as making adjustments to length of yoke and shoulder caps.

The instructions are carefully explaining every step, in the correct order. Diagrams are adjusted to the knitting direction and are worked as usual.

The diagram depicts all rows/rounds, and every stitch seen from the right side. It is read from bottom to top, from right to left. 1 square = 1 stitch.

When working back and forth, every other row is worked from the right side and every other row is worked from the wrong side. When working from the wrong side, the diagram will have to be worked reversed: from left to right, knit stitches are purled, purl stitches are knit etc.

When working in the round every round is worked from the right side and the diagram are worked from right to left on all rounds.

See DROPS lesson: How to read knitting diagrams

The diagram depicts all rows/rounds, and every stitch seen from the right side. It is worked from bottom to top, from right to left.

When working back and forth every other row is worked from the right side: from right to left and every other row is worked from the wrong side: from left to right.

When working in the round, every row in the diagram are worked from the right side, from right to left.

When working a circular diagram you start in the middle and work your way outwards, counter clockwise, row by row.

The rows usually start with a given number of chain stitches (equivalent to the height of the following stitch), this will either be depicted in the diagram or explained in the pattern.

See DROPS lesson: How to read crochet diagrams

Instructions for working several diagrams after each other on the same row/round, will often be written like so: “work A.1, A.2, A.3 a total of 0-0-2-3-4 times". This means you work A.1 once, then A.2 is worked once, and A.3 is repeated (in width) the number of times provided for your size – in this case like so: S = 0 times, M = 0 times, L=2 times, XL= 3 times and XXL = 4 times.

The diagrams are worked as usual: begin with the first row in A.1, then work the first row in A.2 etc.

See DROPS lesson: How to read knitting diagrams

See DROPS lesson: How to read crochet diagrams

The total width of the garment (from wrist-to-wrist) will be larger in the larger sizes, despite the actual sleeves being shorter. The larger sizes have longer sleeve caps and wider shoulders, so there will be a good fit in all sizes.

The measurement sketch/schematic drawing provides information regarding the full length of the garment. If it’s a jumper or a jacket the length is measured from the highest point on the shoulder closest to the neckline, and straight down to the bottom of the garment. It is NOT measured from the tip of shoulder. Similarly, the length of yoke is measured from the highest point on the shoulder and down to where yoke is split into body and sleeves.

On a jacket measures are never taken along bands, unless specifically stated. Always measure inside band stitches when measuring the length.

See DROPS lesson: How to read a schematic drawing

Diagrams are often repeated on the round or in height. 1 repeat is the diagram the way it appears in the pattern. If it says to work 5 repeats of A.1 in the round, then you work A.1 a total of 5 times after/next to each other in the round. If it says to work 2 repeats of A.1 vertically/in height you work the entire diagram once, then begin again at the start and work the entire diagram one more time.

Chain stitches are slightly narrower than other stitches and to avoid working the cast-on edge too tight, we simply chain more stitches to begin with. The stitch count will be adjusted on the following row to fit the pattern and measurement sketch.

The rib edge is more elastic and will contract slightly compared to, for example, stocking stitch. By increasing before the rib edge, you avoid a visible difference in width between the rib edge and the rest of the body.

It’s very easy to cast off too tightly, and by making yarn overs while casting off (and simultaneously casting these off) you avoid a too tight cast off edge.

See DROPS video: How to bind off with yarn overs (yo)

To achieve an even increase (or decrease) you can increase on, for example: every 3rd and 4th row alternately, like so: work 2 rows and increase on the 3rd row, work 3 rows and increase on the 4th. Repeat this until the increase is complete.

See DROPS lesson: Increase or decrease 1 st on every 3rd and 4th row alternately

Should you prefer to work in the round instead of back and forth, you may of course adjust the pattern. You’ll need to add steeks mid-front (usually 5 stitches), and follow the instructions. When you would normally turn and work from the wrong side, simply work across the steek and continue in the round. At the end you’ll cut the piece open, pick up stitches to work bands, and cover the cut edges.

See DROPS video: How to knit steeks and cut open

Should you prefer to work back and forth instead of in the round, you may of course adjust the pattern so you work the pieces separately and then assemble them at the end. Divide the stitches for the body in 2, add 1 edge stitch in each side (for sewing) and work the front and back pieces separately.

See DROPS lesson: Can I adapt a pattern for circular needles into straight needles?

Pattern repeats can vary slightly in the different sizes, in order to get the correct proportions. If you’re not working the exact same size as the garment in the photo, yours might deviate slightly. This has been carefully developed and adjusted so that the complete impression of the garment is the same in all sizes.

Make sure to follow instructions and diagrams for your size!

If you have found a pattern you like which is available in women’s size it’s not very difficult to convert it to men’s size. The biggest difference will be the length of sleeves and body. Start working on the women size that you think would fit across the chest. The additional length will be worked right before you cast off for the armhole/sleeve cap. If the pattern is worked top-down you can add the length right after the armhole or before the first decrease on sleeve.

Regarding additional yarn amount, this will depend on how much length you add, but it is better with a skein too many than too few.

All yarns will have excess fibres (from production) that might come off as lint or shedding. Brushed yarns (ie hairier yarns) have more of these loose, excess fibres, causing more shedding.

Shedding also depends on what is worn under or over the garment, and whether this pulls at the yarn fibres. It’s therefore not possible to guarantee that there will be no shedding

Below are some tips on how to get the best result when working with hairier yarns:

1. When the garment is finished (before you wash it) shake it vigorously so the looser hairs come off. NOTE: do NOT use a lint roller, brush or any method that pulls at the yarn.

2. Place the garment in a plastic bag and put it in your freezer - the temperature will cause the fibres to become less attached to each other, and excess fibres will come off easier.

3. Leave in the freezer for a few hours before taking it out and shaking it again.

4. Wash the garment according to the instructions on the yarn label.

Pilling is a natural process that happens to even the most exclusive of fibers. It's a natural sign of wear and tear that is hard to avoid, and that is most visible in high friction areas of your garment like a sweater's arms and cuffs.

You can make your garment look as new by removing the pilling, using a fabric comb or a pill/lint remover.

Still can't find the answer you need? Then scroll down and leave your question so one of our experts can try to help you. This will be done normally within 5 to 10 working days.
In the meantime, you can read the questions and answers that others have left to this pattern or join the DROPS Workshop on Facebook to get help from fellow knitters/crocheters!

You might also like...

Post a comment to pattern DROPS 227-48

We would love to hear what you have to say about this pattern!

If you want to leave a question, please make sure you select the correct category in the form below, to speed up the answering process. Required fields are marked *.

Comments / Questions (19)

country flag Hanski wrote:

Korjaus edelliseen viestiin: ongelma oli siinä että ajatteli että hihasilmukat ovat mallineuleen väliset silmukat kun niistä puhutaan erikseen hihana. Olisi ehkä syytä ottaa kokonaan pois kaarrokkeen alun jaosta hiha -sanat pois sulkeista niin ei tule sekaannusta. Ihan turha tieto kun osa silmukoista erotellaan hihaan mallineuleen silmukoista.

15.02.2023 - 20:58

country flag Hanski wrote:

Koossa L on virhe raglanlisäysten määrässä. Pitäisi olla 30 kertaa lisäykset joka 2.kerros että tulee hihoihin se 63 silmukkaa.

15.02.2023 - 19:06

country flag Anni wrote:

Hvilket garn er blusen på billedet strikket i?

12.02.2023 - 07:16

DROPS Design answered:

Hei Anni. Den er strikket med 2 tråder DROPS Kid-Silk, farge 35 sjokolade. mvh DROPS Design

13.02.2023 - 11:59

country flag Amalie wrote:

Is the sweater in the pictures 2 strands of kid silk?

09.02.2023 - 01:14

country flag Pia Husted wrote:

Kan det virkelig passe, at der kun skal bruges 5 nøgler garn til hele trøjen? Synes det er vildt hvis der kun skal bruges ialt 250 gr. til en str. XL, som jeg skal strikke. Mvh

27.10.2022 - 14:08

DROPS Design answered:

Hei Pia. Jo, garnmengden stemmer, men du trenger kun 175 gram i str. XL. DROPS Brushed Alpaca Silk er et mohair lignende garn, lett og luftig og har en lang løpelengde, 25 gram er ca 140 meter. Du trenger 175gram = 7 nøster = 980 meter garn. Om du skulle ha strikket denne genseren i en mer "vanlig" garnkvalitet, som f.eks DROPS Nepal, som har en løpelengde på 75 meter på 50 gram, ville du ha trengt 650-700 gram. Ønsker du å ha litt ekstra garn, er det salg på DROPS Brushed Alpaca Silk, og noen steder selges det fra kr. 16,- til 24,-. mvh DROPS Design

31.10.2022 - 08:59

country flag Karoliina wrote:

Kumpaa lankaa kuvan neuleessa on käytetty?

02.03.2022 - 14:03

country flag Perriot wrote:

Bonjour Est ce que l’on fait une couture sur l’endroit où bien sur l’envers de l’ouvrage avec la laine brushing alpaga ? Quel est le côté le plus discret ? Merci

26.01.2022 - 15:05

DROPS Design answered:

Bonjour Mme Perriot, on plie le col sur l'envers/sur l'intérieur du pull, la couture sera sur l'envers (comme le montre cette vidéo. Bonne continuation!

26.01.2022 - 17:12

country flag Julie wrote:

Jeg er nået til bærestykket i str large: 2. Omgang. I 1. Runde hvor jeg strikkede: 14R, tag ud, A1,tag ud, 30R, tag ud, A1, 3R, tag ud, A1, tag ud, 30R, tag ud, A1, tag ud, 3T, tag ud, A1, tag ud, 14 R. Hvordan er systemet det næste 50 omgange? Jeg kan se at jeg skal tage ud hver anden omgang. Men er kommer jo 8 masker mere før hver omgang og så duer det første system ikke. Hjælp.

23.01.2022 - 17:33

country flag Hella wrote:

The english description says to cast on x stitches with 1 strand Brushed Alpaca Silk OG 2 strands Kid Silk... I think that's supposed to mean "or" since I was really confused of you didn't translate that word from norwegian and I was supposed to use both Brushed Alpaca Silk and 2 strands of Kid Silk

10.11.2021 - 23:20

DROPS Design answered:

Dear Hella, thanks for noticing, you are right, you work either with 1 strands Brushed Alpaca or 2 strands Kid-silk - pattern has been edited. Happy knitting!

11.11.2021 - 09:12

country flag Lotte Van Kessel wrote:

Volgens mij is de kleur die bij het patroon wordt aangegeven niet juist.

07.10.2021 - 10:45