DROPS Big Merino
DROPS Big Merino
100% Wool
from 3.75 € /50g
Get the yarn to make this pattern from 15.00€.

The yarn cost is calculated from the pattern’s smallest size and the yarn’s cheapest product type. Looking for an even better price? You might find it on the DROPS Deals!

DROPS SS24

Little Trekker

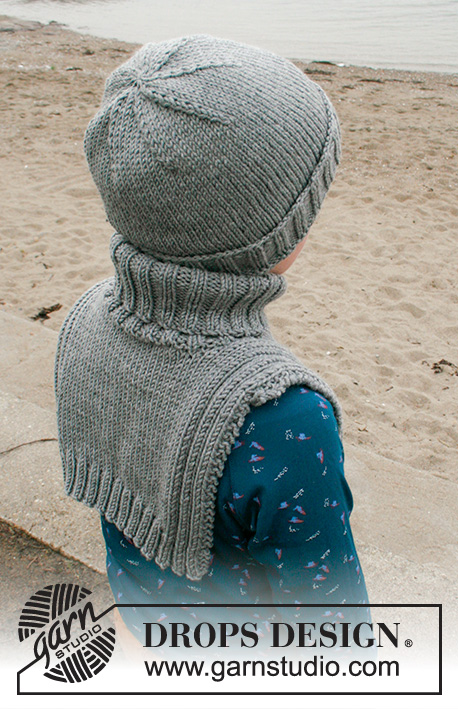
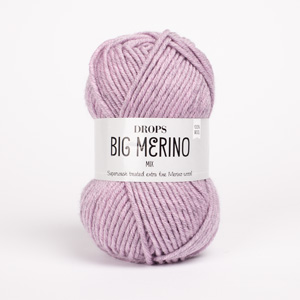
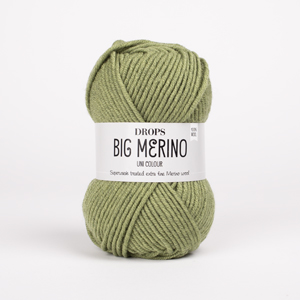
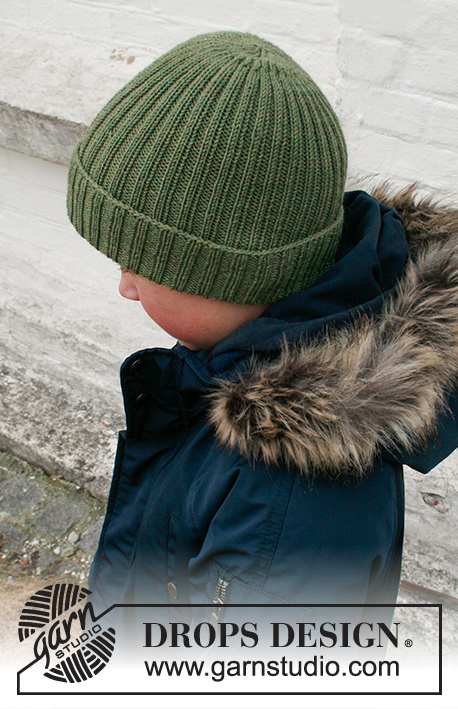
Knitted hat and neck-warmer for children, in DROPS Big Merino. The piece is worked in stocking stitch with ribbed edges. Sizes 2 to 12 years.

DROPS Children 40-32
DROPS Design: Pattern no mb-002-bn
Yarn group C or A + A
-------------------------------------------------------

WHOLE SET:

SIZES:
2 - 3/5 - 6/9 - 10/12 years
Child’s height in cm:
92 - 98/104 - 110/128 - 134/152

MATERIALS:
DROPS BIG MERINO from Garnstudio (belongs to yarn group C)
200-250-250-300 g colour 02, grey

HAT:

SIZES:
2 - 3/5 - 6/9 - 10/12 years
Fits head size:
48/50 - 50/52 - 52/54 - 54/56 cm

MATERIALS:
DROPS BIG MERINO from Garnstudio (belongs to yarn group C)
100-100-100-100 g colour 02, grey

NEEDLES:
DROPS CIRCULAR NEEDLE SIZE 4.5 MM: Length 40 cm.
DROPS CIRCULAR NEEDLE SIZE 3.5 MM: Length 40 cm.
DROPS DOUBLE POINTED NEEDLES SIZE 4.5 MM.
The technique MAGIC LOOP can be used – you then only need circular needle of 80 cm in each size.

KNITTING TENSION:
18 stitches in width and 23 rows in height with stocking stitch = 10 x 10 cm.
NOTE: Needle size is only a guide. If you get too many stitches on 10 cm, change to a larger needle size. If you get too few stitches on 10 cm, change to a smaller needle size.

NECK-WARMER:

SIZES:
2 - 3/5 - 6/9 - 10/12 years
Child’s height in cm:
92 - 98/104 - 110/128 - 134/152

MATERIALS:
DROPS BIG MERINO from Garnstudio (belongs to yarn group C)
150-150-200-200 g colour 02, grey

NEEDLES:
DROPS NEEDLE SIZE 5 MM: Length 40 cm.
DROPS NEEDLE SIZE 4 MM: Length 40 cm.
DROPS DOUBLE POINTED NEEDLES SIZE 4 MM.
The technique MAGIC LOOP can be used – you then only need circular needle of 80 cm in each size.

KNITTING TENSION:
17 stitches in width and 22 rows in height with stocking stitch = 10 x 10 cm.
NOTE: Needle size is only a guide. If you get too many stitches on 10 cm, change to a larger needle size. If you get too few stitches on 10 cm, change to a smaller needle size.

-------------------------------------------------------

Alternative Yarn – See how to change yarns here
Yarn Groups A to F – Use the same pattern and change the yarn here
Yarn usage using an alternative yarn – Use our yarn converter here

-------------------------------------------------------

DROPS Big Merino
DROPS Big Merino
100% Wool
from 3.75 € /50g
Get the yarn to make this pattern from 15.00€.

The yarn cost is calculated from the pattern’s smallest size and the yarn’s cheapest product type. Looking for an even better price? You might find it on the DROPS Deals!

Pattern instructions

NOTE: This pattern is written in British English. All measurements in charts are in cm. For conversion from cm to inches - click here. There are different terms for crocheting in British and American English. If this pattern includes crochet, click for "crochet terms" here. For this pattern in American English, please click here.
-------------------------------------------------------

EXPLANATIONS FOR THE PATTERN:

-------------------------------------------------------

DECREASE TIP (top of hat):
Decrease before each marker: Knit 2 together.

DECREASE/INCREASE TIP (evenly spaced):
To work out how to decrease/increase evenly, count the number of stitches to be decreased/increased over (e.g. 96 stitches), and divide by number of decreases/increases to be made (e.g. 6) = 16. In this example, decrease by knitting together each 15th and 16th stitch.
When increasing, make 1 yarn over after each 16th stitch. On the next row work the yarn overs twisted to avoid holes.

RIDGE/GARTER STITCH (worked back and forth):
Knit all rows.
1 ridge = knit 2 rows.

CASTING-OFF TIP:
To avoid the cast-off edge being tight you can cast off with a larger size needle. If the edge is still tight, make 1 yarn over after approx. each 4th stitch at the same time as casting off; the yarn overs are cast off as normal stitches.

-------------------------------------------------------

START THE PIECE HERE:

-------------------------------------------------------

HAT – SHORT OVERVIEW OF THE PIECE:
The piece is worked in the round with short circular needle/double pointed needles, bottom up.

HAT:
Cast on 84-88-92-96 stitches with short circular needle size 3.5 mm and DROPS Big Merino. Knit 1 round, then work rib in the round (knit 2, purl 2) for 4-5-5-6 cm.
Turn the piece, so the turn-up will be on the right-side when folded up later, and work the rest of the hat in the opposite direction.
Knit 1 round where you decrease 2-4-4-6 stitches evenly spaced – read DECREASE/INCREASE TIP = 82-84-88-90 stitches.
Change to short circular needle size 4.5 mm and work stocking stitch in the round. REMEMBER THE KNITTING TENSION!
When the piece measures 19-20-20-22 cm, insert 8 markers as follows:
Insert marker 1 at the beginning of the round, count 11-12-11-12 stitches and insert marker 2 before the next stitch, then insert the other 6 markers with 10-10-11-11 stitches between each one. There are 11-12-11-12 stitches left after the last marker.
On the next round decrease 1 stitch before each marker – read DECREASE TIP. Decrease like this every 2nd round a total of 5-6-7-7 times = 42-36-32-34 stitches.
Work 2 rounds where all stitches are knitted together 2 and 2 = 11-9-8-9 stitches. Cut the strand, thread it through the remaining stitches, tighten and fasten well. The hat measures approx. 24-26-27-29 cm. Fold up the bottom 4-5-5-6 cm.

-------------------------------------------------------

NECK-WARMER – SHORT OVERVIEW OF THE PIECE:
The piece is worked back and forth, starting at the bottom of the front piece, then working up to the shoulders and casting off for the neck. The shoulders are continued over to the back and stitches cast on for the neck The back piece is worked top down. The neck is worked to finish.

FRONT PIECE:
Cast on 50-58-62-66 stitches with needle size 4 mm and DROPS Big Merino. Purl 1 row from the wrong side. Then work the next row from the right side as follows: 2 edge stitches in GARTER STITCH – read description above, * knit 2, purl 2 *, work from *-* until there are 4 stitches left, knit 2 and 2 edge stitches in garter stitch. Continue this rib back and forth for 4 cm.
The next row is worked from the right side as follows: 2 edge stitches in garter stitch, * knit 2, purl 2 *, work from *-* 1-2-2-2 times, then work stocking stitch over the next 38-38-42-46 stitches and decrease 8-10-10-10 stitches evenly over these stitches – read DECREASE/INCREASE TIP, * purl 2, knit 2 *, work from *-* 1-2-2-2 times and finish with 2 edge stitches in garter stitch = 42-48-52-56 stitches.
Change to needle size 5 mm. The next row is worked from the wrong side as follows: 2 edge stitches in garter stitch, * purl 2, knit 2 *, work from *-* 1-2-2-2 times, work 30-28-32-36 stitches in stocking stitch, * knit 2, purl 2 *, work from *-* 1-2-2-2 times and finish with 2 edge stitches in garter stitch.
Continue this pattern back and forth. REMEMBER THE KNITTING TENSION!
When the piece measures 15-15-18-20 cm, place the middle 12-12-14-16 stitches on a thread for the neck and each shoulder is continued separately.

LEFT SHOULDER (when the garment is worn):
Continue as before and cast off at the beginning of each row from the neck as follows: 2 stitches 1 time and 1 stitch 2-2-2-3 times = 11-14-15-15 stitches on the shoulder. Work until the piece measures 19-20-24-26 cm. Insert 1 marker – top of shoulder. Work 1 row from the right side and 1 row from the wrong side. Work 1 row from the right side and cast on 1 stitch at the end of the row towards the neck = 12-15-16-16 stitches. Now work the right shoulder.

RIGHT SHOULDER (when the garment is worn):
Continue as before and cast off at the beginning of each row from the neck as follows: 2 stitches 1 time and 1 stitch 2-2-2-3 times = 11-14-15-15 stitches on the shoulder. Work until the piece measures 19-20-24-26 cm. Insert 1 marker – top of shoulder. Work 1 row from the right side. Work 1 row from the wrong side and cast on 1 stitch at the end of this row towards the neck = 12-15-16-16 stitches. Work 1 row from the right side, then 1 row from the wrong side where you cast on 18-18-20-24 stitches at the end of the row towards the neck. Place the stitches from the left shoulder on the same needle and continue working these stitches from the wrong side = 42-48-52-56 stitches. Now work the back piece as described below.

BACK PIECE:
= 42-48-52-56 stitches. Work back and forth with stocking stitch, 4-8-8-8 ribbed stitches and 2 edge stitches in garter stitch on each side.
Work until the piece measures 15-16-20-22 cm from the marker on the shoulder. Knit 1 row from the right side where you increase 8-10-10-10 stitches evenly over the stocking stitches – remember DECREASE/INCREASE TIP = 50-58-62-66 stitches.
Change to needle size 4 mm and work rib as follows from the wrong side: 2 edge stitches in garter stitch, * purl 2, knit 2 *, work from *-* until there are 4 stitches left, purl 2 and 2 edge stitches in garter stitch. Continue this rib for 4 cm. Cast off with garter stitch over garter stitch, knit over knit and purl over purl – read CASTING-OFF TIP. The piece measures approx. 19-20-24-26 cm from the marker on the shoulder.

NECK:
Start from the right side on the one shoulder and knit up 48-52-56-64 stitches around the neck (including the stitches on the thread in front) with double pointed needles size 4 mm 4. Knit 1 round where you evenly increase to 72-80-84-96 stitches - remember DECREASE/INCREASE TIP. Then work rib in the round (knit 2, purl 2) for 12-14-16-18 cm – or to desired length. Cast off with knit over knit and purl over purl – remember CASTING-OFF TIP.

This pattern has been corrected.

Updated online: 04.11.2022
FRONT PIECE: ... Change to needle size 5 mm. The next row is worked from the wrong side as follows: 2 edge stitches in garter stitch, * purl 2, knit 2 *, work from *-* 1-2-2-2 times, work 30-28-32-36 stitches in stocking stitch, * knit 2, purl 2 *, work from *-* 1-2-2-2 times and finish with 2 edge stitches in garter stitch.

Each of our patterns has specific tutorial videos to help you.

Do you have a question? See a list of frequently asked questions (FAQ)

Knitting tension is what determines the final measurements of your work, and is usually measured per 10 x 10 cm. It is provided like so: number of stitches in width x number of rows in height - eg: 19 stitches x 26 rows = 10 x 10 cm.

The knitting tension is very individual; some people knit/crochet loosely while others work tightly. You adjust the knitting tension with the needle size, which is why the suggested needle size is only meant as a guide! You need to adjust this (up or down) to ensure that YOUR knitting tension matches the knitting tension provided in the pattern. If you work with a different knitting tension than provided you will have a different yarn consumption, and your work will have different measurements than what the pattern suggests.

The knitting tension also determines which yarns can replace each other. As long as you achieve the same knitting tension you can replace one yarn with another.

See DROPS lesson: How to measure your tension/gauge

See DROPS video: How to make a gauge tension swatch

The required amount of yarn is provided in grams, eg: 450 g. To calculate how many balls you’ll need you first need to know how many grams are in 1 ball (25g, 50g or 100g). This information is available if you click on the individual yarn quality on our pages. Divide the amount required with the amount of each ball. For example, if each ball is 50g (the most common amount), the calculation will be as follows: 450 / 50 = 9 balls.

The important thing when changing from one yarn to another is that the knitting/crochet tension remains the same. This is so that the measurements of the finished piece will be the same as on the sketch provided. It is easier to achieve the same knitting tension using yarns from the same yarn group. It is also possible to work with multiple strands of a thinner yarn to achieve the knitting tension of a thicker one. Please try our yarn converter. We recommend you to always work a test swatch.

Please NOTE: when changing yarn the garment might have a different look and feel to the garment in the photo, due to individual properties and qualities of each yarn.

See DROPS lesson: Can I use a different yarn than the one mentioned in the pattern?

All our yarns are categorised into yarn groups (from A to F) according to thickness and knitting tension – group A contains the thinnest yarns and group F the thickest. This makes it easier for you to find alternative yarns to our patterns, should you wish to switch yarn. All yarns within the same group have a similar knitting tension and can easily replace each other. However, different yarn qualities have different structures and properties which will give the finished work a unique look and feel.

Click here for an overview of the yarns in each yarn group

At the top of all our patterns you’ll find a link to our yarn calculator, which is a helpful tool should you wish to use a different yarn than suggested. By filling in the yarn quality you wish to replace, the amount (in your size) and number of strands, the calculator will present good alternative yarns with the same knitting tension. Additionally it will tell you how much you’ll require in the new qualities and whether you’ll need to work with multiple strands. Most skeins are 50g (some are 25g or 100g).

If the pattern is worked with multiple colours, every colour will have to be calculated separately. Similarly, if the pattern is worked with several strands of different yarns (for example 1 strand Alpaca and 1 strand Kid-Silk) you will have to find alternatives for each, individually.

Click here to see our yarn calculator

Since different yarns have different qualities and textures we have chosen to keep the original yarn in our patterns. However, you can easily find options among our available qualities by using our yarn calculator, or simply pick a yarn from the same yarn group.

It is possible that some retailers still have discontinued yarns in stock, or that someone has a few skeins at home that they would like to find patterns for.

The yarn calculator will provide both alternative yarn as well as required amount in the new quality.

If you think it's hard to decide what size to make, it can be a good idea to measure a garment you own already and like the size of. Then you can pick the size by comparing those measures with the ones available in the pattern's size chart.

You'll find the size chart at the bottom of the pattern.

See DROPS lesson: How to read size chart

The needle size provided in the pattern serves only as a guide, the important thing is to follow the knitting tension. And since knitting tension is very individual, you will have to adjust the needle size to ensure that YOUR tension is the same as in the pattern – maybe you’ll have to adjust 1, or even 2 needle sizes, up or down to achieve the correct tension. For this, we recommend that you work test swatches.

Should you work with a different knitting tension than the one provided, the measurements of the finished garment might deviate from the measurement sketch.

See DROPS lesson: How to measure your tension/gauge

See DROPS video: How to make a tension/gauge swatch

Working a garment top-down provides more flexibility and room for personal adjustment. For example it is easier to try the garment on while working, as well as making adjustments to length of yoke and shoulder caps.

The instructions are carefully explaining every step, in the correct order. Diagrams are adjusted to the knitting direction and are worked as usual.

The diagram depicts all rows/rounds, and every stitch seen from the right side. It is read from bottom to top, from right to left. 1 square = 1 stitch.

When working back and forth, every other row is worked from the right side and every other row is worked from the wrong side. When working from the wrong side, the diagram will have to be worked reversed: from left to right, knit stitches are purled, purl stitches are knit etc.

When working in the round every round is worked from the right side and the diagram are worked from right to left on all rounds.

See DROPS lesson: How to read knitting diagrams

The diagram depicts all rows/rounds, and every stitch seen from the right side. It is worked from bottom to top, from right to left.

When working back and forth every other row is worked from the right side: from right to left and every other row is worked from the wrong side: from left to right.

When working in the round, every row in the diagram are worked from the right side, from right to left.

When working a circular diagram you start in the middle and work your way outwards, counter clockwise, row by row.

The rows usually start with a given number of chain stitches (equivalent to the height of the following stitch), this will either be depicted in the diagram or explained in the pattern.

See DROPS lesson: How to read crochet diagrams

Instructions for working several diagrams after each other on the same row/round, will often be written like so: “work A.1, A.2, A.3 a total of 0-0-2-3-4 times". This means you work A.1 once, then A.2 is worked once, and A.3 is repeated (in width) the number of times provided for your size – in this case like so: S = 0 times, M = 0 times, L=2 times, XL= 3 times and XXL = 4 times.

The diagrams are worked as usual: begin with the first row in A.1, then work the first row in A.2 etc.

See DROPS lesson: How to read knitting diagrams

See DROPS lesson: How to read crochet diagrams

The total width of the garment (from wrist-to-wrist) will be larger in the larger sizes, despite the actual sleeves being shorter. The larger sizes have longer sleeve caps and wider shoulders, so there will be a good fit in all sizes.

The measurement sketch/schematic drawing provides information regarding the full length of the garment. If it’s a jumper or a jacket the length is measured from the highest point on the shoulder closest to the neckline, and straight down to the bottom of the garment. It is NOT measured from the tip of shoulder. Similarly, the length of yoke is measured from the highest point on the shoulder and down to where yoke is split into body and sleeves.

On a jacket measures are never taken along bands, unless specifically stated. Always measure inside band stitches when measuring the length.

See DROPS lesson: How to read a schematic drawing

Diagrams are often repeated on the round or in height. 1 repeat is the diagram the way it appears in the pattern. If it says to work 5 repeats of A.1 in the round, then you work A.1 a total of 5 times after/next to each other in the round. If it says to work 2 repeats of A.1 vertically/in height you work the entire diagram once, then begin again at the start and work the entire diagram one more time.

Chain stitches are slightly narrower than other stitches and to avoid working the cast-on edge too tight, we simply chain more stitches to begin with. The stitch count will be adjusted on the following row to fit the pattern and measurement sketch.

The rib edge is more elastic and will contract slightly compared to, for example, stocking stitch. By increasing before the rib edge, you avoid a visible difference in width between the rib edge and the rest of the body.

It’s very easy to cast off too tightly, and by making yarn overs while casting off (and simultaneously casting these off) you avoid a too tight cast off edge.

See DROPS video: How to bind off with yarn overs (yo)

To achieve an even increase (or decrease) you can increase on, for example: every 3rd and 4th row alternately, like so: work 2 rows and increase on the 3rd row, work 3 rows and increase on the 4th. Repeat this until the increase is complete.

See DROPS lesson: Increase or decrease 1 st on every 3rd and 4th row alternately

Should you prefer to work in the round instead of back and forth, you may of course adjust the pattern. You’ll need to add steeks mid-front (usually 5 stitches), and follow the instructions. When you would normally turn and work from the wrong side, simply work across the steek and continue in the round. At the end you’ll cut the piece open, pick up stitches to work bands, and cover the cut edges.

See DROPS video: How to knit steeks and cut open

Should you prefer to work back and forth instead of in the round, you may of course adjust the pattern so you work the pieces separately and then assemble them at the end. Divide the stitches for the body in 2, add 1 edge stitch in each side (for sewing) and work the front and back pieces separately.

See DROPS lesson: Can I adapt a pattern for circular needles into straight needles?

Pattern repeats can vary slightly in the different sizes, in order to get the correct proportions. If you’re not working the exact same size as the garment in the photo, yours might deviate slightly. This has been carefully developed and adjusted so that the complete impression of the garment is the same in all sizes.

Make sure to follow instructions and diagrams for your size!

If you have found a pattern you like which is available in women’s size it’s not very difficult to convert it to men’s size. The biggest difference will be the length of sleeves and body. Start working on the women size that you think would fit across the chest. The additional length will be worked right before you cast off for the armhole/sleeve cap. If the pattern is worked top-down you can add the length right after the armhole or before the first decrease on sleeve.

Regarding additional yarn amount, this will depend on how much length you add, but it is better with a skein too many than too few.

All yarns will have excess fibres (from production) that might come off as lint or shedding. Brushed yarns (ie hairier yarns) have more of these loose, excess fibres, causing more shedding.

Shedding also depends on what is worn under or over the garment, and whether this pulls at the yarn fibres. It’s therefore not possible to guarantee that there will be no shedding

Below are some tips on how to get the best result when working with hairier yarns:

1. When the garment is finished (before you wash it) shake it vigorously so the looser hairs come off. NOTE: do NOT use a lint roller, brush or any method that pulls at the yarn.

2. Place the garment in a plastic bag and put it in your freezer - the temperature will cause the fibres to become less attached to each other, and excess fibres will come off easier.

3. Leave in the freezer for a few hours before taking it out and shaking it again.

4. Wash the garment according to the instructions on the yarn label.

Pilling is a natural process that happens to even the most exclusive of fibers. It's a natural sign of wear and tear that is hard to avoid, and that is most visible in high friction areas of your garment like a sweater's arms and cuffs.

You can make your garment look as new by removing the pilling, using a fabric comb or a pill/lint remover.

Still can't find the answer you need? Then scroll down and leave your question so one of our experts can try to help you. This will be done normally within 5 to 10 working days.
In the meantime, you can read the questions and answers that others have left to this pattern or join the DROPS Workshop on Facebook to get help from fellow knitters/crocheters!

You might also like...

Post a comment to pattern DROPS Children 40-32

We would love to hear what you have to say about this pattern!

If you want to leave a question, please make sure you select the correct category in the form below, to speed up the answering process. Required fields are marked *.

Comments / Questions (13)

country flag Franziska Stämpfli wrote:

Warum verwenden Sie 3 verschiedene Grössen Stricknadeln bei der Maschenprobe und beim Schalkragen. Wird für 2 rechts 2 links Muster auch eine Maschenprobe gemacht? Und wenn ja auch 17 Maschen und 22 Reihen.\r\n\r\nLiebe Grüsse aus der Schweiz\r\nFranziska

26.11.2023 - 00:03

country flag Manoa wrote:

Bonjour, Je tricote le bonnet et ne comprends pas la consigne suivante : "Tourner l'ouvrage, ainsi le revers sera sur l'endroit quand on va le plier, et on tricote le reste du bonnet dans l'autre sens." Pourriez-vous m'aider, svp ? Merci, bonne journée !

05.12.2022 - 22:30

DROPS Design answered:

Bonjour Manoa, le bas du bonnet doit être replié sur l'endroit à la fin, ainsi, pour que l'endroit de cette bordure soit sur l'endroit quand on la replie, on doit continuer la tricoter sur l'envers - cette vidéo montre (sur un autre modèle) comment procéder pour retourner le début de l'ouvrage et continuer. Bon tricot!

06.12.2022 - 11:07

country flag Linda wrote:

I’m having a problem with the neck warmer. After the rib row decrease on the right side it says change to 5 mm and the next row is on the right side! It states to k2,p2, after the 2 garter edge stitches. How can there be 2 right sides following on with no wrong side in between. For the back piece it talks about a right then wrong side at this point. Many thanks

27.10.2022 - 22:19

DROPS Design answered:

Dear Linda, you are right, work the next row from wrong side with 2 edge stitches in garter stitch as before + the first 4 or 8 sts in rib as before (K over K and P over P from WS) and purl the middle stitches (stocking stitch). Happy knitting!

28.10.2022 - 10:09

country flag Ella wrote:

Hei, hvordan lager jeg 2 kantmaske i rille ?

25.10.2022 - 11:02

DROPS Design answered:

Hej Ella, RILLE (strikkes frem og tilbake): Strikk rett på alle pinner. 1 rille i høyden = 2 pinner rett. Hvordan strikke kantmasker i rillestrikk

26.10.2022 - 08:31

country flag Ulrica wrote:

Hej, ska göra Little Trekker Halsvärmaren, förstår inte hur man gör två kantmaskor i rätstickning, har kopierat från ert mönster:, " FRAMSTYCKE: Lägg upp 50-58-62-66 maskor på sticka 4 med DROPS Big Merino. Sticka 1 varv avigt från avigsidan. Nästa varv stickas så här från rätsidan: 2 kantmaskor i RÄTSTICKNING – läs förklaring ovan, * 2 rätmaskor, 2 avigmaskor *, sti o s v. finns det någon video som förklarar?

28.09.2022 - 13:41

DROPS Design answered:

Hej Ulrica, ja så här stickar du rätstickning: Rätstickning Du hittar massa andra videos längst ner i mönstret :)

28.09.2022 - 15:33

country flag Ghia wrote:

I forgot to label this as a question, so again: "Hi, and thank you for your answer. This one is the only neck warmer with this look made out of Drops Big Merino (which is the yarn I have). I indeed checked through your entire selection. Please refer to a certain adult pattern, that can be made from Drops Big Merino. " I would also appreciate if you could just comment whether it is difficult or fairly easy to enlarge this pattern.

26.07.2022 - 12:37

DROPS Design answered:

Dear Ghia, you could try pattern 226-56, which is worked with 2 threads of group A = 1 thread of Group C, so you could try to work it with Big Merino (Group C yarn). Happy knitting!

31.07.2022 - 16:56

country flag Ghia wrote:

Hi, and thank you for your answer. This one is the only neck warmer with this look made out of Drops Big Merino (which is the yarn I have). I indeed checked through your entire selection. Please refer to a certain adult pattern, that can be made from Drops Big Merino.

26.07.2022 - 12:32

country flag Ghia wrote:

Hello! I would love to make the neck warmer for my mum. Would it be possible to just add some stitches, like 8 or 16 stitches? I'm not a very experienced knitter (yet), so I would love some insight on how hard it would be to enlarge this pattern. Do I add those 8 stitches to every part or do the proportions differ and I just have to try and see? Thank you in advance! Ghia

26.07.2022 - 12:05

DROPS Design answered:

Hi Ghia, why don't you choose from adult patterns. We have manny women patterns for neck wormers you can knit with our yarns. Please see HERE. Happy knitting!

26.07.2022 - 12:29

country flag Marta wrote:

Dzień dobry. Mam pytanie co do drutow w kominie. W wykazie podane są druty pończosznicze nr 5, natomiast we wzorze pojawia się wielkość drutów nr 4 ( przerabianie golfu). Która wielkość jest prawidłowa?

19.07.2022 - 10:16

DROPS Design answered:

Witaj Marto, potrzebne będą druty pończosznicze nr 4. Poprawiłam to już na stronie. Dziękuję za informację. Pozdrawiam!

19.07.2022 - 10:36

country flag Florence L Bass wrote:

Hello - me again! Apologies, I should have included that my question is regarding the HAT instructions! The question in my original post: Towards the end of the instructions it says: "Work 2 rounds where all stitches are knitted together 2 and 2 = 11-9-8-9 stitches." What does this mean? Is this just a standard "k2tog" but explained oddly? Many thanks - Florence

24.04.2022 - 07:58

DROPS Design answered:

Dear Florence, please see answer below.

24.04.2022 - 22:08