
Popular categories
Looking for a yarn?


|
|||||||
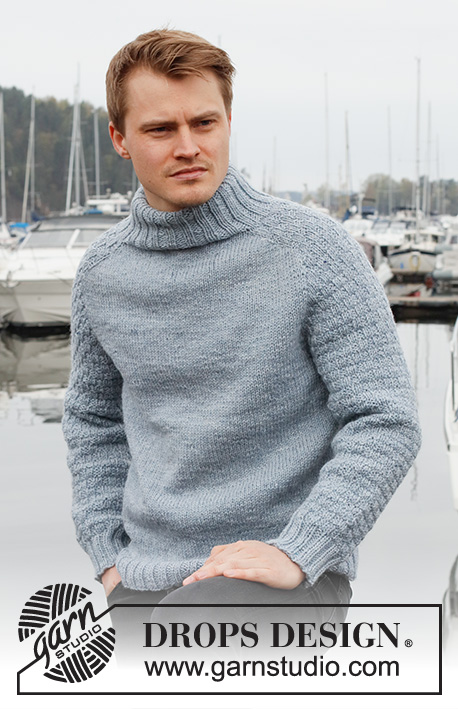
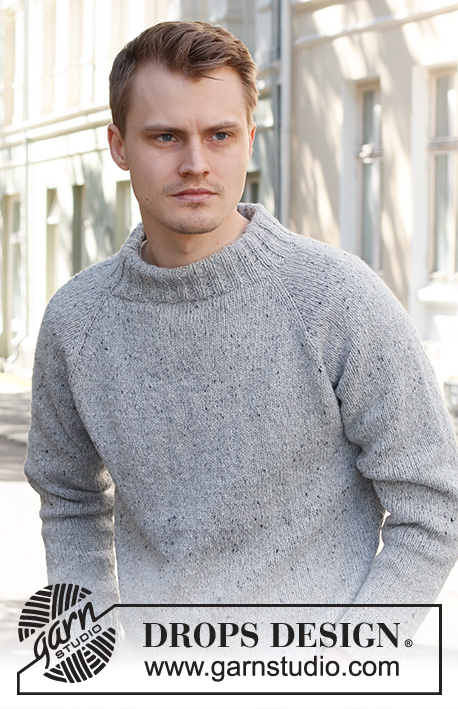
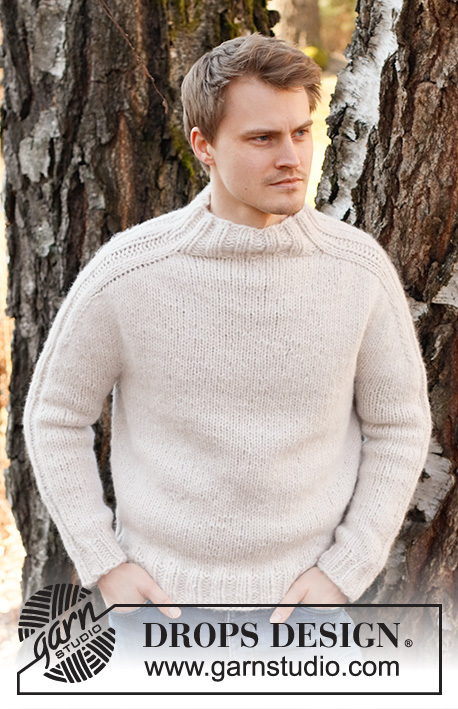
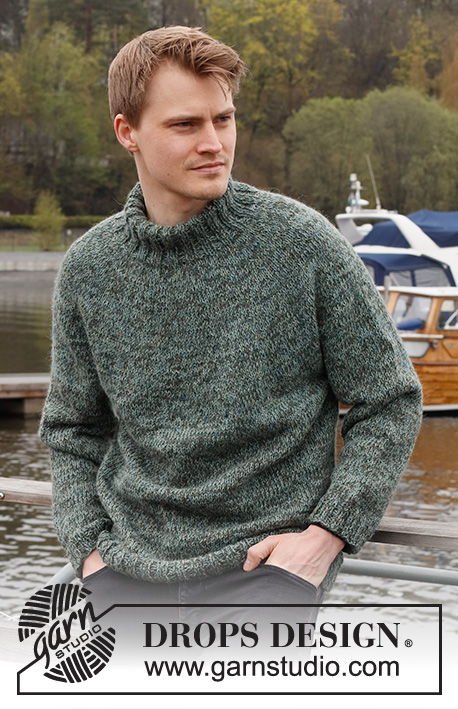
Lucky Wish |
|||||||
 |
 |
||||||
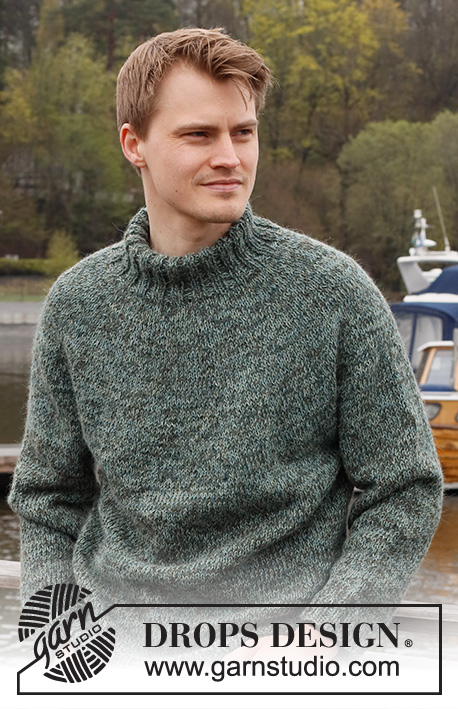
Knitted jumper for men in 2 strands DROPS Alpaca. The piece is worked top down with double neck and round yoke. Sizes S - XXXL.
DROPS 224-21 |
|||||||
|
------------------------------------------------------- EXPLANATIONS FOR THE PATTERN: ------------------------------------------------------- INCREASE TIP (evenly spaced): To work out how to increase evenly, count the total number of stitches on the needle (e.g. 80 stitches) and divide by the number of increases to be made (e.g. 16) = 5. In this example, increase by making 1 yarn over after each 5th stitch. On the next round knit the yarn overs twisted to avoid holes. PATTERN: See diagram A.1. The whole pattern is worked in stocking stitch. DECREASE TIP (for sleeves): Decrease 1 stitch on either side of the marker thread as follows: Work until there are 3 stitches left before the marker thread, knit 2 together, knit 2 (marker thread sits between these 2 stitches), slip 1 stitch as if to knit, knit 1 and pass the slipped stitch over the knitted stitch (2 stitches decreased). CASTING-OFF TIP: To avoid the cast-off edge being tight you can cast off with a larger size needle. If the edge is still tight, make 1 yarn over after approx. each 4th stitch at the same time as casting off; the yarn overs are cast off as normal stitches. ------------------------------------------------------- START THE PIECE HERE: ------------------------------------------------------- JUMPER – SHORT OVERVIEW OF THE PIECE: The neck and yoke are worked in the round with circular needle, from mid back and top down. The yoke is divided for body and sleeves and the body is continued in the round with circular needle. The sleeves are worked with double pointed needles, top down. DOUBLE NECK: Cast on 100-105-110-115-120-130 stitches with short circular needle size 4 mm and 1 strand of each colour DROPS Alpaca (= 2 strands). Knit 1 round. Work rib (knit 2, purl 3) for 4 cm. Now decrease 1 stitch in all the purled sections by purling 2 together = 80-84-88-92-96-104 stitches. Continue the new rib until the neck measures 12 cm. Change to circular needle size 5 mm. YOKE: Insert 1 marker at the beginning of the round mid-back; the yoke is measured from this marker! Knit 1 round where you increase 16-18-26-28-30-34 stitches evenly spaced – read INCREASE TIP = 96-102-114-120-126-138 stitches. Work A.1 over all stitches (= 16-17-19-20-21-23 repeats of 6 stitches). REMEMBER THE KNITTING TENSION! When A.1 has been completed in height there are 256-272-304-320-336-368 stitches on the round. Knit 1 round where you increase 0-0-0-4-8-0 stitches evenly spaced = 256-272-304-324-344-368 stitches. Continue working until the yoke measures 26-28-29-31-33-35 cm from the marker. The yoke is now divided for the body and sleeves as follows: Knit 38-40-44-49-53-58 (= half back piece), place the next 52-56-64-64-66-68 stitches on 1 thread for the sleeve, cast on 6-8-8-10-12-12 stitches (= in side under sleeve), knit 76-80-88-98-106-116 (= front piece), place the next 52-56-64-64-66-68 stitches on 1 thread for the sleeve, cast on 6-8-8-10-12-12 stitches (= in side under sleeve), knit 38-40-44-49-53-58 (= half back piece). The body and sleeves are finished separately. THE PIECE IS NOW MEASURED FROM HERE! BODY: There are now 164-176-192-216-236-256 stitches on the round. Continue with stocking stitch in the round for 32-32-33-33-33-33 cm (or to desired length; there is approx. 6 cm left). Change to circular needle size 4 mm and work rib (knit 2, purl 2) for 6 cm. Loosely cast off with knit over knit and purl over purl – read CASTING-OFF TIP. The jumper measures approx. 68-70-72-74-76-78 cm from the shoulder down. SLEEVES: Place the 52-56-64-64-66-68 stitches from the thread on the one side of the piece on double pointed needles/short circular needle size 5 mm and knit up 1 stitch in each of the 6-8-8-10-12-12 stitches cast on under the sleeve = 58-64-72-74-78-80 stitches. Insert a marker thread in the middle of the 6-8-8-10-12-12 stitches under the sleeve. Allow the thread to follow your work onwards; it will be used when decreasing under the sleeve. Start at the marker thread and work stocking stitch in the round for 3 cm. Now decrease 2 stitches under the sleeve – read DECREASE TIP. Decrease like this every 6-4-3-2½-2½-2½ cm a total of 6-8-11-11-12-12 times = 46-48-50-52-54-56 stitches. Continue without further decreases until the sleeve measures 39-38-37-36-34-32 cm from the division (there is approx. 4 cm left; try the jumper on and work to desired length). Shorter measurements in larger sizes due to wider neck and longer yoke. Knit 1 round where you increase 2-4-2-4-2-4 stitches evenly spaced = 48-52-52-56-56-60 stitches. Change to double pointed needles size 4 mm and work rib (knit 2, purl 2) for 4 cm. Cast off with knit over knit and purl over purl – remember CASTING-OFF TIP! The sleeve measures approx. 43-42-41-40-38-36 cm. Work the other sleeve in the same way. ASSEMBLY: Fold the neck double to the inside and sew down. To avoid the neck being tight and rolling outwards, it is important that the seam is elastic. |
|||||||
Diagram explanations |
|||||||
|
|||||||

|
|||||||

|
|||||||
|
Have you made this or any other of our designs? Tag your pictures in social media with #dropsdesign so we can see them! Do you need help with this pattern?You'll find tutorial videos, a Comments/Questions area and more by visiting the pattern on garnstudio.com. © 1982-2024 DROPS Design A/S. We reserve all rights. This document, including all its sub-sections, has copyrights. Read more about what you can do with our patterns at the bottom of each pattern on our site. |
|||||||


With over 40 years in knitting and crochet design, DROPS Design offers one of the most extensive collections of free patterns on the internet - translated to 17 languages. As of today we count 304 catalogues and 11422 patterns - 11422 of which are translated into English (UK/cm).
We work hard to bring you the best knitting and crochet have to offer, inspiration and advice as well as great quality yarns at incredible prices! Would you like to use our patterns for other than personal use? You can read what you are allowed to do in the Copyright text at the bottom of all our patterns. Happy crafting!
Comments / Questions (40)
Guten Tag, Mit welcher Nadelstärke muss ich die Maschenprobe stricken? Danke für eine Antwort. Grüße Alka
06.03.2024 - 16:13DROPS Design answered:
Liebe Frau Schmidt-Korten, Maschenprobe wird mit den grösseren Nadeln ( Nr 5) gestrickt. Viel Spaß beim stricken!
06.03.2024 - 16:30I have knit several swatches to make sure I have the correct gauge, but am still knitting too tightly. I have to go to at least 5.5-6 mm needles to get 17 stitches in 10 cm, but then the swatch pattern is very light/airy (won't make for a warm sweater). If i hold together three strands of Alpaca, on 5.5 mm needles, and end with the correct gauge size (10 x 10 for 17 stitches and the correct rows), would it work to get the correct measurements on the final sweater?
24.02.2024 - 22:39DROPS Design answered:
Dear Mrs Kistner, if you. like the texture you get with this tension and 3 strands, and if your tension is right in both width and height then it will probably work but just remember that this will also affect the amount of yarn required as we just work with 2 strands here, not with 3. Happy knitting!
26.02.2024 - 08:45Bonjour Je essaye de faire votre Lucky Wish sweater et je veux regarder vos explications sur les videos que vous disponibilisez mais ils non pas de son. Je n’arrive pas à entendre aucun son , sur aucun video. Pouvez-vous m’aider ? Merci
11.02.2024 - 19:46DROPS Design answered:
Bonjour, Nos videos n'ont pas de son pour que ce soie plus facile à toutes les tricoteuses du monde entier de voir nos vídeos. Bons tricots!
12.02.2024 - 09:03Hvordan skal diagrammet forståes når der står 21 rapporter af 6 masker? Skal jeg lave den første udtagning på 24 maske?
27.12.2023 - 20:42DROPS Design answered:
Hej Heidi, du starter nederst i diagrammet. På 4.omgang (ifølge diagrammet) laver du 1 omslag efter hver 6.maske og det gør du hele vejen rundt. På 8. omgang laver du 1 omslag strikker 7 masker, 1 omslag 7 masker osv :)
02.01.2024 - 12:14Bonjour. SVP, je ne sais pas lire un diagramme. Que représente le 6 et le 16 et comment l’appliquer pour la taille L. Merci
25.12.2023 - 06:42DROPS Design answered:
Bonjour, 6 est le nombre de mailles lorsque vous commencez à tricoter le diagramme et 16 est le nombre de mailles lorsque vous avez fini de tricoter une répétition du diagramme. Vous pouvez lire plus d’informations sur les diagrammes de tricot ici : https://www.garnstudio.com/lesson.php?id=68&cid=8. Bon tricot!
28.12.2023 - 23:00Entonces el suéter Lucky wish se teje con dos madejas a la vez. una de bosque verde y otra de niebla marina?
11.12.2023 - 14:42DROPS Design answered:
Hola Lola, sí, se teje con un hilo de cada color, es decir, 2 hilos juntos.
17.12.2023 - 23:09Hello, so if I were to use drops merino, I would have to use 390g of the merino, being converted from 350g of drops alpaca. That doesn't seem like a lot of wool for a sweater. Am I misunderstanding?
06.12.2023 - 23:42DROPS Design answered:
Dear Chantal, if you like to use one of our merino yarns, use Big Merino (yarn group C) to replace 2 strands yarn group A - use the yarn converter to get the new amount in Big Merino to replace these 2 strands Alpaca for the choose size. Happy knitting!
07.12.2023 - 08:40Bonjour Ci je veux faire le pull homme avec 1 seul fil d’une laine plus gros et aussi aiguilles 4 et 5, quelle sera la quantité de fil necessaire? L’ échantillon que vous indiquez sur le pattron de 17 mailles en largeur et 22 rangs en hauteur en Jersey et avec les 2 fils c’ est depuis bloquer le travaille? Merci
06.12.2023 - 18:44DROPS Design answered:
Bonjour Mme Ramos, on tricote ici 2 fils Alpaca (groupe A) que vous pouvez remplacer par 1 fil du groupe C, utilisez notre convertisseur pour voir la nouvelle quantité nécessaire en fonction de la laine choisie. L'échantillon n'est pas bloqué, toutefois, si vous êtes susceptibles d'avoir une différence avant/après, il peut être alors utile de bloquer votre échantillon/ouvrage. Bon tricot!
07.12.2023 - 08:34BEGINT DE EERSTE STEEK VAN HET TELPATROON (A1) ALTIJD OP DEZELFDE HOOGTE OF MOET GE TERUG GAAN?
03.12.2023 - 22:05DROPS Design answered:
Dag Lieve,
Je leest het telpatroon van onder naar boven, dus de eerste naald van het telpatroon is de onderste rij van 6 steken. Deze steken herhaal je steeds in de breedte over de hele toer, totdat je weer aan het begin van de toer bent. Dan brei je de volgende rij ook weer helemaal rondom en zo ga je verder totdat je bovenaan bij A.1 bent.
06.12.2023 - 20:02Hey! Ik vroeg me af hoe we het telpatroon moeten lezen. Is 1 rij hokjes 1 volledige naald? Of moet je in een naald al de hokjes volgen tot het einde van je naald?
21.11.2023 - 09:56DROPS Design answered:
Dag Mila,
Het telpatroon geeft alle naalden weer. Dus, inderdaad alle hokjes volgen. Het telpatroon wordt in de breedtet herhaald en je leest van onder naar boven. Op de eerste naald heb je dus een x aantal herhalingen (afhankelijk van je maat) van 6. Je volgt het patroon ook helemaal in de hoogte, waarbij elke rij dus staat aangegeven.
21.11.2023 - 22:50