DROPS Nepal
DROPS Nepal
65% Wool, 35% Alpaca
from 2.40 £ /50g
Get the yarn to make this pattern from 28.80£.

The yarn cost is calculated from the pattern’s smallest size and the yarn’s cheapest product type. Looking for an even better price? You might find it on the DROPS Deals!

DROPS SS24

Stone Fences

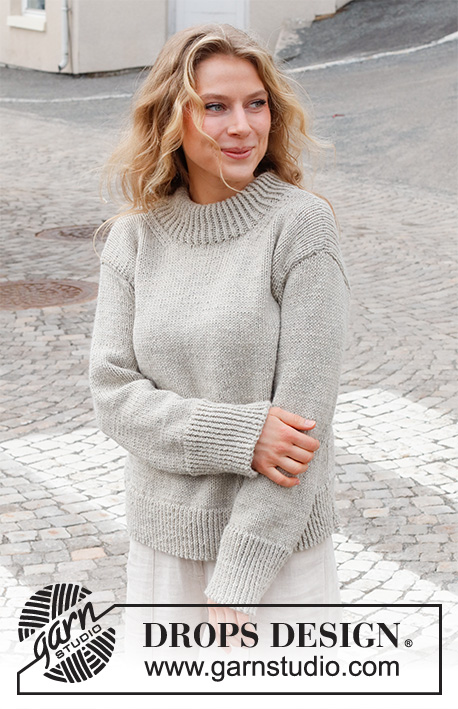
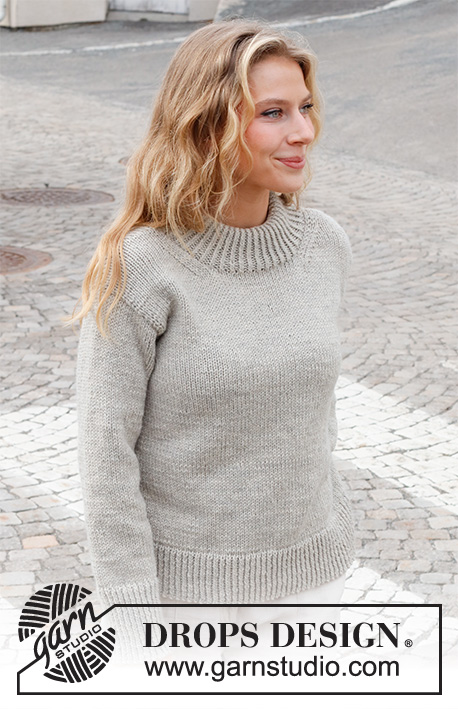
Knitted jumper in DROPS Nepal or DROPS Alaska. The piece is worked with ribbed edges and double neck. Sizes S - XXXL.

DROPS 228-24
DROPS Design: Pattern no ne-354
Yarn group C or A + A
-------------------------------------------------------

SIZES:
S - M - L - XL - XXL - XXXL

MATERIALS:
DROPS NEPAL from Garnstudio (belongs to yarn group C)
600-700-750-800-900-1000 g colour 0500, light grey

Or use:
DROPS ALASKA from Garnstudio (belongs to yarn group C)
650-750-800-850-950-1050 g colour 63, pearl grey

NEEDLES:
DROPS CIRCULAR NEEDLE SIZE 5.5 MM: Length 80 cm.
DROPS CIRCULAR NEEDLE SIZE 4.5 MM: Length 80 cm.

KNITTING TENSION:
16 stitches in width and 20 rows in height with stocking stitch = 10 x 10 cm.
NOTE: Needle size is only a guide. If you get too many stitches on 10 cm, change to a larger needle size. If you get too few stitches on 10 cm, change to a smaller needle size.

-------------------------------------------------------

Alternative Yarn – See how to change yarns here
Yarn Groups A to F – Use the same pattern and change the yarn here
Yarn usage using an alternative yarn – Use our yarn converter here

-------------------------------------------------------

DROPS Nepal
DROPS Nepal
65% Wool, 35% Alpaca
from 2.40 £ /50g
Get the yarn to make this pattern from 28.80£.

The yarn cost is calculated from the pattern’s smallest size and the yarn’s cheapest product type. Looking for an even better price? You might find it on the DROPS Deals!

Pattern instructions

NOTE: This pattern is written in British English. All measurements in charts are in cm. For conversion from cm to inches - click here. There are different terms for crocheting in British and American English. If this pattern includes crochet, click for "crochet terms" here. For this pattern in American English, please click here.
-------------------------------------------------------

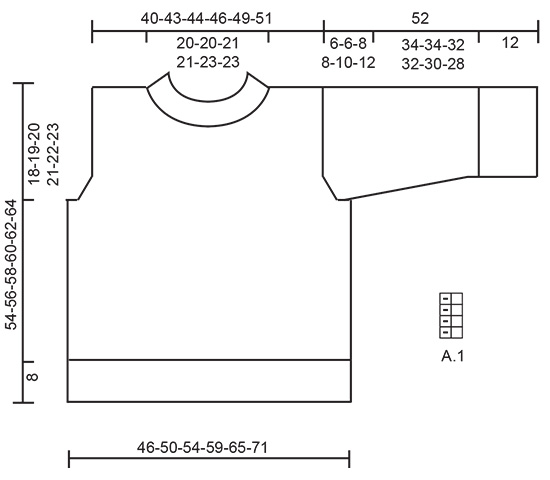
EXPLANATIONS FOR THE PATTERN:

-------------------------------------------------------

RIDGE/GARTER STITCH (worked back and forth):
Knit all rows.
1 ridge = knit 2 rows.

PATTERN:
See diagram A.1. The diagram shows all rows in the pattern from the right side.

DECREASE TIP-1 (evenly spaced):
To work out how to decrease evenly, count the total number of stitches on the needle (e.g. 109 stitches) minus the edge stitches (e.g. 2 stitches) and divide the remaining stitches by the number of decreases to be made (e.g. 27) = 3.96. 
In this example decrease by knitting together each 3rd and 4th stitch (approx.). Do not decrease the edge stitches.

DECREASE TIP-2 (for armholes and neck):
All decreases are worked from the right side!
DECREASE AT BEGINNING OF ROW: 1 edge stitch in garter stitch, knit 2, slip 1 stitch as if to knit, knit 1 and pass the slipped stitch over the knitted stitch (= 1 stitch decreased).
DECREASE AT END OF ROW: Work until there are 5 stitches left, knit 2 together, knit 2 and 1 edge stitch in garter stitch (= 1 stitch decreased).

INCREASE TIP (for sleeves):
All increases are worked from the right side!
Increase 1 stitch by making 1 yarn over. On the next row purl the yarn over twisted to avoid a hole.

CASTING-OFF TIP:
To avoid the cast-off edge being tight you can cast off with a larger size needle. If the edge is still tight, make 1 yarn over after approx. each 4th stitch at the same time as casting off; the yarn overs are cast off as normal stitches.

-------------------------------------------------------

START THE PIECE HERE:

-------------------------------------------------------

JUMPER – SHORT OVERVIEW OF THE PIECE:
The piece is worked back and forth in sections and then sewn together.
The neck is worked in the round to finish.

BACK PIECE:
Cast on 101-109-117-129-143-155 stitches (including 1 edge stitch on each side) with circular needle size 4.5 mm and DROPS Nepal or DROPS Alaska. Purl 1 row from the wrong side. Then work rib as follows:

1 edge stitch in GARTER STITCH – read description above, A.1 until there are 2 stitches left, work the first stitch in A.1 (so the rib is symmetrical) and 1 edge stitch in garter stitch. Continue this rib back and forth for 8 cm – adjust so the next row is from the right side.
Knit 1 row where you decrease 25-27-29-33-37-39 stitches evenly spaced – read DECREASE TIP-1 = 76-82-88-96-106-116 stitches.
Change to circular needle size 5.5 mm.
Continue with stocking stitch and 1 edge stitch in garter stitch on each side.
REMEMBER THE KNITTING TENSION!

When the piece measures 36-37-38-39-40-41 cm, cast off 3-3-5-6-8-8 stitches at the beginning of the next 2 rows for the armholes = 70-76-78-84-90-100 stitches.
Continue to decrease as follows:
Decrease 1 stitch on each side of the piece, every row from the right side a total of 2-3-3-4-5-8 times – read DECREASE TIP-2 = 66-70-72-76-80-84 stitches.
Continue with stocking stitch and 1 edge stitch in garter stitch on each side.
When the piece measures 50-52-54-56-58-60 cm, cast off the middle 30-30-32-32-34-34 stitches for the neck and finish each shoulder separately (= 18-20-20-22-23-25 stitches on each shoulder).
Decrease 1 stitch on the next row from the neck = 17-19-19-21-22-24 stitches. Continue with stocking stitch and 1 edge stitch in garter stitch on each side until the piece measures 54-56-58-60-62-64 cm. Cast off. Work the other shoulder in the same way.

FRONT PIECE:
Cast on and work in the same way as the back piece, until the piece measures 45-47-48-50-51-53 cm. On the next row from the right side, place the middle 18-18-18-18-20-20 stitches on a thread for the neck and finish each shoulder separately.

RIGHT SHOULDER:
Continue back and forth with 1 edge stitch in garter stitch on each side. Decrease 1 stitch at the beginning of each row from the right side 7-7-8-8-8-8 times – remember DECREASE TIP-2 = 17-19-19-21-22-24 stitches.
Continue working until the piece measures 54-56-58-60-62-64 cm. Cast off.

LEFT SHOULDER:
Continue back and forth with 1 edge stitch in garter stitch on each side. Decrease 1 stitch at the end of each row from the right side 7-7-8-8-8-8 times = 17-19-19-21-22-24 stitches.
Continue working until the piece measures 54-56-58-60-62-64 cm. Cast off.

SLEEVES:
Cast on 64-66-68-72-74-74 stitches (including 1 edge stitch on each side) with circular needle size 4.5 mm and DROPS Nepal or DROPS Alaska. Purl 1 row from the wrong side. Then work rib as follows:
1 edge stitch in garter stitch, A.1 until there is 1 stitch left and 1 edge stitch in garter stitch. Continue this rib back and forth for 12 cm.
Knit 1 row from the right side where you decrease 18-18-18-20-20-20 stitches evenly spaced = 46-48-50-52-54-54 stitches.
Change to circular needle size 5.5 mm Continue with stocking stitch and 1 edge stitch in garter stitch on each side. When the piece measures 14 cm, increase 1 stitch inside 2 stitches on each side of the piece – read INCREASE TIP. Increase like this every 10-7½-5½-5½-4-3 cm a total of 4-5-6-6-7-9 times = 54-58-62-64-68-72 stitches.
When the sleeve measures 46-46-44-44-42-40 cm, cast off on each side for the sleeve cap as follows:
Cast off 3-3-5-6-8-8 stitches 1 time, 2 stitches 3 times, then 1 stitch on each side until the sleeve measures 51 cm. Finally, cast off 3 stitches on each side 1 time.
Cast off – read CASTING-OFF TIP. The sleeve measures approx. 52 cm.
Work the other sleeve in the same way.

ASSEMBLY:
Sew the shoulder seams with grafting stitches.
Sew the sleeves into the armholes, inside the 1 edge stitch on the body and the cast-off edge on the sleeve.
Sew the side seams from the armholes down, inside the 1 edge stitch.

NECK:
Start from the right side, at the top of one shoulder and knit up stitches around the neck with circular needle size 4.5 mm and DROPS Nepal or DROPS Alaska. Knit up 98 to 114 stitches (including the stitches from the thread) inside the 1 edge stitch. The number of stitches must be divisible by 2.
Work A.1 in the round until the rib measures 15 cm.
Cast off with knit over knit and purl over purl – remember CASTING-OFF TIP!
Fold the neck double to the inside and sew down. To avoid the neck being tight and rolling outwards, it is important that the seam is elastic.

Diagram

symbols = knit twisted from the right side, purl twisted from the wrong side
symbols = purl from right side, knit from wrong side
diagram

Each of our patterns has specific tutorial videos to help you.

Do you have a question? See a list of frequently asked questions (FAQ)

Knitting tension is what determines the final measurements of your work, and is usually measured per 10 x 10 cm. It is provided like so: number of stitches in width x number of rows in height - eg: 19 stitches x 26 rows = 10 x 10 cm.

The knitting tension is very individual; some people knit/crochet loosely while others work tightly. You adjust the knitting tension with the needle size, which is why the suggested needle size is only meant as a guide! You need to adjust this (up or down) to ensure that YOUR knitting tension matches the knitting tension provided in the pattern. If you work with a different knitting tension than provided you will have a different yarn consumption, and your work will have different measurements than what the pattern suggests.

The knitting tension also determines which yarns can replace each other. As long as you achieve the same knitting tension you can replace one yarn with another.

See DROPS lesson: How to measure your tension/gauge

See DROPS video: How to make a gauge tension swatch

The required amount of yarn is provided in grams, eg: 450 g. To calculate how many balls you’ll need you first need to know how many grams are in 1 ball (25g, 50g or 100g). This information is available if you click on the individual yarn quality on our pages. Divide the amount required with the amount of each ball. For example, if each ball is 50g (the most common amount), the calculation will be as follows: 450 / 50 = 9 balls.

The important thing when changing from one yarn to another is that the knitting/crochet tension remains the same. This is so that the measurements of the finished piece will be the same as on the sketch provided. It is easier to achieve the same knitting tension using yarns from the same yarn group. It is also possible to work with multiple strands of a thinner yarn to achieve the knitting tension of a thicker one. Please try our yarn converter. We recommend you to always work a test swatch.

Please NOTE: when changing yarn the garment might have a different look and feel to the garment in the photo, due to individual properties and qualities of each yarn.

See DROPS lesson: Can I use a different yarn than the one mentioned in the pattern?

All our yarns are categorised into yarn groups (from A to F) according to thickness and knitting tension – group A contains the thinnest yarns and group F the thickest. This makes it easier for you to find alternative yarns to our patterns, should you wish to switch yarn. All yarns within the same group have a similar knitting tension and can easily replace each other. However, different yarn qualities have different structures and properties which will give the finished work a unique look and feel.

Click here for an overview of the yarns in each yarn group

At the top of all our patterns you’ll find a link to our yarn calculator, which is a helpful tool should you wish to use a different yarn than suggested. By filling in the yarn quality you wish to replace, the amount (in your size) and number of strands, the calculator will present good alternative yarns with the same knitting tension. Additionally it will tell you how much you’ll require in the new qualities and whether you’ll need to work with multiple strands. Most skeins are 50g (some are 25g or 100g).

If the pattern is worked with multiple colours, every colour will have to be calculated separately. Similarly, if the pattern is worked with several strands of different yarns (for example 1 strand Alpaca and 1 strand Kid-Silk) you will have to find alternatives for each, individually.

Click here to see our yarn calculator

Since different yarns have different qualities and textures we have chosen to keep the original yarn in our patterns. However, you can easily find options among our available qualities by using our yarn calculator, or simply pick a yarn from the same yarn group.

It is possible that some retailers still have discontinued yarns in stock, or that someone has a few skeins at home that they would like to find patterns for.

The yarn calculator will provide both alternative yarn as well as required amount in the new quality.

If you think it's hard to decide what size to make, it can be a good idea to measure a garment you own already and like the size of. Then you can pick the size by comparing those measures with the ones available in the pattern's size chart.

You'll find the size chart at the bottom of the pattern.

See DROPS lesson: How to read size chart

The needle size provided in the pattern serves only as a guide, the important thing is to follow the knitting tension. And since knitting tension is very individual, you will have to adjust the needle size to ensure that YOUR tension is the same as in the pattern – maybe you’ll have to adjust 1, or even 2 needle sizes, up or down to achieve the correct tension. For this, we recommend that you work test swatches.

Should you work with a different knitting tension than the one provided, the measurements of the finished garment might deviate from the measurement sketch.

See DROPS lesson: How to measure your tension/gauge

See DROPS video: How to make a tension/gauge swatch

Working a garment top-down provides more flexibility and room for personal adjustment. For example it is easier to try the garment on while working, as well as making adjustments to length of yoke and shoulder caps.

The instructions are carefully explaining every step, in the correct order. Diagrams are adjusted to the knitting direction and are worked as usual.

The diagram depicts all rows/rounds, and every stitch seen from the right side. It is read from bottom to top, from right to left. 1 square = 1 stitch.

When working back and forth, every other row is worked from the right side and every other row is worked from the wrong side. When working from the wrong side, the diagram will have to be worked reversed: from left to right, knit stitches are purled, purl stitches are knit etc.

When working in the round every round is worked from the right side and the diagram are worked from right to left on all rounds.

See DROPS lesson: How to read knitting diagrams

The diagram depicts all rows/rounds, and every stitch seen from the right side. It is worked from bottom to top, from right to left.

When working back and forth every other row is worked from the right side: from right to left and every other row is worked from the wrong side: from left to right.

When working in the round, every row in the diagram are worked from the right side, from right to left.

When working a circular diagram you start in the middle and work your way outwards, counter clockwise, row by row.

The rows usually start with a given number of chain stitches (equivalent to the height of the following stitch), this will either be depicted in the diagram or explained in the pattern.

See DROPS lesson: How to read crochet diagrams

Instructions for working several diagrams after each other on the same row/round, will often be written like so: “work A.1, A.2, A.3 a total of 0-0-2-3-4 times". This means you work A.1 once, then A.2 is worked once, and A.3 is repeated (in width) the number of times provided for your size – in this case like so: S = 0 times, M = 0 times, L=2 times, XL= 3 times and XXL = 4 times.

The diagrams are worked as usual: begin with the first row in A.1, then work the first row in A.2 etc.

See DROPS lesson: How to read knitting diagrams

See DROPS lesson: How to read crochet diagrams

The total width of the garment (from wrist-to-wrist) will be larger in the larger sizes, despite the actual sleeves being shorter. The larger sizes have longer sleeve caps and wider shoulders, so there will be a good fit in all sizes.

The measurement sketch/schematic drawing provides information regarding the full length of the garment. If it’s a jumper or a jacket the length is measured from the highest point on the shoulder closest to the neckline, and straight down to the bottom of the garment. It is NOT measured from the tip of shoulder. Similarly, the length of yoke is measured from the highest point on the shoulder and down to where yoke is split into body and sleeves.

On a jacket measures are never taken along bands, unless specifically stated. Always measure inside band stitches when measuring the length.

See DROPS lesson: How to read a schematic drawing

Diagrams are often repeated on the round or in height. 1 repeat is the diagram the way it appears in the pattern. If it says to work 5 repeats of A.1 in the round, then you work A.1 a total of 5 times after/next to each other in the round. If it says to work 2 repeats of A.1 vertically/in height you work the entire diagram once, then begin again at the start and work the entire diagram one more time.

Chain stitches are slightly narrower than other stitches and to avoid working the cast-on edge too tight, we simply chain more stitches to begin with. The stitch count will be adjusted on the following row to fit the pattern and measurement sketch.

The rib edge is more elastic and will contract slightly compared to, for example, stocking stitch. By increasing before the rib edge, you avoid a visible difference in width between the rib edge and the rest of the body.

It’s very easy to cast off too tightly, and by making yarn overs while casting off (and simultaneously casting these off) you avoid a too tight cast off edge.

See DROPS video: How to bind off with yarn overs (yo)

To achieve an even increase (or decrease) you can increase on, for example: every 3rd and 4th row alternately, like so: work 2 rows and increase on the 3rd row, work 3 rows and increase on the 4th. Repeat this until the increase is complete.

See DROPS lesson: Increase or decrease 1 st on every 3rd and 4th row alternately

Should you prefer to work in the round instead of back and forth, you may of course adjust the pattern. You’ll need to add steeks mid-front (usually 5 stitches), and follow the instructions. When you would normally turn and work from the wrong side, simply work across the steek and continue in the round. At the end you’ll cut the piece open, pick up stitches to work bands, and cover the cut edges.

See DROPS video: How to knit steeks and cut open

Should you prefer to work back and forth instead of in the round, you may of course adjust the pattern so you work the pieces separately and then assemble them at the end. Divide the stitches for the body in 2, add 1 edge stitch in each side (for sewing) and work the front and back pieces separately.

See DROPS lesson: Can I adapt a pattern for circular needles into straight needles?

Pattern repeats can vary slightly in the different sizes, in order to get the correct proportions. If you’re not working the exact same size as the garment in the photo, yours might deviate slightly. This has been carefully developed and adjusted so that the complete impression of the garment is the same in all sizes.

Make sure to follow instructions and diagrams for your size!

If you have found a pattern you like which is available in women’s size it’s not very difficult to convert it to men’s size. The biggest difference will be the length of sleeves and body. Start working on the women size that you think would fit across the chest. The additional length will be worked right before you cast off for the armhole/sleeve cap. If the pattern is worked top-down you can add the length right after the armhole or before the first decrease on sleeve.

Regarding additional yarn amount, this will depend on how much length you add, but it is better with a skein too many than too few.

All yarns will have excess fibres (from production) that might come off as lint or shedding. Brushed yarns (ie hairier yarns) have more of these loose, excess fibres, causing more shedding.

Shedding also depends on what is worn under or over the garment, and whether this pulls at the yarn fibres. It’s therefore not possible to guarantee that there will be no shedding

Below are some tips on how to get the best result when working with hairier yarns:

1. When the garment is finished (before you wash it) shake it vigorously so the looser hairs come off. NOTE: do NOT use a lint roller, brush or any method that pulls at the yarn.

2. Place the garment in a plastic bag and put it in your freezer - the temperature will cause the fibres to become less attached to each other, and excess fibres will come off easier.

3. Leave in the freezer for a few hours before taking it out and shaking it again.

4. Wash the garment according to the instructions on the yarn label.

Pilling is a natural process that happens to even the most exclusive of fibers. It's a natural sign of wear and tear that is hard to avoid, and that is most visible in high friction areas of your garment like a sweater's arms and cuffs.

You can make your garment look as new by removing the pilling, using a fabric comb or a pill/lint remover.

Still can't find the answer you need? Then scroll down and leave your question so one of our experts can try to help you. This will be done normally within 5 to 10 working days.
In the meantime, you can read the questions and answers that others have left to this pattern or join the DROPS Workshop on Facebook to get help from fellow knitters/crocheters!

You might also like...

Post a comment to pattern DROPS 228-24

We would love to hear what you have to say about this pattern!

If you want to leave a question, please make sure you select the correct category in the form below, to speed up the answering process. Required fields are marked *.

Comments / Questions (15)

country flag Marlies Plaqlez wrote:

Mouwkop Er staat in het patroon minderd aaniedere kant 5steken En daarna 3x2 steken minderen aan beide kanten En daarna aan iedere kant 1 steek Daarna weet ik niet hoe het verder moet En ook een Opmerking voorpand En rugpand bij de mindering aan de armsgaten Is helemaal anders gedaan als bij de mouwkop

05.12.2023 - 18:00

DROPS Design answered:

Dag Marlies,

Bij de mouw ga je de hele tijd door met 1 steek afkanten aan elke kant totdat je op de juiste lengte bent. Het klopt dat de minderingen voor het armsgat anders zijn. Bij de panden betreft het namelijk het armsgat, vanaf de oksel. De mouw kop komt tegen de schouder aan.

06.12.2023 - 20:00

country flag Sylwia wrote:

Hallo, Ik heb de voorpand, achterpand en mouwen gebreid volgens de aanwijzingen maar nu heb ik een probleem met de stukken aan elkaar te zetten. Hij de achterpand beginnen de armsgaten bij maat L met 38 cm en bij de voorpand met 48 cm dus ze zijn niet symmetrisch. De mouwen zijn wel symmetrisch afgekant.

08.11.2022 - 07:14

DROPS Design answered:

Dag Sylwia,

Dan is er ergens toch iets mis gegaan, want volgens de beschrijving brei je de armsgaten op dezelfde hoogte op het voorpand en het achterpand.

08.11.2022 - 19:37

country flag Jackie wrote:

Hi me again. Its my first time knitting and first time trying to read a pattern please help. On the sleeves it says increase like this every 5 1/2 cm a total of 6 time right. Then it says when sleeves measure 44cm (my calculations say for every 5 1/2 cm it will be 33cm on top of the 14cm before increasing it would be 47cm.) this is confusing. Also when it comes to casting off is it cast off 6 sts 1 time then 2 sts 3 times than 1 stich on each side all in one row or how? Please help.

02.11.2022 - 16:05

DROPS Design answered:

Dear Jackie, you should start increasing when sleeve measures 14 cm, then 2nd increase: 24 cm (10 cm after), 3rd increase: 34 cm, 4th increase: 44 cm - work until piece measures 46 cm then start to cast off for sleeve cap. Happy knitting!

02.11.2022 - 16:14

country flag Jackie wrote:

Hi. On the front piece it says knit til 50cm (xl) than place the middle stitches on a thread for neck and finish each shoulder. Don’t I have to cast off for the armholes?

31.10.2022 - 09:37

DROPS Design answered:

Dear Jackie, yes you have to work as on back piece, ie cast on the same number of stitches as for back piece and decrease after rib as on back piece then cast off and decrease for armholes as on back piece. But neckline will be shaped on front piece earler (50 cm) than on back piece (56 cm). Happy knitting!

31.10.2022 - 13:13

country flag Alessandra wrote:

Come si fa una cucitura elastica per il collo doppio di questo maglione? Grazie

13.10.2022 - 08:29

DROPS Design answered:

Buonasera Alessandra, per ottenere un bordo di chiusura elastico, non deve tirare troppo il filo durante la chiusura, oppure inserire dei gettati regolari durante la chiusura e intrecciarli come maglie normali. Buon lavoro!

13.10.2022 - 22:34

country flag Tos wrote:

Ik heb een vraag over het laatste stuk van de mouw. Er staat ‘kant af aan elke kant voor de mouwkop als volgt’, en daarna staat nog een paar keer ‘aan elke kant’. Betekent dat dat je elke naald (de goede en de verkeerde kant) af kant, of betekent het aan het begin en aan het einde van de naald, of betekent het dat allebei?

17.05.2022 - 23:17

DROPS Design answered:

Dag Tos,

Het betekent dat je steeds aan het begin van elke naald afkant. Dus je begint met afkanten, je breit de naald verder helemaal uit, dan keer je het werk en kant je weer af aan het begin van de naald.

19.05.2022 - 20:49

country flag Tos wrote:

Dit moet mijn eerste trui worden, maar ik begrijp het nog niet helemaal: er staat ribbelsteek, maar ik zie nergens ribbels op de foto’s. Het ziet eruit alsof er in tricotsteek wordt gebreid (afwisselend een naald recht aan de goede kant, en een naald averecht aan de verkeerde kant) en bij de uiteinden in boordsteek van 1 recht 1 averecht wordt gebreid. Begrijp ik het verkeerd?

15.01.2022 - 22:16

DROPS Design answered:

Dag Tos,

De kantsteken worden in ribbelsteek gebreid. Bij het in elkaar zetten van de trui worden de kantsteken gebruikt en deze zijn daarna niet meer zichtbaar. Het klopt dus dat je geen ribbelsteek ziet op de foto.

16.01.2022 - 13:55

country flag Michele Fontinelle wrote:

Ce modèle peut être exécuté avec 2 aiguiilles

13.12.2021 - 16:31

DROPS Design answered:

Bonjour Mme Fontinelle, on tricote ici le dos, le devant et les manches en allers et retours sur aiguille circulaire pour avoir suffisamment de place pour y loger toutes les mailles; si vous ne voulez pas tricoter le col en rond, vous devrez coudre d'abord une seule des épaules, tricoter le col et terminer la couture de la 2ème épaule et du col. Retrouvez plus d'infos ici. Bon tricot!

14.12.2021 - 07:39

country flag Edith wrote:

Le nombre de mailles qui diminuent au passage des cotes au jersey fonctionne bien pour le corps du tricot. Pour les manches, j'ai dû réduire le nombre de mailles montées pour ne pas avoir un poignet beaucoup, beaucoup trop grand. Pour la taille XL, j'ai réduit de 24 mailles. Et puis j'ai augmenté pour retrouvé le bon nombre pour la suite. Bien cordialement.

12.12.2021 - 12:20

country flag Edith wrote:

Nirgendwo ist vom Stilllegen von Maschen die Rede, aber bei der Halskrause sollen stillgelegte Maschen inkludiert werden. Das verwirrt? Vom Muster her ein Pulli, der auch anfängertauglich ist, nicht aber von der Anleitung her:(

11.12.2021 - 14:11

DROPS Design answered:

Liebe Edit, beim Vorderteil werden die mittleren Maschen für den Halsausschnitt stillgelegt (Zitat): In der nächsten Hin-Reihe die mittleren 18-18-18-18-20-20 Maschen für den Halsausschnitt stilllegen.. Viel Spaß beim stricken!

13.12.2021 - 09:11