
Popular categories
Looking for a yarn?


|
|||||||
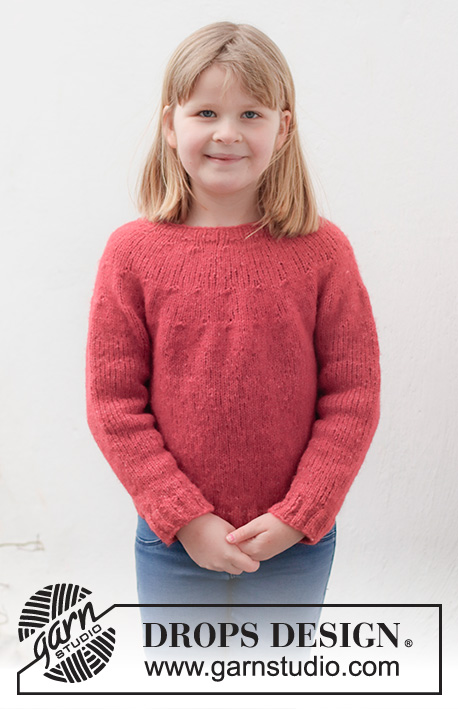
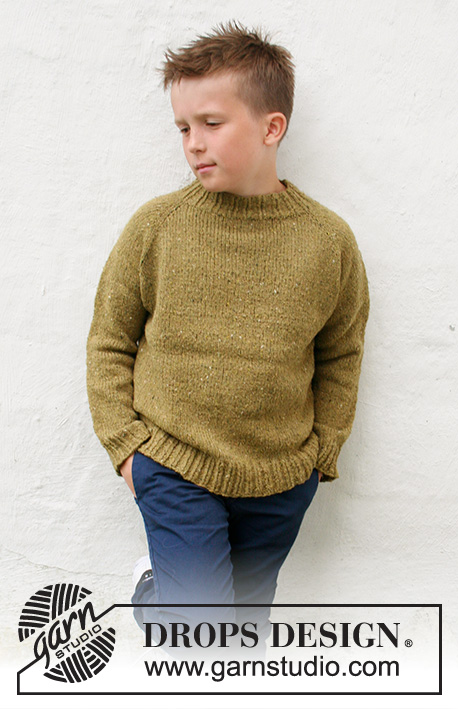
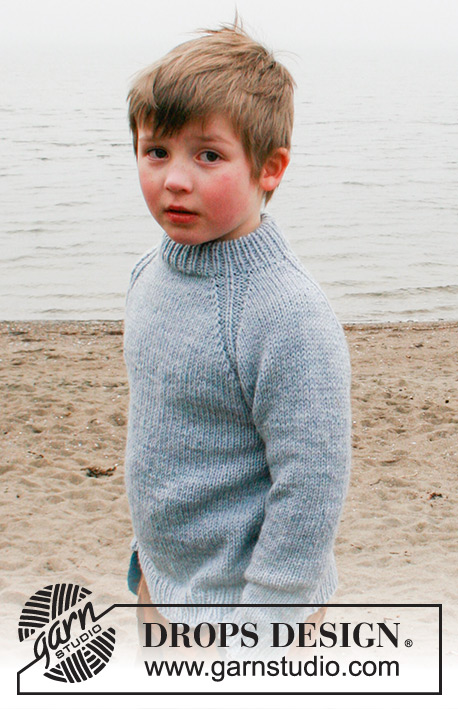
Strand Jumper |
|||||||
 |
 |
||||||
Knitted sweater for children in DROPS Alaska. The piece is worked top down with double neck and raglan. Sizes 2 to 12 years.
DROPS Children 40-3 |
|||||||
|
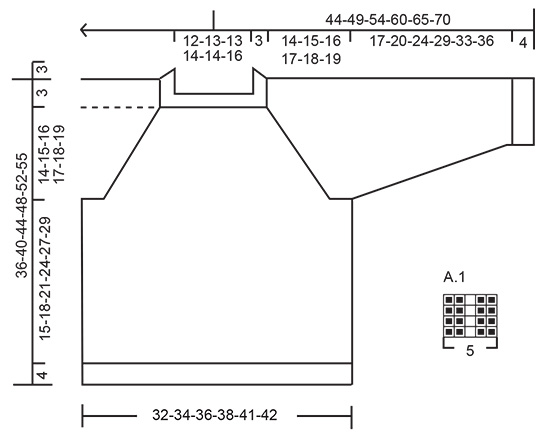
------------------------------------------------------- EXPLANATIONS FOR THE PATTERN: ------------------------------------------------------- PATTERN: See diagram A.1. RAGLAN: Increase 1 stitch on each side of A.1 by making 1 yarn over = 8 stitches increased on the round. On the next round, knit the yarn overs twisted to avoid holes. INCREASE/DECREASE TIP (evenly spaced): To work out how to increase/decrease evenly, count the total number of stitches on needle (e.g. 102 stitches), and divide by the number of increases/decreases to be made (e.g. 10) = 10.2. In this example, increase by making 1 yarn over after approx. each 10th stitch. On the next round knit the yarn overs twisted to avoid holes. When decreasing, knit together approx. each 9th and 10th stitch. DECREASE TIP (for sleeves): Start 3 stitches before the marker thread, knit 2 together, knit 2 (marker thread sits between these 2 stitches), slip 1 stitch as if to knit, knit 1 and pass the slipped stitch over the knitted stitch (2 stitches decreased). BINDING-OFF TIP: To avoid the bind-off edge being tight you can bind off with a larger size needle. If the edge is still tight, make 1 yarn over after approx. each 6th stitch at the same time as binding off; the yarn overs are bind off as normal stitches. ------------------------------------------------------- START THE PIECE HERE: ------------------------------------------------------- SWEATER – SHORT OVERVIEW OF THE PIECE: The neck and yoke are worked in the round with circular needle top down. The yoke is divided for body and sleeves and the body is continued in the round with circular needle. The sleeves are worked with double pointed needles, top down. DOUBLE NECK: Cast on 56-60-60-64-64-68 stitches with double pointed needles size 5.5 MM = US 9 and DROPS Alaska. Knit 1 round and change to short circular needle size 4 MM = US 6. Work rib in the round (knit 1, purl 1) for 7 cm = 2¾". The neck is folded double later. Insert 4 markers – these are used when increasing to raglan on the yoke. Count 8-10-10-10-10-12 stitches, insert 1 marker in the next stitch (= knitted stitch), count 9 stitches, insert 1 marker in the next stitch (= knitted stitch), count 17-19-19-21-21-23 stitches, insert 1 marker in the next stitch (= knitted stitch), count 9 stitches, insert 1 marker in the next stitch (= knitted stitch). There are 9-9-9-11-11-11 stitches left after the last marker. On the next round increase 8 stitches by making 1 yarn over on either side of the 4 marker-stitches (= 8 stitches increased) = 64-68-68-72-72-76 stitches. YOKE: Change to circular needle size 5.5 MM = US 9 and work stockinette stitch in the round – AT THE SAME TIME work A.1 in each transition between the body and sleeves (each marker-stitch is the middle stitch in A.1 – on the first round the yarn overs from the previous round are purled twisted to avoid holes). When you have worked 1 round, start to increase to RAGLAN – read description above. Increase to raglan every 2nd round a total of 11-12-13-14-15-16 times = 152-164-172-184-192-204 stitches. Work 1 round without increasing. Then work 1 round where you increase 1 stitch on each side of the front and back pieces in sizes 2 – 3/4 and 9/10 years (do not increase on the sleeves) = 156-168-172-184-196-204 stitches. Continue with stockinette stitch and A.1 as before (without further increases) until the piece measures 14-15-16-17-18-19 cm = 5½"-6"-6¼"-6¾"-7"-7½" from the neck. Now divide the yoke for the body and sleeves on the next round as follows: Work as before over the first 22-25-26-27-29-31 stitches (= ½ back piece), place the next 33-35-35-37-39-41 stitches on a thread for the sleeves, cast on 6 stitches (= in side under sleeve), work 45-49-51-55-59-61 stitches (= front piece), place the next 33-35-35-37-39-41 stitches on a thread for the sleeves, cast on 6 stitches (= in side under sleeve), work the last 23-24-25-28-30-30 stitches (= ½ back piece). The body and sleeves are finished separately. THE PIECE IS NOW MEASURED FROM HERE! BODY: = 102-110-114-122-130-134 stitches. Continue with stockinette stitch in the round for 15-18-21-24-27-29 cm = 6"-7"-8¼"-9½"-10⅝"-11⅜". There is approx. 4 cm = 1½" left to finished length; try the sweater on and work to desired length. To avoid the following rib being tight, increase 10-10-12-12-14-14 evenly spaced on the next round – read INCREASE/DECREASE TIP = 112-120-126-134-144-148 stitches. Change to circular needle size 4 MM = US 6 and work rib (knit 1, purl 1) for 4 cm = 1½". Bind off with knit over knit and purl over purl – read BINDING-OFF TIP! The sweater measures approx. 36-40-44-48-52-55 cm = 14¼"-15¾"-17¼"-19"-20½"-21⅝" from the shoulder down. SLEEVES: Place the 33-35-35-37-39-41 stitches from the thread on the one side of the piece on double pointed needles size 5.5 MM = US 9 and knit up 1 stitch in each of the 6 stitches cast on under the sleeve = 39-41-41-43-45-47 stitches. Insert a marker thread in the middle of the 6 stitches under the sleeve. Start the round at the marker thread and work stockinette stitch in the round for 3-3-4-4-4-4 cm = 1⅛"-1⅛"-1½"-1½"-1½"-1½". Now decrease 2 stitches mid-under the sleeve – read DECREASE TIP. Decrease like this every 3½-4-5-6-8-9 cm = 1¼"-1½"-2"-2⅜"-3⅛"-3½" a total of 4 times = 31-33-33-35-37-39 stitches. Continue working until the sleeve measures 17-20-24-29-33-36 cm = 6¾"-8"-9½"-11⅜"-13"-14¼" from the division. There is approx. 4 cm = 1½" left to finished length; try the sweater on and work to desired length. Knit 1 round where you decrease 3 stitches evenly in all sizes = 28-30-30-32-34-36 stitches. Change to double pointed needles size 4 MM = US 6 and work rib (knit 1, purl 1) for 4 cm = 1½". Bind off with knit over knit and purl over purl – remember BINDING-OFF TIP! The sleeve measures approx. 21-24-28-33-37-40 cm = 8¼"-9½"-11"-13"-14½"-15¾" from the division. Work the other sleeve in the same way. ASSEMBLY: Fold the neck double to the inside and sew down. To avoid the neck being tight and rolling outwards, it is important that the seam is elastic. |
|||||||
Diagram explanations |
|||||||
|
|||||||
|
|||||||
|
Have you made this or any other of our designs? Tag your pictures in social media with #dropsdesign so we can see them! Do you need help with this pattern?You'll find tutorial videos, a Comments/Questions area and more by visiting the pattern on garnstudio.com. © 1982-2024 DROPS Design A/S. We reserve all rights. This document, including all its sub-sections, has copyrights. Read more about what you can do with our patterns at the bottom of each pattern on our site. |
|||||||


With over 40 years in knitting and crochet design, DROPS Design offers one of the most extensive collections of free patterns on the internet - translated to 17 languages. As of today we count 304 catalogs and 11422 patterns - 11417 of which are translated into English (US/in).
We work hard to bring you the best knitting and crochet have to offer, inspiration and advice as well as great quality yarns at incredible prices! Would you like to use our patterns for other than personal use? You can read what you are allowed to do in the Copyright text at the bottom of all our patterns. Happy crafting!
Comments / Questions (11)
When I divide the stitches t the beginning of raglan I seem to have 15 stitches over (division size 4 10 St then marker, 9st then marker, 21st then marker, 9 St then marker should leave 11 but I have 15)
18.11.2022 - 19:59DROPS Design answered:
Dear Susan, for size 7/8 you should have: 10 sts, 1 stitch with the marker, 9 sts, 1 st with the marker, 21 sts, 1 st with the marker, 9 sts, 1 st with the marker and 11 sts = 64 sts. Remember that markers are inserted inside sts (so you need to add the 4 sts with markers to your stitch count). Happy knitting!
20.11.2022 - 23:45Ik wil dit patroon met Drops Nepal breien. Wat moet ik aanpassen, want ik snap al die berekeningen niet zo goed.
26.09.2022 - 16:07DROPS Design answered:
Dag Jasmin,
Hiervoor kun je de garenvervanger gebruiken, welke je kunt vinden via de link onderaan de materialenlijst bij het patroon. Vul het garen dat in het patroon staat in (dus Alaska), de hoeveelheid benodigde garen in grammen (afhankelijk van je maat, bijvoorbeeld voor de kleinste maat heb je 300 gram nodig en vul 1 draad in. Klik dan op 'zoek alternatieven'. In de lijst staat hoeveel je nodig hebt in Nepal. Dit rond je af op hele bollen (1 bol = 50 gram).
27.09.2022 - 17:57Quand il est indiqué de mettre un marqueur dans la maille, ce dernier sera placé où exactement? Je me réfère au rang qui suit les sept centimètres du col. Merci!
21.06.2022 - 09:57DROPS Design answered:
Bonjour Mme Michaud, vous placez le marqueur dans la maille concernée, ainsi vous aurez 4 mailles avec chacune 1 marqueur et entre ces mailles, celles du demi-dos, des manches et du devant. Bon tricot!
21.06.2022 - 10:35Hei, det er vel feil antall masker i str 3-4 år? Man skal starte med 60 masker, men 10+9+19+9+9 er jo 56 masker... 4 masker til overs...
12.06.2022 - 20:23DROPS Design answered:
Hei Kathrinestrikk. Husk å telle de maskene du setter de 4 merkene i, altså: Tell 10 masker + sett 1 merke i neste maske + tell 9 masker + sett 1 merke i neste maske + tell 19 masker + sett 1 merke i neste maske + tell 9 masker + sett 1 merke i neste maske + 9 masker, som er igjen på omgangen etter siste merke (=10+1+9+1+19+1+9+1+9=60 masker). mvh DROPS Design
13.06.2022 - 13:14Hej. Jeg er ved at strikke strand jumper i str. 2/3 år. Der er et sted i opskriften jeg ikke helt forstår. Når man skal sætte maskemarkørerne efter der er strikket rib i halsen kan jeg ikke få maske antallet til at gå op. Jeg har slået 60 masker op. Når jeg sætter markører som I skriver er der 10 + 9 + 19 + 9 også skal der være 9 masker tilbage på omgangen. Men det giver kun 56 masker, hvilket betyder der er fire masker tilbage op omgangen. Hvor skal jeg gøre med dem? :)
05.04.2022 - 22:09DROPS Design answered:
Hej Ida, du sætter mærkerne i maskerne imellem de 10 + 9 + 19 + 9 + 9 masker, der hvor de 4 + er her i teksten :)
08.04.2022 - 09:03Toller Pullover, schnell gestrickt. Habe das Garn mit Nepal ersetzt. Anleitung ist gut verständlich und Passform ist sehr gut.
11.03.2022 - 10:23Net een vraag gesteld over de trui strand jumper. Ik zie nu dat het twee steken voor de markeerdraad moet en twee erna. Ik ben nu zonder averecht verder gegaan en dit is voor mij gemakkelijker. Het is opgelost. (Helaas had ik niet alles uitgeprint, dus niet gelezen)
19.02.2022 - 07:55Betreft trui, strand jumper. Ik ben bezig met de raglan. Ik moet meerderen aan weerskanten van een rechte steek. Nu moet ik steeds twee averecht aan weerskanten breien. Ik heb bv 1 averecht gebreid, moet meerderen, dus een lus en dan een rechte steek, dan weer een lus, maar dit gaat zo moeilijk want daarna weer een averecht. Hoe doen jullie dat. Ik zit dus met dat meerderen met lussen van averecht naar recht en andersom.
19.02.2022 - 07:21DROPS Design answered:
Dag Wiesje,
Als je tussen een averechte en rechte steek een omslag moet maken en dan is dus na de averechte steek de draad aan de voorkant. Je legt de draad over de rechter naald heen naar de achterkant om een omslag te maken. Dan brei je de rechte steek. Als je een omslag moet maken tussen een rechte en een averechte steek, dan haal je de draad onderdoor naar de voorkant en dan breng je de draad naar boven over de rechter naald en dan weer naar achteren, daarna weer onder de rechter naald naar voren, zodat je de volgende steek averecht kan breien.
21.02.2022 - 12:01Buonasera sto facendo la taglia 9/10 anni nella parte dello SPRONE quando devo misurare il lavoro dal collo prima di dividere per le maniche, si intende dall'inizio del collo che poi verrà piegato? Grazie
07.12.2021 - 22:25DROPS Design answered:
Buonasera Marilyn, sì esatto, deve prendere le misure dall'inizio del lavoro. Buon lavoro!
08.12.2021 - 18:17Kan jeg finde den opskrift til Herre i str. S- M-L..
12.10.2021 - 10:36DROPS Design answered:
Hej Karin, ja her ser du vores søg på dine ønsker: Herre, Raglan, Ovenfra og ned, Garngruppe C
13.10.2021 - 09:28