
Good Morning Sunshine
#goodmorningsunshineslippers
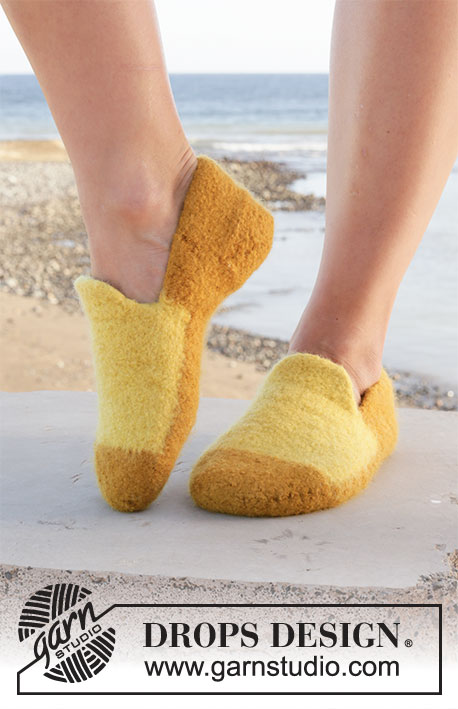
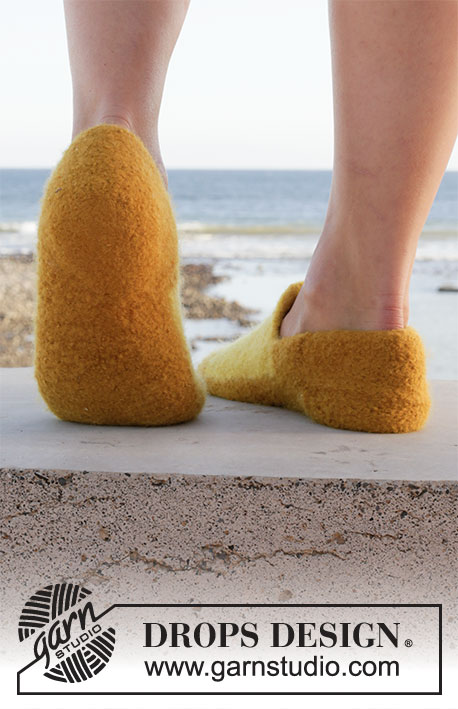
Felted slippers in DROPS Alaska. The piece is worked back and forth in one piece, which is then sewn together before felting. Sizes 35-46.
DROPS 209-17
DROPS Design: Pattern no x-446
Yarn group C
-------------------------------------------------------
SIZES:
Shoe size: 35/37 – 38/40 – 41/43 – 44/46
Foot length after felting: 22 – 24 – 27 – 30 cm
Foot length before felting: approx. 29½ -32½-37-40 cm
MATERIALS:
DROPS ALASKA from Garnstudio (belongs to yarn group C)
150-150-150-150 g colour 58, mustard
50-50-50-50 g colour 59, lemon
KNITTING TENSION:
Before felting: 16 stitches in width and 20 rows in height with stocking stitch = 10 x 10 cm.
After felting: approx. 20 stitches in width and 27 rows in height with stocking stitch = 10 x 10 cm.
NEEDLES:
DROPS SINGLE POINTED NEEDLES SIZE 5.5 MM.
Needle size is only a guide. If you get too many stitches on 10 cm, change to a larger needle size. If you get too few stitches on 10 cm, change to a smaller needle size.
-------------------------------------------------------
EXPLANATIONS FOR THE PATTERN:
-------------------------------------------------------
RIDGE/GARTER STITCH (worked back and forth):
Knit all rows.
1 ridge in height = Knit 2 rows.
-------------------------------------------------------
START THE PIECE HERE:
-------------------------------------------------------
SLIPPERS – SHORT OVERVIEW OF THE PIECE:
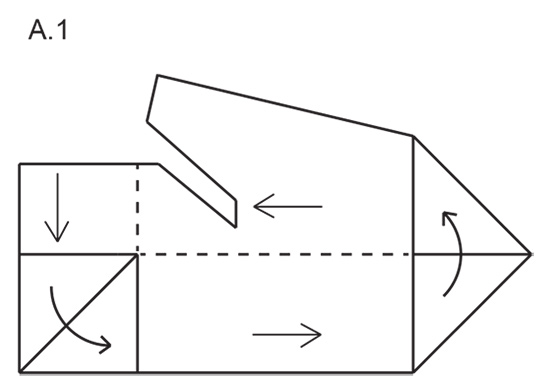
The piece is worked back and forth in one piece. When finished it is sewn together and should be felted afterwards.
SLIPPER:
BACK EDGE:
Cast on 23-25-26-28 stitches with needle size 5.5 mm and mustard. Work 9 RIDGES – read description above. REMEMBER THE KNITTING TENSION!
HEEL:
Now work short rows to make the heel; all rows are knitted (= garter stitch). Start from the right side and work as follows:
Knit until there is 1 stitch left on the row, turn and knit until there is 1 stitch left on the row. * Turn and knit until you have worked 1 stitch less than the previous row, turn and knit until you have worked 1 stitch less than the previous row *, work from *-* until there are 5-5-6-6 stitches left in the middle of the piece (you have turned 9-10-10-11 times on each side). Now knit 1 more stitch each time you turn until you have knitted all stitches again = 23-25-26-28 stitches. Insert a marker in the middle of the row to be used for measuring.
SOLE:
Work garter stitch and decrease 4 stitches evenly on the first row = 19-21-22-24 stitches. Work garter stitch until the piece measures a total of 18½-20-24-27 cm from the marker inserted on the heel.
TOE:
Now work short rows for the toe; all rows are knitted (= garter stitch). Work as follows from the right side: Knit until there is 1 stitch left on the row, turn and knit until there is 1 stitch left on the row. * Turn and knit until you have worked 1 stitch less than the previous row, turn and knit until you have worked 1 stitch less than the previous row *, work from *-* until there are 5-5-6-6 stitches left in the middle of the piece (you have turned 7-8-8-9 times on each side). Now knit 1 more stitch each time you turn until you have knitted all stitches again = 19-21-22-24 stitches. Insert a marker in the middle of the row to be used for measuring.
TOP:
Change to lemon. Work stocking stitch for 9-10-12-13 cm; on the next row from the right side increase 4 stitches evenly spaced (increase with yarn overs which are purled twisted on the next row) = 23-25-26-28 stitches. Continue with stocking stitch for a total of 13½-15-19-22 cm and the next row is worked from the right side. Now only work the first 5 stitches on the row; the remaining stitches are placed on a thread.
Change to mustard and work garter stitch (the first row is knitted from the right side) and increase 1 stitch inside the last stitch on each row from the right side a total of 5 times; the garter stitch should measure 5 cm from the division (do not stretch the piece). Cast off on the next row from the right side.
Place the outermost 5 stitches on the opposite side back on the needle (keep the remaining middle 13-15-16-18 stitches on the thread). Change to mustard and work garter stitch (the first row is knitted from the right side) and increase 1 stitch inside the first stitch on each row from the right side a total of 5 times; the garter stitch should measure 5 cm from the division (do not stretch the piece). Cast off on the next row from the wrong side.
Place the remaining 13-15-16-18 stitches from the thread back on the needle. Use lemon and work 6 ridges (the first row is worked from the right side) AT THE SAME TIME as you decrease as follows every 4th row: Knit the outermost 2 stitches on each side together. Repeat the decrease a total of 3 times = 7-9-10-12 stitches. Cast off on the next row from the right side.
ASSEMBLY:
The piece is sewn together from the wrong side. Fold the piece at the toe so the top lies over the sole. Start by sewing the 9 ridges from the back edge together with the 10 stitches cast off outermost on the top side. Then sew the top and sole together edge to edge as far as the toe. Repeat on the other side.
FELTING:
The piece can be felted either in the washing machine or the tumble dryer – read description below.
Remember: Subsequent washes are as for a normal wool garment.
IN WASHING MACHINE:
Washing machines will vary when felting. If the piece is not felted enough, it can be felted again. If it is felted too much, it can be stretched to the correct size while still wet.
DO THE FOLLOWING:
Lay the piece in the washing machine, using a programme of approx. 40 minutes (not a wool programme).
Wash at 40 degrees without pre-wash, detergent is optional. After washing, shape the piece while it is still wet.
IN TUMBLE DRYER:
Felting in a tumble dryer gives good control over the degree of felting. The tumble dryer can be opened during drying to check the size of the piece. If it is not felted enough it can be thoroughly wetted and felted again. If it is felted too much it can be stretched to the correct size while still wet.
DO THE FOLLOWING:
Lay the piece in water so it becomes completely wet, then place it in the tumble dryer and begin the drying process. Dry to the desired size, checking regularly.
Diagram explanations
 |
= | knitting direction |
 |
= | shows where the slipper is sewn together |
Have you finished this pattern?
Tag your pictures with #dropspattern #goodmorningsunshineslippers or submit them to the #dropsfan gallery.
Do you need help with this pattern?
You'll find 17 tutorial videos, a Comments/Questions area and more by visiting the pattern on garnstudio.com.
Have you purchased DROPS yarn to make this pattern? Then you are entitled to receive help from the store that sold you the yarn.
© 1982-2026 DROPS Design A/S. We reserve all rights. This document, including all its sub-sections, has copyrights. Read more about what you can do with our patterns at the bottom of each pattern on our site.