
Swan’s Embrace Shawl
#swansembraceshawl

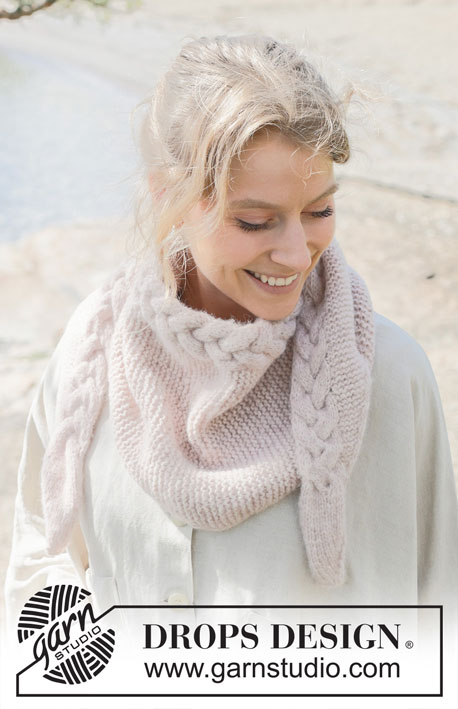
Knitted shawl in DROPS Air. The piece is worked sideways with garter stitch, cables and I-cord.
DROPS 253-28
DROPS Design: Pattern ai-509
Yarn group C or A + A
-------------------------------------------------------
SIZE:
Height: In middle = approx. 30 cm.
Width: From side to side = approx. 164 cm.
YARN:
DROPS AIR from Garnstudio (belongs to yarn group C)
150 g colour 33, pink sand
NEEDLES:
DROPS CIRCULAR NEEDLE SIZE 5 MM: Length 80 cm.
KNITTING TENSION:
17 stitches in width and 22 rows in height, with stocking stitch on needle size 5 mm = 10 x 10 cm.
17 stitches in width and 33 rows in height, with garter stitch on needle size 5 mm = 10 x 10 cm.
NOTE: Needle size is only a guide. If you get too many stitches on 10 cm, change to a larger needle size. If you get too few stitches on 10 cm, change to a smaller needle size.
-------------------------------------------------------
EXPLANATIONS FOR THE PATTERN:
-------------------------------------------------------
2 EDGE-STITCHES I-CORD:
BEGINNING OF ROW:
Slip 1 stitch purl-wise with the strand in front, knit 1.
END OF ROW:
Work until there are 2 stitches left on the row, slip 1 stitch purl-wise with the strand in front, knit 1.
Repeat from both the right and wrong side.
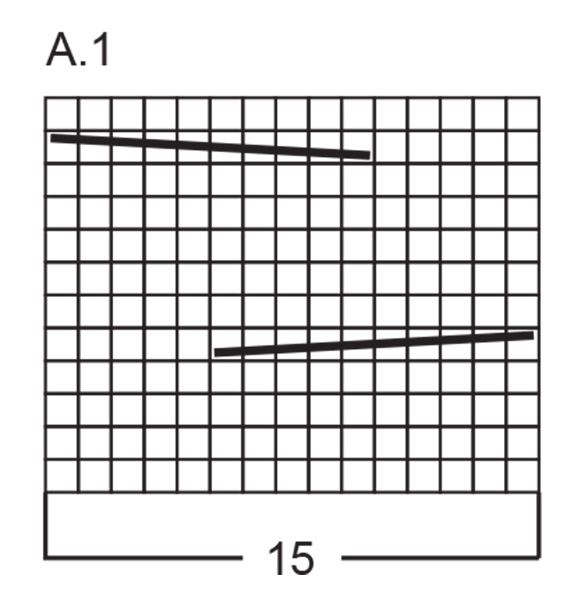
PATTERN:
See diagram A.1.
The diagram shows all rows from the right side.
GARTER STITCH (worked back and forth):
Knit all rows, from both the right and wrong side.
1 ridge in height = knit 2 rows.
INCREASE TIP:
All increases are worked from the right side!
Increase 1 stitch by working 1 yarn over, which is worked twisted on the next row to avoid a hole.
KNITTING TIP:
When working short rows, there will be a small hole after each turn. This hole can be closed by tightening the strand or using the technique German Short Rows as follows:
Slip the first stitch purl-wise, take the strand over the right needle and tighten well from the back (2 loops on the needle). These loops are worked together on the next row.
-------------------------------------------------------
START THE PIECE HERE:
-------------------------------------------------------
SHAWL – SHORT OVERVIEW OF THE PIECE:
The piece is worked back and forth with circular needle, from side to side.
BEGINNING OF SHAWL:
Cast on 7 stitches with circular needle size 5 mm and DROPS Air.
Purl 1 row from the wrong side.
Continue back and forth with stocking stitch, increasing as follows:
ROW 1 (right side): Work 2 EDGE STITCHES I-CORD – read description above, make 1 yarn over – read INCREASE TIP (1 increased stitch), knit until there are 2 stitches left, work 2 edge-stitches I-cord.
ROW 2 (wrong side): Work 2 edge-stitches as before, purl until there are 2 stitches left, purl yarn over twisted, 2 edge stitches as before.
Work ROWS 1 and 2 until there are 20 stitches on the needle. Remember to maintain the knitting tension.
From the right side, insert 1 marker-thread after the 3rd stitch, with 17 stitches after the thread. Allow the thread to follow your work onwards, always with 17 stitches after the thread on the left-hand side, when viewed from the right side.
SECTION 1:
Now work PATTERN and GARTER STITCH – read description above, increasing as follows:
ROW 1 (right side): Work 2 edge-stitches as before, make 1 yarn over – remember INCREASE TIP (1 stitch increased), work garter stitch as far as the marker-thread, A.1 across 15 stitches, 2 edge stitches as before.
ROW 2 (wrong side): Work 2 edge-stitches as before, work A.1, garter stitch (yarn over is knitted twisted) until there are 2 stitches left, 2 edge stitches as before.
ROW 3 (right side): Work 2 edge-stitches as before, garter stitch as far as the marker-thread, work A.1 across 15 stitches, 2 edge stitches as before.
ROW 4 (wrong side): Work 2 edge-stitches as before, A.1, garter stitches until there are 2 stitches left, 2 edge stitches as before.
ROW 5 (right side): Work 2 edge-stitches as before, garter stitch as far as the marker-thread, turn, this is a short row – read KNITTING TIP.
ROW 6 (wrong side): Work garter stitch until there are 2 stitches left, 2 edge stitches as before.
Repeat ROWS 1 to 6 until there are 60 stitches on the needle.
MID-SECTION:
Now continue pattern and garter stitch without increasing as follows:
ROW 1 (right side): Work 2 edge-stitches as before, garter stitch as far as the marker-thread, work A.1, 2 edge-stitches as before.
ROW 2 (wrong side): Work 2 edge-stitches as before, A.1, garter stitch until there are 2 stitches left, 2 edge-stitches as before.
ROW 3 (right side): Work 2 edge-stitches as before, garter stitch as far as the marker-thread, work A.1, 2 edge-stitches as before.
ROW 4 (wrong side): Work 2 edge-stitches as before, A.1, garter stitch until there are 2 stitches left, 2 edge-stitches as before.
ROW 5 (right side): Work 2 edge-stitches as before, garter stitch as far as the marker-thread, turn; this is a short row – remember KNITTING TIP.
ROW 6 (wrong side): Work garter stitch until there are 2 stitches left, 2 edge-stitches as before.
The piece measures approx. 82 cm from the cast-on edge (half the width) and 30 cm in height.
Work ROWS 1 to 6 one more time.
SECTION 2:
Now continue the pattern and garter stitch decreasing as follows:
ROW 1 (right side): Work 2 edge-stitches as before, knit 2 together (1 stitch decreased), garter stitch as far as the marker-thread, work A.1 across 15 stitches, 2 edge-stitches as before.
ROW 2 (wrong side): Work 2 edge-stitches as before, A.1, garter stitch until there are 2 stitches left, 2 edge-stitches as before.
ROW 3 (right side): Work 2 edge-stitches as before, garter stitch as far as the marker-thread, work A.1 across 15 stitches, 2 edge-stitches as before.
ROW 4 (wrong side): Work 2 edge-stitches as before, A.1, garter stitch until there are 2 stitches left, 2 edge-stitches as before.
ROW 5 (right side): Work 2 edge-stitches as before, garter stitch as far as the marker-thread, turn; this is a short row – remember KNITTING TIP.
ROW 6 (wrong side): Work garter stitch until there are 2 stitches left, work 2 edge-stitches as before.
Repeat ROWS 1 to 6 until there are 20 stitches on the needle. Remove the marker-thread and continue with stocking stitch as follows (A.1 is finished).
END OF SHAWL:
Work stocking stitch and decrease as follows:
ROW 1 (right side): Work 2 edge-stitches as before, knit 2 together (1 decreased stitch), knit until there are 2 stitches left, 2 edge-stitches as before.
ROW 2 (wrong side): Work 2 edge-stitches as before, purl until there are 2 stitches left, 2 edge-stitches as before.
Work ROWS 1 and 2 until there are 7 stitches left. Cast off.
The piece measures approx. 164 cm from the cast-on edge.
Diagram explanations
 |
= | knit from right side, purl from wrong side |
 |
= | place 5 stitches on cable needle behind the piece, knit 5, knit 5 from cable needle |
 |
= | place 5 stitches on cable needle in front of piece, knit 5, knit 5 from cable needle |
Have you finished this pattern?
Tag your pictures with #dropspattern #swansembraceshawl or submit them to the #dropsfan gallery.
Do you need help with this pattern?
You'll find 19 tutorial videos, a Comments/Questions area and more by visiting the pattern on garnstudio.com.
Have you purchased DROPS yarn to make this pattern? Then you are entitled to receive help from the store that sold you the yarn.
© 1982-2026 DROPS Design A/S. We reserve all rights. This document, including all its sub-sections, has copyrights. Read more about what you can do with our patterns at the bottom of each pattern on our site.