
Santa's Parade
#dropssantasparade
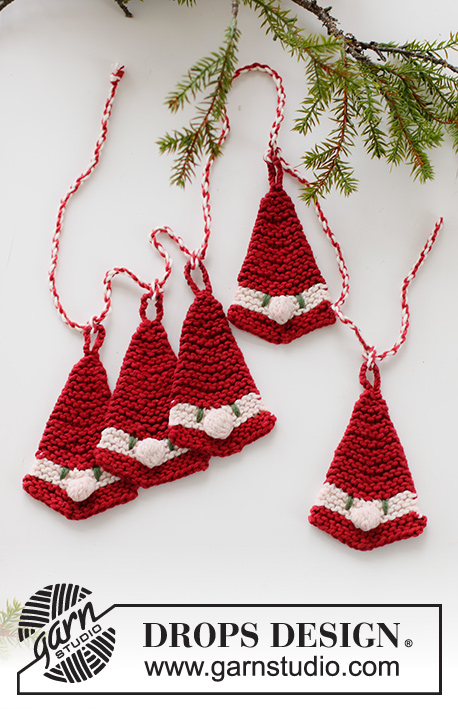
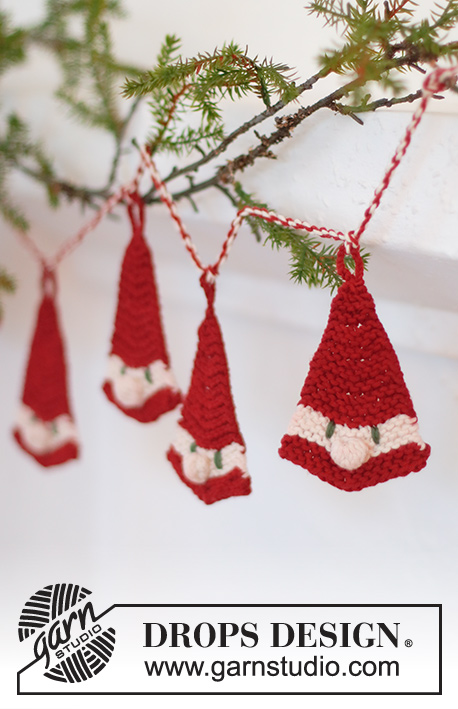
Knitted Christmas Santa decoration in DROPS Paris. The piece is worked top down with garter stitch. Theme: Christmas.
DROPS Extra 0-1543
DROPS Design: Pattern no w-857
Yarn group C or A + A
-------------------------------------------------------
SIZE:
Width at bottom = 8 cm. Length = 10 cm without loop.
MATERIALS:
DROPS PARIS from Garnstudio (belongs to yarn group C)
50 g colour 37, bordeaux
50 g colour 17, off white
+ left-over colour 43, forest green, for eyes
1 Santa weighs approx. 9 g.
NEEDLES:
DROPS STRAIGHT NEEDLE SIZE 3.5 MM.
KNITTING TENSION:
20 stitches in width and 41 rows in height with garter stitch = 10 x 10 cm.
NOTE: Needle size is only a guide. If you get too many stitches on 10 cm, change to a larger needle size. If you get too few stitches on 10 cm, change to a smaller needle size.
-------------------------------------------------------
EXPLANATIONS FOR THE PATTERN:
-------------------------------------------------------
RIDGE/GARTER STITCH (worked back and forth):
Knit all rows.
1 ridge = 2 rows.
BOBBLE:
* Knit 1, 1 yarn over *, repeat from *-* in the same stitch until there are 7 stitches, turn, purl the 7 stitches, turn, knit the 7 stitches, turn, purl the 7 stitches, turn and knit the 7 stitches (4 rows of stocking stitch). Now pass the 2nd stitch over the first stitch, the 3rd stitch over the first stitch and so on until there is 1 stitch left.
-------------------------------------------------------
START THE PIECE HERE:
-------------------------------------------------------
SANTA – SHORT OVERVIEW OF THE PIECE:
The piece is worked from top down. The loop is worked first, then the santa in garter stitch. Change colour for the face and a bobble is worked for the nose. The eyes are embroidered to finish.
LOOP:
Cast on 1 stitch with needle size 3.5 mm and bordeaux DROPS Paris.
* Make 1 yarn-over, pass the stitch over the yarn-over *, repeat from *-* until the loop measures 5 to 6 cm. Insert the left needle in the first stitch cast on and knit this stitch = 2 stitches on the needle.
SANTA:
ROW 1 (= wrong side): Knit the 2 stitches.
ROW 2 (= right side): Knit 1, 1 yarn over, knit 1 = 3 stitches – for a neat finish it is best to work the outermost stitch on each side tightly on all rows.
ROW 3 (= wrong side): Knit 1, knit the yarn over twisted to avoid a hole, knit 1, turn. REMEMBER THE KNITTING TENSION!
Insert 1 marker in the middle-stitch.
Continue with GARTER STITCH back and forth – read description above.
AT THE SAME TIME on the first row from the right side increase 2 stitches by making 1 yarn-over on each side of the marker-stitch – yarn-overs are then knitted twisted on the next row to avoid holes. Increase like this every 6th row a total of 4 times = 11 stitches.
FACE:
When you have worked 25 rows with Bordeaux after the loop, and there are 11 stitches on needle, work the face as follows from right side:
Change to off white. Work 2 ridges and increase on each side of the marker-stitch as before on the last row from the right side = 13 stitches.
Now work the next row as follows from the right side: Knit as far as the marker-stitch, work a BOBBLE in the marker-stitch – read description above (= nose), knit to end of row. Turn and knit back from the wrong side.
Change to bordeaux. Work 2 ridges and increase on each side of the marker-stitch as before on the last row from the right side = 15 stitches.
Cast off with knit from the right side, making 1 yarn-over on each side of the marker-stitch as you cast off (this maintains the shape; yarn-overs cast off as normal stitches). Cut and fasten the strand.
EYES:
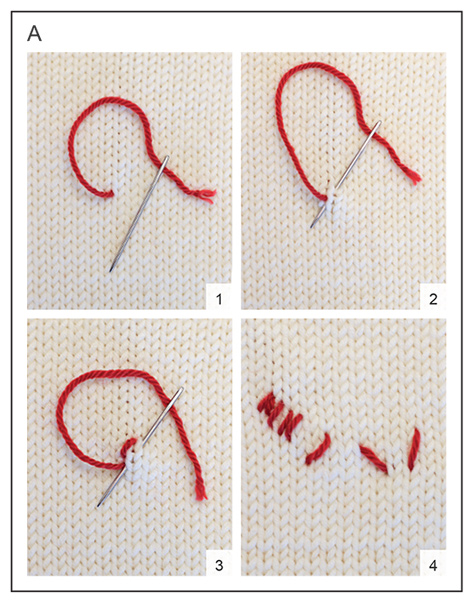
Use forest green and embroider the eyes with 2 flat stitches for each eye – see diagram A and the diagram explanations. Each eye is worked 4 stitches in from the side and covers 2 ridges in height.
STIFFENING:
So the santa hangs nicely, it can be dipped in sugared water or colourless fizzy drink to stiffen, then laid flat to dry.
TWISTED CORD:
Cut 1 strand bordeaux and 1 strand off-white each approx. 3 metres in length. Tie them together at one end. Twist the strands together until they begin to resist, fold them double; they will continue to twist. Tie a knot in the other end.
Work as many santas as you wish and thread the cord through the loop on each santa; so the santas hang nicely tie a knot with the cord around each loop.
Diagram explanations
 |
= | Flat stitch, Pictures 1-4 PICTURE 1: Insert the needle from the wrong side to the right side, where you wish the stitch to start. PICTURE 2: Skip 05 - 1 cm and thread the needle down and up again to where you want the next flat stitch to start, pull the strand through. PICTURE 3: Skip 0.5 - 1 cm and thread the needle down and up again to where you want the next flat stitch to start, pull the strand through. Continue like this until you have enough stitches. Fasten the strand on the wrong side. PICTURE 4: Flat stitches of different lengths and in different directions. |
Have you finished this pattern?
Tag your pictures with #dropspattern #dropssantasparade or submit them to the #dropsfan gallery.
Do you need help with this pattern?
You'll find 15 tutorial videos, a Comments/Questions area and more by visiting the pattern on garnstudio.com.
Have you purchased DROPS yarn to make this pattern? Then you are entitled to receive help from the store that sold you the yarn.
© 1982-2026 DROPS Design A/S. We reserve all rights. This document, including all its sub-sections, has copyrights. Read more about what you can do with our patterns at the bottom of each pattern on our site.