
Angelina
#angelinajacket
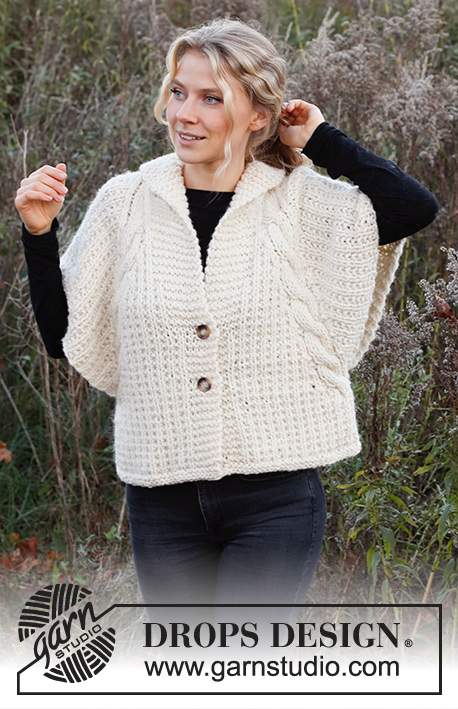
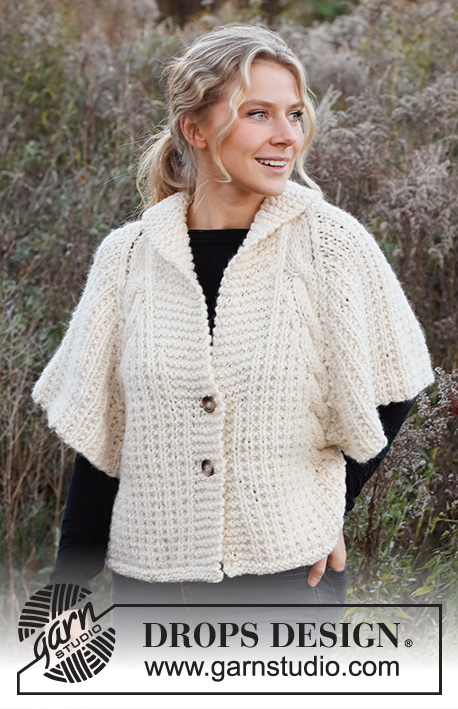
Knitted jacket in DROPS Andes. The piece is worked with textured pattern, cables and raglan. Sizes XS - XXL.
DROPS 226-32
DROPS Design: Pattern no an-067
Yarn group E or C + C
-------------------------------------------------------
SIZES:
XS - S - M - L - XL - XXL
MATERIALS:
DROPS ANDES from Garnstudio (belongs to yarn group E)
600-700-700-800-900-1000 g colour 0100, off white
DROPS BUTTONS, Marble NO 630: 2 items in all sizes.
NEEDLES:
DROPS CIRCULAR NEEDLE SIZE 9 MM: Length 80 cm for textured pattern.
DROPS CIRCULAR NEEDLE SIZE 8 MM: Length 80 cm for garter stitch edges.
DROPS CABLE NEEDLE – for cables.
KNITTING TENSION:
10 stitches in width and 14 rows in height with textured pattern (A.1) = 10 x 10 cm.
NOTE: Needle size is only a guide. If you get too many stitches on 10 cm, change to a larger needle size. If you get too few stitches on 10 cm, change to a smaller needle size.
-------------------------------------------------------
EXPLANATIONS FOR THE PATTERN:
-------------------------------------------------------
RIDGE/GARTER STITCH (worked back and forth):
Knit all rows.
1 ridge = knit 2 rows.
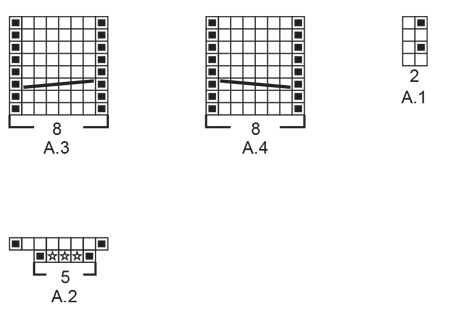
PATTERN:
See diagrams A.1 to A.4. The diagrams show all rows in the pattern from the right side.
DECREASE TIP (evenly spaced):
To work out how to decrease evenly, count the total number of stitches to be decreased over (e.g. 49 stitches) and divide by the number of decreases to be made (e.g. 21) = 2.3.
In this example decrease by knitting together alternately each 1st and 2nd stitch and each 2nd and 3rd stitch (approx.).
RAGLAN:
All decreases are worked from the right side!
DECREASE AS FOLLOWS BEFORE A.3/A.4:
Work until there are 2 stitches left before A.3/A.4, knit 2 together.
DECREASE AS FOLLOWS AFTER A.3/A.4:
Slip 1 stitch as if to knit, knit 1 and pass the slipped stitch over the knitted stitch.
BUTTONHOLES:
Work the buttonholes on the right band. 1 BUTTONHOLE = knit together the third and fourth stitches from the edge and make 1 yarn over. On the next row (wrong side) knit the yarn over to leave a hole.
-------------------------------------------------------
START THE PIECE HERE:
-------------------------------------------------------
JACKET – SHORT OVERVIEW OF THE PIECE.
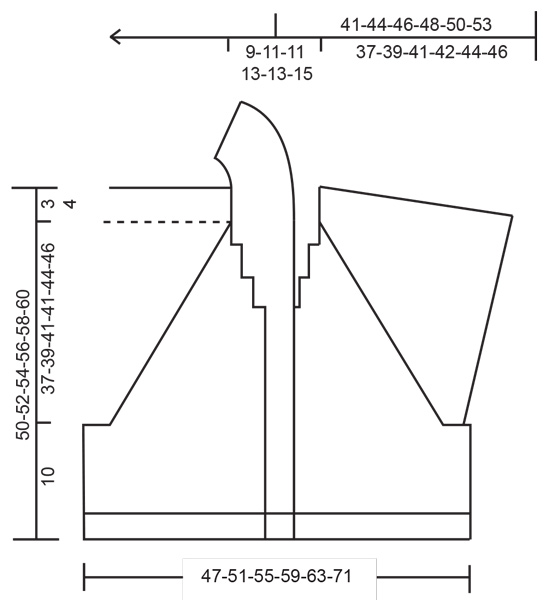
The body is worked back and forth with circular needle, from mid front and bottom up as far as the armholes. Stitches are cast on for the sleeves and the yoke is continued back and forth with circular needle from mid-front at the same time as you decrease to raglan. The collar is finished after the raglan is completed and sewn to the neckline at the back.
BODY:
Cast on 105-113-121-129-137-153 stitches (including 6 band stitches on each side towards mid-front) with circular needle size 8 mm and DROPS Andes. Work 1 RIDGE back and forth over all stitches – read description above. Change to circular needle size 9 mm and work as follows from the right side: 6 band stitches in garter stitch, work A.1 until there are 7 stitches left, work the first stitch in A.1 (so the pattern is symmetrical) and finish with 6 band stitches in garter stitch.
Insert 1 marker in the 30th-32nd-34th-36th-38th-42nd stitch in from each side = sides. There are 45-49-53-57-61-69 stitches between the marker-stitches on the back piece and the marker-stitches are now knitted from the right side and purled from the wrong side. Allow the markers to follow your work onwards.
When the piece measures 10 cm, cast on stitches for the sleeves as described below; approx. 40-42-44-46-48-50 cm left to finished length, you can work to your desired length before casting on stitches for the sleeves.
The next row is worked as follows from the right side: 6 band stitches in garter stitch, continue A.1 over the next 18-20-22-24-26-30 stitches on the right front piece, work A.2 over the next 5 stitches, cast off the marker-stitch, cast on 57-59-63-65-69-71 new stitches (= sleeve), work A.2 over the next 5 stitches, continue A.1 over the next 35-39-43-47-51-59 stitches on the back piece, work A.2 over the next 5 stitches, cast off the marker-stitch, cast on 57-59-63-65-69-71 new stitches (= sleeve), work A.2 over the next 5 stitches, continue A.1 over the next 18-20-22-24-26-30 stitches on the left front piece and 6 band stitches in garter stitch = 229-241-257-269-285-305 stitches. Work back from the wrong side.
OVERVIEW OF THE NEXT SECTION:
You now start to decrease to RAGLAN – read description above. AT THE SAME TIME as you work cables, the buttonholes and the bands are later worked over more stitches as described below. Read PATTERN, RAGLAN, BUTTONHOLES and BANDS/COLLAR before continuing.
PATTERN:
On the next row (right side) start the cables in each transition between the front/back pieces and the sleeves. Work A.3 over A.2 between the right front piece and right sleeve (when the garment is worn) and between the back piece and left sleeve, work A.4 over A.2 between the right sleeve and the back piece and between the left sleeve and the left front piece. Repeat A.3 and A.4 in height.
RAGLAN:
AT THE SAME TIME on the same row from the right side as you start A.3 and A.4, decrease to raglan, but be aware that the decreases are different on the front/back pieces and on the sleeves. Decrease as described below.
BACK PIECE:
Decrease every 4th row (every 2nd row from the right side) a total of 13-12-12-10-10-7 times and then every 2nd row (each row from the right side) a total of 1-4-6-10-12-19 times.
FRONT PIECES:
Decrease every 4th row a total of 12-12-12-10-10-7 times and then every 2nd row a total of 0-2-4-8-10-17 times (i.e. 2 times less than on the back piece).
SLEEVES:
Decrease every 2nd row a total of 26-27-29-29-31-32 times.
BUTTONHOLES:
When the piece measures 15 cm and 25 cm, work the buttonholes on the right band – read description above.
BANDS/COLLAR:
When the piece measures 25 cm, work the bands over 2 more stitches on each side (8 band stitches in garter stitch instead of 6). Repeat this increase every 8-8-9-9-10-10 cm a total of 3 times in height = 12 band stitches in garter stitch on each side. These 12 stitches are now the collar.
NECKLINE:
When the raglan decreases are finished there are 73-73-73-77-77-77 stitches on the needle.
The next row is worked as follows from the right side: Work the 12 garter stitches as before, knit the next 49-49-49-53-53-53 stitches and decrease 21-17-17-13-13-9 stitches evenly over these 49-49-49-53-53-53 stitches– read DECREASE TIP, work 12 garter stitches as before. Turn, work the 12 garter stitches and place them on a thread for the collar, cast off the next 28-32-32-40-40-44 stitches for the neck and work 12 garter stitches as before. Continue the collar as described below.
RIGHT COLLAR:
Change to circular needle size 8 mm. * Work 2 ridges back and forth over the 12 stitches, work 1 ridge back and forth over the first 8 stitches towards mid front *, work from *-* until the collar measures approx. 9-10-10-12-12-14 cm where it is shortest (on the inside) – measure the collar to match the neckline to mid-back. The collar should be stretched slightly when sewn onto the neckline. Cast off with knit from the right side.
LEFT COLLAR:
Place the 12 stitches from the thread on circular needle size 8 mm. Knit 1 row from the right side. * Work 2 ridges back and forth over the 12 stitches, work 1 ridge back and forth over the first 8 stitches towards mid front *, work from *-* until the collar measures approx. 9-10-10-12-12-14 cm where it is shortest (on the inside) – adjust to match the right collar. Knit 1 row from the wrong side and cast off with knit from the right side.
ASSEMBLY:
Sew the collar together mid-back inside the cast-off edge – make sure the seam is on the wrong side when the collar is turned down.
Sew the collar to the neckline.
Sew the buttons onto the left band.
Diagram explanations
 |
= | knit from right side, purl from wrong side |
 |
= | purl from right side, knit from wrong side |
 |
= | knit 1 in both the front and back loops of the stitch (= 1 stitch increased) |
 |
= | place 3 stitches on cable needle in front of piece, knit 3, knit 3 from cable needle |
 |
= | place 3 stitches on cable needle behind the piece, knit 3, knit 3 from cable needle |
Have you finished this pattern?
Tag your pictures with #dropspattern #angelinajacket or submit them to the #dropsfan gallery.
Do you need help with this pattern?
You'll find 21 tutorial videos, a Comments/Questions area and more by visiting the pattern on garnstudio.com.
Have you purchased DROPS yarn to make this pattern? Then you are entitled to receive help from the store that sold you the yarn.
© 1982-2026 DROPS Design A/S. We reserve all rights. This document, including all its sub-sections, has copyrights. Read more about what you can do with our patterns at the bottom of each pattern on our site.