How to decrease stitches
If you want to shape your knitwear, for example for an armhole, neckline or waistline, you can do that with a simple decrease. When decreasing at markers or next to edge stitches you work as follows from the right side:
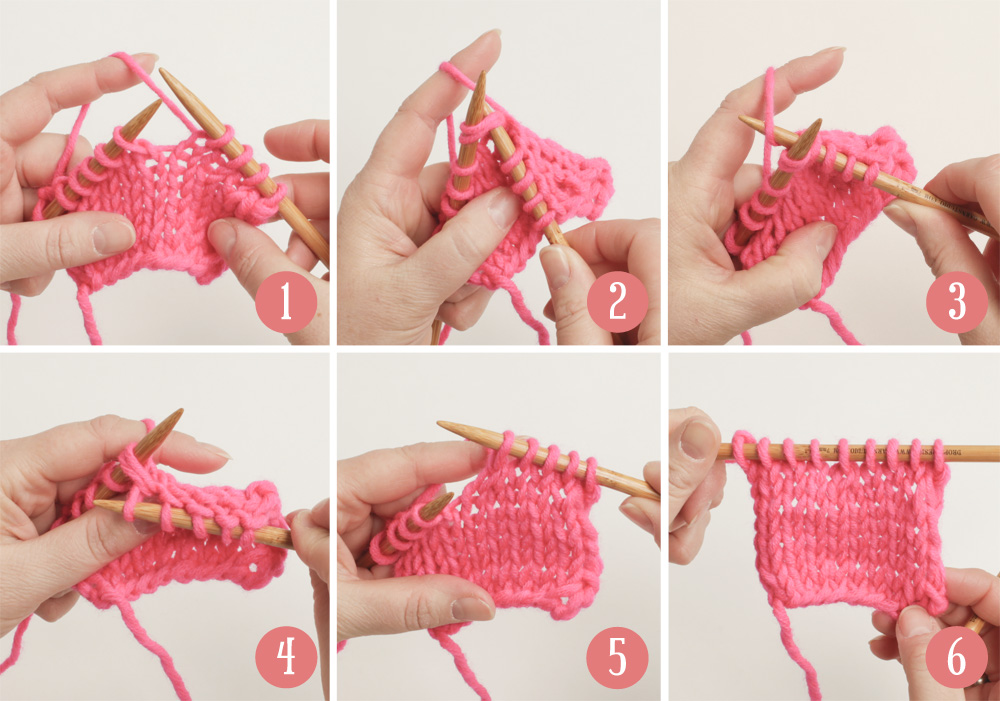
Figure 1: Work until the stitch you want to decrease, on the photo we are decreasing next to 4 edge stitches.
Figure 2: Insert the right hand needle as if to knit into the next 2 stitches on your left hand needle. Insert the needle from left to right, first into the second stitch and then into the first stitch on the left hand needle.
Figure 3: Place the working yarn over the tip of your right hand needle as you would knit one stitch and pull the yarn through both stitches. You now have one new stitch on your right hand needle.
Figure 4: Slide both stitches off the left hand needle. These 2 stitches has now been knit together into one stitch, next to the 4 edge stitches on your right hand needle.
Figure 5: Work the rest of the row and you now have one stitch less compared to when you started working this row.
Figure 6: That’s how easy it is to shape your knitwear.