Baby Talk |
||||
 |
 |
|||
Knitted overall and hat for baby with moss stitch, garter stitch and crochet edge. The set is knitted in DROPS BabyMerino. Size overall: 1 month to 2 years Size hat: Premature to 4 years
DROPS Baby 33-30 |
||||
|
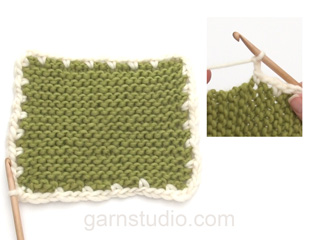
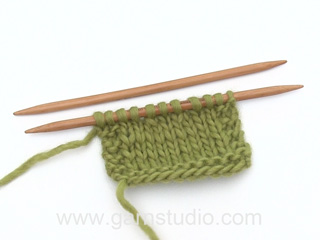
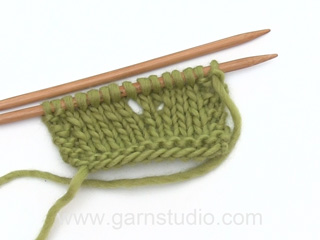
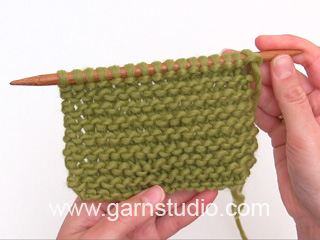
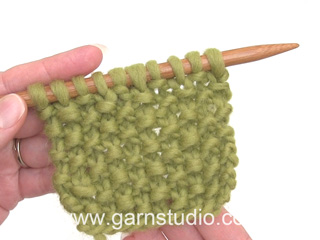
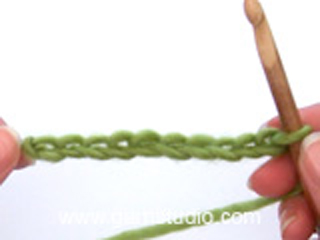
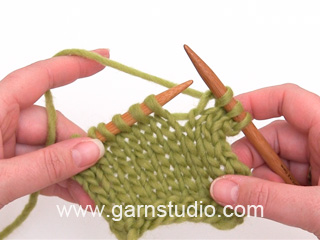
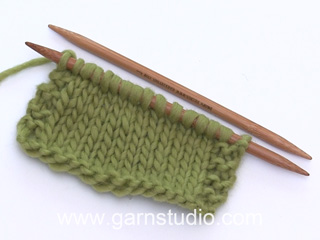
---------------------------------------------------------- EXPLANATION FOR THE PATTERN: ---------------------------------------------------------- GARTER STITCH (in the round - applies to hat): 1 ridge vertically = 2 rounds. Knit 1 round and purl 1 round. MOSS STITCH: Row 1: * Knit 1, purl 1 *, repeat from *-*. Row 2: Knit over purl and purl over knit. Repeat 2nd row upwards. INCREASE TIP (applies to overall): Increase inside 1 edge stitch. All increases are done from the right side. Increase by making 1 yarn over. Knit yarn over twisted on next row, it should not make holes. DECREASE TIP (applies to overall): Decrease inside 1 edge stitch. All decreases are done from the right side. Decrease as follows after 1 edge stitch: Slip 1 stitch knitwise, knit 1, pass slipped stitch over. Decrease as follows before 1 edge stitch: Knit 2 together. ---------------------------------------------------------- BEGIN PIECE FOR OVERALL HERE: ---------------------------------------------------------- OVERALL - SHORT OVERVIEW OF THE PIECE: Work from bottom up. First work 2 legs, then work the legs together and knit back and forth up to sleeve. Cast on stitches for sleeve in each side of piece, and work front and back piece separately until finished. Sew shoulder and sleeve seams and crochet an edge around the opening on overall at the end. Work entire overall in moss stitch. LEG: Worked back and forth on circular needle to make room for all the stitches. Cast on 46-50-54-58 (66-70) stitches (including 1 edge stitch in each side) on circular needle size 3 mm = US 2,5 with light lavender. Work in MOSS STITCH over all stitches - see explanation above. REMEMBER THE KNITTING GAUGE! When piece measures 6 cm = 2⅜", increase 1 stitch in each side of piece inside 1 edge stitch (= 2 stitches increased). Increase like this every 3rd-4th-5th-5th (8th-8th) row 11-11-12-14 (13-16) times in total = 68-72-78-86 (92-102) stitches. When piece measures 15-18-21-24 (29-34) cm = 6"-7"-8¼"-9½" (11⅜"-13⅜"), bind off 5 stitches at the beginning of the 2 next rows for gusset (i.e. bind off stitches in each side of piece) = 58-62-68-76 (82-92) stitches. Put piece aside and knit another leg the same way. OVERALL: Slip both legs on to same circular needle size 3 mm = US 2,5, with bind off stitches towards each other = 116-124-136-152 (164-184) stitches. Insert 1 marker thread in the piece. NOW MEASURE PIECE FROM HERE! Work 6 rows moss stitch back and forth, begin mid front. Then work as follows: Cast on 3 stitches at the end of the next 2 rows (for front bands) = 122-130-142-158 (170-190) stitches. Insert 1 marker after 32-34-37-41 (44-49) stitches in from each side. Move the markers upwards when working, they mark front pieces and back piece. Now increase stitches mid front (i.e. in each side of piece) so that the front pieces overlap. Increase 1 stitch inside 1 edge stitch in each side of piece (= 2 stitches increased) - read INCREASE TIP! Increase on every 4th row 3-2-0-3 (2-13) more times, then on every 6th row 8-11-16-17 (21-15) times (= 12-14-17-21 (24-29) stitches increased in total in each side of piece) = 44-48-54-62 (68-78) stitches on each front piece = 146-158-176-200-218-248 stitches in total. READ ALL OF THE FOLLOWING SECTION BEFORE CONTINUING! DECREASE MID FRONT FOR NECK INSIDE 1 EDGE STITCH WHILE AT THE SAME TIME DIVIDING THE PIECE AND CASTING ON STITCHES FOR SLEEVE. DECREASE MID FRONT FOR NECK AS FOLLOWS: Work over all stitches until piece measures 17-20-25-28 (32-34) cm = 6¾"-8"-9¾"-11" (12½"-13⅜") from marker thread. Then decrease 1 stitch inside 1 edge stitch for neck in each side of piece (= 2 stitches decreased) - read DECREASE TIP! Decrease like this on every other row 20-24-27-31 (35-41) more times, then on every 4th row 2 times (= 23-27-30-34 (38-44) stitches decreased in total in each side of piece). DIVIDE THE PIECE AND CAST ON STITCHES FOR SLEEVE AS FOLLOWS: RIGHT FRONT PIECE: When piece measures 21-26-30-35 (40-43) cm = 8¼"-10¼"-11¾"-13¾" (15¾"-17") from marker thread, divide piece at the 2 markers and finish front and back piece separately. Adjust so that next row is from right side. Now work over stitches until first marker (= right front piece). Slip the remaining stitches on a stitch holder. Now cast on stitches for sleeve at the end of every row from right side as follows (NOTE: Continue to decrease inside 1 edge stitch at the beginning of row as before): Cast on 4-6-6-6 (6-6) stitches in 4-4-5-6 (7-8) times in total, then 17-17-16-16 (18-20) stitches 1 time in total (= 33-41-46-52 (60-68) stitches cast on in total for sleeve). When all stitches are cast on and all decreases are done, there are 54-62-70-80 (90-102) stitches on needle. Work until piece measures 45-53-62-70 (81-90) cm = 17¾"-21"-24⅜"-27½" (32"-35½") in total, measured from leg to shoulder. Bind off. LEFT FRONT PIECE: Work over the last stitches slipped on a stitch holder, until marker. Work as right front piece but reversed - i.e. cast on stitches for sleeve at the end of row from wrong side. Continue to decrease inside 1 edge stitch at the end of row as before for neck. BACK PIECE: = 58-62-68-76 (82-92) stitches. Cast on new stitches at the end of every row in each side for sleeves as follows: Cast on 4-6-6-6 (6-6) stitches in 4-4-5-6 (7-8) times in total, then 17-17-16-16 (18-20) stitches 1 time in total (= 33-41-46-52 (60-68) stitches cast on in total for sleeve in each side of piece) = 124-144-160-180 (202-228) stitches. When piece measures 44-52-61-69 (80-89) cm = 17¼"-20½"-24"-27⅛" (31½"-35") in total, bind off the middle 16-20-20-20 (22-24) stitches for neck and finish each shoulder/sleeve separately (= 54-62-70-80 (90-102) stitches remain on each shoulder). Work like this until piece measures 45-53-62-70 (81-90) cm = 17¾"-21"-24⅜"-27½" (32"-35½") in total, measured from leg to shoulder, adjust according to front pieces. Bind off. Work the other shoulder the same way. ASSEMBLY: Sew overarm/shoulder seams with grafting/kitchener stitches from right side. Sew underarm seams together edge to edge in front loop of outermost stitches. Sew legs together inside 1 edge stitch, and sew the 5 stitches bind off between legs together. Sew vent up to where the 3 new stitches were cast on in each side for band stitches and sew the 3 band stitches in each side of piece to overall. CROCHET EDGE: Crochet on hook size 2.5 mm = US C/2 with light beige around the entire opening mid front on overall as follows: ROW 1 (= from wrong side): Begin mid front at the bottom of left front piece, work 1 single crochet in first stitch where 3 band stitches were cast on, * 1 chain stitch, skip approx. 1 cm = ⅜", 1 single crochet in next stitch *, repeat from *-* (make sure to avoid a tight edge), continue crochet edge around overall until corner where decrease for neck began on left front piece, work tie as follows: 1 single crochet in tip, then work chain stitches for approx. 20-25 cm = 8"-9¾", turn and work 1 slip stitch in every chain stitch, then work 1 single crochet in tip on front piece again, work in the round until next tip (i.e. on right front piece), work tie, continue as before around the rest of overall down to where 3 band stitches were cast on, adjust to finish with 1 single crochet. ROW 2 (= from right side): Work 1 chain stitch, 1 single crochet around first chain stitch, * 4 chain stitches, 1 double crochet in 4th chain stitch from hook, skip 1 single crochet + 1 chain stitch + 1 single crochet, work 1 single crochet around next chain stitch *, repeat from *-* (make sure to work over ties so that the ties are under the edge, i.e. do not work in stitch in tie), finish with 1 slip stitch in first single crochet on previous row. Cut and fasten the yarn. Crochet on hook size 2.5 mm = US C/2 with light beige mix at the bottom around both legs as follows: ROUND 1: Begin at the seam. Work 1 single crochet in first stitch, * 1 chain stitch, skip 2 stitches, 1 single crochet in next stitch *, repeat from *-* and finish with 1 slip stitch in first single crochet at beginning of round. ROUND 2: Work 1 chain stitch, 1 single crochet around first chain stitch, * 4 chain stitches, 1 double crochet in 4th chain stitch from hook, skip 1 single crochet + 1 chain stitch + 1 single crochet, work 1 single crochet around next chain stitch *, repeat from *-* the entire round, finish with 1 slip stitch in first single crochet at beginning of round. Crochet on hook size 2.5 mm = US C/2 with light beige mix at the edge around both sleeves as follows: ROUND 1: Work 1 single crochet in first stitch at the bottom of sleeve, * 1 chain stitch, skip approx. 1 cm = ⅜", 1 single crochet in next stitch *, repeat from *-* (make sure to avoid a tight edge) and finish with 1 slip stitch in first single crochet at beginning of round. ROUND 2: Work 1 chain stitch, 1 single crochet around first chain stitch, * 4 chain stitches, 1 double crochet in 4th chain stitch from hook, skip 1 single crochet + 1 chain stitch + 1 single crochet, work 1 single crochet around next chain stitch *, repeat from *-* the entire round, finish with 1 slip stitch in first single crochet at beginning of round. Then work 1 tie like the one in the tip on right and left front piece, on the outside of left front piece, under sleeve (i.e. in the side) and on the inside of right front piece – make sure that the ties are at the same hight as tips on front piece. ---------------------------------------------------------- BEGIN PIECE FOR HAT HERE: ---------------------------------------------------------- HAT: Worked in the round on double pointed needles. Loosely cast on (68) 80-92-96-104 (112-116) stitches on double pointed needles size 2.5 mm = US 1,5 with light lavender. Work rib = knit 2/purl 2 for (2) 2-3-3-3 (4-4) cm = (3/4") ¾"-1⅛"-1⅛"-1⅛" (1½"-1½"). Switch to double pointed needles size 3 mm = US 2,5 and knit 1 round while AT THE SAME TIME decreasing 8 stitches evenly = (60) 72-84-88-96 (104-108) stitches. Continue with MOSS STITCH - see explanation above. When piece measures (9) 10-11-11-13 (13-14) cm = (3½") 4"-4⅜"-4⅜"-5⅛" (5⅛"-5½"), work in GARTER STITCH - see explanation above. On next knit round decrease (6) 8-7-8-8 (8-9) stitches evenly. Repeat decrease every other round (i.e. every knit round) (5) 5-5-5-5 (6-6) more times (= (6) 6-6-6-6 (7-7) decrease rounds in total) = (24) 24-42-40-48 (48-45) stitches. On next round knit all stitches together 2 by 2. Purl 1 round and repeat decrease on next knit round in size 6/9 and 12/18 months and (2 - 3/4) years (do not decrease in the other sizes) = (12) 12-11-10-12 (12-12) stitches. Pull a double yarn through the remaining stitches and fasten tightly. |
||||
Diagram explanations |
||||
|
||||

|
||||
|
Have you made this or any other of our designs? Tag your pictures in social media with #dropsdesign so we can see them! Do you need help with this pattern?You'll find tutorial videos, a Comments/Questions area and more by visiting the pattern on garnstudio.com. © 1982-2024 DROPS Design A/S. We reserve all rights. This document, including all its sub-sections, has copyrights. Read more about what you can do with our patterns at the bottom of each pattern on our site. |
||||









Comments / Questions (88)
Under rubriken Dress. Jag har satt båda benen på samma rundsticka och jag ska nu sticka 6 varv mosstickning fram och tillbaka? . Min fråga: Är ett varv=fram och tillbaka?
19.10.2024 - 22:45DROPS Design answered:
Hei Anna. 1 varv = bare frem eller bare tilbake. mvh DROPS Design
23.10.2024 - 10:48HILFE!!!! Der Anzug ist gestrickt und zusammen genäht. Der Häkelrand klappt überhaupt nicht! Es zieht alles zusammen und sieht unmöglich aus. Auf dem Bild ist es definitiv anders. Ist die Anleitung denn richtig? Würde mich über schnelle Antworten freuen! Es eilt ihn fertig zu bekommen. 😊
28.09.2024 - 19:59DROPS Design answered:
Liebe Susanne, bei der 1. Reihe der Häkelkante sollen Sie so häkeln, daß die festen Maschen die Arbeit nicht zusammen zieht, dh wenn man ca 1 cm überspringt, soll diese 1 cm genauso die Breite der Luftmasche stimmen; so wird die Kante nicht zu fest sein. Viel Spaß beim Häkeln!
30.09.2024 - 08:16Ben:hvordan skal jeg felle de 5maskene? To og to sammen fem ganger eller to sammen,sette den ene tilbake,to sammen osv. Fem ganger,det blir tverrfelt og skjønner ikke da skrittet.
09.04.2024 - 21:36DROPS Design answered:
Hei Aslaug, Du feller av (sånn som når du feller av på slutten av arbeidet) 5 masker på begynnelsen av neste 2 pinnene. God fornøyelse!
10.04.2024 - 06:35Bonjour, Je ne comprends pas le la couture à faire pour l'entre jambes... Auriez voys un schéma ? Merci par avance car j'arrive à la fin mais je suis bloquée par cette couture.
17.12.2023 - 15:41DROPS Design answered:
Bonjour Valérie, assemblez les mailles rabattues pour l'entrejambe sur le devant de l'ouvrage à celles rabattues pour l'entrejambe sur le dos de l'ouvrage, autrement dit, vous cousez les 10 mailles rabattues (5 m jambe gauche et 5 m jambe droite) côté devant aux 10 mailles rabattues côté dos (5 m jambe gauche et 5 m jambe droite). Bonne continuation!
18.12.2023 - 08:49Bij de laatste deel waar je aan de mouwen gaat beginnen en het werk verdeelt, moet je voor de mouwen 4 keer 4 steken bij zetten. Is dit in een keer 16 steken erbij of elke naald 4 steken erbij zetten? En hoe worden ze er het bij bijgezet wznt bij de tip staat aan de kantsteek met omslag.
17.10.2023 - 10:21DROPS Design answered:
Dag Yani,
Je zet er inderdaad elke naald 4 steken bij op, anders had er wel gestaan dat je 16 steken op moest zetten. Bij een van de video's kun je vinden hoe je steken opzet aan de zijkant.
18.10.2023 - 18:49Bonjour Je suis arrivée à la combinaison et j'ai glissé les mailles des deux jamnbes sur la meme aiguille circulaire. Que voulez vous dire en placant les mailles rabattues les unes contres les autres? Où dois je placer le fil marqueur? Ensuite je dois tricoter 6 rgs en point de riz en aller et retour, en commencant par le milieu devant. Comment je reconnais le milieu devant? Merci pour votre support
27.05.2023 - 15:03DROPS Design answered:
Bonjour Hashim, vous devez avoir les 5 mailles rabattues à la fin de l'une des jambes contre les 5 mailles rabattues au début de l'autre jambe côte à côte. Vous placez votre fil marqueur le long/avant ce 1er rang, il va vous servir de repère pour mesurer la partie "combinaison". Le milieu devant est simplement la partie qui se trouve au milieu du devant (ouverture de la combinaison). Autrement dit, tricotez 1 des jambes sur l'endroit, puis tricotez l'autre jambe à suivre sur l'endroit, tournez et tricotez encore 5 rangs sur toutes les mailles. Bon tricot!
30.05.2023 - 10:29(Strl.68/72) Når man skal måle forstykkene, måler man fra starten av hele arbeidet eller fra slutten av foten der forstykkene begynner? Har strikket høyre forstykke men synes armen allerede er stor nok, så skjønner ikke hvorfor jeg skal da legge opp til ermer på bakstykket også, da blir jo armen gigantisk. Jeg har målt arbeidet fra der benet slutter og opp til skulder, er da 62cm.
16.05.2023 - 13:17DROPS Design answered:
Hej Isabel, du starter på ærmerne når arb måler 21cm + et par pinde + 30 cm, så ærmegabet måler ca 62-52 = 10 cm hvilket stemmer fint med de mål du kan se i måleskitsen :)
17.05.2023 - 10:23Hallo! Ik ben bijna klaar met het eerste pijpje. Ik heb net alle steken erbij gedaan en zit aan 68 steken maar ik meet maar 13 cm en geen 15. Hoe moet ik verder gaan?
21.04.2023 - 13:01DROPS Design answered:
Dag Yani,
Je kunt, voordat je beide pijpen bij elkaar zet, gewoon verder breien met de bestaande steken tot een hoogte van 15 cm.
27.04.2023 - 08:10Hallo! Ik ben bijna klaar met het eerste beenje te breien alleen zit ik vast van het meerdere tot 68 steken. Daarna zou je 15cm moeten hebben maar ik heb maar 13cm? Moet ik doorbreien tot 15? Bedankt ;)
20.04.2023 - 17:41DROPS Design answered:
Dag Yani,
Na het meerderen brei je inderdaad door tot je de juiste lengte hebt bereikt.
20.04.2023 - 20:45Hallo! Superleuk pake, maar ik heb een vraagje. Hoe meerder je aan de binnenkant van een kantsteek? Dankje
17.04.2023 - 19:48DROPS Design answered:
Dag Yani,
Je meerdert zoals beschreven staat bij 'tip voor het meerderen' en je meerdert vlak naast de kantsteek. Dus tussen de kantsteek en de rest van het breiwerk.
17.04.2023 - 20:45