Little Blue Dream |
|
 |
 |
Set of knitted jumpsuit with raglan and crochet teddy bear for baby and children in DROPS Merino Extra Fine
DROPS Baby 20-23 |
|
|
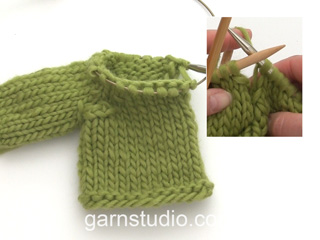
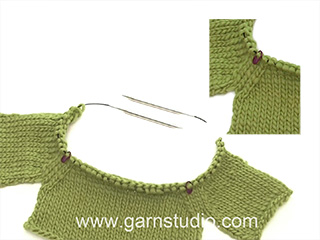
JUMPSUIT: GARTER ST (back and forth on needle): K all rows. DECREASING TIP: Make all dec from RS. Dec as follows before marker: K2 tog. Dec as follows after marker: slip 1 st as if to K, K1, psso. -------------------------------------------------------- LEG: Worked in the round. Cast on 48-54-60 (66-72) sts on double pointed needles size 3.5 mm / US 4 with Merino Extra Fine. Insert a marker at beg of round = inside of leg. K 1 round and continue in rib K3/ P3. When rib measures 4-4-4 (5-5) cm / 1½"-1½"-1½" (2"-2") K 1 round, AT THE SAME TIME dec 6 sts evenly = 42-48-54 (60-66) sts. Change to double pointed needles size 4.5 mm / US 7. P 1 round and continue in stockinette st. When piece measures 6-6-6 (7-7) cm / 2⅜"-2⅜"-2⅜" (2¾"-2¾") inc 1 st each side of marker, and repeat the inc on every 3-4-5 (5-7) cm / 1⅛"-1½"-2" (2"-2¾") a total of 4 times = 50-56-62 (68-74) sts. When piece measures 16-20-23 (25-32) cm / 6¼"-8"-9" (9¾"-12½") divide piece at inside of leg and complete piece back and forth on needle (to make it easier to slip sts on circular needle later on). Cast on 1 edge st each side = 52-58-64 (70-76) sts. When piece measures 18-22-25 (29-34) cm / 7"-8¾"-9¾" (11⅜"-13⅜") bind off 1 edge st each side. Put piece aside and knit the other leg in the same way. BODY PIECE: Slip legs on the same circular needle size 4.5 mm / US 7 = 100-112-124 (136-148) sts. Continue back and forth from mid front as follows (first row = RS): bind off 4 sts, K remaining sts on row. Turn piece, bind off 4 sts and P remaining sts on row = 92-104-116 (128-140) sts. Continue in stockinette st back and forth on all sts. When piece measures 37-45-53 (58-65) cm / 14½"-17¾"-21" (22¾"-25½") work next row as follows (from RS): 17-20-23 (26-29) stockinette sts (= right front piece), bind off 8 sts for armhole, work 42-48-54 (60-66) stockinette sts (= back piece), bind off 8 sts for armhole, work 17-20-23 (26-29) stockinette sts (= left front piece). Put piece aside and knit the sleeves. SLEEVE: Worked in the round. Cast on 36-42-42 (48-48) sts on double pointed needles size 3.5 mm / US 4 with Merino Extra Fine. K 1 round and continue in rib K3/P3. When piece measures approx 3 cm / 1⅛" K 1 round, AT THE SAME TIME dec 6-10-8 (12-10) sts evenly = 30-32-34 (36-38) sts. Change to double pointed needles size 4.5 mm / US 7 and P 1 round. Insert a marker at beg of round = mid under sleeve. Continue in stockinette st. AT THE SAME TIME when piece measures 5 cm / 2" inc 1 st each side of marker mid under sleeve, and repeat the inc on every 5-5-6 (6-6) round a total of 6-6-7 (8-9) times = 42-44-48 (52-56) sts. When piece measures 17-18-21 (24-28) cm / 6¾"-7"-8¼" (9½"-11") bind off 8 sts mid under sleeve (4 sts each side of marker) = 34-36-40 (44-48) sts. Put piece aside and knit the other sleeve. YOKE: Slip sleeves on the same circular needle as body piece where bind off for armhole = 144-160-180 (200-220) sts. Insert a marker in all transitions between body piece and sleeves = 4 markers. Work stockinette st back and forth on all sts. AT THE SAME TIME on 3rd row dec 1 st each side of all markers for raglan - see DECREASING TIP! Repeat the dec on every other row (= every row from RS) a total of 10-11-12 (13-15) times. AT THE SAME TIME when you have dec 7-6-6 (6-7) times for raglan bind off for neck at the beg of every row each side: 2 sts 3-3-4 (5-5) times and then 1 st 0-2-2 (2-3) times. After all dec for raglan and neck bind offs are complete there are 52-56-64 (72-74) sts left on needle and piece measures approx 45-53-62 (68-77) cm / 17¾"-21"-24⅜" (26¾"-30⅜"). Bind off all sts. FRONT BAND: Pick up 63-75-91 (95-103) sts along right front piece from bottom edge towards the neck on circular needle size 3.5 mm / US 4 with Merino Extra Fine. K 1 row from WS, K 1 row from RS and continue in rib as follows (from WS): 1 garter st, * P2, K2 *, repeat from *-* and finish with P2. When rib measures 2 cm / ¾" make buttonholes on next row from RS as follows: rib on the first 10-10-2 (6-2) sts, * P2 tog, 1 YO, 10 sts rib * repeat from *-* a total of 4-5-7 (7-8) times, finish with P2 tog, 1 YO, K2, 1 garter st. Continue in rib until front band measures 4 cm / 1½", bind off with K over K and P over P. Repeat on left front piece – do not make buttonholes. HOOD: Pick up approx 60 to 100 sts (do not pick up on front bands) round neck on circular needle size 4.5 mm / US 7. K 1 row from WS, AT THE SAME TIME adjust no of sts to 44-48-52 (56-60) sts. Work 4 rows garter st. Then K 1 row from RS, AT THE SAME TIME inc 24 sts evenly = 68-72-76 (80-84) sts. Continue in stockinette st with 1 garter st each side towards mid front until hood measures 21-23-25 (27-28) cm / 8¼"-9"-9¾" (10⅝"-11"), bind off. Fold hood double and sew tog at the top, sew edge to edge to avoid a chunky seam. Pick up 112-124-136 (144-152) sts round opening of hood on circular needle size 3.5 mm / US 4. K 1 row from WS, K 1 row from RS and continue in rib as follows (from WS): 1 edge st, * P2, K2 *, repeat from *-* on the next 108-120-132 (140-148) sts and finish with P2 and 1 edge st. Work rib for 8 cm / 3⅛", bind off with K over K and P over P. ASSEMBLY: Sew openings under sleeves and sew seam on the inside of leg inside 1 edge st. Sew left front band to the bottom of body piece where 8 sts were bound off Sew buttons to left front band. Sew the first 4 cm / 1½" from hood to the top edge of front band each side. Fold the other 4 cm / 1½" towards RS and fasten with a few sts. -------------------------------------------------------- BEAR: CROCHET INFO: Replace first sc on round with ch 1 and finish each round with 1 sl st in first sc from beg of round. CROCHET SC TOG: Crochet 2 sc tog to 1 sc as follows: Insert hook in first st, pick up thread, insert hook in next st, pick up thread, make 1 YO and pull thread through all 3 sts on hook. --------------------------------------------------------- --------------------------------------------------------- HEAD AND BODY: Beg at the top of head and after the head crochet the body. Then crochet ears, arms, and the hearts, which are sewn on afterwards. HEAD: SEE CROCHET INFO! Ch 4 with hook size 4 mm / G/6 with light brown mix and form a ring with 1 sl st in first ch. ROUND 1: Crochet 6 sc in ring. ROUND 2: 2 sc in each sc = 12 sc. ROUND 3: * 1 sc in first sc, 2 sc in next sc *, repeat from *-* = 18 sc. ROUND 4: * 1 sc in each of the first 2 sc, 2 sc in next sc *, repeat from *-* = 24 sc. ROUND 5: * 1 sc in each of the first 3 sc, 2 sc in next sc *, repeat from *-* = 30 sc. ROUND 6-11: 1 sc in each sc = 30 sc. ROUND 12: * 1 sc in each of the first 3 sc, then crochet the next 2 sc tog (see above) *, repeat from *-* = 24 sc. ROUND 13: 1 sc in each sc = 24 sc. ROUND 14: * 1 sc in each of the first 2 sc, then crochet the next 2 sc tog *, repeat from *-* = 18 sc. ROUND 15: * 1 sc in first sc, then crochet the next 2 sc tog *, repeat from *-* = 12 sc. Now fill the head with poly stuffing and continue in the round for body without cutting the thread. ROUND 16-18: 1 sc in each sc = 12 sc. ROUND 19: * 1 sc in each of the first 2 sc, 2 sc in next sc *, repeat from *-* = 16 sc. Change to off-white. ROUND 20: * 1 sc in each of the first 3 sc, 2 sc in next sc *, repeat from *-* = 20 sc. Change to light gray/blue. ROUND 21: 1 sc in each sc = 20 sc. Change to light gray/green. ROUND 22: * 1 sc in each of the first 4 sc, 2 sc in next sc *, repeat from *-* = 24 sc. Change to light gray/blue. ROUND 23: 1 sc in each sc = 24 sc. Change to light gray/green. ROUND 24: * 1 sc in each of the first 3 sc, 2 sc in next sc *, repeat from *-* = 30 sc. Change to off-white. ROUND 25: 1 sc in each sc = 30 sc. Change to light gray blue and crochet the rest of the body as follows: ROUND 26-29: 1 sc in each sc = 30 sc. ROUND 30: * 1 sc in each of the first 9 sc, 2 sc in next sc *, repeat from *-* = 33 sc. ROUND 31-39: 1 sc in each sc = 33 sc. ROUND 40: * 1 sc in each of the first 10 sc, 2 sc in next sc *, repeat from *-* = 36 sc. ROUND 41-46: Crochet 1 sc in each sc = 36 sc. ROUND 47: * 1 sc in each of the first 10 sc, then crochet the next 2 sc tog *, repeat from *-* = 33 sc. ROUND 48: 1 sc in each sc = 33 sc. ROUND 49: * 1 sc in each of the first 9 sc, then crochet the next 2 sc tog *, repeat from *-* = 30 sc. ROUND 50: * 1 sc in each of the first 3 sc, then crochet the next 2 sc tog *, repeat from *-* = 24 sc. ROUND 51: 1 sc in each sc = 24 sc. ROUND 52: * 1 sc in each of the first 2 sc, then crochet the next 2 sc tog *, repeat from *-* = 18 sc. ROUND 53: 1 sc in each sc = 18 sc. ROUND 54: * 1 sc in first sc, then crochet the next 2 sc tog *, repeat from *-* = 12 sc. ROUND 55: Crochet 2 sc tog all the way round = 6 sc. Fill the body with poly stuffing, cut the thread, pull thread through remaining sts, tighten and fasten. LEGS: Ch 4 with hook size 4 mm / G/6 with light brown mix and form a ring with 1 sl st in first ch. ROUND 1: Crochet 8 sc in ring. ROUND 2: * 1 sc in first sc, 2 sc in next sc *, repeat from *-*= 12 sc. ROUND 3: 1 sc in each sc = 12 sc – NOTE: Crochet in back loop of st. ROUND 4: 1 sc in each sc = 12 sc – NOTE: Crochet through both loops again. ROUND 5: 1 sc in each sc, at the same time crochet 2 sc tog at the beg and at the end of round = 10 sc. ROUND 6: 1 sc in each sc, at the same time crochet tog 5th and 6th sc and crochet tog 7th and 8th sc on round = 8 sc. Cut the thread. Crochet 1 more leg in the same way. Fill the legs with poly stuffing and sew the legs to bottom of body. ARMS: Ch 4 with hook size 4 mm / G/6 with light brown mix and form a ring with 1 sl st in first ch. ROUND 1: Crochet 4 sc in ring. ROUND 2: 2 sc in each sc = 8 sc. ROUND 3-6: 1 sc in each sc = 8 sc. Change to light gray/green. ROUND 7: 1 sc in each sc = 8 sc. Fill the arm with poly stuffing, place piece flat and crochet 1 sc in each sc through both layers = 4 sc. Cut the thread. Crochet 1 more arm in the same way and sew arms to the side of body at the top. EARS: Ch 4 with hook size 4 mm / G/6 with light brown mix and form a ring with 1 sl st in first ch. ROUND 1: Crochet 6 sc in ring. ROUND 2: * 1 sc in first sc, 2 sc in next sc *, repeat from *-* = 9 sc. ROUND 3: * 1 sc in each of the first 2 sc, 2 sc in next sc *, repeat from *-* = 12 sc. ROUND 4-6: 1 sc in each sc = 12 sc. Place piece flat and crochet 1 sc in each sc through both layers = 6 sc, turn piece and crochet 2 sc tog across the row = 3 sc. Cut the thread and sew ear to the top of head to the side. Crochet 1 more ear and attach to the opposite side of head. SMALL HEART: Ch 2 with hook size 3 mm / C with guacamole (try to find a yellow section of the yarn) and crochet 3 sc in first ch, turn piece. Ch 1, then 1 sc in each st = 5 sc (includes ch at beg and end of row), turn piece. Crochet ch 3, 1 dc in first ch, 1 sc in middle of heart, ch 3, 1 dc in first ch, 1 sl st in ch from beg of previous row. Cut the thread and sew the heart to the front of bear. LARGE HEART: Ch 2 with hook size 3 mm / C with guacamole (try to find a yellow section of the yarn) and crochet 3 sc in first ch, turn piece. Ch 1, then 1 sc in each st = 5 sc (includes ch at beg and end of row), turn piece. Ch 1, then 1 sc in each st = 6 sc (includes ch at beg of row), turn piece. Ch 4, 1 dc in first ch, 1 sc in the middle of heart, ch 4,1 dc in first ch, 1 sl st in ch from beg of previous row. Cut the thread and sew the heart to the front of bear. Crochet 1 more heart and sew to the back of bear. Embroider eyes and mouth at the front of bear with black. |
|

|
|
|
Have you made this or any other of our designs? Tag your pictures in social media with #dropsdesign so we can see them! Do you need help with this pattern?You'll find tutorial videos, a Comments/Questions area and more by visiting the pattern on garnstudio.com. © 1982-2024 DROPS Design A/S. We reserve all rights. This document, including all its sub-sections, has copyrights. Read more about what you can do with our patterns at the bottom of each pattern on our site. |
|










Comments / Questions (129)
Liebes Team, die Kapuze ist nicht das Problem, die ist fertig. Es geht um: "Rund um die Kapuze auf Rundnadel Nr. 3,5, 112-124-136 (144-152) M. aufnehmen." Die Kapuze selber hat ja viel weniger Maschen. Soll man hier auch Maschen über den Blenden aufnehmen? Ich weiß nicht genau, woher so viele Maschen aufgenommen werden sollen. Auf dem Foto sieht es so aus, als seien die Maschen von der Innenseite der Kapuze aufgenommen? Liebe Grüße....Anke
22.08.2024 - 10:47DROPS Design answered:
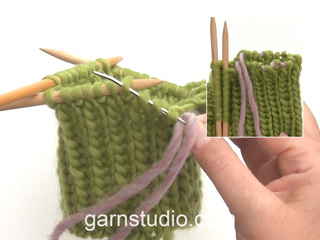
Liebe Anke, die Kapuze misst ca 21-23-25 (27-29) cm x 2 Seiten, so werden Sie an den 42-46-50 (54-58) cm diese 112-124-136 (144-152) Maschen auffassen, man braucht soviele Maschen, weil das Bündchen die Arbeit zusammenzieht, gerne können Sie bei der 1. Reihe die Maschenanzahl anpassen, wenn Sie dann nicht soviele Maschen aufgefassen haben. Viel Spaß beim Stricken!
22.08.2024 - 15:51Ich verstehe nicht, wo genau ich die Maschen aufnehmen soll: Die Kapuze oben zusammennähen. Danach rund um die Kapuze .....Maschen aufnehmen? Die glatt re Reihen hatten ja 72 M. Wo setze ich an mit der Aufnahme und wo bekomme ich die ganzen M her? Soll ich die zunehmen?
21.08.2024 - 22:22DROPS Design answered:
Liebe Frau Keil, die Kapuze wird wie in diesem Video zusammengenäht, Unterschied ist das im Video strickt man 3 M Krausrechts beidseitig und in diesem Modell wird man anstattt die Maschen um die Kapuze auffassen um das Bündchen zu stricken. Viel Spaß beim stricken!
22.08.2024 - 08:30Liebes Team, ich bin am Anfang der Blende. Soll man inclusive der 1. und 2. Reihe mit dem Bündchenmuster zusammen 2 cm erreichen bis die Knopflöcher gestrickt werden oder 2 cm allein das Bündchenmuster? Beginnt die Knopflochreihe in der Hin- oder Rückreihe?
09.08.2024 - 19:33DROPS Design answered:
Liebe Frau Keil, Sie können vom Anfang messen, die Krausrippe wird nicht so "hoch" sein; die Knopflöcher werden bei einer Hinreihe bearbeitet. Viel Spaß beim Stricken!
12.08.2024 - 07:43Für die Raglanpasse werden doch sicherlich die Maschen des Stramplers zusammen mit den Maschen der Ärmel aufgenommen? Mit welcher Rundnadelstärke wird denn dann gestrickt? Es steht dort nur, dass alle Maschen auf eine Rundnadel gelegt werden. Wo genau sollen die vier Markierungen angebracht werden? Liebe Grüße.....Anke
02.08.2024 - 08:00DROPS Design answered:
Liebe Frau Keil, ja genau, alle Maschen werden mit der Nadel Nr 4,5 für die Passe gestrickt. Die Markierungen setzen Sie bei jedem Übergang zwischen Vorder-/Rückenteil und Ärmel. Viel Spaß beim Stricken!
02.08.2024 - 14:28Hallo, ich bin bei der Maschenprobe für den Bären. Es steht 19 fM x 10 Runden. Sind also 20 R gemeint? Ansonsten hätte ich nur 5 cm bei 10 R. Die 19 M sind genau 10 cm. Oder soll man die Maschenprobe als Ring stricken, wie den Kopf? Meine 2. Frage bezieht sich auf den Kopf, beginnend mit dem Ring. Ich verstehe das nicht mit der Häkelinfo. Eigentlich ist doch jede Reihe erklärt. Mit lieben Grüßen Anke
22.07.2024 - 15:15DROPS Design answered:
Liebe Frau Keil, für die Maschenprobe sollen Sie 19 feste Maschen und 10 Reihen/Runden = 10 x 10 cm haben; beim Häkelinfo bedeutet es, daß man die 1. feste Masche der Runde mit einer Luftmasch ersetzt, die Runde endet dann mit 1 Kettmasche in diese Luftmasche. Viel Spaß beim Häkeln!
29.07.2024 - 11:09Hi! Ich stricke gerade diesen süßen Strampler. Bei der Rundpasse weiß ich nicht, was Abnahme für die Passe am Anfang jeder R. "gegen die vordere Mitte abketten" 2 M. bedeutet. Über eine Antwort würde ich mich sehr freuen. LG Barbara
19.07.2024 - 17:40DROPS Design answered:
Liebe Barbara, die Anleitung wurde sprachlich etwas umformuliert und ist nun hoffentlich eindeutiger. Viel Spaß beim Weiterstricken!
28.07.2024 - 11:49What length doubleended needles are required?
08.07.2024 - 13:47DROPS Design answered:
Dear V Marsh, we work with classic 20 cm DPN needles, but you can use shorter ones as well. Happy knitting!
08.07.2024 - 15:52What doesM1 and M2 mean in your diagram for little lamb jumpsuit
07.05.2024 - 03:36DROPS Design answered:
Dear Mrs Wrathmall, do you mean on this pattern? M.1 and M.2 are the name of the diagrams to the both cables you will find next to the measurement chart, under sleeve - read more about diagrams here. Happy knitting!
07.05.2024 - 08:11Thank you for your quick response I am looking forward to the end result as it is for my great grandson due to be born soon
26.04.2024 - 14:04Is the measurement of 34 cm taken from the base of leg or where body pice starts
26.04.2024 - 11:48DROPS Design answered:
See answer below
26.04.2024 - 13:48