Freshwater Pearl Top |
||||||||||||||||
 |
 |
|||||||||||||||
Knitted top/ vest in DROPS Cotton Light. Piece is knitted top down with lace pattern on front pieces and V-neck. Size: S - XXXL
DROPS 249-24 |
||||||||||||||||
|
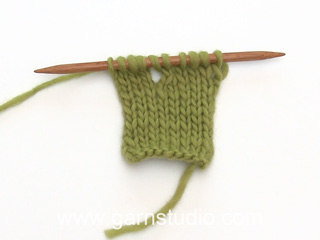
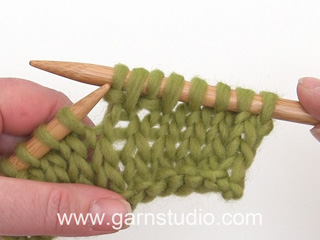
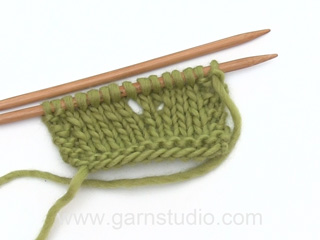
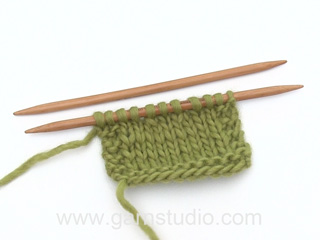
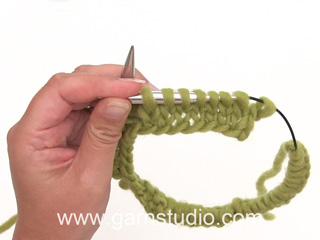
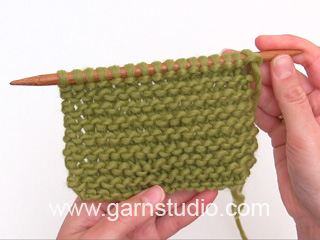
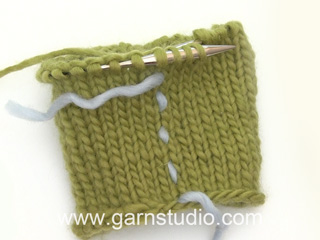
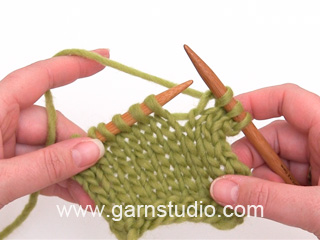
---------------------------------------------------------- EXPLANATION FOR THE PATTERN: ---------------------------------------------------------- GARTER STITCH (when working back and forth): Knit on all rows, i.e. knit from right side and knit from wrong side. 1 ridge vertically = knit 2 rows. PATTERN: See diagrams A.1 and A.2. Choose diagram for correct size. Diagrams show all rows in pattern seen from the right side. INCREASE TIP-1 (band): All increases are done from the right side. INCREASE AS FOLLOWS ON RIGHT FRONT PIECE: Work until 2 stitches remain on needle, knit 1 in front and back loop of next stitch (= 1 stitch increased), knit 1. INCREASE AS FOLLOWS ON LEFT FRONT PIECE: Knit 1, knit 1 in front and back loop next stitch (= 1 stitch increased). INCREASE TIP-2 (back piece): All increases are done from the right side. Increase 1 stitch by making 1 yarn over. On next row (= wrong side) purl the yarn over to make a hole. Then work the new stitches in stockinette stitch. INCREASE TIP-3 (sides of body): All increases are done from the right side. Increase 1 stitch on each side of marker thread as follows: Work until 2 stitches remain before marker thread, make 1 yarn over, knit 4 (marker thread is in the middle of these 4 stitches), make 1 yarn over (= 2 stitches increased). On next row work yarn overs twisted to avoid holes. Then work the new stitches in stockinette stitch. INCREASE TIP-4 (evenly): Increase 1 stitch by making 1 yarn over. On next row work yarn over twisted to avoid holes DECREASE TIP-1 (sides of body): All decreases are done from the right side! Decrease 1 stitch on each side of marker thread as follows: Work until 3 stitches remain before marker thread, knit 2 together, knit 2 (marker thread is between these 2 stitches), slip 1 stitch knitwise, knit 1, pass slipped stitch over stitch worked (= 2 stitches decreased). Decrease the same way at the other marker thread. BUTTONHOLES (top down): Decrease for buttonholes on right band (when garment is worn). Decrease from right side when 3 stitches remain on row as follows: Make 1 yarn over, knit the next 2 stitches together, knit last stitch. On next row (wrong side) knit the yarn over to make a hole. Decrease first buttonhole when approx. 1 cm =⅜" has been worked after last increase on band. Then decrease the next 3 buttonholes, approx. 7-7½-7½-8-8-8 cm = 2¾"-2⅞"-2⅞"-3⅛"-3⅛"-3⅛" apart. ---------------------------------------------------------- START THE PIECE HERE: ---------------------------------------------------------- TOP - SHORT OVERVIEW OF THE PIECE: Worked back and forth on needles, top down. Work in garter stitch on shoulder straps, lace pattern on front piece and stockinette stich on back piece. Begin by casting on stitches for shoulder strap on right front piece, and work downwards while at the same time increasing in each side of piece for armhole and V-neck. When armhole and V-neck are done, put right front piece aside while working the back piece. When back piece has been worked down to armholes, work left front piece the same way as right front piece. At the armholes slip front pieces and back piece on to same circular needle, and work body downwards back and forth on circular needle. Then fasten the shoulder straps to back piece. RIGHT FRONT PIECE: Cast on 7-7-9-9-11-11 stitches on circular needle size 3 MM = US 2.5 with DROPS Cotton Light and work in GARTER STITCH - read explanation above. When shoulder strap measures 7-7-7-7-7-8 cm = 2¾"-2¾"-2¾"-2¾"-2¾"-3⅛", insert 1 marker, this marks the shoulder. Then work in garter stitch until shoulder strap measures 11-11-11-11-11-13 cm = 4⅜"-4⅜"-4⅜"-4⅜"-4⅜"-5⅛", finish with a row from wrong side. Switch to circular needle size 4 MM = US 6 and work PATTERN - read explanation above, i.e. work A.1 and increase in each side for armhole and V-neck as shown in diagram (1st row = right side). REMEMBER THE KNITTING GAUGE! When A.1 has been worked, there are 29-29-31-31-33-33 stitches on needle. Work next row as follows from right side: Work A.2A, work A.2B 2 times in total, work A.2C. Continue pattern like this. When 4 rows remain in A.2 (see bracket for correct size) and next row is worked from right side, increase 1 stitch for band at the end of row – read INCREASE TIP-1. Repeat increase on next row from right side (these 2 stitches make the neck edge go over to band). When A.2 has been worked, there are 47-49-53-57-61-65 stitches on row and piece measures approx. 18-19-20-21-22-24 cm = 7"-7½"-8"-8¼"-8¾"-9½" from marker on shoulder strap. Cut the yarn, put piece aside and work the back piece as explained under. BACK PIECE: Cast on 52-54-60-64-70-74 stitches on circular needle size 3 MM = US 2.5 and work 3 ridges. Switch to circular needle size 4 MM = US 6, and work as follows: ROW 1 (= right side): 3 stitches in garter stitch, increase 1 stitch for armhole – read INCREASE TIP-2, knit until 3 stitches remain, increase 1 stitch for armhole, work 3 stitches in garter stitch. ROW 2 (= wrong side): 3 stitches in garter stitch, purl (purl the yarn overs to make holes) until 3 stitches remain, work 3 stitches in garter stitch. Repeat 1st and 2nd row until 16-17-18-20-21-23 increases have been done in total in each side = 84-88-96-104-112-120 stitches, and last row is worked from wrong side. Cut the yarn, put piece aside and work the left front piece as explained under. LEFT FRONT PIECE: Cast on 7-7-9-9-11-11 stitches on circular needle size 3 MM = US 2.5, and work in garter stitch. When shoulder strap measures 7-7-7-7-7-8 cm = 2¾"-2¾"-2¾"-2¾"-2¾"-3⅛", insert 1 marker, this marks the shoulder. Then work in garter stitch until shoulder strap measures 11-11-11-11-11-13 cm = 4⅜"-4⅜"-4⅜"-4⅜"-4⅜"-5⅛", finish with a row from wrong side. Switch to circular needle size 4 MM = US 6 and work PATTERN - read explanation above, i.e. work A.1 and increase in each side for V-neck and armholes as shown in diagram (1st row = right side). When A.1 has been worked, there are 29-29-31-31-33-33 stitches on needle. Work next row as follows from right side: Work A.2A, work A.2B 2 times in total, work A.2C. Continue pattern like this. When 4 rows remain in A.2 and next row is worked from right side, increase 1 stitch for band at the beginning of row – read INCREASE TIP-1. Repeat increase on next row from right side (these 2 stitches make the neck edge go over to a band). When A.2 has been worked, there are 47-49-53-57-61-65 stitches on row and piece measures approx. 18-19-20-21-22-24 cm = 7"-7½"-8"-8¼"-8¾"-9½" from marker on shoulder strap. Do not cut the yarn. Now put parts together for body as explained below. BODY: Begin from right side and work part in the following order: Left front piece, back piece, right front piece: ROW 1 (= right side): Work 5 stitches in garter stitch (= band), continue pattern as shown in A.2B until 3 stitches remain on left front piece, work 3 stitches in garter stitch, cast on 6-8-8-10-14-18 new stitches on row (= in the side), work 3 stitches in garter stitch, knit 78-82-90-98-106-114, 3 stitches in garter stitch from back piece, cast on 6-8-8-10-14-18 new stitches on row (= in the side), work 3 stitches in garter stitch, continue pattern as shown in A.2B until 5 stitches remain on right front piece, work 5 stitches in garter stitch (= band) = 190-202-218-238-262-286 stitches. Insert 1 marker thread in each side on body, in the middle of the 6-8-8-10-14-18 stitches that were cast on in each side. Move the marker threads upwards when working - marker threads should be used for decrease and increase in the sides. ROW 2 (= wrong side): Work 5 stitches in garter stitch, continue A.2 until 6-7-7-8-10-12 stitches remain before first marker thread, work 12-14-14-16-20-24 stitches in garter stitch (marker thread is in the middle of these stitches), purl 78-82-90-98-106-114, work 12-14-14-16-20-24 stitches in garter stitch (marker thread is in the middle of these stitches), continue A.2 until 5 stitches remain, work 5 stitches in garter stitch. ROW 3 (= right side): Work 5 stitches in garter stitch, continue A.2 until 6-7-7-8-10-12 stitches remain before first marker thread, work 12-14-14-16-20-24 stitches in garter stitch, knit 78-82-90-98-106-114, 12-14-14-16-20-24 stitches in garter stitch, continue A.2 until 5 stitches remain, work 5 stitches in garter stitch - remember BUTTONHOLES – read explanation above. ROW 4 (= wrong side): Work 5 stitches in garter stitch, continue A.2 until 6-7-7-8-10-12 stitches remain before first marker thread, work 12-14-14-16-20-24 stitches in garter stitch (marker thread is in the middle of these stitches), purl 78-82-90-98-106-114, 12-14-14-16-20-24 stitches in garter stitch (marker thread is in the middle of these stitches), continue A.2 until 5 stitches remain, work 5 stitches in garter stitch. Then work back and forth with 5 band stitches in garter stitch in each side towards mid front, A.2 on front pieces and stockinette stitch on back piece. Work A.2 as far out towards the marker thread as possible in each side - work the stitches that do not fit a whole repetition towards the marker thread in stockinette stitch. When piece measures 6-6-7-7-8-8 cm = 2⅜"-2⅜"-2¾"-2¾"-3⅛"-3⅛" from where the parts were put together, decrease 1 stitch on each side of both marker threads - read DECREASE TIP (= 4 stitches decreased). Repeat decrease when piece measures 13-13-14-14-15-15 cm = 5⅛"-5⅛"-5½"-5½"-6"-6" from where parts were put together = 182-194-210-230-254-278 stitches. When piece measures 19-19-20-21-22-22 cm = 7½"-7½"-8"-8¼"-8¾"-8¾" from where the parts were put together, increase 1 stitch on each side of both marker threads - read INCREASE TIP-3 (= 4 stitches increased) = 186-198-214-234-258-282 stitches. Work until piece measures 24-25-26-26-27-27 cm = 9½"-9¾"-10¼"-10¼"-10⅝"-10⅝" from where parts were put together – adjust to work a few row in stockinette stitch after a row with lace pattern on front pieces. On next row (= right side) begin rib while at the same time increasing 17-19-19-21-23-27 stitches evenly on row (do not increase over bands) – read INCREASE TIP-4 = 203-217-233-255-281-309 stitches, work as follows: Switch to circular needle size 3 MM = US 2.5, work band as before, work rib (= knit 1/purl 1 - remember increase) until 6 stitches remain, knit 1 stitch and band as before. When rib measures 2-2-2-3-3-3 cm =¾"-¾"-¾"-1⅛"-1⅛"-1⅛" bind off. Piece measures approx. 44-46-48-50-52-54 cm = 17¼"-18"-19"-19¾"-20½"-21¼" from marker on shoulder strap. ASSEMBLY: Sew shoulder straps to back piece - begin seam at the edge in each side and sew stitch against stitch. Sew the buttons on to the left band. |
||||||||||||||||
Diagram explanations |
||||||||||||||||
|
||||||||||||||||

|
||||||||||||||||

|
||||||||||||||||

|
||||||||||||||||

|
||||||||||||||||
|
Have you made this or any other of our designs? Tag your pictures in social media with #dropsdesign so we can see them! Do you need help with this pattern?You'll find tutorial videos, a Comments/Questions area and more by visiting the pattern on garnstudio.com. © 1982-2024 DROPS Design A/S. We reserve all rights. This document, including all its sub-sections, has copyrights. Read more about what you can do with our patterns at the bottom of each pattern on our site. |
||||||||||||||||







Comments / Questions (15)
"BAKSTYCKE: Lägg upp 52-54-60-64-70-74 maskor på rundsticka 3 och sticka 3 rätstickning. Byt till rundsticka 4, och sticka så här:" 3 vad rätstickning? Varv? Cm? Maskor?
21.10.2024 - 15:44DROPS Design answered:
Hej. Tack för info, det ska vara 6 varv rätstickning (detta är nu rättat i texten). Mvh DROPS Design
22.10.2024 - 10:12I have been following knitting patterns for nearly 60 years but after I finished A1 I gave up. I tried multi times but it has defeated me. I wanted to make it for my granddaughter. 😔
10.10.2024 - 18:49DROPS Design answered:
Dear Jen, when A.1 is done, you have 29-31 or 33 sts on needle (see size), then work these stitches as follows (seen from RS): A.2A (=7, 8 or 9 sts), repeat the 8 sts A.2B a total of 2 times (16 sts) and finish with A.2C (= 6, 7 or 8 sts) so that in the first size you get: 7+16+6= 29 sts, in the next 2 sizes: 8+16+7=31 sts and last 2 sizes: 9+16+8 =33 sts , now you continue increasing on each side as before and as shown in A.2A and A.2C and continue lace pattern inbetween with A.2B. Happy knitting!
11.10.2024 - 09:46I don't understand how to continue with the A2 pattern once you've attached the sides. I tried just repeating A2B but it doesn't look right.
28.07.2024 - 19:21DROPS Design answered:
Dear Karina, you worked A.2b with A.2a and C before in the front pieces, and the other 2 charts are for increases that you won't be working here. So you simply continue with A.2b. When you continue, continue with the next row after the last row of A.2b worked in the front pieces (for example, if you ended on the 2nd row, continue with the 3rd one, don't restart the pattern). It's important to align A.2b over the front pieces, so that the position of the pattern matches the position before; you can work incomplete repeats of the pattern at the beginning and end of the row to adjust this. Happy knitting!
28.07.2024 - 23:38Cześć, Czy ktoś odpowie na mój wcześniejszy komentarz?
23.06.2024 - 10:39DROPS Design answered:
Witaj Krystianie, wysłałeś do nas zapytanie oznaczając je jako 'komentarz', a nie 'pytanie', dlatego było niewidoczne i nie otrzymałeś odpowiedzi. Za chwilę odniosę się do Twojego pytania :)
24.06.2024 - 08:25Bin in der 2. Reihe vom Rumpfteil. Nun soll ich die beiden Seitenteile in A.2 stricken. Es gibt jedoch kein A.2. Wie soll ich ab der 2. Reihe weiterstricken?
22.06.2024 - 11:09DROPS Design answered:
Lieber Marten, bei der 1. Reihe haben Sie A.2B gestrickt, bei der 2. Reihe stricken Sie die 2.Reihe A.2B (Rückreihe = alle Maschen werden links gestrickt). Viel Spaß beim Stricken!
24.06.2024 - 08:07Wszystko szło gładko do etapu “Tył i przód”. Rząd pierwszy zrobiłem, mam problemy z rzędem drugim: dalej przerabiać schemat A.2”. Dobrze rozumiem, że przerabiam cały A.2? Czyli najpierw A.2A + 2x A.2B + A.2C tak długo aż zostanie 8 oczek do markera? \\r\\n- W rzędzie drugim jestem na lewej stronie robótki czyli 2A zaczynam pierwszego rzędu na schemacie 2A czy od drugiego. Czy w kolejnych rzędach “tył i przód” robię kolejne rzędy schematów 2A?
21.06.2024 - 00:06DROPS Design answered:
Witaj Krystianie, od momentu połączenia robótki przerabiasz już tylko schemat A.2B i ścieg francuski (na obszycia przodów i na wys. podkrojów rękawów). Poprawimy to w tekście, gdyż opis może być mylący. Serdecznie pozdrawiamy!
24.06.2024 - 08:39Wie wird beim Rückenteil die 2. Reihe gestrickt? Die erste und zweite Reihe wiederholt sich mit den Zunahmen bis gewünschte Länge erreicht ist. Ich dachte gelesen zu haben, das das Rückenteil glatt rechts gestrickt wird oder soll es auch kraus gestrickt werden?
20.06.2024 - 08:59DROPS Design answered:
Liebe Mandy, beim Rückenteil stricken Sie glattrechts bis alle Zunahmen fertig sind, dh die 1. Reihe + die 2. Reihe so wiederholen (bei der 1. Reihe strickt man rechts = Hinreihe und bei der 2. Reihe strickt man links = Rückreihe, bei den 2 Reihen sind es 3 Maschen krausrechts beidseitig. Viel Spaß beim Stricken!
20.06.2024 - 12:55Gdy zostaje do wykonania 4 rzędy schematu A.2 (patrz ramka odpowiednia dla rozmiaru) - nie widzę schematu A.2 :(
14.05.2024 - 15:50DROPS Design answered:
Witaj Agnieszko, chodzi o schematy A.2a i A.2c. Pozdrawiamy!
14.05.2024 - 16:28Bei Zunahmetipp 1: Die Zunahme soll passieren, wenn noch 3 Maschen auf der Nadel sind, aber die „3. Masche“ ist ja sozusagen der Umschlag. Also wird die Zunahme vor oder nach dem Umschlag gearbeitet?
07.05.2024 - 12:03DROPS Design answered:
Liebe Michelle, dann stricken Sie den Umschlag wie im Diagram gezeigt, dh stricken Sie die 3. Masche vor Ende der Reihe zwei Mal, dann Umschlag, und 2 Maschen rechts / 2 M rechts, 1 Umschlag, 2 Mal die 3. Masche bei dem anderen Vorderteil. Viel Spaß beim Stricken!
07.05.2024 - 13:32Beim rechten Vorderteil steht: "Weiter glatt rechts stricken, bis der Schulterträger eine Länge von (...). Dem Bild und dem linken Vorderteil zu entnehmen, sollte doch weiter in Krausrippen gestrickt werden oder?
22.04.2024 - 12:08DROPS Design answered:
Liebe Michelle, ja man soll weiter in krausrippen stricken, danke für den Hinweis, eine Korrektur erfolgt. Viel Spaß beim Stricken!
22.04.2024 - 13:09