Gentle Wind Cardigan |
|
 |
 |
Knitted jacket in DROPS Daisy and DROPS Kid-Silk. The piece is worked top down with stockinette stitch, European/diagonal shoulders, V-neck and I-cord. Sizes S - XXXL.
DROPS 248-4 |
|
|
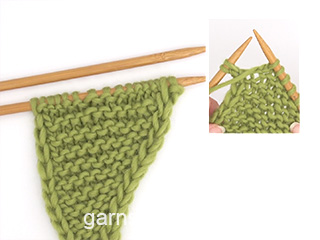
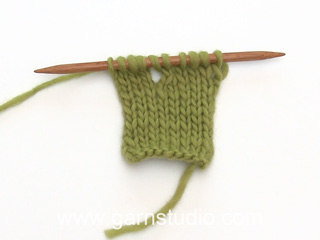
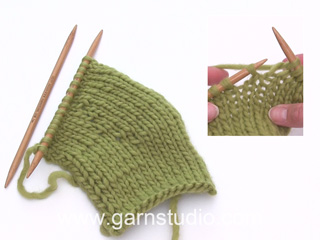
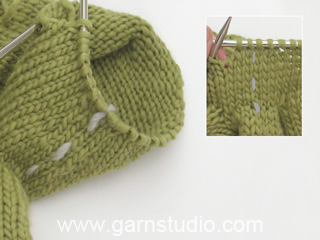
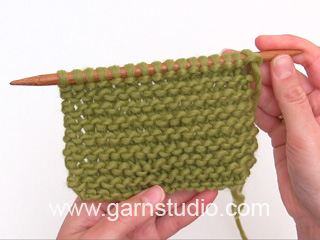
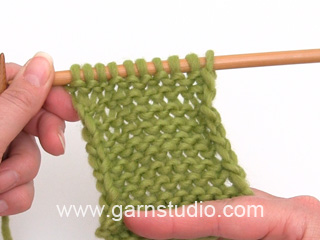
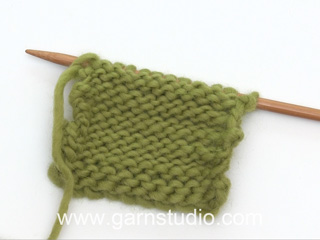
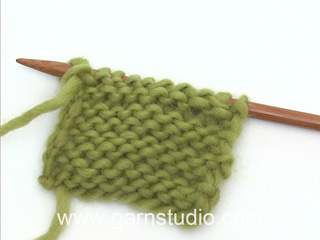
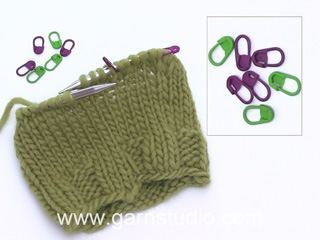
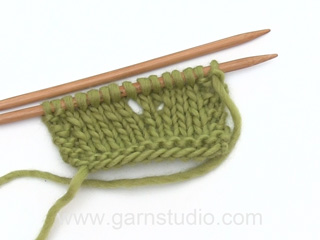
------------------------------------------------------- EXPLANATIONS FOR THE PATTERN: ------------------------------------------------------- GARTER STITCH (worked back and forth): Knit all rows. 1 ridge = knit 2 rows. INCREASE TIP-1: INCREASE 1 STITCH TOWARDS THE LEFT - from right side: Use the left needle to pick up the strand between 2 stitches from the previous row, pick up strand from the front and knit the back loop. INCREASE 1 STITCH TOWARDS THE RIGHT- from right side: Use the left needle to pick up the strand between 2 stitches from the previous row, pick up strand from behind, knit the front loop. INCREASE TIP-2: INCREASE 1 STITCH TOWARDS THE LEFT - from wrong side: Use the left needle to pick up the strand between 2 stitches from the previous row, pick up strand from behind and purl the front loop. INCREASE 1 STITCH TOWARDS THE RIGHT- from wrong side: Use the left needle to pick up the strand between 2 stitches from the previous row, pick up strand from the front purl the back loop. LEFT BAND WITH I-CORD: RIGHT SIDE: Slip 1 stitch purl-wise with strand in front, knit 1, work 5 garter stitches. WRONG SIDE: Work 5 garter stitches, slip 1 stitch purl-wise with strand in front, knit 1. RIGHT BAND WITH I-CORD: RIGHT SIDE: Work 5 garter stitches, slip 1 stitch purl-wise with strand in front, knit 1. WRONG SIDE: Slip 1 stitch purl-wise with strand in front, knit 1, work 5 garter stitches. BUTTONHOLES: Work buttonholes on the right band (when the garment is worn). Work from the right side when there are 5 stitches left on the row as follows: Make 1 yarn over, knit 2 together, work to end of row as before. On the next row (wrong side), knit the yarn over to leave a hole. The first buttonhole is worked 1 cm = ⅜" after the last increase for the V-neck. The other 3 buttonholes are then worked with approx. 9½-9½-10-10-10-10½ cm = 3⅝"-3⅝"-4"-4"-4"-4⅛" between each one. The bottom buttonhole is worked in the transition between the stockinette stitch and rib. KNITTING TIP: When working the short rows, there will be a small hole when the piece is turned – the hole can be closed by tightening the strand or using the German Short rows technique as follows: Slip the first stitch as if to purl, place the strand over the right needle and tighten the strand tightly at the back (this should result in two loops on the needle). These loops are knitted together on the next row. DECREASE TIP (for sleeves): Decrease 1 stitch on each side of the marker-thread as follows: Work until there are 3 stitches left before the marker-thread, knit 2 together, knit 2 (marker-thread sits between these 2 stitches), slip 1 stitch knit-wise, knit 1 and pass the slipped stitch over the knitted stitch. ------------------------------------------------------- START THE PIECE HERE: ------------------------------------------------------- JACKET – SHORT OVERVIEW OF THE PIECE: The pattern uses needles of different lengths; start with the length which fits the number of stitches and change when necessary. Stitches are cast on for the back of the neck, then the back piece is worked back and forth, top down, increasing on each side for the shoulders until the correct number of stitches is reached. The back piece now has slightly diagonal shoulders. Continue working as far as the armholes. The back piece then waits while the front pieces are worked. The front pieces are worked separately, first the band (which is later sewn to the back neckline). Stitches are then knitted up along the shoulder on the back piece and the front piece is worked down as far as the armholes at the same time as stitches are increased for the neckline. The front and back pieces are joined and the body continued back and forth with circular needle. Stitches are knitted up around each armhole. The sleeve cap is worked back and forth with short rows, then the sleeve is continued in the round. The bands from the front pieces are sewn together (mid-back), then sewn to the neckline. BACK PIECE: Cast on 30-32-34-36-36-38 stitches with circular needle size 5 MM = US 8 and 1 strand of each quality (2 strands). ROW 1 (= wrong side): Purl. ROW 2 (= right side): Read INCREASE TIP-1, knit 3, increase 1 stitch towards the left, knit until there are 3 stitches left, increase 1 towards the right, knit 3. ROW 3 (= wrong side): Read INCREASE TIP-2, purl 3, increase 1 stitch towards the left, purl until there are 3 stitches left, increase 1 stitch towards the right, purl 3. Work ROWS 2 and 3 a total of 13-14-14-15-16-18 times (= 26-28-28-30-32-36 worked rows), after the last increase, there are 82-88-90-96-100-110 stitches. Insert 1 marker outermost on one side. The piece is now measured from here! REMEMBER THE KNITTING GAUGE! Continue with stockinette stitch until the piece measures 13-14-14-14-13-14 cm = 5⅛"-5½"-5½"-5½"-5⅛"-5½", from the marker measured along the armhole. Now increase for the armholes. INCREASE FOR ARMHOLES: ROW 1 (= right side): Remember INCREASE TIP-1, knit 3, increase 1 stitch towards the left, knit until there are 3 stitches left, increase 1 stitch towards the right, knit 3. ROW 2 (= wrong side): Purl. Work ROWS 1 and 2 a total of 1-1-2-3-4-4 times (= 2-2-4-6-8-8 worked rows) = 84-90-94-102-108-118 stitches. Continue working until the piece measures 14-15-16-17-17-18 cm = 5½"-6"-6¼"-6¾"-6¾"-7", from the marker measured along the armhole, finishing with a row from the right side. Cut the strand, place the stitches on a stitch holder and work the left band and front piece along the left back shoulder as follows. LEFT BAND: Cast on 7 stitches with circular needle size 5 MM = US 8 and 1 strand of each quality (= 2 strands). Work LEFT BAND WITH I-CORD – read description above, until the band measures 8-9-9-10-10-10 cm = 3⅛"-3½"-3½"-4"-4"-4", finishing with a row from the wrong side. Now work the left front piece as follows: LEFT FRONT PIECE: Find the left back shoulder as follows: Lay the back piece flat, right side up, with the stitches on the stitch holder towards you. The left side of the back piece is the left shoulder. Knit up stitches along the left back shoulder, starting from the right side by the neck and working to the shoulder as follows: ROW 1 (= right side): Work the 7 band stitches, then knit up 1 stitch in each row along the left back shoulder, inside the outermost stitch (knit up 26-28-28-30-32-36 stitches) = 33-35-35-37-39-43 stitches. All measurements on the front piece are taken from the knitted-up stitches. ROW 2 (= wrong side): Purl until there are 7 stitches left, work 7 band stitches as before. ROW 3 (= right side): Work 7 band stitches, knit to end of row. ROW 4 (= wrong side): Purl until there are 7 stitches left, work 7 band stitches. Repeat ROWS 3 and 4 until the piece measures 7-7-7-7-8-8 cm = 2¾"-2¾"-2¾"-2¾"-3⅛"-3⅛". OVERVIEW OF THE NEXT SECTION: Now start to increase for the V-neck. You will also increase for the armhole before the increases for the V-neck are finished. Read both next 2 sections before continuing, so you know when to begin increasing for the armhole. INCREASE FOR V-NECK: ROW 1 (= right side): Work 7 band stitches, knit 2, increase 1 stitch towards the left - remember INCREASE TIP-1, knit to end of row. ROW 2 (= wrong side): Purl until there are 7 stitches left, work 7 band stitches. Work ROWS 1 and 2 a total of 10-11-12-13-13-14 times (= 20-22-24-26-26-28 worked rows). Then increase as follows: ROW 1 (= right side): Work 7 band stitches, knit to end of row. ROW 2 (= wrong side): Purl until there are 7 stitches left, work 7 band stitches. ROW 3 (= right side): Work 7 band stitches, knit 2, increase 1 stitch towards the left - remember INCREASE TIP-1, knit to end of row. ROW 4 (= wrong side): Purl until there are 7 stitches left, work 7 band stitches. Work ROWS 1 to 4 a total of 5 times (= 20 worked rows) = 15-16-17-18-18-19 increases for V-neck. Continue with stockinette stitch and the bands. INCREASE FOR ARMHOLE: AT THE SAME TIME, when the piece measures 23-24-24-24-25-26 cm = 9"-9½"-9½"-9½"-9¾"-10¼", increase for the armhole as follows (remember the increases for V-neck are not finished): ROW 1 (= right side): Work 7 band stitches, knit until there are 3 stitches left, increase 1 stitch towards the right - remember INCREASE TIP-1, knit 3. ROW 2 (= wrong side): Purl until there are 7 stitches left, work 7 band stitches. Work ROWS 1 and 2 a total of 1-1-2-3-4-4 times (= 2-2-4-6-8-8 worked rows). When all the increases for V-neck and armhole are finished, there are 49-52-54-58-61-66 stitches. Continue working until the piece measures 24-25-26-27-29-30 cm = 9½"-9¾"-10¼"-10⅝"-11⅜"-11¾", from the knitted-up stitches. Finish after a row from the right side. Cut the strand, place the stitches on a stitch holder and work the right band and front piece along the right back shoulder as follows: RIGHT BAND: Cast on 7 stitches with circular needle size 5 MM = US 8 and 1 strand of each quality (= 2 strands). Work RIGHT BAND WITH I-CORD – read description above, until the band measures 8-9-9-10-10-10 cm = 3⅛"-3½"-3½"-4"-4"-4", finishing with a row from the wrong side. Cut the thread and put the stitches on a thread or another needle, it should be worked from the band stitches when knitting up stitches for the right front piece. RIGHT FRONT PIECE: Knit up stitches along the right back shoulder, starting from the right side by the shoulder and working towards the neck: Knit up 1 stitch in each row, inside the outermost stitch (knit up 26-28-28-30-32-36 stitches along the right back shoulder), then work the 7 stitches from the right band as before = 33-35-35-37-39-43 stitches. All measurements on the front piece are taken from the knitted-up stitches. ROW 1 (= wrong side): Work 7 band stitches as before, purl to end of row. ROW 2 (= right side): Knit until there are 7 stitches left, work 7 band stitches. Repeat ROWS 1 and 2 until the piece measures 7-7-7-7-8-8 cm = 2¾"-2¾"-2¾"-2¾"-3⅛"-3⅛". OVERVIEW OF THE NEXT SECTION: Now start to increase for the V-neck. You will also increase for the armhole before the increases for the V-neck are finished. Read both next 2 sections before continuing, so you know when to begin increasing for the armhole. INCREASE FOR V-NECK: ROW 1 (= right side): Knit until there are 9 stitches left, increase 1 stitch towards the right - remember INCREASE TIP-1, knit 2, work 7 band stitches. ROW 2 (= wrong side): Work 7 band stitches, purl to end of row. Work ROWS 1 and 2 a total of 10-11-12-13-13-14 times (= 20-22-24-26-26-28 worked rows). Now increase as follows: ROW 1 (= right side): Knit until there are 7 stitches left, work 7 band stitches. ROW 2 (= wrong side): Work 7 band stitches, purl to end of row. ROW 3 (= right side): Knit until there are 9 stitches left, increase 1 stitch towards the right, knit 2, work 7 band stitches. ROW 4 (= wrong side): Work 7 band stitches, purl to end of row. Work ROWS 1 to 4 a total of 5 times (= 20 worked rows) = 15-16-17-18-18-19 increases for V-neck. 1 cm = ⅜" after the last increase, start working the BUTTONHOLES – read description above. Continue with stockinette stitch and the bands. INCREASE FOR ARMHOLE: AT THE SAME TIME, when the piece measures 23-24-24-24-25-26 cm = 9"-9½"-9½"-9½"-9¾"-10¼", increase for the armhole as follows (remember the increases for V-neck are not finished): ROW 1 (= right side): Knit 3, increase 1 stitch towards the left – remember INCREASE TIP-1, knit until there are 7 stitches left, work 7 band stitches. ROW 2 (= wrong side): Work 7 band stitches, purl to end of row. Work ROWS 1 and 2 a total of 1-1-2-3-4-4 times (= 2-2-4-6-8-8 worked rows). When all the increases for V-neck and armhole are finished, there are 49-52-54-58-61-66 stitches. Continue working until the piece measures 24-25-26-27-29-30 cm = 9½"-9¾"-10¼"-10⅝"-11⅜"-11¾", from the knitted-up stitches. Finish after a row from the right side. Now join all the pieces for the body as follows: BODY: The piece is now measured from here! Work from the wrong side over the 49-52-54-58-61-66 stitches on the right front piece, cast on 4-6-8-8-12-12 stitches (in side under sleeve), work from the wrong side over the 84-90-94-102-108-118 stitches on the back piece, cast on 4-6-8-8-12-12 stitches (in side under sleeve), work from the wrong side over the 49-52-54-58-61-66 stitches from the left front piece = 190-206-218-234-254-274 stitches. Continue back and forth with stockinette stitch and the bands on each side until the piece measures 28-29-30-31-31-32 cm = 11"-11⅜"-11¾"-12¼"-12¼"-12½" from the armhole. On the next row from the right side, begin the rib at the same time as you increase 22-22-22-26-26-26 stitches evenly spaced (do not increase over the bands) = 212-228-240-260-280-300 stitches. Work as follows: Change to circular needle size 4 MM = US 6. Work the band as before, work rib (knit 2, purl 2 – remember the increases) until there are 9 stitches left, knit 2 and work the band stitches as before. When the rib measures 6 cm = 2⅜", bind off. The front piece measures 58-60-62-64-66-68 cm = 22¾"-23⅝"-24⅜"-25¼"-26"-26¾" measured from the knitted-up stitches, the jacket measures 56-58-60-62-64-66 cm = 22"-22¾"-23⅝"-24⅜"-25¼"-26". The front piece is approx. 2 cm = ¾" longer, as the knitted-up stitches are not on the top of the shoulder but slightly down the back piece. SLEEVES: Lay the piece flat and insert 1 marker at the top of the armhole (NOTE! This is not where stitches were knitted up but approx. 5-6 cm = 2"-2⅜" down the front piece = mid-top of shoulder). Using circular needle size 5 MM = US 8 and 1 strand of each quality (= 2 strands), start in the middle of the cast-on stitches under the sleeve and knit up 68-74-80-82-90-94 stitches around the armhole – make sure you have equal numbers of stitches on each side of the marker. Work stockinette stitch in short rows, back and forth for the sleeve cap (to give the sleeve a better fit). Start mid-under the sleeve: ROW 1 (right side): Work 9-10-10-10-11-11 stitches past the marker, turn – read KNITTING TIP. ROW 2 (wrong side): Work 9-10-10-10-11-11 stitches past the marker, turn. ROW 3 (right side): Work 10-11-8-6-5-5 stitches past the previous turn, turn. ROW 4 (wrong side): Work to 10-11-8-6-5-5 stitches past the previous turn, turn. Repeat rows 3 and 4 until you have turned 3-3-4-5-6-6 times on each side. AFTER THE LAST TURN: After row 4 has been worked for the last time, turn and knit to the beginning of the round (mid-under sleeve). Insert 1 marker-thread here, which is used when decreasing under the sleeve. Allow the thread to follow your work onwards. Work stockinette stitch in the round. When the sleeve measures 4-4-5-6-6-6 cm = 1½"-1½"-2"-2⅜"-2⅜"-2⅜", from the knitted-up stitches (all lengths measured mid-top of sleeve), decrease 2 stitches under the sleeve – read DECREASE TIP. Decrease like this every 2nd round 2-2-3-3-4-4 times, then every 4½-3½-2½-2½-2-1½ cm = 1⅝"-1¼"-1"-1"-¾"-½", 6-8-9-9-11-12 times (a total of 8-10-12-12-15-16 times) = 52-54-56-58-60-62 stitches. Work until the sleeve measures 38-37-38-37-37-35 cm = 15"-14½"-15"-14½"-14½"-13¾". Change to double pointed needles size 4 MM = US 6. Work rib (knit 2, purl 2) at the same time as you increase 16-18-16-18-20-18 stitches evenly on the first round = 68-72-72-76-80-80 stitches. When the rib measures 10-10-10-10-10-10 cm = 4"-4"-4"-4"-4"-4", bind off. The sleeve measures approx. 48-47-48-47-47-45 cm = 19"-18½"-19"-18½"-18½"-17¾". ASSEMBLY: Sew the buttons onto the left band. Sew together the bands from the front pieces (mid-back), then sewn them to the neckline. |
|

|
|
|
Have you made this or any other of our designs? Tag your pictures in social media with #dropsdesign so we can see them! Do you need help with this pattern?You'll find tutorial videos, a Comments/Questions area and more by visiting the pattern on garnstudio.com. © 1982-2024 DROPS Design A/S. We reserve all rights. This document, including all its sub-sections, has copyrights. Read more about what you can do with our patterns at the bottom of each pattern on our site. |
|













Comments / Questions (49)
Bitte meine Frage wegen der VT-Zunahmen löschen, ich habe nicht richtig gelesen. Entschuldigung, tut mir leid!
18.10.2024 - 09:54Bitte meine Frage wegen der VT-Zunahmen löschen, ich habe nicht richtig gelesen. Entschuldigung, tut mir leid!
18.10.2024 - 09:53Hallo, ich habe folgende Frage: Bei der Zunahme für das linke Vorderteil mache ich die Zunahmemasche nach der 3. Rechtsmasche, beim rechten Vorderteil nach 2 Rechtsmaschen. Ist das richtig? Danke! Barbara Venohr
18.10.2024 - 09:44DROPS Design answered:
Liebe Frau Venohr, die Zunahmen für den V-Ausschnitt sind nach den ersten 9 Maschen (7 Blenden-Maschen + 2 M glattrechts) am Anfang einer Hin-Reihe beim linken Vorderteil und vor den letzten 9 Maschen (2 M glattrechts + 7 Blenden-Maschen) am Ende einer Hin-Reihe beim rechten Vorderteil, so sind sie beide gleich but spiegelverkehr. Viel Spaß beim Stricken!
18.10.2024 - 15:44Ich meinte natürlich ' umstechen oder umnähen '... oder vielleicht umhäkeln???
03.10.2024 - 10:26Ich habe diese Jacke gestrickt. Leider weiten sich die Knopflöcher bei so weichem Garn sehr schnell und die Knöpfe rutschen durch. Wie kann man also Knopflöcher umstellen oder vielleicht umhäkeln, damit sie nicht so ausleiern? Gibt es Tipps oder eine Lektion dazu ?
03.10.2024 - 10:24DROPS Design answered:
Liebe Susi, vielleicht können Sie die Innenseite von den Knopflöchern mit Knopflochstich stichen? (siehe Video); fragen Sie auch mal Ihr DROPS Händler auch per Telefon oder per E-Mail, vielleicht haben sie dann einen anderen Vorschlag. Viel Spaß beim STricken!
03.10.2024 - 16:13Jeg er usikker på om jeg forstår opskriften ift forkant og forstykke. Hvordan fungere det når man strikker, vil der ikke komme et stort hul, når man skal strikke dem sammen? For den video der er til opskriften om forstykket viser ikke noget om forkanten
10.09.2024 - 17:50DROPS Design answered:
Hej Thea, det vil se ud som i videoen med kanterne: Halskanter sys til halsen bagpå
13.09.2024 - 14:12Vad är det för svar? Jag vill vilket av era garner jag kan använda i stället för det som står i beskrivningen. Obs att jag inte tål ull, så vilket akrylgarn kan jag t ex använda?
06.09.2024 - 10:16DROPS Design answered:
Hej Maj, da vi ikke har akrylgarn i vores sortiment, sendte vi dig hele oversigten over vores sortiment. Vi håber at du finder noget du kan bruge. God dag!
06.09.2024 - 11:56Ich habe übrigens die Variante 10+8+8+8+6=40 gestrickt.
03.09.2024 - 17:09Ich stricke den Cardigan in Größe L. Hinweis mit der Bitte um Überprüfung und Korrektur: Bei den verkürzten Reihen der Armkugel heißt es (10+8+8+8+8) × 2 Was 42 ergibt und nicht 40 für den halben Arm. In der letzten verkürzten Reihe verbleiben also nur 6 Maschen je Seite. ;-) Oder muß es bei den Zunahmen korrekt 5x 8 = 40 heißen?
03.09.2024 - 17:07Jag tål inte ullgarn och skulle vilja veta vilket annat garn jag kan använda. Gärna polyester. Inte bomull.
02.09.2024 - 11:31DROPS Design answered:
Hej Maj, her ser du hele vores sortiment : DROPS sortiment
06.09.2024 - 09:18