
Popular categories
Looking for a yarn?


|
|
DROPS 57-13 |
|
|
|
|
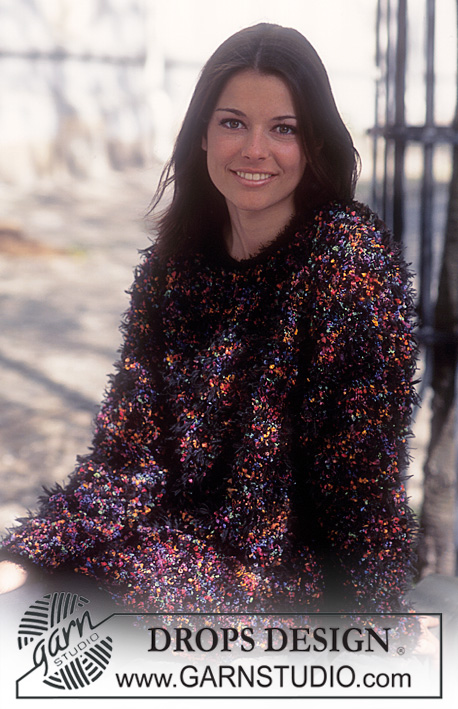
DROPS Fur cape in Pelliza
DROPS 57-13 |
|
|
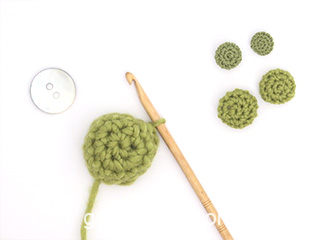
Gauge: 17 sts x 22 rows on larger needles in stockinette stitch = 10 x 10 cm [4"x4"]. Garter Stitch, when knitting flat: Knit all sts, all rows. Garter Stitch, when knitting in the round: *Rnd 1, knit. Rnd 2, purl.* Repeat from * - *. Border: Knit 5 cm [2"] in stockinette stitch, purl 1 row for folding edge, knit 5 cm [2"] in stockinette stitch. Short model: If a short model is desired knit as follows: Body: dec the measurements at armhole, neck and binding off by 15 (15-15) cm [5-⅞"]. Finished length = 80 (85-90) cm [31.5" (33.5" - 35.5")]. Reduce the yarn amount by 100 (150-150) g. Note! The garment will stretch about 10% in length with use; take this into account relative to the length you desire when measuring the work. If a short model is desired, see instructions above. Right Front: Cast on 57 (63-70) sts on smaller needles with 2 strands of brown and knit Border (see instructions above). Change to larger needles and stockinette stitch. Cast on 18 sts at the center front for placket and placket lining. 75 (81-88) sts. When the work measures 71 (75-80) cm [28" (29.5" - 31.5")], bind off for armhole at the side every other row: 4 sts 1 (1-1) time, 3 sts 1 (2-3) time(s), 2 sts 2 (3-4) times, 1 st 3 (2-2) times. 61 (63-65) sts. When the work measures 89 (94-99) cm [35" (37" - 39")], bind off at the neck edge every other row: 22 (23-23) sts 1 time, 3 sts 1 time, 2 sts 1 time, 1 st 1 time. Bind off when the work measures 95 (100-105) cm [35.5" (39-⅜" - 41-⅜")]. Left front: Cast on and knit like the right front, reversing all shaping. Back: There is a split at the center back; for this reason the back is worked in two pieces for the first 25 (26-28) cm [9-⅞" (10.25" - 11")]. Cast on 57 (63-70) sts on smaller circular needles with 2 strands of brown and knit border: 5 cm [2"] in stockinette stitch. Purl 1 row. Then cast on 8 sts at the center back for "split" placket. These sts are kni in garter stitch. Knit 5 cm [2"] in stockinette stitch for border, keeping the placket sts in garter stitch. Change to larger circular needles and knit in stockinette stitch, keeping the placket stitches in garter stitch. When the work measures 25 (26-28) cm [9-⅞" (10.25" - 11")], bind off the 8 placket sts. 57 (63-70) sts. Put the work aside and knit a matching part, reversing the placket shaping. Put both back pieces on the same needle with the placket sts at the center back. 114 (126-140) sts. Join the pieces and knit in stockinette stitch. When the work measures 71 (75-80) cm [28" (29.5" - 31.5")], bind off for armholes every other row: 4 sts 1 (1-1) time, 3 sts 1 (2-3) time(s), 2 sts 2 (3-4) times, 1 st 3 (2-2) times. 86 (90-94) sts When the work measures 93 (98-103) cm [36.5" (38-⅝" - 40.5")], bind off the center 16 (18-18) sts for the neck. Then bind off 2 sts at each neck edge on the next row. Bind off when the work measures 95 (100-105) cm [35.5" (39-⅜" - 41-⅜")]. Sleeves: (Knit flat) Cast on 52 (54-54) sts on smaller needles with 2-strands of brown and knit Border. Change to larger needles and knit stockinette stitch. At the same time, inc 1 st at each side 15 (16-16) times: Size S/M: every 4th row. Sizes M/L + XL: alternately every 3rd and every 4th row. = 82 (86-86) sts. When the work measures 38 (35-32) cm [15" (13.75" - 12-⅝")], bind off for sleeve caps on each side every other row: 2 sts 4 times, 1 st 7 (10-13) times, 4 sts 2 times. Bind off. The work measures approximately 50 (50-50) cm [19.75"]. Assembly: Sew shoulder seams. Lay the right placket in the back over the left and sew. Fold the outermost 12 sts of the placket on the front over against the wrong side and sew. Sew on the fur hooks. Sew on a decorative button at the top edge of the right placket. Fold the border at the bottom and sew. Optional crocheted button: You can crochet a decorative button as follows: Chain 4, join into a ring with a slip stitch. 1st row: 5 single crochet (sc) in the ring. 2nd row: work 2 sc into each sc from the previous row 3rd row: * 2 sc into the next st, 1 sc *, repeat * - * Increase in this fashion on every row, but add 1 sc in between each time 2 sc are worked into 1 sc. When the decorative covering is big enough for the button, work 2 rows without increasing, then 3 rows on which sts are decreased corresponding to the increased sts. Collar: Pick up approximately 90-100 sts around the neck from the wrong side (including over the placket) on smaller needles and knit 28 cm [11"] in stockinette stitch. Bind off and fold the collar over and sew. Sew on the sleeves. |
|

|
|
|
Have you made this or any other of our designs? Tag your pictures in social media with #dropsdesign so we can see them! Do you need help with this pattern?You'll find tutorial videos, a Comments/Questions area and more by visiting the pattern on garnstudio.com. © 1982-2024 DROPS Design A/S. We reserve all rights. This document, including all its sub-sections, has copyrights. Read more about what you can do with our patterns at the bottom of each pattern on our site. |


With over 40 years in knitting and crochet design, DROPS Design offers one of the most extensive collections of free patterns on the internet - translated to 17 languages. As of today we count 304 catalogs and 11422 patterns - 11417 of which are translated into English (US/in).
We work hard to bring you the best knitting and crochet have to offer, inspiration and advice as well as great quality yarns at incredible prices! Would you like to use our patterns for other than personal use? You can read what you are allowed to do in the Copyright text at the bottom of all our patterns. Happy crafting!
Comments / Questions (5)
Greetings! I'm confused as to whether or not this is a pullover sweater jacket, the assembly directions call for sewing the packets over each other and then sewing on the fur hooks...? Is this a cardigan or pullover? Please advise? And thank you for providing such wonderful patterns and informative instructions on all the patterns!
01.02.2023 - 06:37DROPS Design answered:
Dear Mrs Diacon, this is a jacket but at the beginning of the back piece you worked 2 pieces joined later together, you should sew the 8 sts on the right side of back piece over the 8 sts on the left side of back piece and sew them together. Happy knitting!
01.02.2023 - 08:56Bonjour, Avec quelles laines puis-je remplacer drops pelliza pour avoir le même effet pour 2 fils ? Cordialement Nicole Pelletier
29.11.2020 - 22:24DROPS Design answered:
Bonjour Mme Pelletier, DROPS Pelliza était vraiment spéciale et rien ne peut vraiment la remplacer, vous pouvez regarder du côté de laines de 17 cm de tension, comme par exemple Alpaca Bouclé, n'hésitez pas à faire différents essais, et échantillons pour pouvoir vous décider en toute connaissance de cause. Votre magasin pourra vous conseiller en fonction des textures souhaitées. Bon tricot!
30.11.2020 - 10:54Bonjour Doit on uniquement monter les mailles avec 2 fils et continuer ensuite avec un seul fil OU BIEN tout tricoter avec 2 fils
19.06.2018 - 09:29DROPS Design answered:
Bonjour Mme Espeit, le manteau se tricote entièrement avec 2 fils sur la base de 17 m x 22 rangs = 10 x 10 cm. Bon tricot!
19.06.2018 - 11:13Bonjour Emmerechts, les 18 m de la bordure devant sont à tricoter en jersey et seront repliées ensuite et cousues sur l'envers pour les bordures devant de chaque côté. Bon tricot !
03.04.2009 - 09:37EMMERECHTS wrote:
Bonjour, Devant droit : ... Monter 18 m au milieu devant pour la bordure ... Pouvez-vous m'expliquer, je suis un petit peu perdue et dans quel point faut-il les tricoter? D'avance merci.Bien à vous, Lucienne
02.04.2009 - 15:41