
Popular categories
Looking for a yarn?


|
|||||||||||||||||||
Dancing Damsel |
|||||||||||||||||||
 |
 |
||||||||||||||||||
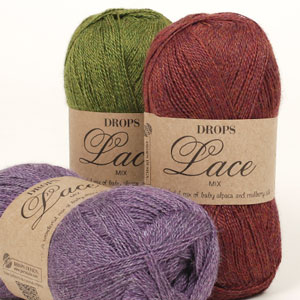
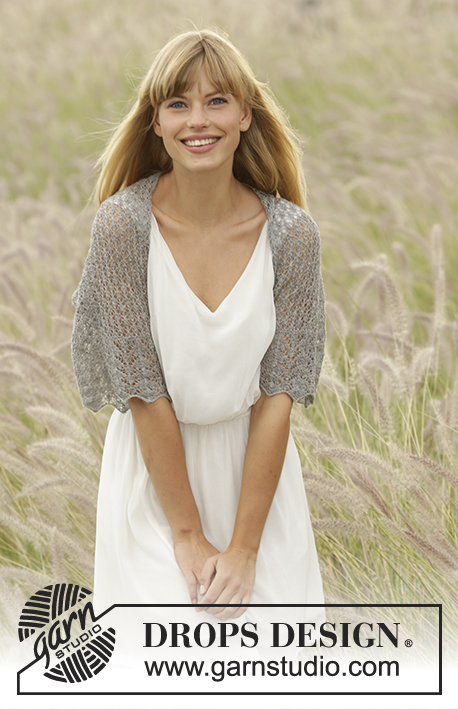
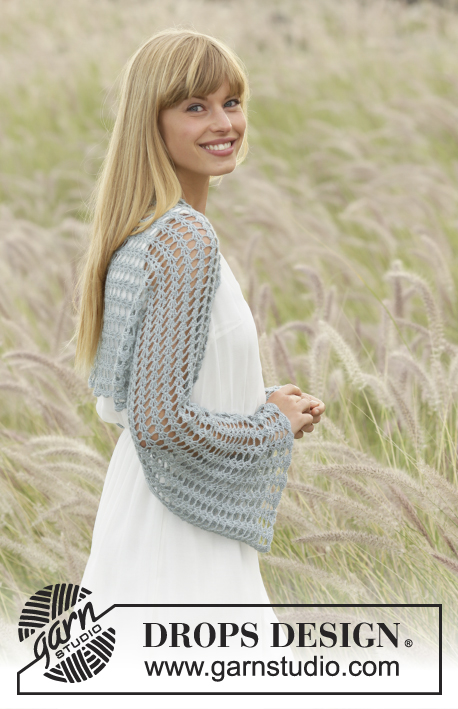
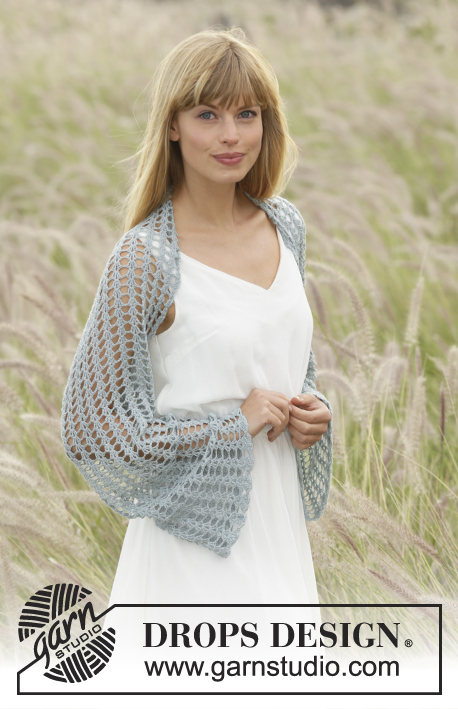
Crochet DROPS shoulder piece with fan pattern in ”Lace”. Size S- XXXL
DROPS Extra 0-1278 |
|||||||||||||||||||
|
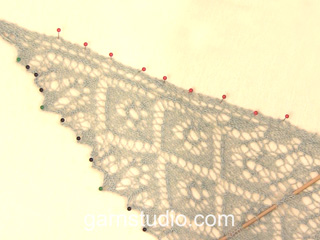
PATTERN: See diagrams A.1 to A.6. ---------------------------------------------------------- SHOULDER PIECE: Worked back and forth in two parts. Beg from mid back by working one half of the shoulder piece, then work from beg of this half to make the other half. FIRST HALF: Work 143-151-159-167-175-183 ch on hook size 4 mm with Lace. Turn piece and work back in ch as follows: Beg by working 1 sl st in the 15th ch from hook. Then work along the ch-row as follows: * 7 ch, skip 7 ch and work 1 sl st in next ch *, repeat from *-* the entire row and finish with 1 sl st in last ch on row = 17-18-19-20-21-22 ch-space in a row. Turn piece and work according to diagram A.1 to A.3, i.e. work as follows: ROW 1: Work 4 ch, work 2 dtr around first ch-space, 1 ch and 2 dtr around same ch-space, * 2 ch and skip to next ch-space, work 2 dtr around ch-space, 1 ch, 2 dtr around same ch-space *, repeat from *-* the entire row. Turn piece. ROW 2: Work 4 ch, work 2 dtr around ch in first dtr-group, 1 ch and 2 dtr around same ch, * 2 ch, 2 dtr-around ch in next dtr-group, 1 ch, 2 dtr around same ch *, repeat from *-* the entire row. REMEMBER THE CROCHET TENSION! Continue to work as 2nd row until piece measures 65-66-67-68-69-70 cm. Then work according to diagram A.4 to A.6, i.e. work as follows: ROW 1: Work 4 ch, 4 dtr around ch in first dtr-group, 1 ch and 4 dtr around same ch (= 1 large dtr-group), * 1 ch, 4 dtr-around ch in next dtr-group, 1 ch, 4 dtr around same ch *, repeat from *-* the entire row. Turn piece. ROW 2: Work 6 ch, 1 dc around ch in first dtr-group, 5 ch, * 1 dc around next ch, 5 ch, 1 dc around ch in next dtr-group, 5 ch *, repeat from *-* the entire row and finish with 1 dc in 4th ch at beg of previous row. Fasten off. SECOND HALF: Turn piece and work on the underside of the 17-18-19-20-21-22 ch-spaces from beg of first half. Work the same way as first half but beg on ROW 1. SHAPING: Place the piece in lukewarm water until it is soaking wet. Carefully squeeze out the water - do not twist. Then roll the piece in a towel and squeeze to remove more water - the piece will now only be moist. Place the piece on a carpet or mattress - carefully stretch it out to measurements: 36-38-40-42-44-46 cm in width (before assembly) and 146-148-150-152-154-156 cm in length. Leave to dry. ASSEMBLY: Fold the piece along and sew the underarm seams tog along the dotted lines shown on chart. The garment must be shaped after every wash. |
|||||||||||||||||||
Diagram explanations |
|||||||||||||||||||
|
|||||||||||||||||||

|
|||||||||||||||||||

|
|||||||||||||||||||
|
Have you made this or any other of our designs? Tag your pictures in social media with #dropsdesign so we can see them! Do you need help with this pattern?You'll find tutorial videos, a Comments/Questions area and more by visiting the pattern on garnstudio.com. © 1982-2024 DROPS Design A/S. We reserve all rights. This document, including all its sub-sections, has copyrights. Read more about what you can do with our patterns at the bottom of each pattern on our site. |
|||||||||||||||||||


With over 40 years in knitting and crochet design, DROPS Design offers one of the most extensive collections of free patterns on the internet - translated to 17 languages. As of today we count 304 catalogues and 11422 patterns - 11422 of which are translated into English (UK/cm).
We work hard to bring you the best knitting and crochet have to offer, inspiration and advice as well as great quality yarns at incredible prices! Would you like to use our patterns for other than personal use? You can read what you are allowed to do in the Copyright text at the bottom of all our patterns. Happy crafting!
Comments / Questions (34)
Potrei avere maggiori dettagli su come eseguire il campione per poter decidere quale uncinetto usare? Grazie
07.04.2024 - 21:39DROPS Design answered:
Buonasera Rita, deve utilizzare l'uncinetto che le permette di ottenere 6 gruppi di maglie alte in 10 cm di larghezza. Buon lavoro!
07.04.2024 - 23:48Potrei avere maggiori dettagli su come fare il campione? Grazie
07.04.2024 - 21:25DROPS Design answered:
Buonasera Rita, deve utilizzare l'uncinetto che le permette di ottenere 6 gruppi di maglie alte in 10 cm di larghezza. Buon lavoro!
07.04.2024 - 23:48Hi I am starting the second half and it saw to start at row 1. Well row one starts with 4 chain and does not seem to fit with what's there. Should I start at row 2. And where do I start the chain . Thank you Catherine
11.05.2023 - 00:52DROPS Design answered:
Dear Mrs Pugh, you crochet first the row 1 in the 17-18-19-20-21-22 chain spaces from beginning of first part (A.1 to A.3), the treble crochets groups are worked in the same chain-spaces as the first part of piece, but this time you crochet around the foundation chain (the chain row below on the picture to work in the opposite way). Happy crocheting!
11.05.2023 - 07:55Hei! Det fungerer ikke å skrive ut denne oppskriften (verken "Skriv ut" > "Oppskrift" eller "Bilder" fungerer), og jeg har forsøkt i tre ulike nettlesere. Gjelder en rekke andre oppskrifter også dessverre. Det er mange oppskrifter jeg får til å skrive ut altså, så tror kanskje problemet ikke bare gjelder meg, men at enkelte av oppskriftene rett og slett har fått en feil i scriptet/viderekoblingen. Vet dere om det er mulig å rette opp i?
14.03.2023 - 11:34DROPS Design answered:
Hej Siri, vi kan skrive den ud her på flere forskellige skrivere.... Prøv at slukke og tænde igen for skriveren (træk stikket ud) det plejer at hjælpe :)
17.03.2023 - 08:19Can I get this pattern in english please?
06.11.2022 - 08:54DROPS Design answered:
Sure Pauline, all our patterns are available in English - click on the scroll down menu below the photo to edit language. Happy crocheting!
07.11.2022 - 10:19Hallo und vielen Dank für die schöne Anleitung. Die Nadelgröße kann allerdings in gar keinem Fall stimmen. Mit einem Lace-Garn würden die Maschen immer deutlich lockerer aussehen, als auf den Fotos. Könnten Sie bitte die Gramm- und Meter-Angabe des ehemaligen Garns angeben? Nach vielen Fehlversuchen habe ich das Maß von 10 cm für 5 \"Blüten\" mit einem Lace-Garn (800m auf 50 g) mit einer 2,5 Nadel erreicht. Allerdings sieht mein Maschenbild lockerer aus, als auf den Fotos hier.
20.09.2022 - 13:24Förstår inte måttangivelserna. Enl text ska jag virka diagram 1-3 i 65 cm vilket blir totalt 130 cm för båda halvorna. Blir diagram A4-A6 6,5 cm?
08.08.2022 - 15:02DROPS Design answered:
Hej Anna, arbejdet skal formes til de rigtige mål. Läs FORMNING, men prøv arbejdet først, så du kan se hvor meget du skal dra i arb :)
10.08.2022 - 12:16Non ho capito come si deve cucire il coprispalle, dopo averlo confezionato all'uncinetto. Grazie
29.04.2022 - 11:33DROPS Design answered:
Buonasera Ersilia, deve piegarlo e cucire sotto le braccia. Buon lavoro!
29.04.2022 - 17:30Hello, I am doing size medium abd after round 1 I am not sure how to turn as my last chain is one that should be skipped. Thanks for a beautiful pattern btw.
03.01.2022 - 13:36Para una talla xs, cuantas cadeneta o medidas nesecito? Gracias 😊
17.10.2021 - 10:15DROPS Design answered:
Hola Angélica, la talla más pequeña de esta labor es la talla S. A partir de las medidas de la talla S, recomendamos hacer una regla de 3 para mirar los puntos necesarios para las medidas deseadas, siempre teniendo en cuenta la tensión del tejido.
17.10.2021 - 19:10