
Popular categories
Looking for a yarn?


|
|
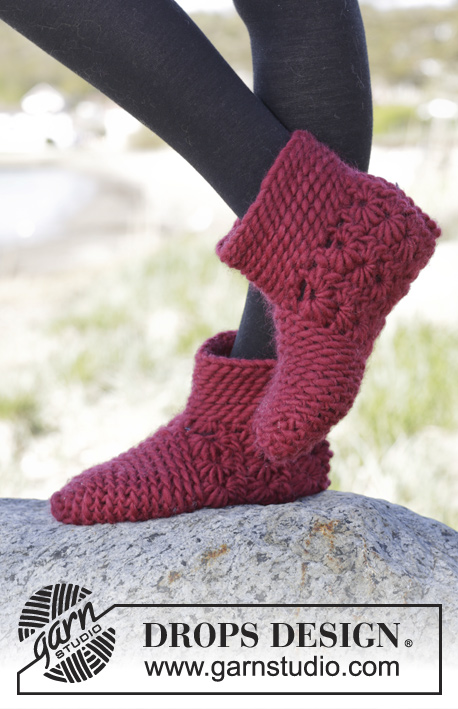
Candy Cane |
|
|
|
|
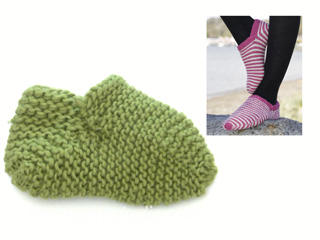
Knitted DROPS slippers in garter st with stripes in "Nepal".
DROPS 164-9 |
|
|
GARTER ST (back and forth): K all rows. 1 ridge = K2 rows. MAGIC CIRCLE: To avoid hole in the middle beg with this technique: Hold yarn end in the left hand and make a loop around left index finger (from left to right). Hold the loop with left thumb and index finger. Insert needle through loop, get yarn from ball, pull yarn back through loop, 1 YO (place yarn from the back and towards you) and pull YO through sts on needle, * insert needle through loop, 1 YO, pull YO through loop, 1 YO and pull YO through outermost st on right needle (i.e. the last st made) *, repeat from *-* until there are 12-12-12 sts on needle. Distribute sts on needles size 4.5 mm / US 7. Then work as explained in pattern – AT THE SAME TIME pull yarn end so that loop is tighten tog and the hole disappears. STRIPES: * 1 ridge off white, 1 ridge cerise *, repeat from *-*. INCREASE TIP: Inc 1 st by working 2 sts in a st, i.e. work in front and back loop of st. DECREASE TIP: Dec 1 st on each side of markers as follows: Work until 2 sts remain before marker, K 2 tog, K 1 (= st with marker), slip 1 st as if to K, K 1, psso (= 2 sts dec). NOTE: Work dec before 1st marker at the end of row. ---------------------------------------------------------- SLIPPER: Work in garter st back and forth from the toe and back towards heel. Start with cerise and MAGIC CIRCLE - see explanation above - on needles size 4.5 mm / US 7. Then work in GARTER ST and STRIPES - see explanation above, AT THE SAME TIME insert 1 marker like this: Work 6 sts (= under the foot), insert marker in next st, work the remaining 5 sts(= on top of foot). Work 1 row from WS. On next row from RS inc in 2nd sts on each side of marker, and in last st on row - READ INC TIP! Repeat inc on every row from RS 4-5-6 more times = 32-36-40 sts. REMEMBER THE KNITTING GAUGE When piece measures 14-17-19 cm / 5½"-6¾"-7½", slip the first 15-17-19 sts (= under foot) on a stitch holder, and work 2 ridges with 2 strands cerise, over the last 17-19-21 sts on needle (= on top of foot). Then K 1 row while AT THE SAME TIME inc 5-6-7 sts = 22-25-28 sts. Loosely bind off with 2 strands. Cast on 17-19-21 sts on needle size 4.5 mm / US 7 with 2 strands cerise. Then work 2 ridges back and forth. Then work with 1 strand. Slip sts from stitch holder back on needle = 32-36-40 sts. Continue with garter st and stripes - adjust to continue with stripes from sts under foot. AT THE SAME TIME on next row from RS beg dec - READ DECREASE TIP! Repeat dec on each side of each marker every 4th row 3-3-4 more times = 16-20-20 sts. Bind off the remaining sts. Knit another slipper the same way, but reversed, so that seam is in the opposite side. ASSEMBLY: Sew slipper tog in the side, sew in outer loops of edge sts. Sew tog heel in one and one st inside bind-off edge. Sew edges in garter st neatly tog on each side of foot as follows: Place edge on edge in garter st from top of foot over edge in garter st from back of foot and sew tog through both layers in the sides. Fasten off. |
|
|
Have you made this or any other of our designs? Tag your pictures in social media with #dropsdesign so we can see them! Do you need help with this pattern?You'll find tutorial videos, a Comments/Questions area and more by visiting the pattern on garnstudio.com. © 1982-2024 DROPS Design A/S. We reserve all rights. This document, including all its sub-sections, has copyrights. Read more about what you can do with our patterns at the bottom of each pattern on our site. |


With over 40 years in knitting and crochet design, DROPS Design offers one of the most extensive collections of free patterns on the internet - translated to 17 languages. As of today we count 304 catalogs and 11422 patterns - 11417 of which are translated into English (US/in).
We work hard to bring you the best knitting and crochet have to offer, inspiration and advice as well as great quality yarns at incredible prices! Would you like to use our patterns for other than personal use? You can read what you are allowed to do in the Copyright text at the bottom of all our patterns. Happy crafting!
Comments / Questions (7)
Dit is een mooi maar ingewikkeld patroon. Jullie patroonbeschrijving in Nederlands , daar ontbreken stukken, zeer frustrerend. De positie van de 2 markers? Hoeveel cm moet het hieldeel worden? Ik moest naar de video kijken om hier achter te komen.
22.01.2022 - 22:56Dans les explications ce n'est pas noté qu'il faut mettre 1 marqueur en début et en fin de rang des 21m montées et pour les diminutions heureusement qu'il y a la vidéo car ce n'est pas clair du tout.
16.10.2018 - 18:59Bonjour je ne comprends pas à partir de:-tricoter ensuite 1 rang end,EN MEME TEMPS,répartir 5-6-7 augmentations=20-23-26m (il doit y avoir une erreur car on avait 17-19-21m??????????????? -Continuer ensuite avec 1 seul fil??? -EN MEME TEMPS,au rg suivant sur l'endroit,commencer à diminuer -VOIR DIMINITIONS!Répéter ces diminutions de chaque côté de chaque marqueur????????????? ON NE M'A DIT DE METTRE DES MARQUEURS AVANT,,,,,,,,,,,,,,
16.10.2018 - 11:30DROPS Design answered:
Bonjour Mme Jacqueton, on aura 22-25-28 m après les augmentations (et non 20-23-26 m - la correction a été faite merci). On monte ensuite 17-19-21 m avec 2 fils et on tricote 2 côtes mousse (= 4 rangs endroit) avec les 2 fils (= le fil en double), puis on continue avec 1 seul fil (= fil simple). Vous diminuez ensuite aux marqueurs qui ont été placés au début. N'hésitez pas à regarder la vidéo de ce modèle. Bon tricot!
16.10.2018 - 15:46Bonjour , y a t'il un tuto du rond magique s'il vous plaît ?
18.09.2015 - 15:36DROPS Design answered:
Bonjour Mme Baconnet, la vidéo ci-dessous vous montre comment monter les mailles en rond (rond magique). Bon tricot!
19.09.2015 - 09:37Hej!! Vi blir inte riktigt kloka på hur hälen ska stickas!! - Hur ska de sparade maskorna sättas bredvid de nyupplagda på stickan, in mot mitten på arbetet eller utanför?? - Det står att det ska minskas på varje sida markörerna på hälen, men var ska markörerna sitta?? Känns som det fattas nån rad i mönstret, eller?? Vore tacksam för lite hjälp!! Mvh Hemfliten Lin&Ull Storgatan 5 53431 VARA
15.08.2015 - 11:39DROPS Design answered:
Hej Hemfliten. Jo i den norska står det var man sätter markörerna: Legg opp 17-19-21 m på p 4,5 med 2 tråder cerise (= bak på foten). Deretter strikkes det 2 riller frem og tilbake. Sett 1 merke i første og siste m på p. Videre strikkes det med 1 tråd slik:... Lycka till!
09.09.2015 - 08:27Gute form, lustig
14.06.2015 - 06:07Love these! Please include these in the collection!
29.05.2015 - 08:36