
Popular categories
Looking for a yarn?


|
||||||||||||||||||||||||||||||||||
Leonard |
||||||||||||||||||||||||||||||||||
 |
 |
|||||||||||||||||||||||||||||||||
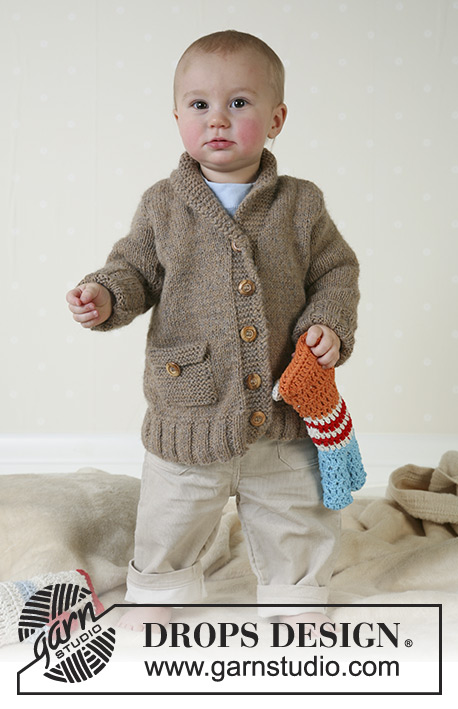
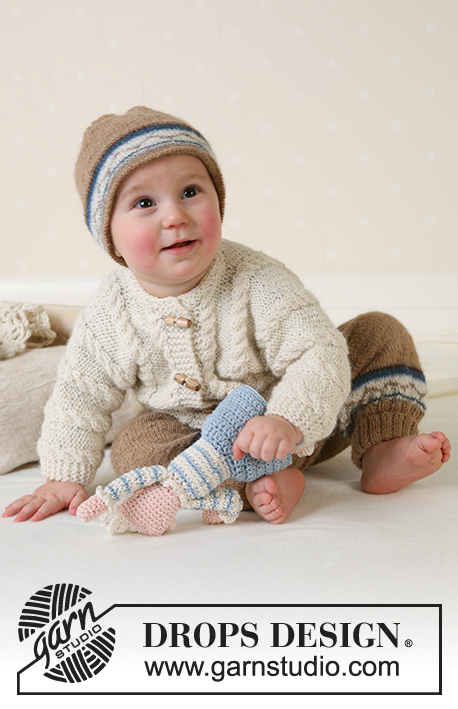
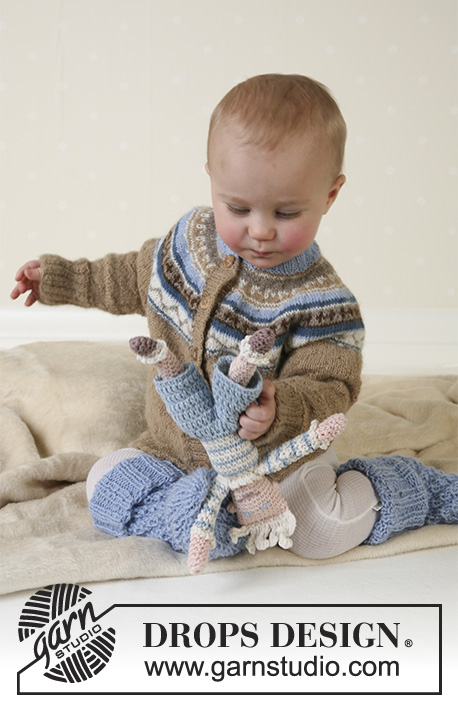
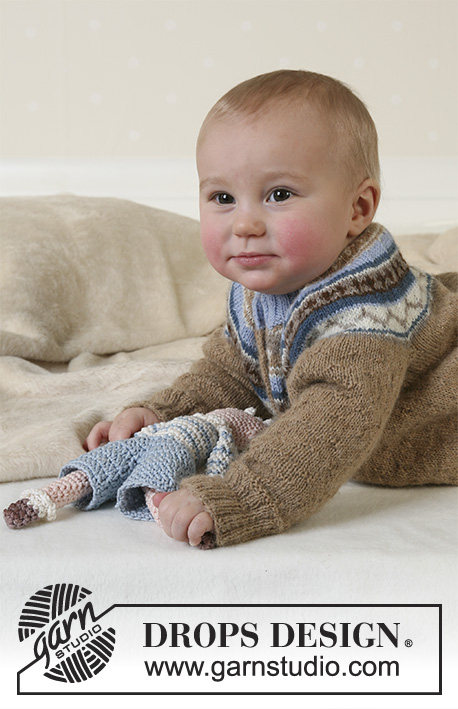
DROPS Jacket, socks and soft toy in Alpaca
DROPS Baby 13-15 |
||||||||||||||||||||||||||||||||||
|
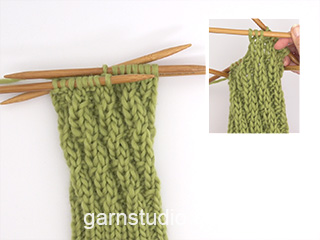
JACKET: Knitting gauge: 24 sts x 32 rows on needles size 3 mm / US 2.5 in stockinette sts = 10 x 10 cm / 4" x 4". Garter sts: Knit all rows Rib: *K2, P2*, repeat from *-*. Pattern: See diagrams M.1 and M.2. Front and back piece: Knit the jacket back and forth on circular needle from mid front. Cast on 144-160-180 (196-212) sts (incl 1 edge st towards mid front each side, knitted in garter sts throughout) with camel and circular needle size 2.5 mm / US 1.5 and purl 1 row from wrong side. Continue in rib with 1 edge sts and a further 2 sts in garter sts each side. When piece measures 3 cm / 1⅛" change to circular needle size 3 mm / US 2.5 and knit 1 row from the right side, at the same time dec evenly to 125-137-149 (167-179) sts. Knit 1 row from the wrong side. Now knit next row as follows from the right side: 1 edge st, M.1A over the next 120-132-144 (162-174) sts, M.1B (= 3 sts) and 1 edge st. Continue the pattern like this. At the same time, insert a marker 32-35-38 (42-45) sts in from each side = 61-67-73 (83-89) sts between markers on back piece. When piece measures approx 19-20-23 (27-30) cm – adjust after 2 or 3 rows in stockinette sts after a row with pattern in diagram – bind off 10-10-10 (12-12) sts each side for armhole (i.e. 5-5-5- (6-6) sts each side of markers) = 51-57-63 (71-77) sts on back piece and 27-30-33 (36-39) sts on each front piece. Put piece aside and knit the sleeves. Sleeve: Knit round on double pointed needles size 2.5 mm / US 1.5. Cast on 44-48-52 (56-60) sts with camel. Knit 1 round and continue in rib. When sleeve measures 4-5-5- (6-6) cm, change to double pointed needles 3mm/US 2.5. Knit 1 round, at the same time dec evenly to 36-36-42 (42-48) sts. Purl 1 round and continue in M.1A. At the same time, when sleeve measures 5-6-6- (7-7) cm inc 2 sts mid under arm a total of 6-8-10 (13-12) times as follows: Size 1/3 months: alternately on every 5th and 6th round Size 6/9 +12/18 months: on every 4th round Size 2 years: alternately on every 3rd and 4th round Size 3/4 years: on every 5th round = 48-52-62 (68-72) sts – incorporate the new sts in M.1 as you go along. When sleeve measures 16-17-19 (23-27) cm – adjust as for back and front pieces – bind off 10-10-10 (12-12) sts mid under arm = 38-42-52 (56-60) sts. Put the piece aside and knit the other sleeve. Yoke: Put sleeves in on the same needle as back and front pieces where you bind off for armholes = 181-201-233 (255-275) sts. Knit 2-4-6 (1-5) rows stockinette sts (1st row = right side), at the same time adjusting number of sts to 173-191-227 (245-263). Now continue and dec according to M.2 – see diagram for appropriate size and remember 1 edge st each side. After the last dec there are 59-65-77 (83-89) sts left, finish M.2. Now knit 1-2-3 (1-1) rows of stockinette sts with camel, at the same time dec evenly to 42-50-62 (70-74) sts on the last row. Put sts on a thread. Assembly: Sew the openings under the arms. Front edges: Pick up 85-89-101 (117-129) sts along left front piece with camel and needle size 2.5 mm / US 1.5. Note! If you pick up fewer/more sts that this, you need to adjust number of sts on first row. Knit 1 row from wrong side, knit 1 row from right side and purl 1 row from wrong side. Now continue in rib with 1 edge st + 2 sts in garter sts towards neckline and 2 edge sts + 2 sts in garter sts towards lower edge (seen from the right side). When rib measures approx 2.5-3 cm bind off loosely in rib. Repeat along right front edge, but when rib measures 1 cm / ⅜", make 6-6-6 (7-7) buttonholes evenly distributed – the top one approx 1 cm / ⅜" from neck line and the bottom one approx 2 cm / ¾" from lower edge. Make buttonholes by K 2 tog and making a yo. Neck: Put sts from thread on yoke on needle size 2.5 mm / US 1.5 and pick up an additional 6 sts over each front edge with baby blue = 54-62-74 (82-86) sts on row (number of sts is dividable by 4 +2). Knit 1 row from the wrong side, 1 row from the right side and 1 row from the wrong side. Continue in rib with 2 edge sts each side towards mid front (seen from the right side). Bind off loosely in rib when rib measures approx 4-6 cm. Fold neck double towards the wrong side and attach with neat sts – make sure the seam doesn’t pull. _________________________________________ SOCKS: Foot length: approx 10-11-12 (14-15) cm Knitting gauge: 17 sts x 22 rows with 2 strands of Alpaca on needle size 5 mm / US 8 in stockinette sts = 10 x 10 cm / 4" x 4". Rib: *K2, P2*, repeat from *-*. Loosely cast on 28-32-36 (40-44) sts with 2 strands of Alpaca on double pointed needles size 5 mm / US 8. Knit 6-6-7 (8-8) cm rib. Now knit 1 row, shifting the rib 1 st to the left as follows: over (K2, P2) it will be (P1, K2, P1). *Knit 3 rounds with K over K and P over P, on 4th round shift the rib 1 st to the left*, repeat from *-* until piece measures 25-26-27 (29-30) cm. Now purling all purled sts tog 2 and 2, knit 2 rounds with K over K and P over P, work 1 round knitting all knitted sts tog 2 and 2, work 2 rounds with K over K and P over P and work 1 round knitting all knitted sts tog 2 and 2 = 7-8-9 (10-11) sts. Cut the thread and pull through the remaining sts, fasten. The sock measures approx 28-29-30 (32-33) cm. --------------------------------------------------------- SOFT TOY: see pattern 13-33 --------------------------------------------------------- |
||||||||||||||||||||||||||||||||||
Diagram explanations |
||||||||||||||||||||||||||||||||||
|
||||||||||||||||||||||||||||||||||

|
||||||||||||||||||||||||||||||||||

|
||||||||||||||||||||||||||||||||||
|
Have you made this or any other of our designs? Tag your pictures in social media with #dropsdesign so we can see them! Do you need help with this pattern?You'll find tutorial videos, a Comments/Questions area and more by visiting the pattern on garnstudio.com. © 1982-2024 DROPS Design A/S. We reserve all rights. This document, including all its sub-sections, has copyrights. Read more about what you can do with our patterns at the bottom of each pattern on our site. |
||||||||||||||||||||||||||||||||||


With over 40 years in knitting and crochet design, DROPS Design offers one of the most extensive collections of free patterns on the internet - translated to 17 languages. As of today we count 304 catalogs and 11422 patterns - 11417 of which are translated into English (US/in).
We work hard to bring you the best knitting and crochet have to offer, inspiration and advice as well as great quality yarns at incredible prices! Would you like to use our patterns for other than personal use? You can read what you are allowed to do in the Copyright text at the bottom of all our patterns. Happy crafting!
Comments / Questions (14)
SIIS MISSÄ ON MALLIN M1 JA M2 PIIRROKSET? TODELLA HUONOSTI TOTEUTETTU OHJE.
03.01.2023 - 12:52Guten Abend, meine Frage betrifft die Passe. Ich stricke Grösse 12-18 Monate und habe wie angegeben das mittlere Muster gestrickt. Dh meine letzte Reihe ist camel und jetzt weiss ich nicht weiter. Da steht weiter mit M2 bis zum fertigen Mass. Aber da bin ich mir nicht sicher, denn wenn man das Bild anschaut, dann ist der Abschluss der Passe das Muster und nicht 10 cm camel. Wenn Sie mir helfen könnten, wäre das super. Vielen Dank Nettia
26.08.2021 - 00:22DROPS Design answered:
Liebe Nettia, in 12/18 Mon. stricken Sie zuerst bei der Passe 6 Reihen glatt rechts, dann die 33 Reihen in M.2 dann noch 3 Reihen glatt rechts (beachten Sie, daß Ihre Maschenprobe in der Höhe stimmt, dh 32 R = L10 cm) - Passe ist jetzt fertig, die Maschen legen Sie still und Halsblende wird nach den beiden Blenden gestrickt. Viel Spaß beim stricken!
26.08.2021 - 08:42Mistä löytyy ohjeen mallipiirustus?
31.10.2020 - 16:18DROPS Design answered:
Hi Topu! At the bottom of the pattern. Happy knitting!
23.11.2020 - 18:56Jeg forstår ikke størrelserne, jeg skal strikke jakken i str 80/86 (1-1,1/2 år) men jeg synes at det ser ud som om i mener at str 12/18 mdr=74/80 og ikke 80/86, kan I hjælpe lidt med str. på denne jakke?
16.04.2017 - 21:51DROPS Design answered:
Hej, vi har skrevet opskriften i 5 størrelser(bindestreg imellem hver størrelse): 1/3 måneder - 6/9 måneder - 12/18 måneder - 2 år - 3/4 år. Det vil sige at: 1/3 måneder = 50/56cm 6/9 måneder = 62/68cm 12/18måneder = 74/80cm 2 år = 86/92cm 3/4 år = 98/104cm
28.04.2017 - 08:21I M2 tredje varvet uppifrån (12/18 mån) ska det vara vitt garn där man tar två räta tillsammans, eller ska det vara beigemix?
21.09.2014 - 18:14DROPS Design answered:
Hej Christina, Det skall vara beigemix.
23.09.2014 - 14:49Can have use coton to replace alpaga please thank angeline
04.11.2007 - 21:19Hvor er den flot ! Den glæder jeg mig allerede til at lave.
19.05.2006 - 21:05Hilde wrote:
Desse fargane var kjempefine i lag!
25.03.2006 - 21:36Mii wrote:
Superfin kofta & fina sockor! ..men det skulle vara fint med en mössa till! ;O)
15.03.2006 - 14:53Agneta wrote:
härliga färger,mysig kofta m. sockar som ser så goa ut att ha på.
15.03.2006 - 13:25