
Popular categories
Looking for a yarn?


|
||||||||||
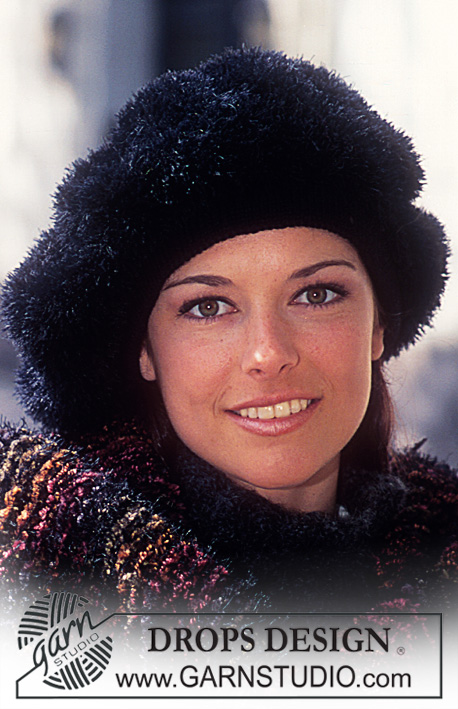
Winter Chic |
||||||||||
|
|
||||||||||
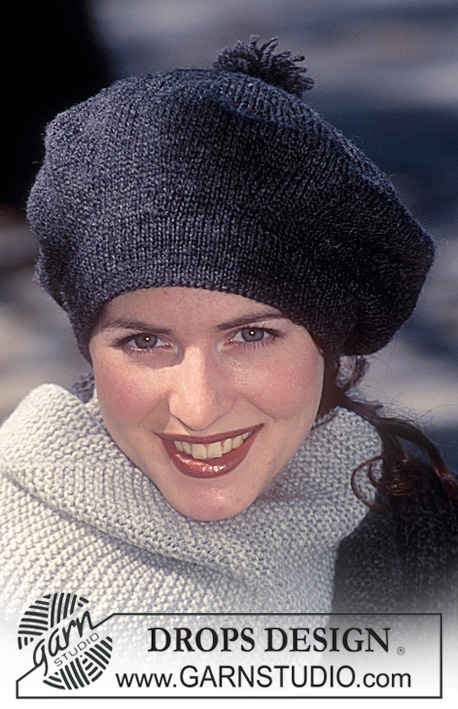
DROPS Crocheted Hat and Scarf.
DROPS 58-19 |
||||||||||
|
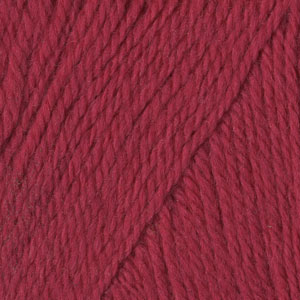
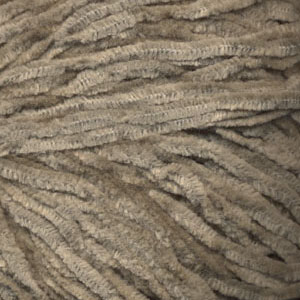
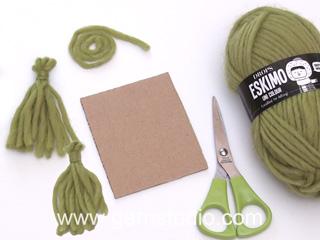
HAT: Gauge: 15 sc and 17 rows = 10 x 10 cm [4" x 4"]. Hat: Crochet the hat with double yarn. Begin with 1 strand black Alpaca and 1 strand black Tynn Chenille. Chain 4 and slip st into a ring. Begin all rows with ch 1 which replaces the first sc and end all rows with 1 ch st. Round 1: 7 sc into the ring. Round 2: 2 sc into each sc = 14 sc. Round 3: * 2 sc in the 1st sc, 1 sc in the next sc *. Repeat from * - * for 7 increases = 21 sc. Round 4: * 2 sc in the 1st sc, 2 sc *. Repeat from * - *. Increase in this fashion every row, but add 1 sc in between every time 2 sc are crocheted in one sc. Continuing increasing until the work measures approximately 7 cm [2.75"] from the center, then inc every other row until there are 91 sts on a row. Continue without increasing until the work measures 19 cm [7.5"] from the center. Work 1 row, decreasing 13 sts evenly distributed on the row (work decreases by skipping 1 sc). 78 sts. Change to 1 strand Alpaca and 1 strand Tynn Chenille Pelsprint. Work 4 rows even, then make the brim as follows: Rnd 1: * 4 sc, 2 sc in the next sc *. Repeat from * - * throughout the row. Rnds 2 - 4: Crochet without increasing. Rnd 5: * 5 sc, 2 sc in the next sc *. Repeat from * - *. Rnd 6 - 24: Crochet without increasing. After the 24th row finish with 1 chain st in the first st. Cut the strands and knot the ends. Fold the brim over 2 times against the wrong side. SCARF: Materials: DROPS ALPACA from Garnstudio 100 g in Color No. 8903, Black. and: DROPS TYNN CHENILLE PELSPRINT from Garnstudio 200 g in Color No. 933, Dark Brown. DROPS 5 mm [US H] crochet hook, or size needed to obtain correct gauge. Gauge: 12 sc and 12 rows = 10 x 10 cm [4" x 4"]. Pattern: See chart. (Pattern is a multiple of 5 sts +1 st). The pattern is seen from the right side. Scarf: Crochet the scarf with double yarn using 1 strand Alpaca and 1 strand Tynn Chenille Pelsprint. Chain 56. Begin with row 2 of the chart. Work rows 2 - 5 once and then repeat rows 4 and 5 to finished length. When the work measures 170-180 cm [66" - 70»], cut the strands. Knot the ends. Make 4 tassels as follows: cut 50 strands (approximately 20 cm [7-⅞"] in length) of Tynn Chenille Pelsprint, tie a double strand of Alpaca/Tynn Chenille Pelsprint around the center of the tassel, fold it double (the tassel will be approximately 10 cm [4"] long), twist a strand of Tynn Chenille Pelsprint around the tassel 4-5 times approximately 3 cm [1.25"] below the fold. Attach one tassel to each corner of the scarf. |
||||||||||
Diagram explanations |
||||||||||
|
||||||||||

|
||||||||||
|
Have you made this or any other of our designs? Tag your pictures in social media with #dropsdesign so we can see them! Do you need help with this pattern?You'll find tutorial videos, a Comments/Questions area and more by visiting the pattern on garnstudio.com. © 1982-2024 DROPS Design A/S. We reserve all rights. This document, including all its sub-sections, has copyrights. Read more about what you can do with our patterns at the bottom of each pattern on our site. |
||||||||||


With over 40 years in knitting and crochet design, DROPS Design offers one of the most extensive collections of free patterns on the internet - translated to 17 languages. As of today we count 304 catalogs and 11422 patterns - 11417 of which are translated into English (US/in).
We work hard to bring you the best knitting and crochet have to offer, inspiration and advice as well as great quality yarns at incredible prices! Would you like to use our patterns for other than personal use? You can read what you are allowed to do in the Copyright text at the bottom of all our patterns. Happy crafting!
Comments / Questions (15)
Het garen is niet meer beschikbaar, hoe krijg ik nu de goede combinatie die zo dicht mogelijk bij het gebruikte garen zit, ik vind de combinatie op de foto zo mooi.
18.01.2023 - 15:00DROPS Design answered:
Dag Monika,
Helaas hebben we niet iets wat hierbij in de buurt komt. Je zou het beste even langs een winkel bij je in de buurt kunnen gaan om te kijken of je iets naar je smaak kunt vinden.
18.01.2023 - 20:51Der Hut gefällt mir sehr gut. Ich würde ihn auch sehr gerne nachmachen.\r\n\r\nPS Es wäre schön wenn man die Kommentare mit einem Klick in meine Sprache auch lesen könnte.
07.12.2021 - 21:58Can you suggest ply and alternatives please. I tried the converter
18.11.2021 - 14:52DROPS Design answered:
Dear GIl, click on the both yarn name (below material list) to geet more info over these yarns and feel free to use our yarn converter for any suggestions for alternatives for these both yarns. Your DROPS store will also be able to assist you choosing the best alternative - even per mail or telephone. Happy knitting!
18.11.2021 - 17:28Hei kuinka monta silmukkaa pitäisi olla kierroksella 4 ja 5? Ja kuinka monella kerroksella pitäisi päästä 91 silmukkaan?
19.10.2021 - 20:42En lång linje med två tvärstreck är en dubbelstolpe Varför har inte ni samma beskrivning av maskor som resten av världen? Det är supersvårt, helt i onödan, att tyda era mönster
09.09.2021 - 16:283. kruhová řada: *2 krátké sloupky do 1. krátkého sloupku, 1 krátký sloupek do následujícího krátkého sloupku*, *-* co znamenají ty hvězdičky
26.02.2021 - 16:28DROPS Design answered:
Dobrý den, Dano, hvězdičky označují úsek vzoru, který je potřeba opakovat - buď až do konce řady nebo tolikrát, kolikrát je uvedeno. Hodně zdaru! Hana
28.02.2021 - 00:25Sehr geehrte Damen und Herren, ich möchte gerne den Hut, Drops 58/19, nacharbeiten. Leider gibt es das Garn Camelia von Garnstudio und Tynn Cotton Chenille von Garnstudio nicht mehr. Welches Garn empfehlen Sie mir? Hier benötigt man die Farben Schwarz und Dunkelbraun. Mit freundlichen Grüßen Cornelia Krautscheidt
23.07.2020 - 12:08DROPS Design answered:
Liebe Frau Krautscheidt, vor "Anleitungsschritte" finden Sie einen Kasten mit den benötigten Garnen. Wenn Sie direkt auf den Namen des Garns klicken, öffnet sich ein Fenster mit möglichen Garnalternativen. Sie können auch direkt bei den Garnen schauen: DROPS Camelia gehört zur Garngruppe A, Sie können also alle Garne der Garngruppe A verwenden. DROPS Tynn Cotton Chenille gehört zur Garngruppe B. Um zu ermitteln, wie viel Garn Sie benötigen (die Lauflänge der Garnalternativen ist ev. unterschiedlich) können Sie den Link zum Garnumrechner im Kopf der Anleitung verwenden. Viel Spaß beim Aussuchen!
24.07.2020 - 10:16Please its possible to have in the czech language?\r\nIn english is so hard for me to translate corectly. \r\nThank you \r\nM.
02.01.2020 - 21:02DROPS Design answered:
Milá Martino, díky za podnět, návod bude v češtině dostupný co nevidět - sledujte, prosím přehled nejnovějších českých překladů - zde , ppř. odkaz na jednotlivé jazykové verze přímo pod fotkou v návodu. Hezký večer! Hana
02.01.2020 - 21:30Yarn substitutes please? I tried the converter with no success. Perhaps others could benefit from an answer posted here.
19.09.2019 - 18:50DROPS Design answered:
Dear Angelina, please try our yarn converter (keep 1 thread); you will see some alternatives. Happy crocheting!
20.09.2019 - 08:30Ook heb ik een vraag extra over de hoed. Hoe wordt de rand omgevouwen. Wat is de verkeerde kant. De buitenkant van de hoed of de binnenkant. En als je het twee keer hebt omgevouwen wordt deze rand dan vastgenaaid?
06.02.2019 - 15:54