
Popular categories
Looking for a yarn?


|
|||||||||||||||||||
DROPS 93-32 |
|||||||||||||||||||
|
|
|||||||||||||||||||
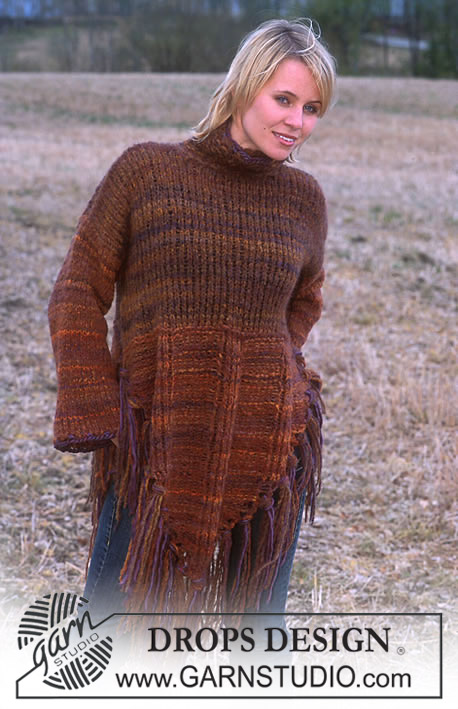
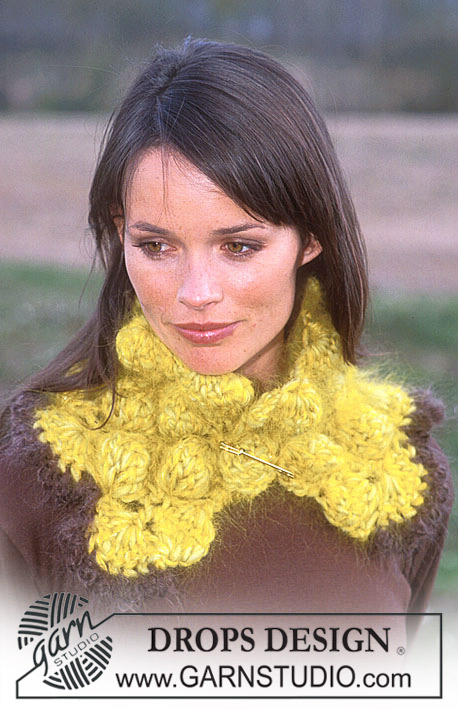
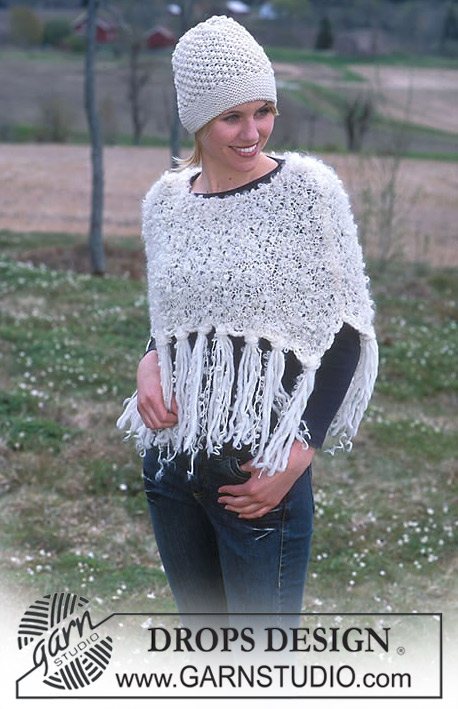
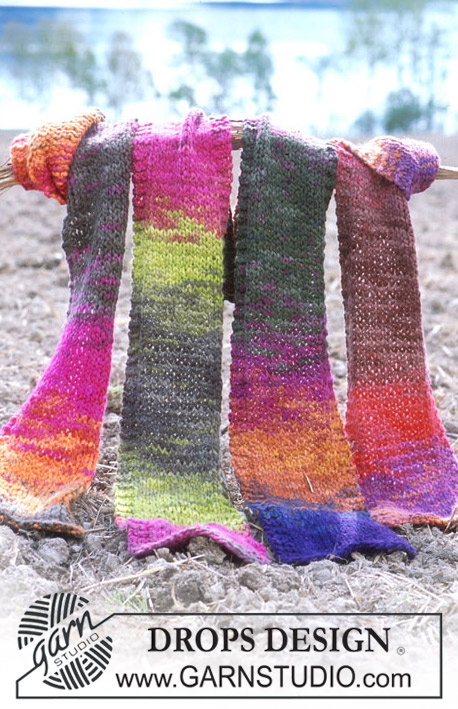
DROPS Poncho, crochet hat and scarf
DROPS 93-32 |
|||||||||||||||||||
|
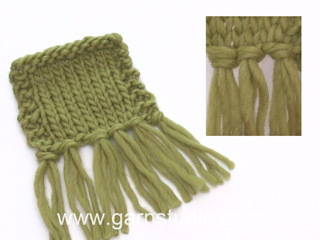
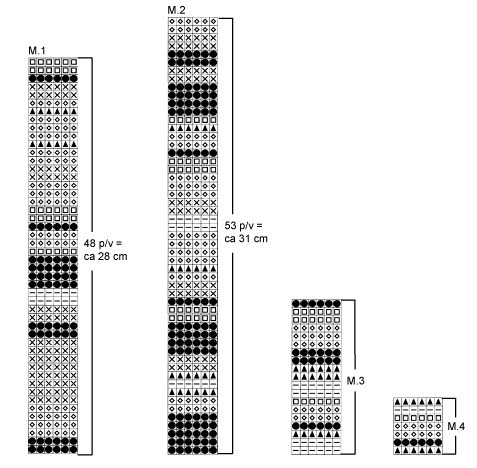
PONCHO: Knitting Gauge: 11 sts x 17 rows on needles size 7 mm in stocking sts. = 10 x 10 cm. Rib: *K4, P4*, repeat from *-* Garter stitch (back and forth on circular needle): 1st row: knit, 2nd row: knit Pattern: See diagram M.1 and M.2 The poncho is knitted back and forth on a circular needle. Back piece: Cast on 114-120-126 sts on circular needle size 7 with Highlander no 13. Knit stocking stitch. When piece measures 9-11-13 cm, knit M.1. After M.1 knit M.2. After M.2 change back to Highlander no 13 and continue in stocking stitch. When piece measures 72-76-80 cm, cast of the centre 14 sts for neck. On next row, decrease 1 st on each neck side = 49-52-55 sts left on each shoulder. Cast off when piece measures 76-80-84 cm. Left front piece: Cast on 57-60-63 sts on circular needle size 7 with Highlander no 13. Knit stocking stitch. When piece measures 9-11-13 cm, knit M.1. After M.1 knit M.2. At the same time, when piece measures 56-60-64 cm, decrease 1 st towards mid front on every 2 cm a total of 8 times = 49-52-55 sts left on shoulder. At the same time, after M.2 change back to Highlander no 13 and continue in stocking stitch. Cast off when piece measures 76-80-84 cm. Right front piece: Cast on and knit as left front piece, but mirrored. Assembly: Assemble the poncho inside out, i.e. the wrong side on the outside! Sew the shoulder seams. Collar: Pick up approx 36 to 44 sts (must be divisible by 8) round neck on back piece and splits on front pieces on circular needle size 7mm with Highlander no 13. Purl 1 round and continue in Rib with 4 sts either side in garter sts. When collar measures 4-6-8 cm, increase all rib-reports to K5, P5 – increase the 4 garter sts at sides to 5 as well - = approx 45 to 55 sts. When collar measures 8-10-12 cm, increase rib to K6, P6 and garter sts to 6 = approx 54 to 66 sts. Cast off loosely when collar measures 11-13-15 cm. Tassels: 1 tassel = 1 thread of Highlander nr 07, 04 and 03, 2 threads of Highlander no 13 and no 15 (= 7 threads), each measuring 40 cm. Fold threads double, pull through st at the end of each piece and pull ends through loop. Attach tassels along the bottom of both pieces with approx 6-7 cm in between. SCARF: Tension: width of 2 reports x length of 5 rows on crochet hook size 7mm = 10x10 cm Pattern: See diagram M.3. 1 row in pattern equals 1 crochet row. Repeat the pattern until finished measurements. Crochet 20 loose ch using crochet hook 7 mm with Highlander no 04. Continue as described below, at the same time crocheting stripes following M.3. 1st round: 1 tr in 4th ch from the crochet hook, 1 tr in next ch, *1 ch, skip 2 ch, 1 tr in each of the following 3 ch*, repeat from *-* a total of 3 times, turn 2nd round: 4 ch, 3 tr in first ch, *1 ch, 3 tr in next ch*, repeat from *-* a total of 2 times and finish with 1 ch and 1 tr in last st, turn 3rd round: 3 ch, 2 tr in first ch *1 ch, 3 tr in next ch*, repeat from *-* a total of 3 times, turn Repeat row 2 and 3 until scarf measures approx 230 cm. Cut thread. HAT: Crochet tension: width of 2 reports x length of 5 rows on crochet hook size 7mm = 10x10 cm Tension: 11 sts x 17 rows on needle size 7mm = 10x10cm Pattern: See diagram M.4. 1 row in pattern equals 1 crochet row. Repeat the pattern until finished measurements. Rib: *K2, P3*, repeat from *-* (knitted rim on hat) Hat: The hat is crochet from top down with a knitted rim in Rib. Crochet 5 cs using crochet hook size 7mm with Highlander no 04 and form a ring with a sl st. 1st round: 3 ch, 2 tr in ring, *1 ch, 3 tr in ring*, repeat from *-* a total of 3 times and finish with 1 ch and 1 sl st in 3rd ch from beginning or round = 4 tr-groups 2nd round: 4 ch, 3 tr in 1st ch, 1 ch, 3 tr in same ch, 1 ch, 3 tr in next ch, 1 ch, 3 tr in next ch, 1 ch, 3 tr in same ch, 1 ch, 2 tr in next ch, finish with 1 sl st in 3rd ch from beginning of round = 6 tr-groups 3rd round: : 3 ch, 2 tr in 1st ch, 1 ch, 3 tr in next ch, 1 ch, 3 tr in next ch, 1 ch, 3 tr in same ch, 1 ch, 3 tr in next ch, 1 ch, 3 tr in next ch, 1 ch, 3 tr in next ch, 1 ch, 3 tr in same ch, 1 ch and finish with 1 sl st in 3rd ch from beginning of round = 8 tr-groups 4th round: 4 ch, 3 tr in first ch, 1 ch, 3 tr in same ch, 1 ch *3 tr in next ch , 1 ch, *, repeat from *-* a total of 3 times, 3 tr in the next ch, 1 ch, 3 tr in the same ch, 1 ch *3 tr in the next ch, 1 ch*, repeat from *-* a total of 2 times and finish with 2 tr in last ch and 1 sl st in 3rd ch from beginning of round = 10 tc-groups 5th round: 3 ch, 2 tr in first ch, *1 ch, 3 tr in next ch*, repeat from *-* until the end of the round and finish with 1 ch 1 sl st in 3rd ch from beginning of round = 10 tr-groups 6th round: 4 ch, 3 tr un first ch, *1 csh 3 tr in next ch*, repeat from *-* until the end of the round and finish with 1 ch, 2 tr in last ch and 1 sl st in 3rd ch from beginning of round 7th round: Crochet as round 5. The hat now measures approx 16 cm from the top – if it’s shorter, repeat row 6. Knitted rim: Pick up 60 sts on double pointed needles size 7mm with Highlander 04 round the last crochet row – pick up 1 st in each tr and 3 sts in each ch. Purl 1 round, knit 1 round and continue in Rib. When rib measures approx 7 cm, cast off loosely. |
|||||||||||||||||||
Diagram explanations |
|||||||||||||||||||
|
|||||||||||||||||||
|
|||||||||||||||||||
|
Have you made this or any other of our designs? Tag your pictures in social media with #dropsdesign so we can see them! Do you need help with this pattern?You'll find tutorial videos, a Comments/Questions area and more by visiting the pattern on garnstudio.com. © 1982-2024 DROPS Design A/S. We reserve all rights. This document, including all its sub-sections, has copyrights. Read more about what you can do with our patterns at the bottom of each pattern on our site. |
|||||||||||||||||||


With over 40 years in knitting and crochet design, DROPS Design offers one of the most extensive collections of free patterns on the internet - translated to 17 languages. As of today we count 304 catalogues and 11422 patterns - 11422 of which are translated into English (UK/cm).
We work hard to bring you the best knitting and crochet have to offer, inspiration and advice as well as great quality yarns at incredible prices! Would you like to use our patterns for other than personal use? You can read what you are allowed to do in the Copyright text at the bottom of all our patterns. Happy crafting!
Comments / Questions (11)
¿Los patrones M1 y M2 se tejen en punto jersey también? No me queda claro y en la imagen no lo parece. Mil gracias.Paula
08.04.2020 - 18:10DROPS Design answered:
Hola Paula! Los patrones M1 y M2 se tejen en punto jersey. Buen trabajo!
04.11.2020 - 17:51Does anyone have a free Knitting pattern for the Clint Eastwood Poncho?
27.02.2018 - 22:00DROPS Design answered:
Dear Cynthia, we have many patterns for ponchos, please see the detailed search, you might even find one that is similar to teh one you are looking for. Happy Crafting!
27.02.2018 - 23:24Bonjour, je vos qu'il faut remplacer la laine de départ par d'autres qualités Cependant, j'aimerais connaître le métrage du fil utilisé à l'origine Merci d'avance
14.02.2018 - 10:30DROPS Design answered:
Bonjour Cat, Vous trouverez toutes ces informations sur le nuancier de DROPS Highlander ainsi que dans la liste des qualités épuisées. Bon tricot!
14.02.2018 - 11:41Bonjour, je me retrouve avec le poncho beaucoup plus log devant que derrière, malgré les bonnes mesures. Avec l'écharpe on ne voit pas bien si le poncho est fermé devant. Merci d'avance pour votre réponse
18.09.2017 - 20:36DROPS Design answered:
Bonjour Lilou, le devant et le dos ont exactement la même longueur (= 76-80-84 cm) - le poncho n'est pas assemblé au milieu devant, sur la photo, on le maintient avec un épingle. Bon tricot!
19.09.2017 - 08:49What does nr 13 mean?
04.08.2017 - 19:31DROPS Design answered:
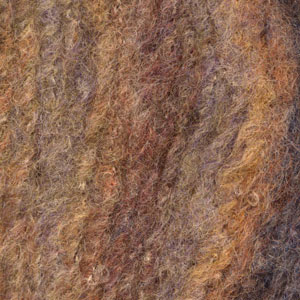
Hi Kathleen, The numbers refer to the different colour yarns. So no 13 is brown-mix, no 15 is orange....etc. as shown at the top of the page. Happy knitting!
05.08.2017 - 16:44Sharon Bryan wrote:
Hi. I have just finished a drops poncho. 93_32 and although i have used the recomended wool, it curls up on the edges. The edges are not straight like your pattern. Any ideas how i can flattern the edges or do somtbing to stop them curling over..... Thankyou
13.01.2016 - 22:39Hi.. I have just started the neck on the poncho 93-32, but i am a bit confused on how to do the neck. I have picked up 36 stitches and purled one row.. And nowi am stuck!!! do i have to add extra stiches on.? Thankyou. Sharon
03.01.2016 - 18:02DROPS Design answered:
Dear Mrs Bryan, after the P row, work in rib K4/P4 with 4 sts in garter st on each side. After 4-6-8 cm, inc 1 st in each K section and in each P section + in garter st on each side and continue in rib K5/P5 with 5 sts in garter st on each side. Happy knitting!
04.01.2016 - 09:46I have neally finished a drops pattern poncho drops 93-32 but not sure what it means when on the left front piece it says decrease 1 stitch towards mid front on every 2cm (does this mean to say 2 stitches or is 2cm correct) a total of 8 times that should leave you with 55cm (i assume that meant 55 stitchs) then on the right front piece it tells you to cast on and knit as the left front - but mirrored. But i have knitted the left and right side the same. What am i doing wrong. Thankyou. Sharon
21.12.2015 - 23:54DROPS Design answered:
Dear Mrs Bryan, typo will be corrected, thank you. Both front pieces are the same but in order to get the dec for neck on mid front, dec should be done on the other side - On left front piece, you dec 1 st from RS = at the end of row from RS, on right front piece, you dec 1 st from RS = at beg of row from RS. Happy knitting!
22.12.2015 - 10:48Bonsoir à tous. Le dos pas de soucis mais pour réaliser le devant droite puis le gauche (encolure en V) c'est la que ça coince. Comment et partie de quand faire cette forme en V ? Merci d'avance
21.12.2015 - 23:04DROPS Design answered:
Bonjour Patricia, le devant gauche a été corrigé - les diminutions de l'encolure V manquaient. Merci. Bon tricot!
22.12.2015 - 10:23Bonjour, je viens de finir la partie dos, mais il me semble que les partie devant droites et gauches sont mal expliqué, comment devons nous faire étant donné que l'on doit monter 57 mailles pour finir avec 49 mailles après avoir rabattue les 14 mailles centrales? cela me semble fort compliqué, pouvez-vous me réexpliquer ?
09.11.2014 - 08:04DROPS Design answered:
Bonjour Emelyne, vous avez 114m, vous rabattez les 14 m centrales pour l'encolure (il reste 100 m soit 50 m pour chaque épaule) et terminez chaque épaule séparément en diminuant 1 m côté encolure, il reste 49 m pour chaque épaule. Bon tricot!
10.11.2014 - 09:33