
Popular categories
Looking for a yarn?


|
|
Teddy |
|
|
|
|
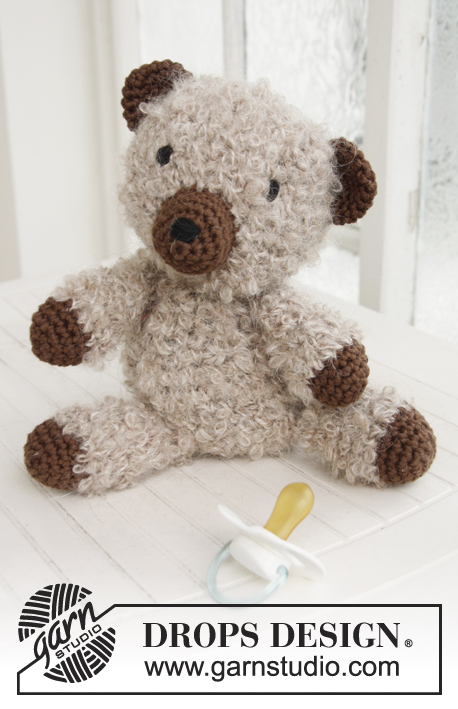
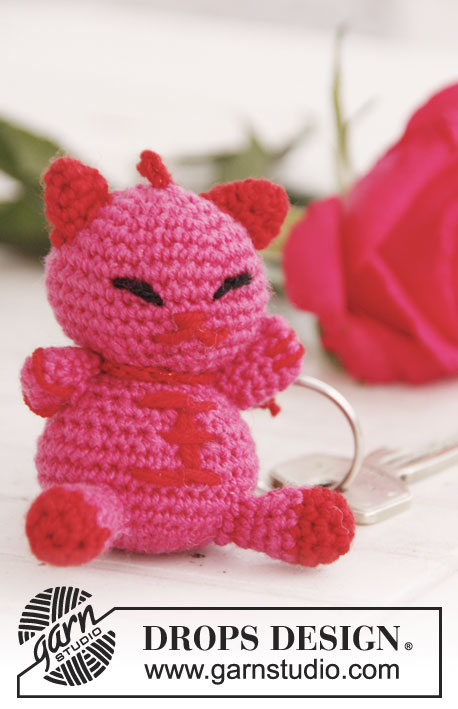
Crochet teddy bear in DROPS Muskat
DROPS Baby 21-43 |
|
|
CROCHET INFO: MAGIC CIRCLE: When piece is worked in the round, start with this technique to avoid holes in the middle (instead of ch-ring): Hold the yarn end and wind the yarn one time around the index finger to make a loop. Hold the loop with left thumb and middle finger, place the yarn over left index finger. Insert hook through the loop, make a YO and pull yarn through loop, ch 1, then work sc's around the loop. When the desired no of sc have been reached, pull the yarn end to tighten the loop. Fasten the yarn end on the back side. Continue to work in the round in a circle. WORK IN THE ROUND IN A CIRCLE: After last sc on the round, continue to next round with 1 sc in next sc (= the first sc from previous round). NOTE: Insert a marker at the beg of round between last sc and first sc on the round, move the marker upwards. WORKING 2 SC TOG: * Insert hook in next st, get yarn *, repeat from *-* one more time, make a YO and pull yarn through all 3 sts on hook. COLOR CHANGE - SC: To get a nice color change work last sc on round as follows: Insert hook in last st, get yarn, make a YO with the new color and pull it through all sts on hook. Continue on to next round with the new color. -------------------------------------------------------- HEAD: Start at the top of the head by working a Magic circle with Muskat old pink on hook size 3 mm / D - READ EXPLANATION ABOVE! ROUND 1: Work 6 sc around loop. READ WORK IN THE ROUND IN A CIRCLE. ROUND 2: Work 2 sc in every sc around = 12 sc. ROUND 3: * 1 sc in next sc, 2 sc in next sc *, repeat from *-* around = 18 sc. ROUND 4: * 1 sc in the next 2 sc, 2 sc in next sc *, repeat from *-* around = 24 sc. ROUND 5: * 1 sc in the next 3 sc, 2 sc in next sc *, repeat from *-* around = 30 sc. ROUND 6: * 1 sc in the next 4 sc, 2 sc in next sc *, repeat from *-* around = 36 sc. ROUND 7: * Work 1 sc in every sc = 36 sc. ROUND 8: * 1 sc in the next 5 sc, 2 sc in next sc *, repeat from *-* around = 42 sc. ROUND 9-13: Work 1 sc in every sc = 42 sc. ROUND 14: * 1 sc in the next 5 sc, then crochet the next 2 sc tog * - See explanation above, repeat from *-* around = 36 sc. ROUND 15: Work 1 sc in every sc = 36 sc. ROUND 16: * 1 sc in the next 4 sc, then crochet the next 2 sc tog *, repeat from *-* around = 30 sc. ROUND 17: Work 1 sc in every sc = 30 sc. ROUND 18: * 1 sc in the next 3 sc, then crochet the next 2 sc tog *, repeat from *-* around = 24 sc. ROUND 19: * 1 sc in the next 2 sc, then crochet the next 2 sc tog *, repeat from *-* around = 18 sc. ROUND 20: * 1 sc in next sc, then crochet the next 2 sc tog *, repeat from *-* around = 12 sc. Fasten off. Fill the head with some poly stuffing. BODY: Start at the bottom of body by making a magic circle in old pink. ROUND 1-6: Work as head (6th round = 36 sc on round). ROUND 7-12: Work 1 sc in every sc around = 36 sc on the round. ROUND 13: * 1 sc in the next 4 sc, then crochet the next 2 sc tog *, repeat from *-* around = 30 sc. ROUND 14: Work 1 sc in every sc = 30 sc. ROUND 15: * 1 sc in the next 3 sc, then crochet the next 2 sc tog *, repeat from *-* around = 24 sc. ROUND 16: Work 1 sc in every sc = 24 sc. ROUND 17: * 1 sc in the next 2 sc, then crochet the next 2 sc tog *, repeat from *-* around = 18 sc. ROUND 18: Work 1 sc in every sc = 18 sc. ROUND 19: * 1 sc in next sc, then crochet the next 2 sc tog *, repeat from *-* around = 12 sc. Cut the yarn and keep 30 cm / 12" for assembly. Fill the body with some poly stuffing. LEG: Start by making a magic circle in pink. ROUND 1: Work 6 sc in the magic circle. ROUND 2: Work 2 sc in every sc = 12 sc. ROUND 3-4: Work 1 sc in every sc = 12 sc on the round. Switch to old pink in last sc on 4th round - READ COLOR CHANGE. ROUND 5-6: Work 1 sc in every sc = 12 sc on the round. ROUND 7: * 1 sc in the next 4 sc, then crochet the next 2 sc tog *, repeat from *-* one more time = 10 sc. ROUND 8: * 1 sc in the next 3 sc, then crochet the next 2 sc tog *, repeat from *-* one more time = 8 sc. ROUND 9-10: Work 1 sc in every sc = 8 sc on the round. Cut the yarn and keep 20 cm / 8" for assembly. Work another leg the same way. Fill the legs with some poly stuffing. ARM: Start by making a magic circle in pink. ROUND 1: Work 5 sc around loop. ROUND 2: Work 2 sc in every sc around = 10 sc. ROUND 3-4: Work 1 sc in every sc = 10 sc. Switch to old pink in last sc on 4th round. ROUND 5-6: Work 1 sc in every sc = 10 sc. ROUND 7: * 1 sc in the next 3 sc, then crochet the next 2 sc tog *, repeat from *-* one more time = 8 sc. ROUND 8-10: Work 1 sc in every sc = 8 sc. Cut the yarn and keep 20 cm / 8" for assembly. Work another arm the same way. Fill the arms with some poly stuffing. SNOUT: Start by making a magic circle in pink. ROUND 1: Work 6 sc around loop. ROUND 2: Work 2 sc in every sc around = 12 sc. ROUND 3: * 1 sc in the next 2 sc, 2 sc in next sc *, repeat from *-* around = 16 sc. ROUND 4: Work 1 sc in every sc = 16 sc. Cut the yarn and keep 20 cm / 8" for assembly. Fill the snout with some poly stuffing. EAR: Start by making a magic circle in Muskat pink. ROUND 1: Work 4 sc around loop. ROUND 2: Work 2 sc in every sc = 8 sc. ROUND 3: * 1 sc in the next 3 sc, 2 sc in next sc *, repeat from *-* one more time = 10 sc. ROUND 4: Work 1 sc in every sc = 10 sc. Cut the yarn and keep 20 cm / 8" for assembly. Work another ear the same way. TAIL: Start by making a magic circle in pink. ROUND 1: Work 5 sc around loop. ROUND 2: Work 2 sc in every sc = 10 sc. ROUND 3-4: Work 1 sc in every sc = 10 sc on the round. Cut the yarn and keep 20 cm / 8" for assembly. ASSEMBLY: Sew the ears and the snout on the head. Sew the nose on the snout and eyes on the head with some left-over purple yarn. Sew the head on to body with neat little stitches. Sew the arms and legs on to body with neat little stitches. Sew the tail to the back of body. |
|
|
Have you made this or any other of our designs? Tag your pictures in social media with #dropsdesign so we can see them! Do you need help with this pattern?You'll find tutorial videos, a Comments/Questions area and more by visiting the pattern on garnstudio.com. © 1982-2024 DROPS Design A/S. We reserve all rights. This document, including all its sub-sections, has copyrights. Read more about what you can do with our patterns at the bottom of each pattern on our site. |


With over 40 years in knitting and crochet design, DROPS Design offers one of the most extensive collections of free patterns on the internet - translated to 17 languages. As of today we count 304 catalogs and 11422 patterns - 11417 of which are translated into English (US/in).
We work hard to bring you the best knitting and crochet have to offer, inspiration and advice as well as great quality yarns at incredible prices! Would you like to use our patterns for other than personal use? You can read what you are allowed to do in the Copyright text at the bottom of all our patterns. Happy crafting!
Comments / Questions (22)
Verwirrend, bei Materialien steht eine Nadel in 3 und in der Anleitung 2,5. Was ist nun richtig?
14.04.2024 - 16:20DROPS Design answered:
Liebe Diana, Nadel Nr 3 ist richtig, danke für den Hinweis, eine Korrektur erfolgt. Viel Spaß beim Häkeln!
15.04.2024 - 08:13Jak se prosím dělá skrytý steh?
04.05.2020 - 14:59DROPS Design answered:
Dobrý den, nejde o speciální techniku, spíš o drobné stehy, které pak nejsou vidět. Díky za upozornění, v návodu jsem formulaci upravila. Hodně zdaru! Hana
18.05.2020 - 18:16Hello, I recently started my handmade business, which is to make and sell amigurumis. I would love to use the following yarns Drops Muskat, Safran and Paris. I know the toys need to be CE tested and pass EN71 1-3 standards. I have tested them to EN71-1 and EN71-2 standards, but I would also need to prove the yarns' compliance for EN71-3 standard. Would you be able to provide any certification that I could use in my technical file to prove this? I would be grateful for any advice. Thank you.
03.01.2019 - 18:16DROPS Design answered:
Dear Mrs Michalewska, our yarns are certified Oeko-Text, you can get more informations from their website with the certificate number given on the shadecard page. Happy crocheting!
07.01.2019 - 12:47Bonjour, Quand vous dites "Quand le nombre de ms souhaité est fait, tirer l'extrémité du fil pour resserrer la boucle." Combien de maille faut-il?
01.09.2018 - 18:32DROPS Design answered:
Bonjour Mme Bordier, tout va dépendre de la pièce que vous réalisez: soit 6 ms pour la tête, le corps, les jambes et le museau, 5 ms pour les bras et la queue et 4 ms pour les oreilles. Bon crochet!
04.09.2018 - 11:10Bonjour, Quand vous dites "Quand le nombre de ms souhaité est fait, tirer l'extrémité du fil pour resserrer la boucle." Combien de maille faut-il?
01.09.2018 - 18:31Wie hoch ist der Teddy im Original?
18.02.2017 - 14:28Hallo ich häkel grade den kopf runde 14 was meint ihr mit danach die nächsten 2 M. zusammen ? lg antonia
14.03.2015 - 13:28DROPS Design answered:
Sie häkeln 5 fM ganz normal und dann häkeln Sie die nächsten 2 fM zusammen. Dann wieder 5 fM und 2 fM zusammenhäkeln usw. bis Rd-Ende. Wie Sie 2 fM zusammenhäkeln, ist über der Anleitung erklärt. Oder Sie schauen sich dazu ein Hilfsvideo an, das finden Sie oben im Kopf neben dem Foto, es heißt "Abnehmen". Weiterhin viel Spaß mit dem süßen Teddy!
14.03.2015 - 17:53Hallo! Ich finde die Seite sehr toll, aber was bedeuten die Sterne(*) in den Anleitungen? Leider komm ich nicht drauf. Lg und Danke schonmal! Corina
18.08.2014 - 17:01DROPS Design answered:
Liebe Corina, das, was zwischen den Sternchen steht, wird wiederholt. Wenn die Anweisung also lautet: "von *-* wdh", wiederholen Sie alle Schritte, die sich zwischen den Sternchen befinden.
18.08.2014 - 21:29Hallo, ich habe den Bären soeben fertiggestellt - er ist entzückend! Vielen Dank für diese schöne Anleitung.
16.03.2014 - 23:19Det vat der skal bruges tilmfyld. Er det almindelig bomuldsvat, som kan købes i et hvert supermarked
31.07.2013 - 07:31