
Popular categories
Looking for a yarn?


|
|||||||||||||
Julefrid |
|||||||||||||
|
|
|||||||||||||
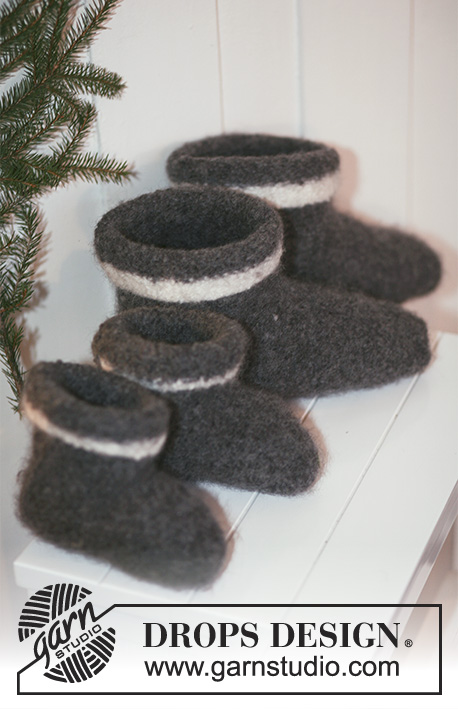
Felted DROPS Christmas slippers with cable in ”Nepal”.
DROPS Extra 0-793 |
|||||||||||||
|
PATTERN: See diagram M.1 (= 13 sts). GARTER ST (back and forth on needle): K all rows. GUSSET ANKLE: Beg from RS: * Work 6 sts, turn piece and work 6 sts back (there might be a small hole in the piece but this will even out after felting), work 9 sts, turn piece and work 9 sts back, work 12 sts, turn piece and work 12 sts back, work 16 sts, turn piece and work 16 sts back, work 12 sts, turn piece and work 12 sts back, work 9 sts, turn piece and work 9 sts back, work 6 sts, turn piece and work 6 sts back *. Work 1 row over all sts and work Gusset Ankle from *-* in the opposite side (beg from WS). GUSSET HEEL: Work until 12-13-15-16 sts remain before diagram M.1, turn piece and work back while at the same time inc by working 2 sts in the last st on row. Work until 11-12-14-15 sts remain before diagram M.1, turn piece and work back and inc by working 2 sts in the last st on row. Work until 10-11-13-14 sts remain before diagram M.1, turn piece and work back and work 2 sts in the last st - continue like this until 5-6-8-9 sts remain before diagram M.1 - now stop inc in the last st on row but continue until 2-3-4-5 sts remain before diagram M.1 – then work reversed (i.e. work 1 st less before every turn). When 5-6-8-9 sts remain before diagram M.1, beg working the outermost 2 sts tog - continue until 12-13-15-16 sts remain before diagram M.1. -------------------------------------------------------- SLIPPER: The slipper is worked back and forth on needle in garter st. Beg at the top of the leg and finish with the toe. Cast on 49-51-55-57 sts on needle size 6 mm / US 10 with Nepal. Work 1st row from RS as follows: K 2 tog, 16-17-19-20 sts in garter st, diagram M.1 (= 13 sts), 16-17-19-20 sts in garter st, K 2 tog = 47-49-53-55 sts. Continue with diagram M.1 and 17-18-20-21 sts in garter st in each side. When 1 repetition of diagram M.1 has been worked vertically, work GUSSET ANKLE starting from RS - see explanation above! After Gusset Ankle has been worked in both sides, continue as before until diagram M.1 has been worked a total of 2 times vertically from cast on edge. REMEMBER THE GAUGE! Then work GUSSET HEEL starting from RS - see explanation above! After gusset heel in the right side, work 1 row with pattern over all sts, then work gusset heel in the left side (beg from WS). When gusset heel has been worked in both sides, insert a marker in the outermost st - now measure foot from here. Continue diagram M.1 with garter st in each side, AT THE SAME TIME dec for foot by K 2 tog on each side of diagram M.1 on every row from RS a total of 3-3-4-4 times = 41-43-45-47 sts. Continue over these sts until foot measures 9.5-12-13-15 cm / 3¾"-4¾"-5⅛"-6", measured from marker). On next row from RS, work the 13 sts over diagram M.1 as follows: K 2 tog, K 2 tog, K 2 tog, P 1, K 2 tog, K 2 tog, K 2 tog = 35-37-39-41 sts on needle. Work in garter st over all sts until finished measurements, and now dec for toes as follows: Dec 4 sts evenly on row by K2 tog a total of 4 times on row = 31-33-35-37 sts. K 9-9-11-11 rows. On next row from RS, dec 6 sts evenly = 25-27-29-31 sts. K 5-5-7-7 rows. On next row from RS, dec 4 sts evenly = 21-23-25-27 sts. K 3 rows in all sizes. Work next row as follows: K 1, then K2 tog on the remaining sts = 11-12-13-14 sts on row. Cut the yarn and pull it through the remaining sts and tighten tog. ASSEMBLY: Sew tog mid under foot, from toe and up to cast on edge, sew edge to edge (in front loop of sts) to avoid a chunky seam. CROCHET BORDER: Crochet with off white Puddel on hook size 7 mm/US K. Work around the edge as follows: * 1 sc, ch 2, skip 1 cm / ½" *, repeat from *-* around the edge, finish with 1 sl st in first sc. FELTING: Place the slippers in the washing machine with a detergent without enzymes and optical bleach. Wash warm at 40C/104F with normal spin but no pre-wash. After wash shape the slippers to the right measurements while still wet and leave to dry flat. At subsequent wash, wash the slippers at regular wool program. AFTER FELTING: If the piece is not felted enough and is too big: Wash the piece one more time in the washing machine while it is still wet add a terry towel that measures approx. 50 x 70 cm = 19¾" x 27½" - NOTE: Do not use a short program. If the piece has been felted too much and is too small: While the piece is still wet stretch it to the correct measurements, if the piece is dry, make sure to soak it first. Remember: All subsequent washes are as a normal wool garment. |
|||||||||||||
Diagram explanations |
|||||||||||||
|
|||||||||||||

|
|||||||||||||
|
Have you made this or any other of our designs? Tag your pictures in social media with #dropsdesign so we can see them! Do you need help with this pattern?You'll find tutorial videos, a Comments/Questions area and more by visiting the pattern on garnstudio.com. © 1982-2024 DROPS Design A/S. We reserve all rights. This document, including all its sub-sections, has copyrights. Read more about what you can do with our patterns at the bottom of each pattern on our site. |
|||||||||||||


With over 40 years in knitting and crochet design, DROPS Design offers one of the most extensive collections of free patterns on the internet - translated to 17 languages. As of today we count 304 catalogs and 11422 patterns - 11417 of which are translated into English (US/in).
We work hard to bring you the best knitting and crochet have to offer, inspiration and advice as well as great quality yarns at incredible prices! Would you like to use our patterns for other than personal use? You can read what you are allowed to do in the Copyright text at the bottom of all our patterns. Happy crafting!
Comments / Questions (3)
Kui kanna lühendatud read on tehtud on silmi kudumil 13+13+13=39 , siis tuleb kahandada enne mustrit M1 ja peale M1 2silmust paremp.kokku kolm korda lõpuks peab juhises jääma 43 aga ei saa jääda ju, jääb 33 silma. Kuidas sellest aru saada?
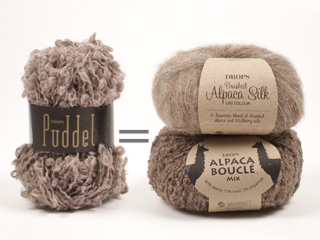
08.12.2022 - 09:09Hallo, was kann ich als Alternative für Puddel nehmen?
20.11.2016 - 21:18DROPS Design answered:
Liebe Katja, hier finden Sie Garnalternativen zu Puddel. Viel Spaß beim stricken !
21.11.2016 - 10:36Hej! När man st kilhäl, läs sista meningen KILHÄL: tills det återstår 12-13-15-16 m före M.1 - blir det att man har sammanlagt 33 m efter att man minskat till tån, dvs 10 m mindre än det ska! Fel? Mhv, Alina
16.07.2013 - 11:52DROPS Design answered:
Du har samma antal m som innan, när du är färdig med kilhälen. Sedan börjar du att minska till foten enligt beskrivningen.
15.11.2013 - 09:37