
Categorie popolari
State cercando un filato?


Lasciare un commento sul modello DROPS 164-15
Noi saremmo felici di ricevere i tuoi commenti e opinioni su questo modello!
Se vuoi fare una domanda, fai per favore attenzione a selezionare la categoria corretta nella casella qui sotto per velocizzare il processo di risposta. I campi richiesti sono indicati da *.
|
|
Magic Autumn |
|
 |
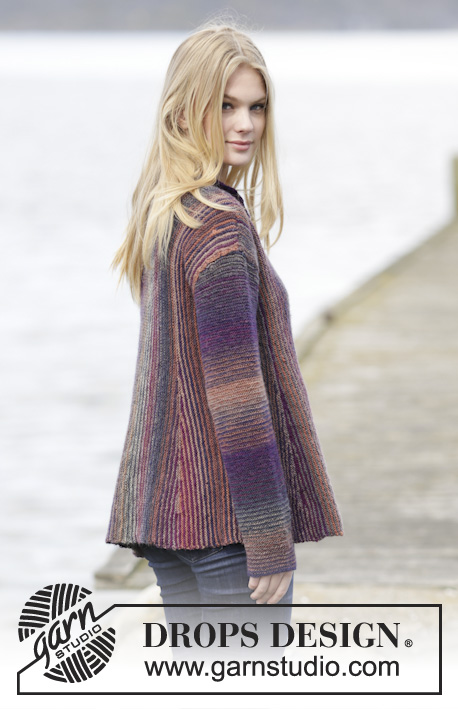 |
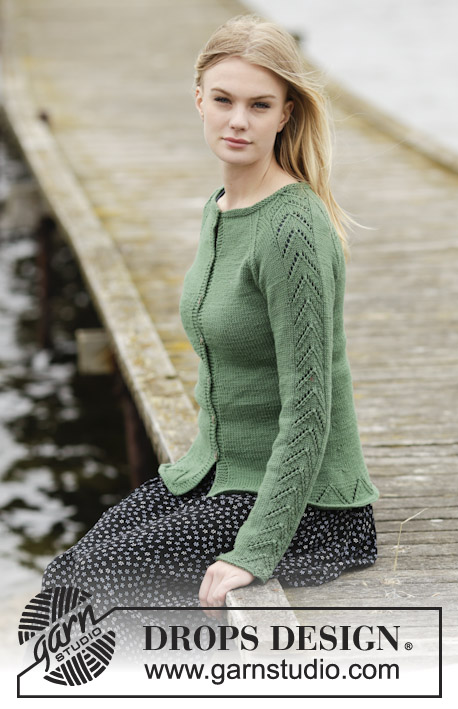
Cardigan DROPS ai ferri, a punto legaccio, con pieghe e collo a scialle, lavorato nel senso della lunghezza, in "Delight". Taglie: Dalla S alla XXXL.
DROPS 164-15 |
|
|
SUGGERIMENTO PER IL LAVORO: Il punto legaccio è molto elastico. Il cardigan risulterà quindi un po’ più lungo e un po’ più largo rispetto alle misure indicate nello schema. STRISCE: Per un risultato finale più rigato, lavorare alternativamente con 2 gomitoli. Lavorare * 2 ferri con il primo gomitolo, 2 ferri con il secondo gomitolo *, ripetere da *-*. Cambiare il filo all’inizio di un ferro sul rovescio del lavoro. Far seguire il filo lungo il lato inferiore del cardigan / sul lato della manica. PIEGA: Lavorare 1 piega a ferri accorciati come segue (1° ferro = rovescio del lavoro): lavorare 75 m, girare e lavorare il ferro di ritorno, lavorare 68 m, girare e lavorare il ferro di ritorno, lavorare 62 m, girare e lavorare il ferro di ritorno, lavorare 55 m, girare e lavorare il ferro di ritorno, lavorare 49 m, girare e lavorare il ferro di ritorno, lavorare 42 m, girare e lavorare il ferro di ritorno, lavorare 36 m, girare e lavorare il ferro di ritorno, lavorare 29 m, girare e lavorare il ferro di ritorno, lavorare 23 m, girare e lavorare il ferro di ritorno, lavorare 16 m, girare e lavorare il ferro di ritorno, lavorare su tutte le m, girare e lavorare il ferro di ritorno, lavorare su tutte le m, girare e lavorare il ferro di ritorno, lavorare 16 m, girare e lavorare il ferro di ritorno, lavorare 23 m, girare e lavorare il ferro di ritorno, lavorare 29 m, girare e lavorare il ferro di ritorno, lavorare 36 m, girare e lavorare il ferro di ritorno, lavorare 42 m, girare e lavorare il ferro di ritorno, lavorare 49 m, girare e lavorare il ferro di ritorno, lavorare 55 m, girare e lavorare il ferro di ritorno, lavorare 62 m, girare e lavorare il ferro di ritorno, lavorare 68 m, girare e lavorare il ferro di ritorno, lavorare 75 m, girare e lavorare il ferro di ritorno. SUGGERIMENTO PER PRENDERE LE MISURE: Misurare dal ferro di avvio delle m. Misurare dove la piega è più stretta. ---------------------------------------------------------- DIETRO: Si lavora avanti e indietro sui ferri circolari, sempre a punto legaccio, quindi lavorare tutti i ferri a dir. Iniziare su un lato. Vedere il SUGGERIMENTO PER IL LAVORO ! Avviare, senza stringere troppo il filo, 102-104-106-109-111-113 m sui ferri circolari n° 3,5 con il filato Delight. Lavorare a STRISCE - vedere le spiegazioni sopra. Lavorare 5-11-13-15-19-21 ferri (1° ferro = diritto del lavoro). RICORDARSI LA TENSIONE DEL LAVORO! Alla fine del ferro successivo (sul rovescio del lavoro), avviare 3 nuove m per lo scalfo. Avviare poi nuove m alla fine di ogni 6° ferro (= sul rovescio del lavoro), come segue: 3 m 0-0-1-2-4-5 volte = 105-107-112-118-126-131 m. Alla fine del ferro successivo sul rovescio del lavoro, avviare 38-41-40-39-35-35 m = 143-148-152-157-161-166 m. Proseguire a punto legaccio su tutte le m finché il lavoro non misura 9-10-11-12-14-16 cm (assicurarsi che il ferro successivo sia sul diritto del lavoro). Lavorare 1 ferro a dir sul diritto del lavoro. Lavorare ora una PIEGA - vedere le spiegazioni sopra. Dopo aver completato la piega, lavorare 1 ferro su tutte le m (sul rovescio del lavoro). Proseguire avanti e indietro su tutte le m finché il lavoro non misura 17-19-21-23-26-28 cm - VEDERE IL SUGGERIMENTO PER PRENDERE LE MISURE. Intrecciare ora, per lo scollo, 5 m all’inizio del ferro successivo (sul diritto del lavoro) = 138-143-147-152-156-161 m. Proseguire finché il lavoro non misura 25-27-29-31-36-38 cm. Avviare ora 5 m alla fine del ferro (sul rovescio del lavoro) = 143-148-152-157-161-166 m. Proseguire avanti e indietro su tutte le m finché il lavoro non misura 32-35-38-41-47-49 cm (assicurarsi che il ferro successivo sia sul diritto del lavoro). Lavorare 1 ferro a dir sul diritto del lavoro. Lavorare ora una piega. Dopo aver completato la piega, lavorare 1 ferro su tutte le m. Proseguire finché il lavoro non misura ca.40-43-45-47-52-54 cm. Intrecciare ora 38-41-40-39-35-35 m all’inizio del ferro successivo (sul diritto del lavoro) per lo scalfo = 105-107-112-118-126-131 m. All’inizio del ferro successivo (sul diritto del lavoro) intrecciare 3 m. Intrecciare poi all’inizio di ogni 6° ferro: 3 m 0-0-1-2-4-5 volte = 102-104-106-109-111-113 m. Continuare avanti e indietro finché il lavoro non misura 42-46-50-54-62-66 cm. Intrecciare le m senza stringere troppo il filo. DAVANTI SINISTRO: Avviare le m e lavorare dal lato verso il centro davanti. Avviare, senza stringere troppo il filo, 102-104-106-109-111-113 m sui ferri circolari n° 3,5 con il filato Delight. Lavorare a strisce e avviare nuove m per lo scalfo come indicato per il dietro = 143-148-152-157-161-166 m. Quando il lavoro misura 6-7-8-9-12-14 cm, lavorare una piega. Dopo aver completato la piega, lavorare 1 ferro su tutte le m (sul rovescio del lavoro). Proseguire avanti e indietro su tutte le m. Quando il lavoro misura 13-15-17-17-19-21 cm - VEDERE IL SUGGERIMENTO PER PRENDERE LE MISURE, lavorare una piega. Dopo aver completato la piega, lavorare 1 ferro su tutte le m (sul rovescio del lavoro). Proseguire finché il lavoro non misura 3-3-3-5-6-6 cm dopo l’ultima piega (il lavoro misura ora ca.17-19-21-23-26-28 cm in tutto). Avviare ora 23-23-23-23-28-28 nuove m alla fine del ferro sul rovescio del lavoro = 166-171-175-180-189-194 m. Proseguire avanti e indietro su tutte le m per 6-6-6-6-8-8 cm. Intrecciare le m senza stringere troppo il filo. DAVANTI DESTRO: Avviare le m e lavorare dal centro davanti verso il lato. Avviare, senza stringere troppo il filo, 166-171-175-180-189-194 m sui ferri circolari n° 3,5 con il filato Delight. Lavorare a strisce avanti e indietro su tutte le m per 3 cm. Intrecciare ora le m per le asole sul rovescio del lavoro, come segue: Lavorare 24 m, * 2 m insieme a dir, 1 m gettata, lavorare 20-20-20-22-22-22 m *, ripetere da *-* 4 volte, lavorare le rimanenti m sul ferro (= 4 asole). Proseguire a punto legaccio e a strisce su tutte le m finché il lavoro non misura 6-6-6-6-8-8 cm. Al ferro successivo sul diritto del lavoro, intrecciare le prime 23-23-23-23-28-28 m = 143-148-152-157-161-166 m. Proseguire avanti e indietro su tutte le m finché il lavoro non misura ca.9-9-9-11-12-13 cm. Lavorare ora una piega. Dopo aver completato la piega, lavorare 1 ferro su tutte le m (sul rovescio del lavoro). Proseguire avanti e indietro su tutte le m finché il lavoro non misura ca.17-18-19-20-20-21 cm (assicurarsi che il ferro successivo sia sul rovescio del lavoro). Lavorare una piega. Dopo aver completato la piega, lavorare 1 ferro (sul rovescio del lavoro) su tutte le m. ALLO STESSO TEMPO, quando il lavoro misura 4-4-3-2-2-2 cm dopo l’ultima piega, intrecciare le prime 38-41-40-39-35-35 m (sul diritto del lavoro) per lo scalfo. Al ferro successivo (sul diritto del lavoro) intrecciare 3 m all’inizio del ferro. Poi intrecciare all’inizio di ogni 6° ferro: 3 m 0-0-1-2-4-5 volte = 102-104-106-109-111-113 m. Proseguire avanti e indietro su tutte le m finché il lavoro non misura 6-7-8-9-12-14 cm dopo l’ultima piega. Intrecciare le m senza stringere troppo il filo. MANICHE: Si lavorano avanti e indietro a punto legaccio. Avviare, senza stringere troppo il filo, 55-57-60-62-62-66 m (compresa 1 m vivagno da ciascun lato) sui ferri circolari n° 3,5 con il filato Delight. Lavorare a strisce. Quando il lavoro misura 5-5-5-7-9-7 cm, aumentare 1 m da ciascun lato ogni 5-4-3½-2½-2-2 cm 9-11-12-15-17-18 volte in tutto = 73-79-84-92-96-102 m. Quando il lavoro misura 48-48-47-47-45-44 cm, intrecciare 3 m da ciascun lato per l’arrotondamento delle maniche. ATTENZIONE: misure più corte per le taglie più grandi perché l’arrotondamento della manica è più lungo e le spalle sono più larghe. Intrecciare ora per l’arrotondamento delle maniche da ciascun lato, ogni 2 ferri, come segue: 2 m 2-2-2-2-1-0 volte e 1 m 10-12-14-15-24-28 volte. Intrecciare poi 2 m da ciascun lato finché il lavoro non misura 54-55-55-56-56-57 cm. Intrecciare ora 3 m da ciascun lato 1 volta. Intrecciare le rimanenti m. Il lavoro misura ca.55-56-56-57-57-58 cm. CONFEZIONE: Cucire le spalle. Montare le maniche. Cucire le maniche e i lati del davanti / dietro all’interno della m vivagno. Cucire le estremità del collo a scialle al centro, sul dietro e cucirlo allo scollo. Attaccare i bottoni sul bordo sinistro. |
|

|
|
|
Avete realizzato questo o un altro dei nostri modelli? Taggate le vostre foto nei social media con #dropsdesign in modo che possiamo vederle! Avete bisogno di aiuto con questo modello?Troverete video tutorial, una sezione per i commenti/domande e molto altro guardando il modello su www.garnstudio.com © 1982-2024 DROPS Design A/S. Ci riserviamo tutti i diritti. Questo documento, compreso tutte le sue sotto-sezioni, è protetto dalle leggi sul copyright. Potete leggere quello che potete fare con i nostri modelli alla fine di ogni modello sul nostro sito. |
|


Con oltre 40 anni di esperienza nel design di modelli di maglia e uncinetto, DROPS Design offre la più estesa collezione di modelli gratuiti su internet - tradotti in 17 lingue. Ad oggi vi possiamo fornire 304 cataloghi e 11422 modelli - 8666 dei quali sono tradotti in Italiano.
Ci stiamo impegnando molto per darvi il meglio che vi possiamo offrire in termini di maglia e uncinetto, ispirazioni e consigli così come filati di grande qualità ad un prezzo incredibile! Volete utilizzare i nostri modelli per qualcosa d'altro oltre al vostro uso personale? Potete leggere tutto ciò che è consentito nel testo sul Copyright in basso su tutte le pagine dei nostri modelli. Buon lavoro!
Commenti / Domande (84)
Bonjour Je n ai pas suffisamment de laine Réf. Drop you 8 Lilas 16 pour finir ce modèle Elle est en rupture de stock dans tous vos magasins Par quelle référence est elle remplacée ? Cordialement
23.02.2024 - 15:33DROPS Design answered:
Bonjour MTL, vous pouvez utiliser un autre fil du groupe de fils C, comme Paris par ex; ou bien 2 fils du groupe de fils A (2 x Safran par ex). Votre magasin saura vous conseiller la couleur idéale. Notez toutefois que ce modèle se tricote en Delight, une laine qui appartenait au groupe de fils A, la DROPS Loves You 8 ne serait ici pas une alternative. Bon tricot!
23.02.2024 - 15:55When measuring across the back, pattern Magic Autumn, are all the measurements taken from the cast on edge? Ie in xl sizes, the first measurement is 5 1/2 inches. The next is 10 1/4 inches. Does that mean 10 1/4 inches from the cast on edge?
01.01.2022 - 19:37DROPS Design answered:
Hi Ann, Yes, unless otherwise stated, you measure from the cast-on edge. Happy knitting!
03.01.2022 - 07:51Der Halsausschnitt am Rückenteil beträgt je nach Größe 8-10 cm. So, wie ich es verstehe, wird an beide Vorderteile ein Band für den Schalkragen in 10 cm Länge gestrickt. Wie wird dieses denn in den Halsausschnitt eingenäht? Mir kommt der Halsausschnit sehr klein vor. Kann man ihn vergrößern? Wie lang muss man dann das Band an den Vorderteilen stricken?
20.12.2021 - 09:56DROPS Design answered:
Liebe Agneta, die Seite vom Kragen beim rechten Vorderteil zusammen mit der Seite vom Kragen beim linken Vorderteil und dann die Länge entlang Halsausschnitt am Rückenteil annähen. Viel Spaß beim stricken!
20.12.2021 - 14:33Is it possible to shorten the garment with casting on less stitches? Thank you
23.06.2021 - 16:58DROPS Design answered:
Dear Rosa, Please understand we cannot modify our patterns for each individual request. To shorten the garment, you would have to take off stitches from above the shortrows, and from the shortrows as well as recalculate them, to have a nicely balanced piece. Happy Stitching!
23.06.2021 - 20:38I made left front side and now I'm working on the right side, but I got confused. The left side said after the 2nd pleat the piece measures 17 cm, then I castted on 23 sts and worked another 6 cm... The right side says when the piece measures 17 cm, work the 2nd pleat. Then work another 4 cm and cast off 38... Is the right side the same width as the left one?
11.03.2021 - 20:42DROPS Design answered:
Dear Katarina, the right front piece is the same but is started from the mid front while the left front piece started from the side towards mid front, that's the reason why measurements look a bit different since they are not take from the same first row. Right front piece is the mirrored image as the left front piec; Happy knitting!
12.03.2021 - 08:29I have knitted this pattern and love it. Thanks. Could I do this in a cotton or other yarn for use in spring for a similar drape? If so , which yarn would you recommend? Many thanks.
28.01.2021 - 15:02DROPS Design answered:
Dear Teiji, you can use any other yarn from yarn group A - try out our yarn converter to find other alternatives. Happy knitting!
28.01.2021 - 16:31Thank you for such a quick response, after I read your response-I hit myself in the head (kempie), makes sense, but one more sillyquestion. It says to make the button holes after an inch of knitting and then I continue on making the right side, isn\'t that a big overlap, shouldn\'t the button holes be closer to the edge when I finish the side? Sorry for these ridiculous questions.\r\nKaren
01.12.2020 - 13:52DROPS Design answered:
Dear Mrs Cantor, pattern has been written like this, ie with 3 cm = approx. 1 inch front edge before buttons - you can adjust placement for the buttons afterwards. Happy knitting!
02.12.2020 - 08:08I hope all is well and safe with you and your family, in this crazy uncertain world. Back to my brain, not working I am knitting a DROPS Design pattern called Magic Autumn-pattern number 164-15 and I just don't understand the right front piece and now I hope I even did the left side correctly. Cast on 171 stitches(medium) from mid front to the side???? Not at all sure what that even means, while the left side I casted on 104from the bottom up. Please help Thank you, Karen Cantor
01.12.2020 - 01:53DROPS Design answered:
Dear Karen, the left front piece was worked from the side (towards back piece) towards the mid front (neck/opening of jacket) - you ended with 171 sts in size M. The right front piece will be worked reversed, ie you start from mid front (neck/opening of jacket) and end at the side (towards back piece) with 171 sts. Hope this will help. Happy knitting!
01.12.2020 - 09:38Venstre forstykke, skal man starte med 15 pinde, inden man begynder på ærmegab?
28.09.2020 - 11:12DROPS Design answered:
Hei Kristen. Ja, det strikkes som på bakstykket. Og på slutten av neste pinne (fra vrangen) legges det opp 3 nye masker til ermhull. God Fornøyelse!
28.09.2020 - 17:05Good morning, please is there a pattern instruction for a pleat-like garment for crocheting as well ? thanks
21.03.2020 - 11:22DROPS Design answered:
Dear Mrs Solarova, there isn't any similar crocheted pattern, but you could find inspiration in our crocheted jackets. Happy crocheting!
23.03.2020 - 09:19