
Popular categories
Looking for a yarn?


|
||||||||||||||||||||||
DROPS Children 12-40 |
||||||||||||||||||||||
|
|
||||||||||||||||||||||
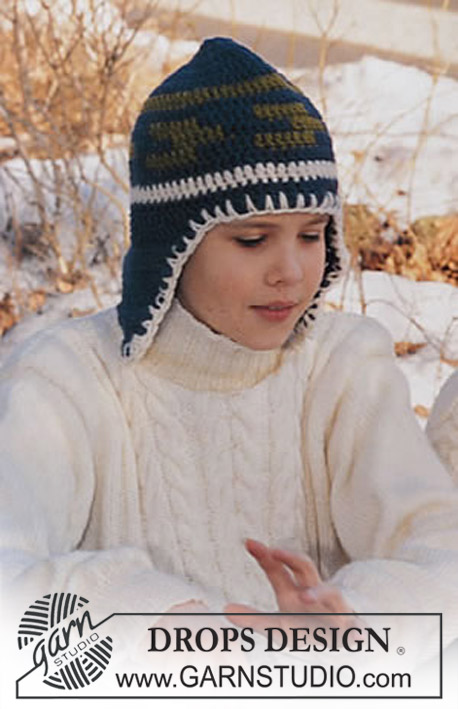
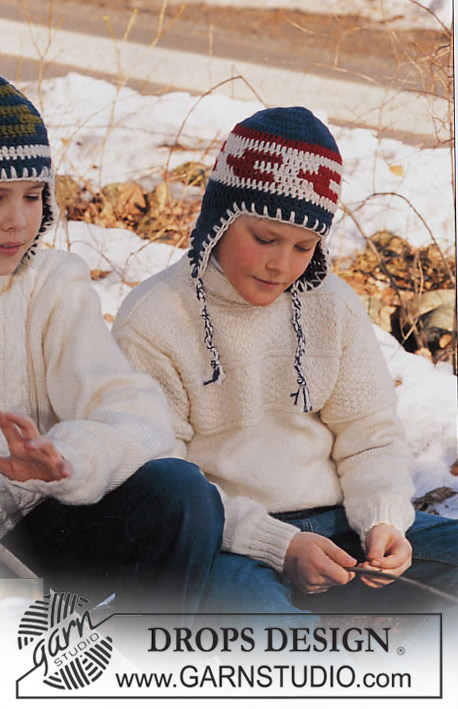
Jumper, hat and neck warmer
DROPS Children 12-40 |
||||||||||||||||||||||
|
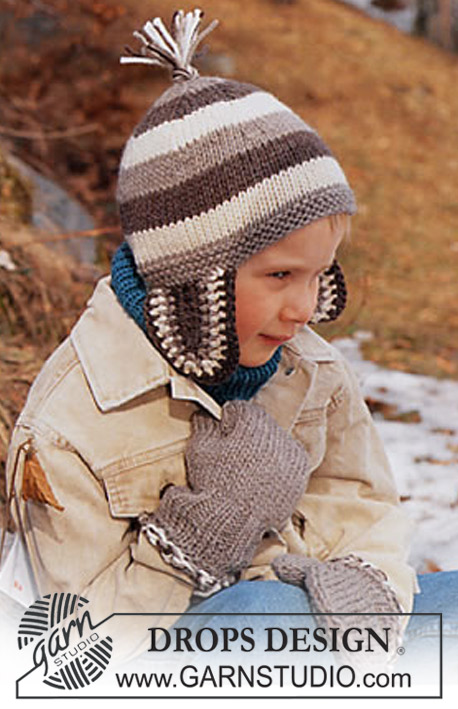
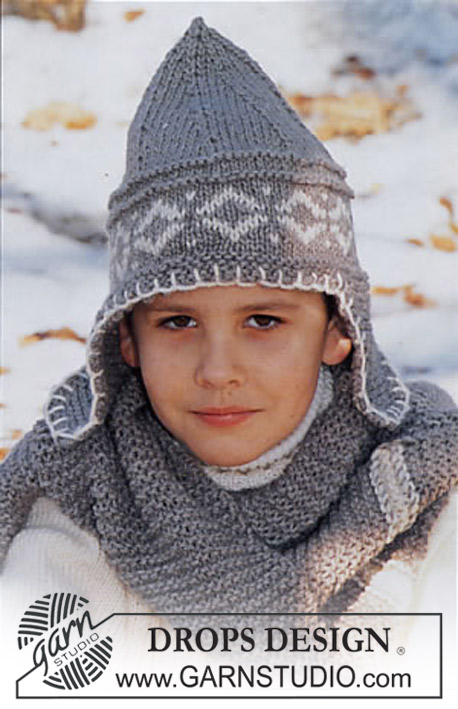
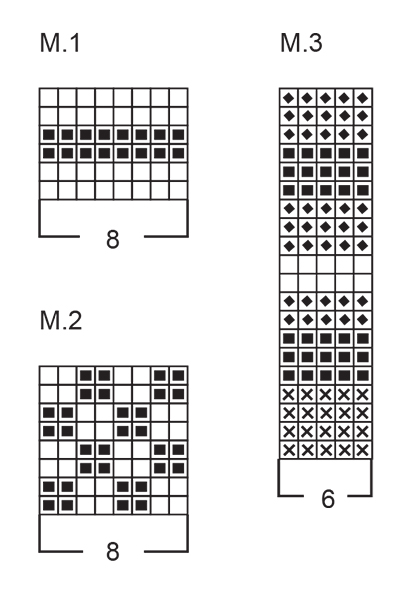
Knitting Tension: 21 sts x 28 rows on needles size 4 mm in stocking sts. = 10 x 10 cm Rib: *K2, P2*, repeat from *-* Pattern: See diagrams M.1 and M.2. For the back and front pieces knit the pattern as follows: *M.1, then M.2 for 5-5-6 (6-7-7) cm*, repeat from *-* a total of 2 times and finish with M.1 (= approx 16-16-18 (18-20-20) cm in total). --------------------------------------------------------------------- Front piece: Cast on 74-82-86 (94-102-106) sts ( inclusive of 1 edge st each side) with Karisma on needles size 3 mm. Knit 4-4-4 (5-5-5) cm rib with an edge st each side. Change to needles size 4 mm and continue in stocking sts. Remember the knitting tension! When the piece measures 18-21-23 (24-24-26) cm knit the pattern – see explanation above- with an edge st each side. At the same time when the piece measures 25-27-30 (31-32-33) cm, bind off 4-6-6 (8-10-10) sts each side for armhole = 66-70-74 (78-82-86) sts. Continue in pattern and an edge st each side. After the pattern (see above) continue in stocking sts until finished measurements. When the piece measures 36-38-42 (43-45-47)cm bind off the centre 14-14-16 (16-18-18) sts for neck. Continue to bind off each neck side on every other row, 2 sts 2 times and 1 st 4 times = 18-20-21 (23-24-26) sts left for each shoulder. Bind off remaining sts when the piece measures 40-43-47 (49-51-53) cm Back piece: Cast on and knit as the front piece. Bind off for armholes as for the front and continue until the piece measures 38-41-45(47-49-51) cm. Bind off the centre 26-26-28 (28-30-30) sts for the neck. Continue to bind off each neck side 2 sts 1 time = 18-20-21 (23-24-26) sts left for each shoulder. Bind off remaining sts when the piece measures 40-43-47 (49-51-53) cm Sleeve: Cast on 46-50-50(54-54-58) sts ( inclusive of 1 edge st each side) with Karisma on needles size 3 mm. Knit 4-4-4 (5-5-5) cm rib with an edge st each side. Change to needles size 4 mm and continue in stocking sts. Please read all of the sleeve section before continuing! When the piece measures 7 cm inc. 1 st each side a total of 9-10-11 (12-13-14) times on every 3rd cm (alternate the inc between every 8th and 9th row) = 64-70-72 (78-80-86) sts. At the same time when the piece measures 23-26-29 (32-35-38) cm knit M.1 and then continue to knit M.2 – incorporate new sts in the pattern as you go along. At the same time when the piece measures 34-37-41 (43-46-50) cm insert a marking thread each side (this thread marks where to sew the sleeve to the front and back piece). At the same time when the piece measures 34-38-42 (45-49-52) cm knit M.1, and bind off when the piece measures approx 36-40-44 (47-51-55) cm. Assembly: Sew the shoulder seams. Neck: Pick up approx. 80 to 92 sts (divisible with 4) around the neck with Karisma on double pointed needles size3. P 2 rounds and K 1 round. Continue in rib. When the neck measures 5-5-6 (6-7-7) cm, K 3 rounds (for the roll over edge) and bind off. Sew in the sleeves. Sew the sleeves and the side seams inside the edge sts. --------------------------------------------------------------------- HAT: Size: 3/5 – 6/9 – 10/14 years. Materials: DROPS Karisma Superwash from Garnstudio 50-50-50g colour no 01, off white 50-50-50 g colour no 54, light brown 50-50-50 g colour no 56, dark brown 50-50-50 g colour no 62, brown DROPS pointed and double pointed needles size 4 mm Knitting Tension: 21 sts x 28 rows on needles size 4 mm in stocking sts. = 10 x 10 cm. Garter sts (back and forth on needle): K 1st row, K 2nd row Garter sts (on circular needles): P 1st round, K 2nd round Pattern: See diagram M.3 and M.4. Knit M.4 in stocking sts. M.3 are knitted in garter sts, this means that 1 row in the diagram = K 2 rows. The earflaps are knitted in M.3, therefore it is necessary to cut and sew the threads for each stripe. --------------------------------------------------------------------- Earflaps: Cast on 5 sts with light brown and needles size 4 mm. Knit in garter sts according to M.3 – see explanation above ( if you haven’t reach the final measures when finish with M.3 continue in the same colour as the last stripe) at the same time after 2 rows of garter sts, begin to inc – inc 1 st each side as follows: Make a yo inside the 2nd st each side –twist and knit the yo on the returning row, to avoid a hole – inc. 1 st each side on every 4th row 8-9-10 times = 21-23-25 sts. Continue in garter sts until the flap measures 8-9-10 cm. Put aside and knit another one. Hat: Put one of the earflaps on needle size 4 mm, cast on 14-16-18 new sts in the last colour of M.3 for the back and knit in the other earflap on the same row = 56-62-68 sts. Knit 4 rows back and forth in garter sts over all sts – at the same time inc 1 st each side on every other row (as done for the earflaps) 2 times = 60-66-72 sts. Change to light brown and cast on 28-30-32 sts in between the earflaps for the front = 88-96-104 sts. Change to double pointed needles size 4 mm and continue to knit the hat round – now do all measures from this point! Knit 4 rows of garter sts over all sts, cut the thread. Begin at the centre back of the hat – continue in stocking sts over all sts after M.4 and until finished. NB: make sure the threads are not too tight when knitting with 2 colours. At the same time, when finished the lama pattern, bind off 8 sts evenly distributed on the 4 rounds marked with an arrow in diagram = 56-64-72 sts. Continue to bind off according to diagram = 7-8-9 sts, cut the thread, pull through the remaining sts and sew tight. The hat measures approx 25 cm from the centre front and to the top. --------------------------------------------------------------------- NECK WARMER: See pattern no 12-26 --------------------------------------------------------------------- |
||||||||||||||||||||||
Diagram explanations |
||||||||||||||||||||||
|
||||||||||||||||||||||
|
||||||||||||||||||||||

|
||||||||||||||||||||||

|
||||||||||||||||||||||
|
Have you made this or any other of our designs? Tag your pictures in social media with #dropsdesign so we can see them! Do you need help with this pattern?You'll find tutorial videos, a Comments/Questions area and more by visiting the pattern on garnstudio.com. © 1982-2024 DROPS Design A/S. We reserve all rights. This document, including all its sub-sections, has copyrights. Read more about what you can do with our patterns at the bottom of each pattern on our site. |
||||||||||||||||||||||


With over 40 years in knitting and crochet design, DROPS Design offers one of the most extensive collections of free patterns on the internet - translated to 17 languages. As of today we count 304 catalogues and 11422 patterns - 11422 of which are translated into English (UK/cm).
We work hard to bring you the best knitting and crochet have to offer, inspiration and advice as well as great quality yarns at incredible prices! Would you like to use our patterns for other than personal use? You can read what you are allowed to do in the Copyright text at the bottom of all our patterns. Happy crafting!
Comments / Questions (6)
Smådrops 12-26
20.08.2015 - 21:49Hej! Hittar inte mönstret på löskragen, var finns den? Det står så här i mönstret, Löskrage: Se mönster under modell nr 26-12 Hittar ingen löskrage under modell 26-12. Hälsningar Helene
20.08.2015 - 19:54DROPS Design answered:
Hej Helene, den hittar du under DROPS Children 12-26.
21.08.2015 - 09:04Sue Moffett wrote:
The pattern states change to 4mm and knit to::knit the pattern?? wher e is this part,what is M1 M2 and where is the rest of the chest part of the pattern it has sections of pattern,really do not understand Thanks Sue
01.02.2015 - 16:50DROPS Design answered:
Dear Mrs Moffett, M1 and M2 are the diagrams you will find at the very bottom of the page - click here to read more about diagrams. Happy knitting!
02.02.2015 - 12:52Hoi Tea. Je hebt gelijk. Ik heb het patroon gewijzigd. Bedankt. Gr. Tine
08.12.2009 - 12:23Bij oorklepjes: meerder 18-9-10 x st aan weerskanten in elke 4e nld = 21-23-25 st, moet zijn 8-9-10
08.12.2009 - 08:37Skrivefeil på lueoppskrift når det henvises til genseroppskrift. Det er ikke mod. 40-12, men mod 12-40...
06.05.2009 - 16:08