Comments to DROPS 141-40
![]() Céspedes wrote:
Céspedes wrote:
Apres avoir tricoter A.1 et A.2, dois ke continuar avec A.2?
05.11.2023 kl. 17:41:DROPS Design answered:
Bonjour Mme Céspedes, tout à fait, quand A.1 est terminé, vous tricotez A.2 et vous répétez A.2 en hauteur jusqu'à la fin. Bon tricot!
06.11.2023 kl. 08:45:
![]() Lillan I Bradley wrote:
Lillan I Bradley wrote:
Hello, I have received an email answer from you to my last question regarding pattern 141-40. Unfortunately, I did NOT understand what I was told i.e., "garter" stich & "stocking" stich, etc. The patterns A3 through A6 refer to KNIT/PURL stitches on right side and wrong side. Would you be so kind and read my question again and, hopefully,, I'll receive a different answer. Thank you very much!
22.06.2023 kl. 22:04:DROPS Design answered:
Dear Mrs Bradley, I'm sorry, I might have misunderstood your question then; A.5 and A.6 is just a mirrored pattern from A.3 and A.4; work the stitches the same way as explained in the diagram key: the white squares are knitted from RS and purled from WS and the dots are purled from RS and knitted from WS. If it doesn't help, please try to reword your question as it is misunderstood. Thanks for your comprehension.
23.06.2023 kl. 07:42:
![]() Lillan wrote:
Lillan wrote:
Hello, the store in California where I used to buy your yarn and ask questions when needed, has closed down:( I now order yarn from Woolwarehouse in UK. Since they knit differently, I have to ask your web site again: Drops 141-40 Sarah's Delight; LEFT SIDE Pattern A.5, after knitting the pattern from right side, the last two stiches 13 &14 then show two KNIT sts rather than ONE knit & one purl like in the right front piece??? Thank you very much for your response :) Lillan
22.06.2023 kl. 00:33:DROPS Design answered:
Dear Lillan, the 13rd stitch in A.5/A.6 is a stocking stitch and the last stitch is worked in garter stitch; as the 1st stitch in A..3 was worked in garter stitch and the 2nd stitch in A.3 was a stocking stitch. This 14th/1st stitch is knitted from RS and knitted from WS.Can this help or did I misunderstand your question?
22.06.2023 kl. 10:07:
![]() Lillan Bradley wrote:
Lillan Bradley wrote:
After reading all the English answers re: right front piece with cable, I am still not understanding the following: AT THE SAME TIME when piece measures 33cm (XL) dec 1 stitch TOWARDS MID FRONT??? repeat decrease every cm 22 more times. Also: READ DECREASE TIP: Dec as follows AFTER A4.....??? Hope this makes sense and thanks for your reply. Lillan
12.06.2023 kl. 03:11:DROPS Design answered:
Dear Mrs Bradley, when piece measures 33 cm you will start decreasing for neck, on right front piece you will decrease after A.4 (as explained under decrease tip), ie work the A.4 stitches, then slip 1 as if to K, K1 and psso. Repeat this decrease 22 more times on every 1 cm (decrease from RS only). Happy knitting!
12.06.2023 kl. 09:12:
![]() Barbara wrote:
Barbara wrote:
Pattern 140-141. On the right front how many stitches should remain after decreasing on the front. I have to work 43 rows (22 times) if decreasing one stitch every half inch on right side only. I need to know how many stitches before I start the armhole bind off.
12.07.2022 kl. 08:51:DROPS Design answered:
Dear Barbara, after the decreases on back piece, there are 47-51-55-61-67-73 sts, then after cast off/decreases for armhole and neck , there are 19-20-21-22-23-24 sts left and before casting off, there are 17-18-19-20-21-22 sts left. Happy knitting!
12.07.2022 kl. 09:02:
![]() Barbara wrote:
Barbara wrote:
Pattern number 141-40 Sarah's delight vest The decrease for armhole on the back is causing some problems for me. The pattern says to decrease 3sts on the next two rows=6sts. 2sts six times=12 and 1sts x7 =7sts. A total of 25 stitches are decreased. I am doing the XXL and need to end up 84 its. Please help.
05.07.2022 kl. 22:13:DROPS Design answered:
Hi Barbara, You have 110 stitches before starting the armholes. You cast off on both sides: 3 stitches x 1 = 6, 2 sts x 4 = 16 and 1 st x 4 = 8. You have then cast off a total of 30 sts which leaves you with 80 sts. Happy knitting!
06.07.2022 kl. 06:57:
![]() Barbara wrote:
Barbara wrote:
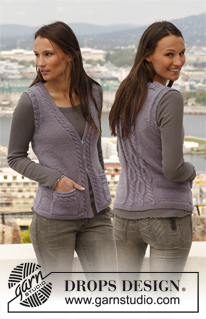
I have completed the back of pattern u-671 up to row 79. My question is do I now complete A3 It is hard to see from the photograph as the model has long hair which obscures the view of the upper back. I am anxious to complete this project so an early replay would be appreciated.
04.07.2022 kl. 09:04:DROPS Design answered:
Dear Barbara, when you have worked the whole diagram A.1, work now A.2 and repeat A.2 over A.1 (as shown in diagram = the 3 cables over 6 sts). Happy knitting!
04.07.2022 kl. 16:22:
![]() Monica Ahlin wrote:
Monica Ahlin wrote:
När man stickat bakstycket med diagram A1s alla varv, skall man sedan sticka diagram A2 6 varv och sedan upprepa dessa 6 varv hela vägen upp?
30.03.2022 kl. 21:37:DROPS Design answered:
Hej Monica. Ja det stämmer. Mvh DROPS Design
31.03.2022 kl. 08:09:
![]() Brandi wrote:
Brandi wrote:
Hello again. Earlier I had asked for help on the back piece for size xl. This was your answer: Dear Brandi, for size XL, you should cast off on BOTH SIDES 3 stitches 2 times = 6, 2 stitches 5 times = 10, and 1 stitch 4 times = 4, 6+10+4 = 10 stitches x 2 = so you cast off 20 stitch all together. 122-20= 82 stitch is the number of stitches you should end up with. Happy Stitching! The problem here is that 122-20 does not equal 82 it equals 102. Still needing help with the numbers. Thanks
04.08.2021 kl. 07:15:DROPS Design answered:
Dear Brandi, it looks like there was a small mistake in the previous answer, you will decrease 20 sts on each side (= 3 sts 2 times, 2 sts 5 times and 1 st 4 times), ie 40 sts in total = 102-40=82 sts remain. Happy knitting!
04.08.2021 kl. 07:59:
![]() Brandi wrote:
Brandi wrote:
Currently working the back piece decreases for the armholes. When looking at the stitch counts for size xl it says I will start with 122 sts and end with 82 sts. When I counted the decreases it didn’t add up correctly. I’m sure I’m missing something. Please advise. Thank you
03.08.2021 kl. 16:57:DROPS Design answered:
Dear Brandi, for size XL, you should cast off on BOTH SIDES 3 stitches 2 times = 6, 2 stitches 5 times = 10, and 1 stitch 4 times = 4, 6+10+4 = 10 stitches x 2 = so you cast off 20 stitch all together. 122-20= 82 stitch is the number of stitches you should end up with. Happy Stitching!
04.08.2021 kl. 04:44:
![]() Becky Eisen wrote:
Becky Eisen wrote:
I’m am working on the Right Front Piece and question is about the buttonhole. The patter says to k2tog in 3 and 4 stitch, then YO. The 3rd and 4th stitch are purl, so I P2tog. The button that is supposed to fit this tiny little hole is 20 mm. I could only get a 2.5 mm to fit. How to make a bigger hole, or am I missing something?
25.06.2021 kl. 19:55:DROPS Design answered:
Dear Becky, K2Tog and a yarnover should be anough for that size of button (on the next ro, take care that do not twist the stitch you knit into the yarnover. If it is still too small, try to do a double yarnover, and in the next row knit into the first and drop the second. Happy Stitching!
26.06.2021 kl. 01:10:
![]() Keri Clark wrote:
Keri Clark wrote:
I am working on the right front piece and am at the direction in the pattern that says "AT THE SAME TIME when piece measures 12 1/4 (my size), dec 1 st towards mid front." I want to clarify what "towards mid front" means. Would I be decreasing in the stockinette section of the front, and doing so close to the patterned section of the front?
04.06.2021 kl. 06:43:DROPS Design answered:
Dear Mrs Clark, the decreases worked mid front are for the V-Neck, ie decrease as explained under DECRASE TIP = after A.4 on right front piece, ie at the beginning of the stocking section after the cable. Happy knitting!
04.06.2021 kl. 07:14:
![]() Anna Ramadori wrote:
Anna Ramadori wrote:
Salve! Volevo avvisare che c'è un errore nella spiegazione del diagramma. Nella quinta riga dove dice. Trasferire 1 m sul f. ausiliario sul dietro del lavoro, 3 m dir (voi indicate 2) poi il resto è giusto.
15.05.2021 kl. 07:44:DROPS Design answered:
Buonasera Anna, grazie per la segnalazione, abbiamo corretto la legenda. Buon lavoro!
15.05.2021 kl. 22:21:
![]() Keri Clark wrote:
Keri Clark wrote:
Does the front pieces require the 10 rows of garter stitch ribbing as required for the back before starting with the A.3 pattern?
07.05.2021 kl. 01:28:DROPS Design answered:
Dear Keri, The cable pattern at the back starts after the garter stitch, but on the front edge starts right after the cast on, because this cable is going allon all the front edge. There is a number of stitches on which a garter stitch edge still knitted, next to the cabled stitch at the edge. So no extra garter stitch needed on the front, just follow the pattern. Happy Knitting!
07.05.2021 kl. 01:37:
![]() Melody wrote:
Melody wrote:
I’m currently on the back piece and wondering for the armhole decrease and it’s says “cast off for armholes at the beg of every row in each side as follows”, does that mean cast of (x) number of stitches at the BEG and END of row? Or does it mean ONLY beg of every row, so a 1 RS and 1 WS (or vice versa) = 1 set which = 1 times?
25.03.2021 kl. 00:17:DROPS Design answered:
Dear Melody, it means, the beginning of EVERY row, so there are cast off on both sides. happy Knitting!
25.03.2021 kl. 01:51:
![]() Sylvia wrote:
Sylvia wrote:
For sides it says when piece measures 20cm inc in the side as on back piece. Does this mean inc 1 stitch OR inc 1 stitch plus repeat inc every (applicable cm) 3 more times. I assume it is once as total number of stitches are not listed for side after increase as it does for back???
30.09.2020 kl. 18:05:DROPS Design answered:
Dear Sylvia, on the side of teh back you increase once and three more times, that is 4 times in total, and so you have to increase 4 times total on the front as well. I hope this helps, Happy Knitting!
01.10.2020 kl. 00:22:
![]() Myriam De Meyer wrote:
Myriam De Meyer wrote:
Na het opnemen van de steken voor de armsgaten, staat in de beschrijving: brei 1 naald rechts aan de verkeerde kant. Moet dit niet averechts zijn, zodat de rechtse kant aan de goede kant komt? Bedankt!
29.08.2018 kl. 15:52:DROPS Design answered:
Dag Myriam, Nee, het is de bedoeling dat je 1 naald recht aan de verkeerde kant breit; zo is het patroon ontworpen. Maar uiteraard kun je er voor kiezen om een naald averecht aan de verkeerde kant te breien, maar net wat je zelf het mooist vindt :)
31.08.2018 kl. 12:08:
![]() E.Bakker wrote:
E.Bakker wrote:
Is er geen aparte tekening van het rugpand. Zou het niet mooier geweest zijn als het patroon begint en eindigt met A2?Ook is het patroon niet aangepast aan een grotere of langere maat. Een heel gedoe omdat zelf mooi te verdelen. Wel leuk patroon hoor. Groetjes Mevrouw Bakker.
05.11.2017 kl. 10:39:DROPS Design answered:
Hallo E. Bakker, De afmetingen van het voor- en achterpand, zijn op de v-hals na, verder gelijk, dus deze kunnen in 1 schematekening. Verder is het patroon door onze ontwerpers bedacht met A.2 aan één kant in de confectie maten S t/m XXXL. Je kunt de maat kiezen die het beste in de buurt komt door te vergelijken met een bestaand kledingstuk en evt. naar wens aanpassen, door de hoogte of breedte aan te passen door meer of minder steken op te zetten en te bfreien in de gedeeltes waar geen kabels zitten of meer of minder naalden in de hoogte te breien.
06.11.2017 kl. 13:12:Anne wrote:
Do the diagrams show both right AND wrong side stitches? Please state how to knit stitches on the wrong side, this is not clear in your instructions. Thanks
29.06.2017 kl. 16:42:DROPS Design answered:
Dear Anne, yes, diagrams shows ALL rows in pattern, seen from right side (RS). Please, see instructions above diagrams - RS = right side, WS = wrong side. When you knit cables, purl all stitches on the wrong side. Happy knitting!
29.06.2017 kl. 17:59:
![]() Birthe Bjerg wrote:
Birthe Bjerg wrote:
Det er ærgerligt at modellens lange - flotte, for det er det - hår, forhindrer os i at se hvordan afslutningen på ryggen er. Måske vil man være helt vild med den, hvis man ellers kunne se den. Fotografen har misforstået opgaven. Kan desværre ikke kaldes et spørgsmål.
14.11.2015 kl. 21:10:
![]() Anne-Marie wrote:
Anne-Marie wrote:
Hej! Vad jag kan se har det blivit ett fel i diagrammet. Mönster A1 på varv 47. Mvh Anne-Marie
08.02.2014 kl. 14:01:DROPS Design answered:
Hej, vi ser inte felet, vad är det som är fel där? Notera det varit en rättelse på diagram symbol 4 och 5 på mönstret online. Det är tyvärr ett fel i de tryckta katalogerna.
11.02.2014 kl. 00:20:
![]() Nadia64 wrote:
Nadia64 wrote:
Come faccio a sapere qual'è la taglia giusta per me ? non sono riuscita a trovare corrispondenze!
18.09.2013 kl. 08:00:DROPS Design answered:
Buongiorno Nadia, se scorre la pagina verso il basso, sotto il diagramma troverà lo schema con le misure per tutte le taglie: con quello riuscirà a trovare la taglia giusta per lei. Buon lavoro!
18.09.2013 kl. 11:56:
![]() Pauline Ewart wrote:
Pauline Ewart wrote:
I'm just starting A2 on the Back piece and it says "when piece measures 20 cm ....". My piece already measured 28 cm when I finished A1! Should the pattern read "when the piece measures 30 cm ...."? Grateful your advice. Regards, Pauline
21.05.2013 kl. 08:31:DROPS Design answered:
Dear Mrs Ewart, you begin to inc each side when piece measures 20 cm - and - after you have worked A.1, you work in A.2. Happy knitting!
21.05.2013 kl. 09:05:
![]() Luisa Pavolettoni wrote:
Luisa Pavolettoni wrote:
Nei due davanti devo passare dai ferri n°3 al n°4 come per il dietro o vengono fatti tutti con il n°3?Nel caso ci sarebbe differenza anche nella grossezza dei punti! Grazie
13.10.2012 kl. 14:11:DROPS Design answered:
Grazie! C'era un errore. Ora è stato corretto. Devi cambiare i ferri anche sui davanti!
15.10.2012 kl. 12:39:
![]() Coco wrote:
Coco wrote:
De uitleg bij het 5e symbool van het telpatroon is : = zet 1 st op een kabelnld en houd deze achter het werk, 2 st r, 1 st av van de kabelnld volgens mij moet het 3 st r zijn. Zo staat het ook in de noorse en engelse beschijving.
14.09.2012 kl. 15:41:DROPS Design answered:
Hallo. Ja, je hebt gelijk. Wij hebben het patroon aangepast. Bedankt.
17.09.2012 kl. 11:51:
![]() Sjan wrote:
Sjan wrote:
Ik kan de tekening niet vinden van dit vestje Ik weet niet waar ik dat moet zoeken,.....Groet Sjan
30.08.2012 kl. 18:12:DROPS Design answered:
Kijk onderaan het patroon. Hier staan alle teltekeningen.
31.08.2012 kl. 16:24:
![]() Mariethe House wrote:
Mariethe House wrote:
Je voudrais savoir comment se continue le dos après A1 et A2? faut il reprendre le motif A1 ou continuer avec les torsades A2 jusqu'à l'encolure? Est il possible d'avoir une photo qui montre plus clairement l'avant et le dos? merci de votre aide.
24.08.2012 kl. 12:53:DROPS Design answered:
Bonjour Mariethe, pour le dos, on continue en suivant A2, je cite : "... Après avoir tricoté 1 fois A.1 en hauteur, continuer avec A.2 au-dessus des mailles de A.1.". Vous répétez les rangs encadrés à droite pour A2 jusqu'à l'encolure. Bon tricot !
24.08.2012 kl. 14:37:
![]() Rita Verbanck wrote:
Rita Verbanck wrote:
Bij het telpatroon is de uitleg van het 4de en het 5de symbool van plaats gewisseld,4 hoort bij 5 en 5 bij 4. anders zeer mooi patroon
09.08.2012 kl. 09:52:DROPS Design answered:
Hoi Rita. Je hebt gelijk. Ik heb het vermeld bij ons Design Team en het patroon aangepast. Bedankt voor de reactie.
22.08.2012 kl. 10:15:
![]() Molly wrote:
Molly wrote:
Quite impossible waiting for autumn to do it. just started today and I really look forward to wear it
27.07.2012 kl. 15:18:
![]() Helen Børgesen wrote:
Helen Børgesen wrote:
Jeg kan ikke få forklaringen i diagrammet til at passe. Det er de 2, hvor man sætter masker foran og bagved. Skal teksten byttes om og der mangler da en maske i den ene. Hjælp, jeg kan ikke rigtig komme videre, da det er første gang med snoninger.
25.07.2012 kl. 11:16:DROPS Design answered:
Der var en fejl i diagrammet. Det er rettet til.
18.01.2013 kl. 21:14:
![]() Jennifer wrote:
Jennifer wrote:
Knitting is not my forte...but this is too pretty not to give it a shot!
17.07.2012 kl. 12:55:
![]() Verrier wrote:
Verrier wrote:
J'adore !!! vite vite les expliquations svp. Merci en tous cas pour tous les choix de modèles que vous nous fournissez car c'est un pur bonheur de tricoter depuis que je connais votre site
11.07.2012 kl. 14:15:Chrissie Anderson wrote:
Just let me have the pattern, I need to get started, it looks fab in the pic.
05.07.2012 kl. 17:25:
![]() Hanne wrote:
Hanne wrote:
Rigtig flot og meget brugbar. Lad os endelig få opskriften på denne :-)
29.06.2012 kl. 08:53:
![]() Sabinci wrote:
Sabinci wrote:
Oooh, fein!
28.06.2012 kl. 17:19:
![]() Yvette wrote:
Yvette wrote:
Med lång ärm är den här läcker
27.06.2012 kl. 20:29:Diane wrote:
Je suis du Québec! C'est exactement le genre de vêtements que j'adore. J'ai très hâte d'avoir les explications pour le faire! Votre choix de patrons est un pur bonheur.
26.06.2012 kl. 00:41:Jacqueline wrote:
Oû sont les explications?!!
24.06.2012 kl. 21:03:
![]() Katja wrote:
Katja wrote:
Looking forward to knit this wonderful waistcoat.
18.06.2012 kl. 22:11:
![]() Monika wrote:
Monika wrote:
Snygg väst, går det att komplettera med ärmar så att man får en kofta också
09.06.2012 kl. 17:22:
![]() Susanne wrote:
Susanne wrote:
Flotte detaljer
08.06.2012 kl. 04:50:Sybilla wrote:
I love this - I have been looking for a good waistcoat pattern for a long time and look forward to doing this
06.06.2012 kl. 20:34:
![]() THERESE wrote:
THERESE wrote:
à moi aussi, il a plu tout de suite.
06.06.2012 kl. 17:52:
![]() ÜLLE KANEP wrote:
ÜLLE KANEP wrote:
Hea mõte kuidas vestile natuke palmikut teha
02.06.2012 kl. 23:53:
![]() ÜLLE KANEP wrote:
ÜLLE KANEP wrote:
Hea mõte kuidas vestile natuke palmikut teha
02.06.2012 kl. 23:53:
![]() Doucette wrote:
Doucette wrote:
Trés beau, facile aussi à porter.
02.06.2012 kl. 22:10:Angel wrote:
Great layering peice nice detail
02.06.2012 kl. 09:45:
![]() DeBreiboerderij wrote:
DeBreiboerderij wrote:
Heel vrouwelijk en elegant en overal op de combineren!
01.06.2012 kl. 23:07:
![]() H. Sas wrote:
H. Sas wrote:
Mag in een vinnigere kleur. Dit is vrij sober van kleur.
01.06.2012 kl. 13:22:Christa wrote:
Gefällt mir ausgezeichnet.
01.06.2012 kl. 09:04:
![]() Michèle wrote:
Michèle wrote:
Tout simplement magnifique !
01.06.2012 kl. 08:06:
![]() Jaanika wrote:
Jaanika wrote:
See on imekena vest!
31.05.2012 kl. 21:35:
![]() Irene wrote:
Irene wrote:
Hooray! A great vest pattern!
31.05.2012 kl. 21:28:ALMA MONICA RAMIREZ wrote:
Ojalá puedan traducir al español es muy bonito el modelo
31.05.2012 kl. 18:30:
![]() Anneli Kulju wrote:
Anneli Kulju wrote:
Hei! Olen sellainen liivi-ihminen, tässä ihana malli.
31.05.2012 kl. 16:12:Post a comment to pattern DROPS 141-40
We would love to hear what you have to say about this pattern!
If you want to leave a question, please make sure you select the correct category in the form below, to speed up the answering process.
Your email address will not be published. Required fields are marked *.
Je trouve dommage que l'on ne puisse pas voir le dos du gilet au niveau des épaules. Les cheveux cache tout. J'aurai aimé voir le motif près des épaules.
20.01.2016 kl. 02:39: