Clue #4 - Time to add some colour...
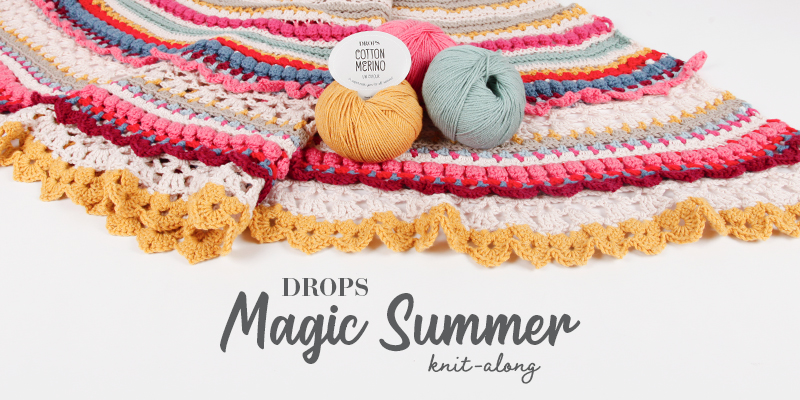
In this clue we crochet 20 new rows with lots of exciting techniques, and we will be working our stripes with 3 beautiful colours.

As usual, you will find videos to assist you at the end of the clue. But if you still have questions, you can always leave them using the form at the bottom of the page!

First a little information

PATTERN:
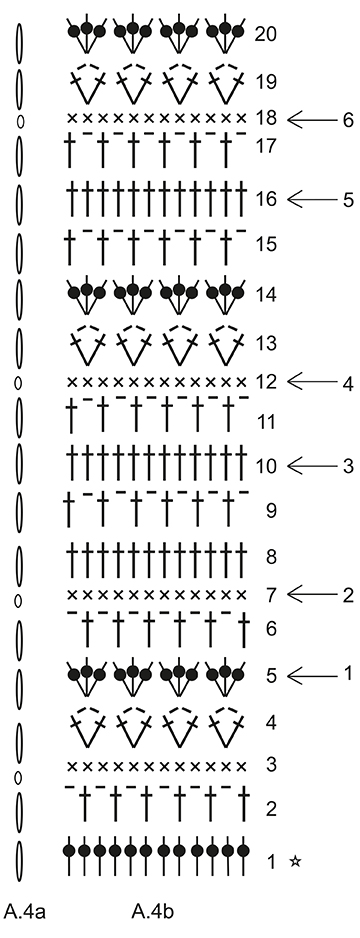
In clue #4 we are working with diagram A.4a and A.4b. A.4a shows how row begins. NOTE: The beginning of rows is drawn above each other in the same diagram even though they are worked alternately the right and left side of the shawl and not above each other.

STRIPES:
Cut thread after each row, unless the next row has the same colour. Fasten the threads in the side when you have finished.
ROWS 1-3: powder (colour a)
ROW 4: mustard (colour b)
ROWS 5-7: beige (colour e)
ROWS 8-9: powder (colour a)
ROWS 10-12: beige (colour e)
ROW 13: mustard (colour b)
ROWS 14-15: powder (colour a)
ROWS 16-18: beige (colour e)
ROW 19: mustard (colour b)
ROW 20: powder (colour a)

COLOUR CHANGE:
When switching colours, work as follows: Work last stitch on row with the first colour, but wait with last yarn over and pull through, switch to next colour and work the last yarn over and pull through on the last stitch with this colour, then work next row.

CROCHET INFO:
Information between two * are repeated every time it says *-* in the pattern.

If you are experienced, follow the brief description and diagrams A.4a+b which you will find under. If you need more help to get started continue to read the clue below.

Brief version

Continue working STRIPES – see explanation above, and pattern A.4b (A.4a shows how every row begins and are worked in addition to the stitches in A.4b). Read COLOUR CHANGE! NOTE: To get a better overview of which row to work in the pattern and stripes, put a mark in the piece here and the next row is counted as row 1. Meaning first row in A.4b = Row 1 in stripes.

Diagram for Clue #4

= 1 chain stitch
= 1 treble crochet around chain stitch/chain stitch space
= From right side: 1 treble crochet into back loop of stitch. From wrong side: 1 treble crochet into front loop of stitch
= From right side: 1 double crochet into back of stitch. From wrong side: 1 double crochet into front of stitch
= increase (with the same stitch shown in the chart) on each side of the marking threads on row with arrow.
= Work 3 chain stitches on beginning of row
= Work 1 chain stitch on beginning of row
= start here

Need help to get started?

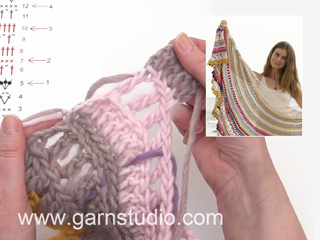
Here’s a more detailed description of how to start with Clue #4. We have marked where we are working in the diagram with red.

ROW 1 (= right side): Work 3 chain stitches (A.4a), then work A.4b as follows: * 2 treble crochets around first/next chain stitch space, 3 treble crochets around next chain stitch space *, work from *-* entire row = 120 treble crochets.

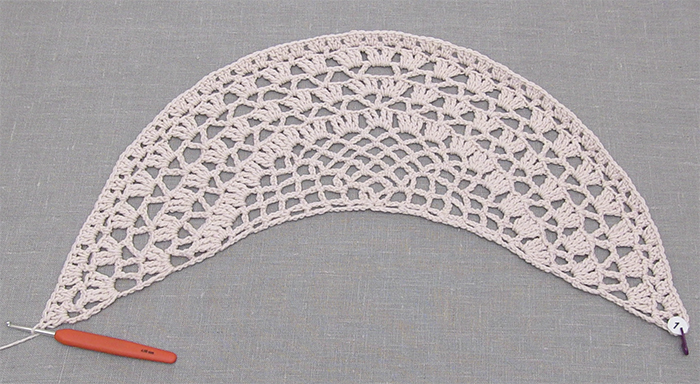
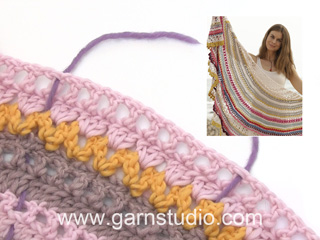
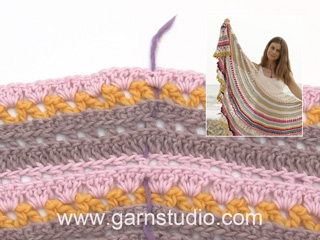
Without working, add 12 marking threads in piece as follows: add 1 marking thread after the first 5 stitches, then add the next 11 marking threads with 10 stitches between each marking thread, there are now 5 treble crochet left on row after the last marking thread. The marking thread follows along while working the piece and will almost have the same stitch numbers on each side.


Turn work and work row 2, 3 and 4 according to diagram, A.4a and A.4b, - read COLOUR CHANGE.
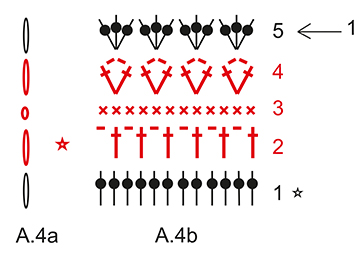

Turn work, work Row 5 (ARROW 1) and increase as follows: Increase 1 treble crochet on each side of the marking threads by working 1 treble crochet extra around the chain stitch space (=24 stitches increased) = 144 treble crochets on row.
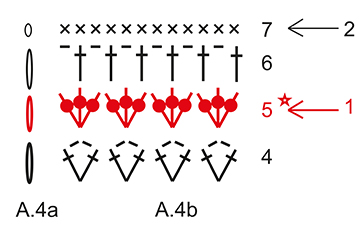

Turn work and work rows 6-10. Continue following stripes – see above and increase on row 7 (ARROW 2, increase as follows: increase 1 double crochet on each side of the marking threads by working 2 double crochets in the same stitch = 24 stitches increased) = 168 double crochets on row and on row 10 (ARROW 3, increase as follows: increase 1 treble crochet on each side of the marking threads by working 2 treble crochets in 1 stitch = 24 stitches increased) = 192 treble crochets on row.
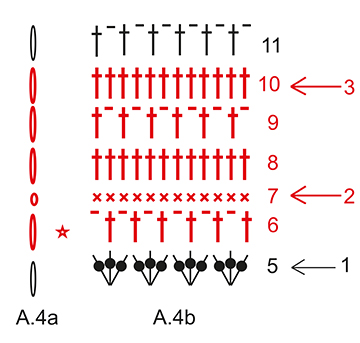

Turn work, and work rows 11-15. Continue following stripes – see above and increase on row 12 (ARROW 4 and increase as follows: increase 1 double crochet on each side of the marking threads by working 2 double crochets in 1 stitch = 24 stitches increased) = 216 double crochets on row.


Turn work and work rows 16-20. Continue following stripes – see above and increase on row 16 (ARROW 5 and increase as follows: Increase 1 treble crochet on each side of the marking threads by working 2 treble crochets in 1 stitch = 24 stitches increased) = 240 treble crochets on row and on row 18 (ARROW 6 and increase as follows: Increase 1 double crochet by working 2 double crochets in 1 stitch on each side of the marking threads = 24 stitches increased) = 264 double crochets on row.


Finished!

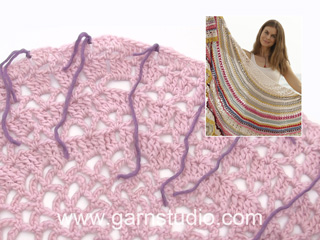
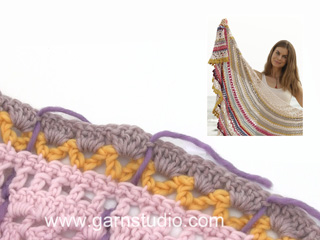
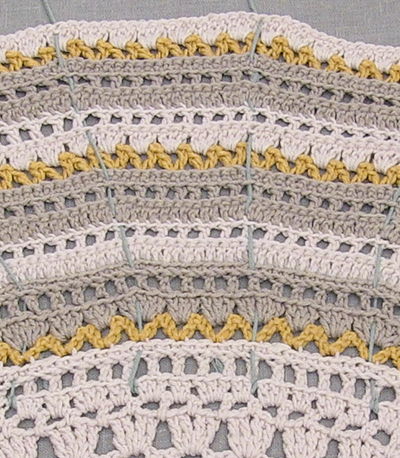
Clue 4 is now finished and the piece measures approx. 39 cm between the chain stitch ring and the middle of the last row worked when all 20 rows have been worked. The picture below shows how piece looks. Now you can look forward to the next clue! Just make sure you don't forget to send pictures of your progress to our Gallery!

Ran out of colour E too early? You can use colour G instead in row 18.
Tutorial Video

Comments (78)

Yvette wrote:

Hoeveel \../ tussen elke markeerder in rij 5? Volgens video 3 tussen markeerder 1 en 2 maar dan kom ik niet uit. Bij foto's van anderen zitten er soms 3 en soms 4 tussen. Graag opgave van de hele rij. In volgende clue graag duidelijke aanwijzingen tussen welke steken een markeerder komt

19.05.2018 - 08:51

DROPS Design answered:

Hoi Yvette, In toer 5 meerder je aan elke kant van elke markeerdraad, dat betekent dat er na toer 5, 12 steken tussen elke markeerdraad zitten en 6 steken voor de eerste en na de laatste markeerdraad.

21.05.2018 - 10:53

Mary Margaret Kachurowski wrote:

I\'ve figured out the first increase row, however, I had to pull the thread lines out. Far easier to move the stitch markers as opposed to dealing with 12 bits of hanging thread! I'm experienced with reading charts and this presentation is just too confusing. If it was my first chart, it would be my last one. Hopefully, when and if this pattern is published in full, the whole chart will be presented in a user friendly way.

18.05.2018 - 03:58

Ana wrote:

Ana: Esto leí para las que se les acaba el color e. -¿Se agotó el color "e" durante la pista n. ° 4? ¡No te preocupes! Puedes conectar la última ronda de esa pista con el número de color "g".-

17.05.2018 - 21:30

Ana wrote:

Ana: Ah vale, vale. Sólo era una suposición mía. Había creído que igual te faltaba un poco para terminar una fila. He leído en otros comentarios que le ha pasado a más personas la falta de color e, pero no sé si también de cotton light o de otro tipo.

17.05.2018 - 21:19

Doenja wrote:

In rij 4 van clue 4 begint de rij met 3 lossen... ik neem aan dat na de laatste V ook weer moet worden geëindigd met een stokje ? Jammer dat niet iedere keer een foto van het begin en einde te zien is en alleen close-up van het midden gedeelte. Mvg

17.05.2018 - 20:19

DROPS Design answered:

Hallo Doenja, Je haakt inderdaad aan het einde van die toer weer een stokje. Het kan inderdaad beter aangegeven worden, ik zal het even doorgeven aan designafdeling.

21.05.2018 - 10:19

Ana wrote:

Con respecto a la falta de hilo de depósito cotton light, he revisado los materiales, del color e se piden 50gr, no entiendo de qué convertidor de hilo me habláis yo estoy usando este hilo en las cantidades que marcan y en la.pista cuatro me falta para dos filas y media, sin contar que aún no se si este color se pide en más pistas más adelante

17.05.2018 - 19:44

Mary Margaret Kachurowski wrote:

Just starting this section and am getting very confused reading the pattern instructions through. The marking thread ? is this the same purpose as a stitch marker? Each row seems to reflect 12 stitches but where are the increases supposed to fit in? I'm hoping that once I start this section it will become clear, but right now it's as clear as mud :-(

17.05.2018 - 15:12

Crystal wrote:

What is the purpose of the marking thread and how do I know where to place them on each row?

17.05.2018 - 03:11

DROPS Design answered:

Dear Crystal, you insert the marking thread and will then increase on each side of each of the marking threads on the rows with an arrow - see also the row after row explanations with pictures. You put marker 1 between stitch 5 and 6, (dont count the 3 chain stitches - A.4), marker 2 between 15 and 16, 3 between 25/26, 4 between 35/36, 5 between 45/46, 6 between 55/56, 7 between 65/66, 8 between 75/76, 9 between 85/86, 10 between 95/95, 11 between 105/106 and 12 between 115/116. Although there is a difference between the photos and the video, the result will be the same. Then let the markers follow work upwards. Happy Crocheting!

17.05.2018 - 09:19

Ana wrote:

Sonia, sí, puedes poner marcadores, o lo que tú quieras. Sólo es para facilitar la labor. La única diferencia es que el hilo lo vas moviendo hacia arriba sin necesidad de soltarlo y los marcadores los quitas y los vuelves a colocar donde correspondan.

16.05.2018 - 18:15

Ana wrote:

Ana Marín, yo creo que si no te llega es porque 50g de cotton merino, tiene 110 metros, y 50g de cotton light, tiene 105 metros. Si pinchas en "materiales", hay un link de "convertidor de hilos" y verás que necesitas gramos diferentes para cada hilo.

16.05.2018 - 18:06

Sonia wrote:

Hola, supongo que no se puede porque si no así lo habríais indicado, pero los hilos se pueden sustituir por marcadores?

16.05.2018 - 17:04

DROPS Design answered:

Hola Sonia, sí, los hilos se pueden sustituir por marcapuntos. Debes estar atenta en las filas en las que hay aumentos para colocar los marcapuntos en sus sitios correspondientes.

20.05.2018 - 20:25

Auri wrote:

Gracias Ana, solucionado

16.05.2018 - 15:59

Ana wrote:

Auri: En la fila 19, tienes que tener 264 puntos = 88 grupos de "punto alto, 2 cadenas, punto alto". Las 3 cadenas del comienzo de fila creo que no se cuentan.

16.05.2018 - 14:48

Ana Marín wrote:

Estoy utilizando cotton light de drops, con el kit de miss kits, en la cuarta pista acabando de usar el color e no puedo terminar las filas que me marca el patrón en ese color, que está mal?

16.05.2018 - 14:15

DROPS Design answered:

Hola Ana, en este apartado puedes ver las cantidades de material necesarios para realizar la labor. Si las cantidades son correctas, puede ser que estés trabajando demasiado flojo y utilices más material. https://www.garnstudio.com/dropsalong.php?id=4&m=1&cid=23

20.05.2018 - 20:24

Auri wrote:

Hola, podéis decirme cuantos puntos debe tener la vuelta número 19? Gracias

16.05.2018 - 14:08

DROPS Design answered:

Hola Auri, en la fila 19 deberías tener 88 grupos de 1 p.a + 2 p. de cad. + 1 p.a. , es decir, es decir, 352 puntos, contando los 176 p.a y 176 puntos de cadeneta.

20.05.2018 - 20:19

Cathy wrote:

Why does the U.S. English version show treble stitches on the diagram for double crochet stitches?

15.05.2018 - 20:14

DROPS Design answered:

Dear Cathy, there was a mistake in the US-English text but it has been edited now, ie US-terms are now right. Happy crocheting!

16.05.2018 - 09:59

Catherine wrote:

How difficult is to follow the instructions when pictures, charts, terminology and videos are all mismatched. Not to mention the cumbersome markers...you seem to be lef to your own devices. Such a pity cos the pattern is really nice and I really want to complete it.

15.05.2018 - 10:14

DROPS Design answered:

Dear Catherine, We are really sorry to hear that! Of course we will try to help you to understand. Please write your question concretely and briefly here in the clue - then we will answer you as soon as possible.

15.05.2018 - 11:14

Cathy wrote:

Row 5 diagram only shows 3 stitches per group and does not seem to reflect the increase stitches. The video seems to show skipping over the increase stitches. Please give explicit instructions for how to treat the increase stitches.

15.05.2018 - 03:37

DROPS Design answered:

Dear Cathy, the video shows how to crochet row 5 (time code 05.10) and how to increase on each side of 1st marker (time code 05:16) and on each side of 2nd marker (time code 05:32), repeat these increase on each side of remaining markers. Happy crocheting!

15.05.2018 - 10:21

Anuski wrote:

Si tienes un nº diferente de puntos, colocar los marcadores aproximadamente. Dividir el nº total de puntos de la fila, por el nº de marcadores que tienes que poner (12) y ese es el nº de puntos que tiene que haber entre marcadores y luego dividir ese resultado entre 2 y ése es el nº de puntos a contar desde el borde para colocar los marcadores extremos.

13.05.2018 - 21:48

Anuski wrote:

Fila 1: 120 puntos -las 3 cadenas de subida no cuentan-, y la secuencia de varetas de cada arco es 2-3-2-3-2-3... los marcadores de los extremos, se ponen a 5 varetas del borde y los otros, separados entre sí por 10 varetas. 120 puntos/12 marcadores=10 y 10/2=5. Fila 20 : después de los aumentos, habrá 264 puntos. En esa última fila, los marcadores extremos se colocan a 11 varetas del borde, y los demás, están separados entre sí por 22 varetas. 264/12=22 y 22/2= 11

13.05.2018 - 21:42

Leave a comment or question to this clue

Your email address will not be published. Required fields are marked *.